Key Takeaways
- Mix dry ingredients (flour, baking powder, salt, sugar) separately from wet ingredients (eggs, milk, butter), then fold together gently.
- Prepare a 9-inch greased and floured pan, pour batter evenly, then top with crumb mixture before baking.
- Bake at 350°F for 35–40 minutes until a toothpick emerges with few moist crumbs and the top turns golden.
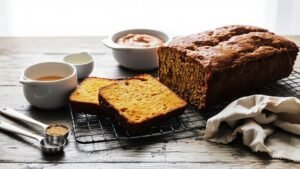
- Cool in pan 10–15 minutes, then transfer to wire rack for complete cooling before slicing and serving.
- Store in an airtight container at room temperature for 2 days or refrigerate up to 5 days for best texture.
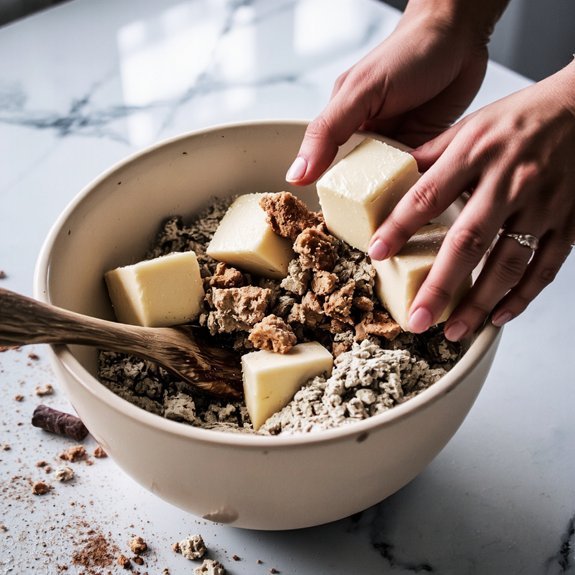
Gathering Your Ingredients
Before you begin mixing, you’ll want to assemble all your ingredients to guarantee a smooth baking process.
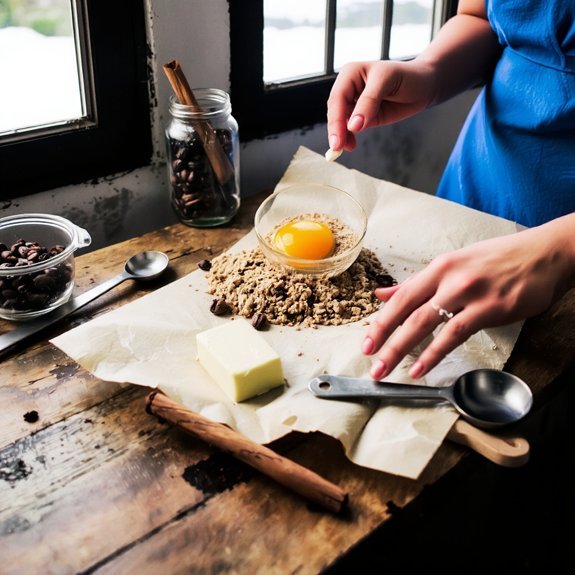
Gather two cups all-purpose flour, one cup sugar, two teaspoons baking powder, half a teaspoon salt, one cup milk, two eggs, and four tablespoons melted butter.
For the streusel topping, you’ll need one-third cup brown sugar, two tablespoons flour, and two tablespoons butter.
Consider seasonal sourcing for your ingredients—locally-sourced eggs and dairy enhance flavor while supporting independent producers who value your freedom to choose quality.
Budget substitutions work effectively here: use Greek yogurt instead of sour cream, or substitute applesauce for half the butter to reduce fat content.
These modifications maintain structural integrity without compromising taste or texture.
Organize everything before starting, ensuring efficient workflow and precise measurements for ideal results.
Essential Baking Equipment
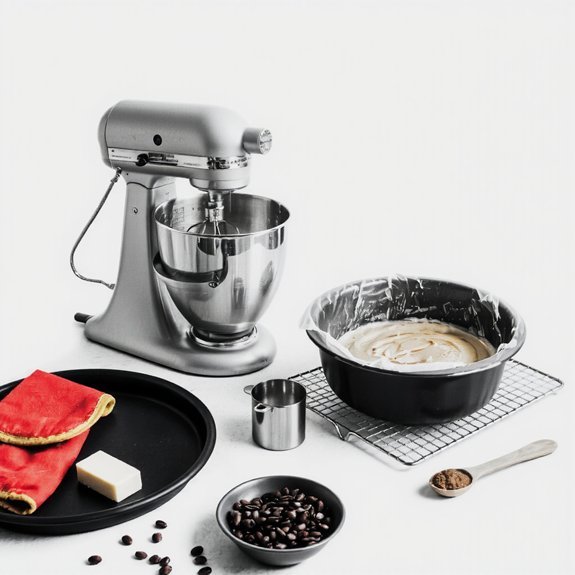
You’ll need a nine-inch round cake pan—preferably metal for even heat distribution—along with mixing bowls in varying sizes, a whisk, and measuring cups and spoons for accuracy.
A digital scale eliminates guesswork when portioning ingredients, ensuring consistent results every time.
Include a wooden spoon or spatula for thorough blending and a bench scraper for cleanly dividing batter or scraping bowl sides.
An oven thermometer verifies your oven’s true temperature, preventing under or overbaking.
Don’t overlook parchment paper for lining your pan, which prevents sticking and promotes even browning.
Finally, secure a cooling rack to allow proper air circulation after baking.
These tools work together to give you complete control over your coffee cake’s texture and flavor development.
Preparing Your Cake Pan
With your equipment assembled, proper pan preparation becomes your next step toward baking success.
You’ll want to select either a nine-inch round or square cake pan—cast iron works beautifully here.
If you’re using cast iron, guarantee proper seasoning; a well-seasoned surface prevents sticking and rust prevention requires thorough drying after washing.
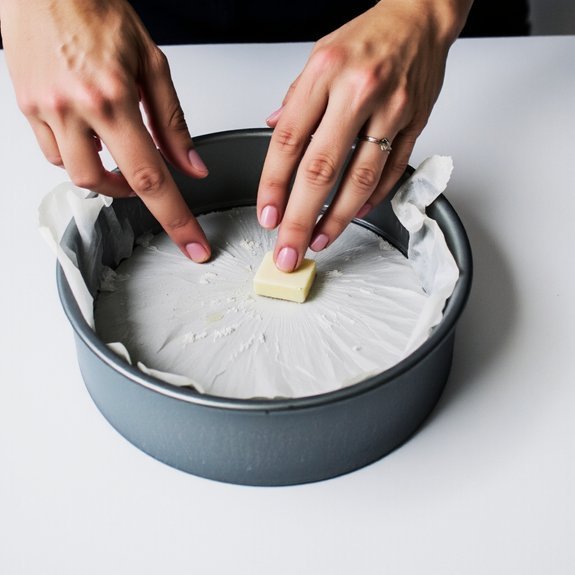
Grease your pan generously with butter or oil, coating the bottom and sides completely.
Don’t skimp—adequate lubrication facilitates easy removal.
Dust the greased surface with flour, tapping out excess.
Alternatively, you can line the bottom with parchment paper for extra insurance.
This preparation step takes mere minutes but dramatically impacts your final result.
You’re effectively creating a non-stick environment that guarantees your cake releases cleanly, preserving its structure and presentation.
Making the Cake Batter

Now that your pan’s prepared, it’s time to combine your dry and wet ingredients. You’ll mix flour, baking powder, salt, and sugar in one bowl while whisking eggs, milk, and melted butter separately. Fold the wet mixture into the dry components until just combined—don’t overmix, as this develops gluten and toughens your cake.
| Ingredient | Measurement | Purpose |
|---|---|---|
| All-purpose flour | 2 cups | Structure |
| Baking powder | 2 tsp | Leavening |
| Sugar | ¾ cup | Sweetness |
Resting batter for five minutes allows gluten to relax and leavening agents to activate fully. This essential step guarantees a tender crumb. Consider flavor variations like cinnamon, vanilla extract, or nutmeg to customize your creation. Your batter’s now ready for the pan and oven.
Creating the Cinnamon Crumb Topping
You’ll start by whisking together flour, brown sugar, and cinnamon in a bowl to combine your dry ingredients evenly.
Next, you’ll cut cold butter into small cubes and work them into the mixture using your fingertips until the texture resembles coarse breadcrumbs.
This technique guarantees you’ll achieve the perfect crumb consistency—neither too fine nor too chunky—that’ll bake into a satisfyingly crunchy topping.
Mixing Dry Ingredients Together
Combining flour, brown sugar, cinnamon, and salt creates the foundation for your cake’s textured crown. You’ll want to whisk these dry ingredients together thoroughly to guarantee proper flour aeration and spice distribution throughout your topping mixture.
This step prevents clumping and guarantees even flavor in every bite.
Once your dry ingredients are well-combined, you’ll add cold butter pieces to the mixture. Using a pastry cutter or your fingertips, work the butter into the flour until the texture resembles coarse breadcrumbs. This technique creates pockets of butter that yield those coveted crispy-yet-tender crumbs when baked.
The resulting mixture should appear uniform and slightly moist, holding together gently when squeezed but remaining loose enough to sprinkle. Don’t overwork it—restraint here prevents a dense, cake-like topping.
Incorporating Butter Into Mixture
Cold butter’s integration into your dry mixture demands precision and restraint.
You’ll cut cubed butter into your flour blend using a pastry cutter or your fingertips, working quickly to prevent emulsification science from compromising texture.
The goal: pea-sized butter pieces suspended throughout, creating pockets that yield tender crumbs.
Don’t overwork the mixture—excessive friction generates heat, dissolving butter into the flour rather than maintaining distinct particles.
This separation is vital for your topping’s signature crumbly structure.
If you’re exploring butter alternatives, opt for coconut oil or vegetable shortening with similar melting points.
These substitutes won’t dramatically alter your results, though they’ll produce subtly different flavor profiles.
Keep everything cold.
Chill your bowl beforehand if your kitchen runs warm.
This restraint guarantees your coffee cake’s crumb topping achieves that coveted, delicate consistency.
Achieving Perfect Crumb Texture
Three essential components—brown sugar, ground cinnamon, and those perfectly separated butter pieces—converge to create your coffee cake’s defining topping.
You’ll combine these ingredients by cutting cold butter into the sugar-cinnamon mixture until you’ve achieved an irregular, granular texture that won’t compact.
This crumb microstructure is vital.
The distinct butter pockets create air gaps that promote even browning and deliver that satisfying bite you’re after.
Don’t overwork the mixture; excessive handling melts the butter and collapses your desired architecture.
During sensory evaluation, you’ll notice the textural contrast between the tender cake and this crispy-edged topping.
The cinnamon’s warmth complements the caramelized sugar notes, while butter provides richness.
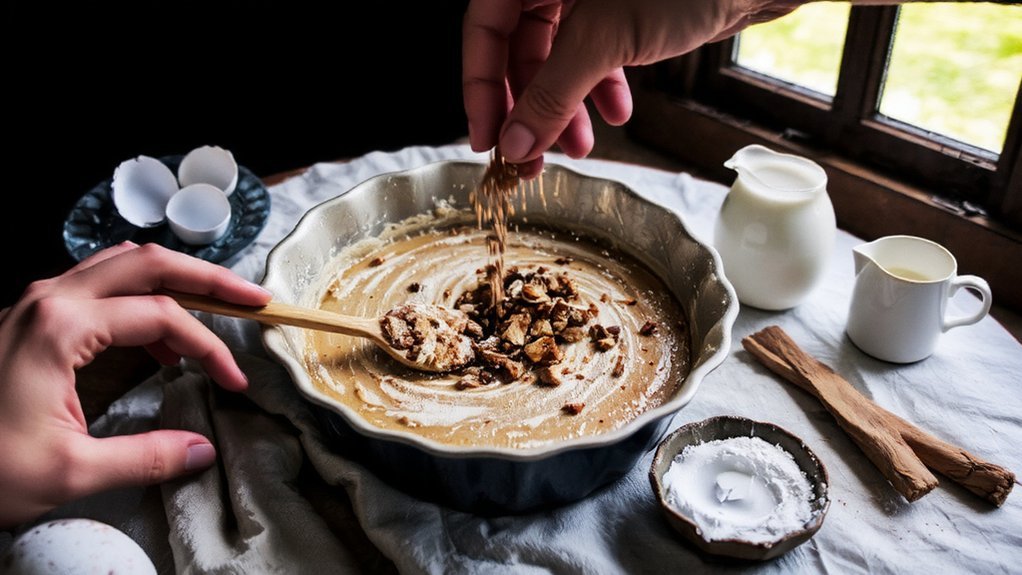
Distribute your topping evenly across the batter before baking, allowing gravity and heat to work together.
You’ve now mastered the technical foundation for an exceptional coffee cake.
Assembling and Baking
You’ll want to grease and flour your pan thoroughly to prevent sticking.
Then pour your batter into the bottom layer before generously distributing your cinnamon crumb topping across the surface.
Bake your coffee cake at 350°F for 35-40 minutes, checking for doneness by inserting a toothpick into the center—it should emerge with just a few moist crumbs clinging to it. Let the cake cool in the pan for 10-15 minutes before turning it out onto a wire rack to cool completely.
Preparing Your Pan
Before the batter meets the oven, proper pan preparation guarantees even baking and effortless removal.
You’ll want to select an 8- or 9-inch round or square cake pan, ensuring it’s in excellent condition.
Grease your pan thoroughly with butter or oil, coating every surface—bottom, sides, and corners.
Don’t skimp; you’re creating a release layer.
For seasoning pans and preventing sticking, dust the greased interior with flour, tapping out excess.
Alternatively, use parchment paper as your base for guaranteed extraction.
Level your oven rack before inserting the pan.
Position it in the center, allowing heat circulation around all sides.
Regarding pan storage, keep your prepared pan in a cool, dry location until you’re ready to pour batter.
This prevents condensation and maintains your preparation’s integrity throughout baking.
Baking Time Guidelines
Once your batter’s prepared and your pan’s ready, it’s time to assemble and bake.
Pour your mixture into the greased pan, spreading it evenly for uniform cooking.
Preheat your oven to 350°F, ensuring proper oven calibration for accurate temperature control.
This precision matters—underheated ovens won’t set your cake’s structure, while excessive heat burns the exterior before the center cooks through.
Bake for 35-40 minutes until a toothpick inserted in the center emerges clean.
Don’t rely solely on time; visual cues guide you better.
The cake should develop a light golden top and pull slightly from the pan’s edges.
Consider altitude adjustments if you’re baking above 3,000 feet.
Higher elevations demand increased oven temperature by 25°F and reduced baking time by 5-10 minutes, compensating for moisture evaporation and lower air pressure.
Cooling and Serving Tips
Proper cooling’s essential to preserving your coffee cake’s texture and allowing the streusel topping to set firmly.
You’ll want to place your cake on a wire rack cooling station for at least thirty minutes before slicing. This approach prevents condensation from trapping steam, which would otherwise compromise your crumb structure.
Once cooled completely, you’re free to serve your cake at room temperature or slightly warmed.
The beverage pairing you choose matters considerably—strong coffee complements the cake’s richness, while black tea offers subtle contrast. You can also pair it with lighter options like herbal infusions if you prefer less intensity.
Store your remaining cake in an airtight container for up to three days, maintaining ideal freshness and texture throughout.
Storage and Make-Ahead Options
If you’re planning ahead, you’ll find that coffee cake actually improves when you prepare it a day in advance—the flavors deepen and the crumb becomes more tender as moisture redistributes throughout the structure.
| Storage Method | Duration | Reheating Tips |
|---|---|---|
| Room Temperature | 2 days | Serve as-is |
| Refrigerator | 5 days | Warm 10 minutes at 350°F |
| Freezer Storage | 3 months | Thaw overnight, then reheat |
| Wrapped Portions | 1 week | Microwave 30-45 seconds |
You’ll maximize shelf life by wrapping your cooled cake tightly in plastic wrap, then aluminum foil. Freezer Storage preserves quality exceptionally well when you portion individual slices beforehand. For Reheating Tips, avoid the microwave for whole cakes—it creates uneven moisture distribution. Instead, wrap your cake in foil and warm it gently in a 350°F oven for fifteen minutes, restoring its original texture and crumb structure.
Frequently Asked Questions
Can I Substitute All-Purpose Flour With Whole Wheat Flour in Coffee Cake?
You can substitute whole wheat flour for all-purpose flour, though you’ll encounter notable texture differences.
Whole wheat flour absorbs more moisture, yielding a denser, heartier crumb.
The flavor impact shifts toward nuttiness and earthiness, which complements coffee cake’s spiced character.
You’ll likely need to adjust liquid ratios and may want to use a blend—say 50% whole wheat, 50% all-purpose—to maintain tenderness while capturing whole wheat’s robust character.
This approach gives you control over your baking results.
What’s the Ideal Room Temperature for Coffee Cake Ingredients Before Mixing?
You’ll want your ingredients at 68-72°F for ideal results.
Your butter should reach a soft, pliable consistency—easily indented but still holding its shape.
Room-temperature eggs blend seamlessly into your batter, creating superior emulsification and a lighter crumb structure. This temperature range guarantees you’re not bound by cold ingredients that resist proper incorporation, giving you complete control over your cake’s final texture and rise.
How Do I Know When My Coffee Cake Is Perfectly Baked?
You’ll know your coffee cake’s perfectly baked when you insert a toothpick into the center and it emerges clean or with just a few moist crumbs clinging to it. Simultaneously, you’ll want to verify the internal temperature reaches 205-210°F using an instant-read thermometer.
The cake’s edges should pull slightly from the pan’s sides, and the top’ll display a golden-brown crust. Don’t overbake—that compromises your cake’s tender crumb structure and freedom of flavor.
Can I Freeze Coffee Cake Batter Before Baking It Later?
Yes, you can freeze your coffee cake batter using proper freezing methods.
Pour it into an airtight container or freezer bag, then store it for up to three months.
When you’re ready to bake, employ thawing techniques by refrigerating it overnight before bringing it to room temperature.
This approach preserves your batter’s structural integrity and leavening agents, ensuring you’ll achieve superior results when you finally bake your cake without compromising quality or texture.
Why Did My Coffee Cake Turn Out Dry Instead of Moist?
Your coffee cake turned dry because you’ve likely overmixed the batter, which develops excessive gluten and creates a dense, parched crumb. Additionally, you’re probably baking at too high an oven temperature, causing the exterior to set before moisture distributes evenly throughout.
Lower your heat by 25°F and mix until ingredients just combine. These adjustments’ll yield a tender, moist cake that respects your baking autonomy.


Leave a Comment