Key Takeaways
- Preheat oven to 350°F and prepare a 9-inch pan with grease, flour, or parchment paper based on pan material.
- Mix dry ingredients (flour, cocoa powder, baking soda, salt) and whisk wet ingredients (eggs, oil, buttermilk, vanilla) separately before combining.
- Gradually blend dry and wet ingredients together until smooth and lump-free to develop proper crumb structure and rise.
- Bake for 30–35 minutes on the center rack without opening the oven door; check doneness with a toothpick for moist crumbs.
- Cool cake on a wire rack for 30–45 minutes at room temperature, then frost with chocolate buttercream once completely cooled.
Gather Your Ingredients

Before you start mixing, gather two cups of all-purpose flour, one cup of unsweetened cocoa powder, two cups of granulated sugar, three large eggs, one cup of buttermilk, one cup of strong brewed coffee (cooled to room temperature), half a cup of vegetable oil, two teaspoons of vanilla extract, two teaspoons of baking soda, one teaspoon of baking powder, and one teaspoon of salt.
You’ll achieve best results by measuring precisely. Don’t rely on guessing—use a kitchen scale or measuring cups for accuracy.
You’re free to explore substitute options: swap buttermilk with plain yogurt, or replace vegetable oil with coconut oil for different flavor profiles.
For storage tips, keep dry ingredients in airtight containers away from moisture and heat. You’ll want to refrigerate eggs and buttermilk until you’re ready to bake. This preparation guarantees you’re not scrambling mid-recipe, giving you complete control over your baking process.
Prepare Your Baking Pans
With your ingredients measured and ready, you’ll now prepare the vessels that’ll hold your batter during baking. Proper pan preparation directly impacts your cake’s texture and release.
| Pan Material | Best For | Preparation |
|---|---|---|
| Aluminum | Even baking | Grease and flour |
| Steel | Durability | Oil and parchment |
| Glass | Visibility | Butter and cocoa powder |
| Silicone | Non-stick release | Light greasing only |
| Cast iron | Browning edges | Generous oil coating |
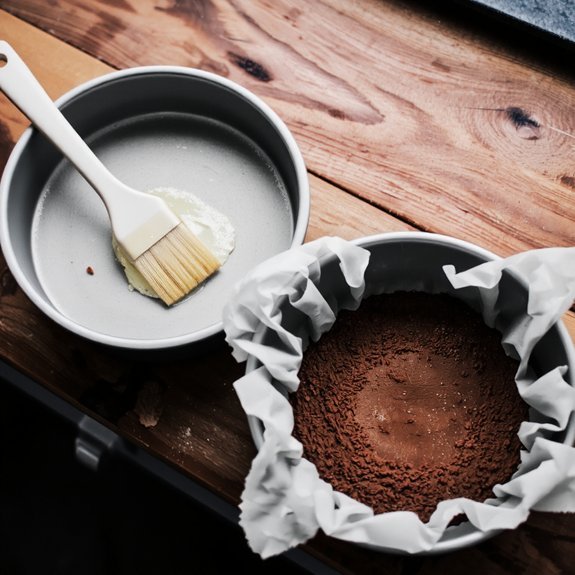
Choose your pan materials based on desired browning intensity. Grease thoroughly using butter or oil, ensuring complete coverage on all surfaces. Line bottoms with parchment paper for foolproof extraction. Implement these cleaning tips: wash immediately after cooling, avoid abrasive scrubbers on non-stick surfaces, and dry completely to prevent rust on steel pans. Your preparation now guarantees successful cake release.
Mix the Dry Ingredients
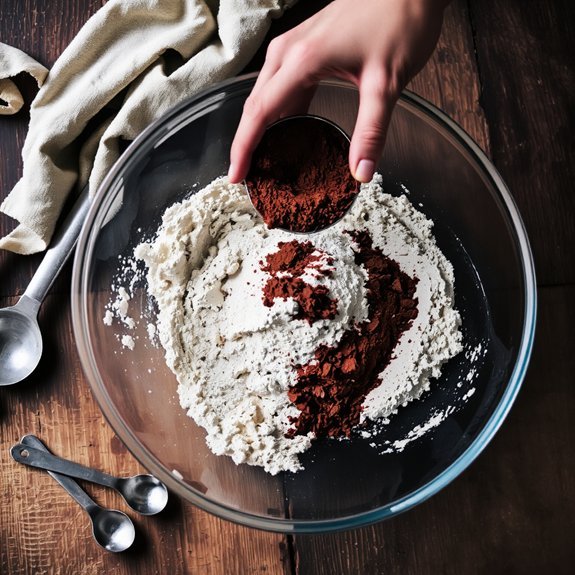
Combining your dry ingredients creates the foundation for your cake’s structure and crumb. You’ll need two cups of all-purpose flour, three-quarters cup unsweetened cocoa powder, two teaspoons baking soda, and one teaspoon salt.
Whisk these components together in a large bowl for about thirty seconds. If you don’t have a whisk, you can use a fork or even a fine-mesh strainer as sift alternatives to break up clumps and distribute ingredients evenly.
For spice variations, consider adding one-quarter teaspoon cayenne pepper or one-half teaspoon cinnamon to enhance chocolate’s depth. These optional additions won’t overpower the cocoa but will add subtle complexity.
Mix until the dry ingredients appear uniform with no streaks of flour remaining. This guarantees even distribution of leavening agents, guaranteeing consistent rise and texture throughout your cake.
Combine the Wet Ingredients
You’ll need to measure your wet ingredients precisely—typically three large eggs, half a cup of vegetable oil, and one cup of buttermilk or water—ensuring accuracy before combining them.
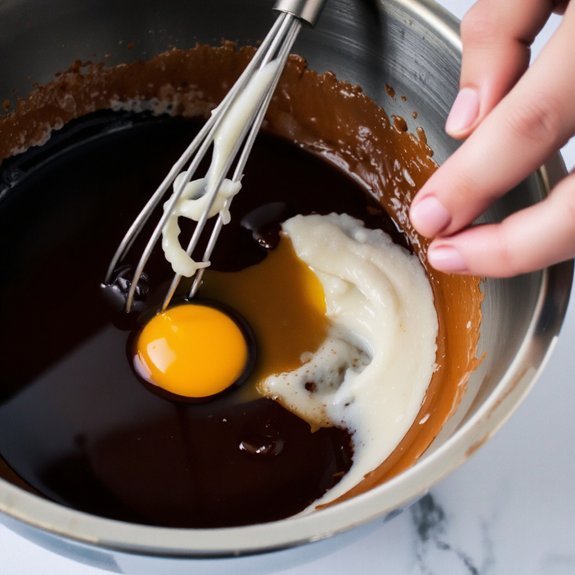
In a separate bowl, you’ll whisk together the eggs and oil until they’re fully emulsified, which creates a stable base for incorporating your other liquids.
Once you’ve achieved a uniform mixture, you’re ready to merge the wet and dry components.
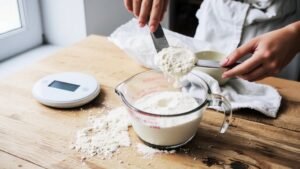
Measuring Accurate Liquid Amounts
Precise liquid measurement forms the foundation of a properly textured chocolate cake, so you’ll want to gather your wet ingredients—eggs, milk, oil, and vanilla extract—before beginning.
Accurate measurement directly impacts your cake’s crumb structure and moisture content.
Here’s how to measure correctly:
- Use the meniscus technique: Position your measuring cup at eye level and read the bottom curve of the liquid surface against the calibration markings.
- Select appropriate vessels: Use liquid measuring cups for oils and milk, not dry cups, which compress ingredients inconsistently.
- Don’t approximate: Each milliliter matters in baking chemistry, affecting your cake’s density and rise.
Combine your measured liquids thoroughly before incorporating dry ingredients.
This guarantees even distribution and prevents lumps that compromise texture.
Mixing Eggs and Oil
The emulsification of eggs and oil creates the fat-water suspension that gives your chocolate cake its tender crumb and rich mouthfeel. You’ll whisk your eggs vigorously before adding oil in a thin, steady stream—this method prevents separation and guarantees ideal emulsion stability.
The egg’s lecithin acts as a natural emulsifier, binding the hydrophobic oil to the aqueous egg components. You’re building a stable matrix that’ll hold your dry ingredients evenly.
Add your measured oil gradually while whisking continuously. Rush this process, and you’ll break the emulsion, resulting in a grainy batter. Once fully incorporated, your mixture should appear glossy and uniform. This preparation directly affects protein coagulation during baking, determining your cake’s final texture. You’ve now established the foundation for a moist, structurally sound chocolate cake.
Blend Everything Together
You’ll want to mix your dry ingredients—flour, cocoa powder, baking soda, and salt—in a separate bowl before combining them with the wet mixture you’ve already prepared.
Once you’ve blended the wet ingredients properly, you’ll gradually add the dry ingredients to the wet mixture, stirring until you’ve achieved a smooth, lump-free batter. This two-step approach prevents overmixing and guarantees your chocolate cake develops the ideal crumb structure.
Mixing Dry Ingredients First
Combining your dry ingredients separately before adding wet components guarantees even distribution of leavening agents and prevents lumps that’d compromise your cake’s crumb structure.
Here’s your approach:
- Sift together your flour, cocoa powder, baking soda, baking powder, and salt through a fine-mesh sieve twice—sifting benefits include aerating the mixture and breaking up any compacted cocoa particles that’d create bitter pockets.
- Whisk thoroughly for 30 seconds after sifting to guarantee uniform clumping prevention and consistent leavening distribution throughout your dry blend.
- Set aside your combined dry ingredients in a separate bowl, keeping them accessible for the next blending stage.
This methodical dry-ingredient preparation sets your chocolate cake up for success, eliminating texture inconsistencies.
It also secures predictable rise during baking.
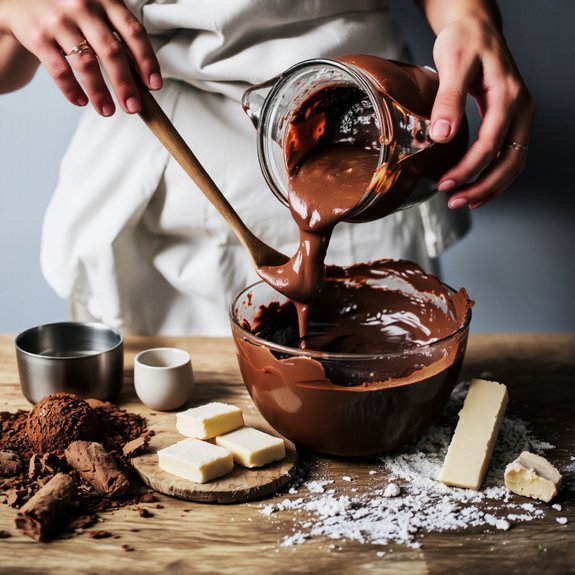
Combining Wet Ingredients Properly
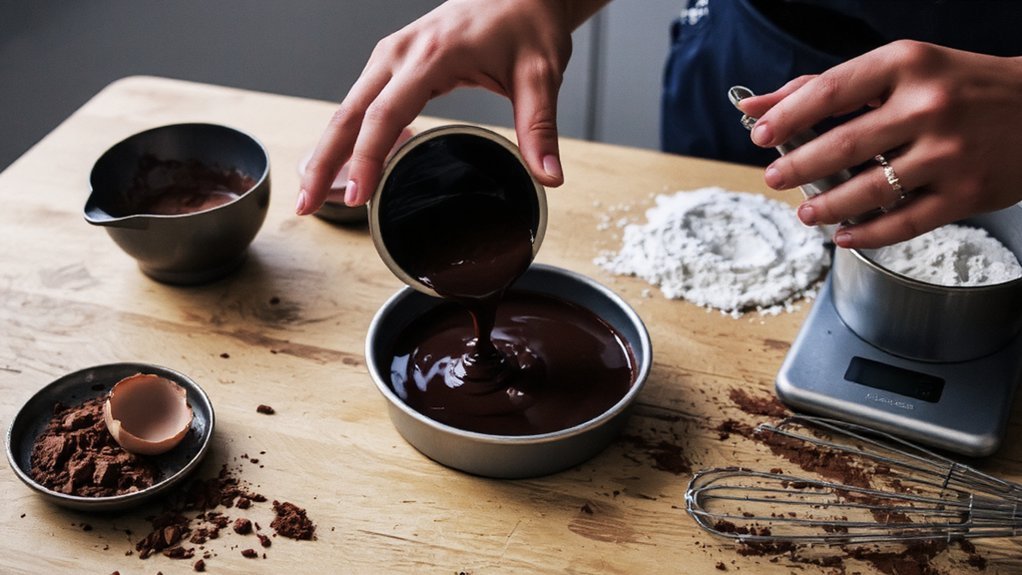
Once your dry ingredients are set aside, it’s time to blend your wet components—eggs, oil, buttermilk, vanilla extract, and melted chocolate—into a cohesive mixture that’ll properly incorporate with your dry blend.
Start by whisking eggs and oil together, employing an emulsion technique that creates stability.
Gradually add buttermilk while maintaining consistent whisking to manage viscosity properly. This prevents separation and guarantees even distribution throughout your batter.
Stir in vanilla extract, then slowly incorporate your cooled melted chocolate. The temperature matters—chocolate that’s too hot’ll cook your eggs.
Whisk until the mixture achieves uniform consistency and deep color saturation.
Don’t over-mix; you’re simply combining these components, not aerating them. This wet blend must be completely homogeneous before meeting your dry ingredients in the final step.
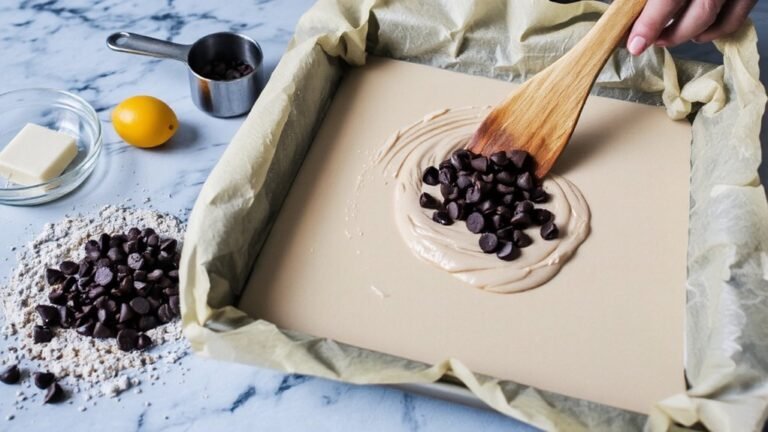
Pour the Batter
Transfer your batter to the prepared cake pan, ensuring it’s distributed evenly across the bottom.
Your pouring technique matters—you’re in control of the final result.
Consider these essentials:
- Container ergonomics: Hold your mixing bowl at a slight angle, positioning the spout near the pan’s center for ideal flow without splashing.
- Batter consistency: Pour steadily in one continuous motion, letting gravity do the work rather than forcing it.
- Even distribution: Gently tap the pan’s sides against the counter to settle the batter and release trapped air pockets.
Scrape the bowl’s interior thoroughly with a spatula to capture every bit of chocolate mixture.
Don’t waste what you’ve created.
The pan’s prepared surface—whether greased or lined—ensures your cake releases cleanly after baking.
Bake to Perfection
Preheat your oven to 350°F (175°C) before placing your pan inside, as this temperature creates the ideal environment for even crumb development and proper rise without over-browning the exterior.
| Factor | Guidelines |
|---|---|
| Oven Calibration | Use an oven thermometer to verify actual temperature |
| Baking Time | 30-35 minutes for standard 9-inch rounds |
| Altitude Baking | Increase temp 15-25°F above sea level |
| Doneness Test | Insert toothpick; it should emerge with moist crumbs |
You’ll want to avoid opening your oven door during the first 25 minutes, as temperature fluctuations compromise rise. Position your pan in the center rack for best heat circulation. Check doneness at 30 minutes using the toothpick method—you’re seeking that perfect balance between moist interior and set edges. Your chocolate cake’s structure depends on proper oven calibration and patience.
Cool Your Cake Layers
After you’ve baked your chocolate cake layers to perfection, you’ll transfer them to a wire rack where air can circulate underneath and around each layer, preventing the bottoms from becoming soggy.
You’ll let your cake layers cool at room temperature for approximately 30-45 minutes, allowing the crumb structure to set and stabilize before you attempt frosting or stacking.
This cooling period is essential because warm cake layers lack structural integrity and’ll tear or shift when you handle them.
Wire Rack Method
Cooling your cake layers on a wire rack allows air to circulate beneath the cake, preventing moisture from pooling on the bottom and creating a soggy, dense crumb structure.
You’ll gain superior results by following these steps:
1. Position your rack properly – Place it on a clean, level surface away from drafts.
Maintain rack maintenance by cleaning it thoroughly before use to prevent debris transfer.
2. Arrange layers strategically – Space saving means stacking racks vertically if needed, making sure at least two inches between each layer for best airflow.
3. Monitor cooling time – Allow 15-20 minutes until the cake firms up enough to handle, but remains slightly warm for frosting application.
This method produces structurally sound layers ready for your chocolate frosting.
Room Temperature Timing
Once your chocolate cake layers have firmed up on the wire rack, you’ll want to transfer them to a countertop or table where they can reach complete room temperature—typically 60-90 minutes depending on layer thickness and your kitchen’s ambient temperature.
During this warming schedule, don’t rush the process by applying frosting to warm cake; the structural integrity depends on thorough cooling.
Your resting intervals allow the crumb matrix to set completely, preventing frosting from melting into soft spots.
Monitor your cake’s temperature by touching the center bottom—it should feel neutral to your fingertips, not cool.
This patience guarantees stable layers for frosting application and ideal flavor development as residual heat dissipates completely.
Make Your Frosting
To achieve a smooth, creamy frosting that’ll complement your chocolate cake, you’ll need to combine softened butter, powdered sugar, cocoa powder, and a splash of vanilla extract in a large mixing bowl.
1. Beat the ingredients on medium speed for 3-5 minutes until light and fluffy, scraping the bowl’s sides periodically to guarantee complete incorporation.
2. Add a pinch of salt and adjust cocoa powder ratios to your preferred chocolate intensity.
Dairy-free butter works seamlessly for allergen substitutions.
3. Spread your frosting immediately onto cooled cake layers using an offset spatula for even coverage and professional results.
For storage tips, refrigerate leftover frosting in an airtight container for up to two weeks.
You’ll maintain ideal texture and flavor by allowing it to soften slightly before reusing.
Frost and Decorate
With your frosting ready and your cake layers completely cooled, you’re set to assemble and embellish your creation.
Place your first cake layer on a flat surface and spread an even frosting layer across its top.
Stack your second layer, then apply frosting to the entire exterior using an offset spatula for smooth, professional coverage.
Now you’ll employ piping techniques to add personalized details.
Load a piping bag with frosting and select your desired tip—grass tips create texture, round tips produce dots, and star tips generate dimensional borders.
Pipe around the cake’s base and top edge.
Finally, position your chosen cake toppers for visual impact.
Whether you select fresh berries, chocolate shards, or custom toppers, make sure they’re positioned securely and complement your chocolate cake’s rich appearance.
Frequently Asked Questions
Can I Substitute All-Purpose Flour With Cake Flour in This Recipe?
You can substitute all-purpose flour with cake flour, but you’ll need to adjust your ratios. Cake flour’s lower protein content produces a more tender crumb than all-purpose flour.
For every cup of all-purpose flour, replace it with 1 cup plus 2 tablespoons of cake flour. Alternatively, you can create a cornstarch substitution by mixing 1 cup all-purpose flour with 2 tablespoons cornstarch to mimic cake flour’s delicate structure and achieve superior results.
How Do I Know if My Cake Is Done Baking Without a Toothpick?
You’ve got several reliable methods.
The jiggle test works well—gently shake the pan; your cake’s done when the center barely moves.
Check the internal temperature with an instant-read thermometer; it should hit 205-210°F at the cake’s center.
You can also press the top lightly; it’ll spring back when fully baked.
These techniques give you complete control over your baking results without relying on toothpicks.
Why Did My Cake Layers Sink in the Middle After Baking?
Your cake layers sank because you’ve likely got a leavening imbalance—too much baking soda or powder threw off the rise.
You’ve overfilled pans, so batter expanded beyond capacity then collapsed as it cooled.
Don’t exceed two-thirds pan fullness.
Recalibrate your leavening ratio: use one teaspoon baking soda per cup flour, or one-and-a-half teaspoons baking powder.
Verify ingredient measurements precisely.
Your freedom to bake perfectly hinges on respecting these proportions.
Can I Make This Cake Ahead and Freeze It for Later?
You can absolutely freeze your chocolate cake for later convenience.
Wrap cooled layers tightly in plastic wrap, then aluminum foil for ideal freezing methods.
Store up to three months at 0°F.
For thawing tips, transfer your cake to the refrigerator overnight before frosting—this prevents condensation and maintains structural integrity.
You’re free to frost either before or after thawing, depending on your timeline and preference.
How Long Does Frosted Cake Last at Room Temperature Before Spoiling?
You’ve got about two days before your frosted chocolate cake risks mold growth and quality decline at room temperature.
Buttercream frosting provides decent protection, but you’re fighting humidity and ambient warmth.
For extended shelf life, refrigerate it—you’ll gain four to five days.
Store it in an airtight container, keeping it away from moisture.
Don’t let temperature fluctuations compromise your baking efforts; control your environment or freeze it.


Leave a Comment