Key Takeaways
- Whisk together flour, baking soda, baking powder, salt, cinnamon, and nutmeg; sift to aerate and ensure even distribution.
- Emulsify eggs with vegetable oil, then blend in applesauce, yogurt, and vanilla extract; whisk vigorously for two minutes until stable.
- Gradually fold wet ingredients into dry ingredients, then add shredded carrots last; avoid overmixing to prevent excessive gluten development.
- Bake in two prepared 9-inch round pans at 350°F for 35–40 minutes until toothpick emerges with minimal crumbs and top springs back.
- Cool in pans for 15 minutes, turn onto wire racks, then frost with cream cheese frosting once layers reach room temperature.
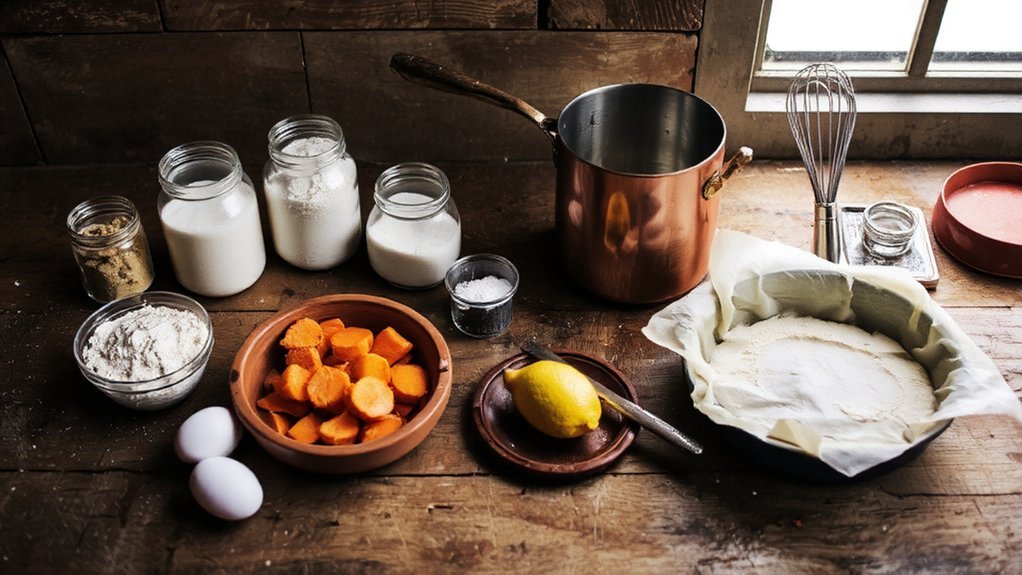
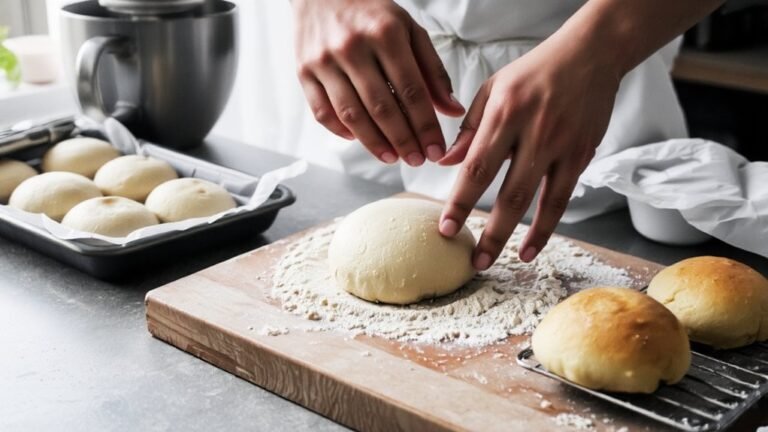
Gather Your Ingredients
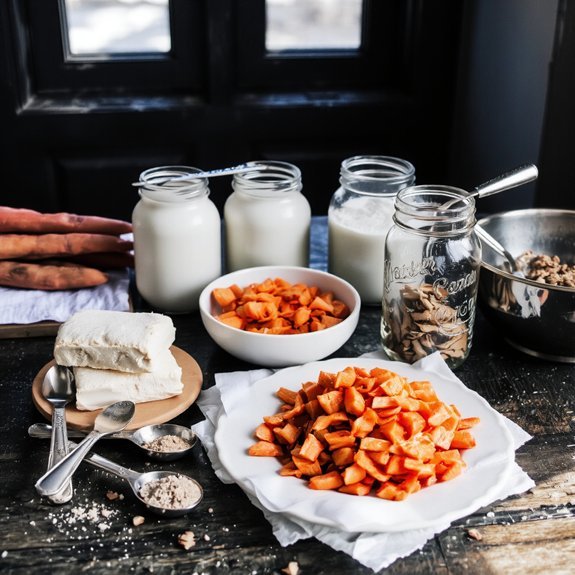
Before you begin mixing, you’ll need to gather the dry ingredients: two cups all-purpose flour, two teaspoons baking soda, one and a half teaspoons baking powder, one teaspoon ground cinnamon, half a teaspoon ground nutmeg, and half a teaspoon salt.
For wet ingredients, collect three eggs, one cup vegetable oil, two cups shredded carrots, and one cup crushed pineapple with juice.
You’ll also need one teaspoon vanilla extract.
Use this shopping checklist to make sure you don’t forget anything.
If you’ve got allergies, consider allergy alternatives: substitute all-purpose flour with gluten-free flour, or replace eggs with flax eggs.
For dairy-free frosting, use coconut oil instead of butter.
Having everything prepared beforehand streamlines your baking process and prevents mid-recipe interruptions.
3. Prepare Your Baking Pans

To guarantee even baking and easy removal, you’ll need to properly prepare two 9-inch round cake pans.
Properly prepare two 9-inch round cake pans to guarantee even baking and easy removal from the start.
Start by evaluating pan compatibility with your oven’s dimensions and heat distribution. You’ve got options:
- Apply nonstick treatments using butter and flour, making sure of complete coverage on all surfaces
- Use parchment paper circles cut to fit pan bottoms precisely
- Consider commercial baking sprays for consistent nonstick results
Proper pan preparation prevents sticking and helps your carrot cake releases cleanly.
Butter-and-flour methods work best for traditional results, while nonstick sprays offer convenience.
Whichever nonstick treatment you choose, don’t skimp on coverage—pay special attention to corners and edges where batter tends to adhere.
Position your pans on the center oven rack before mixing your batter.
This setup gives you freedom to move directly from preparation to baking without delays.
4. Mix the Dry Ingredients
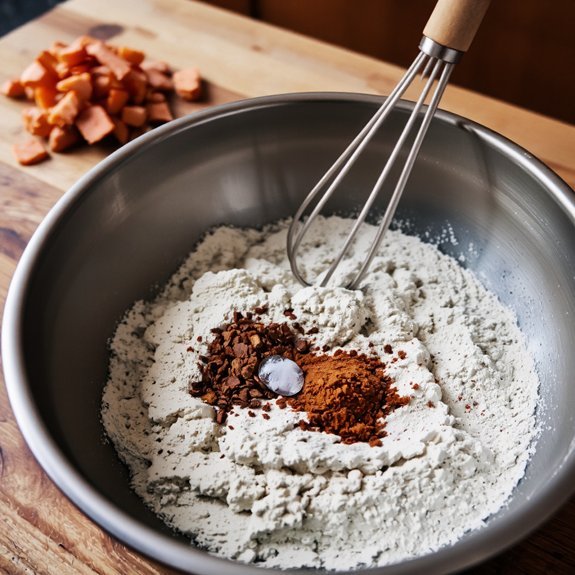
Once you’ve prepared your pans, you’ll combine the dry ingredients in a medium mixing bowl to establish your cake’s foundation.
Whisk together two cups of all-purpose flour, two teaspoons of baking soda, one teaspoon of baking powder, and half a teaspoon of salt.
This combination creates structure and lift for your cake.
Next, incorporate your spices: one and a half teaspoons of ground cinnamon, half a teaspoon of ground nutmeg, and quarter teaspoon of ground cloves.
Proper spice balance promotes complexity without overpowering the carrots.
Whisk vigorously for one minute to distribute leavening agents evenly and achieve clumping prevention, which guarantees consistent crumb texture throughout your baked cake.
This thorough mixing step eliminates pockets of unmixed baking soda that’d create bitter spots in your finished product.
5. Combine the Wet Ingredients
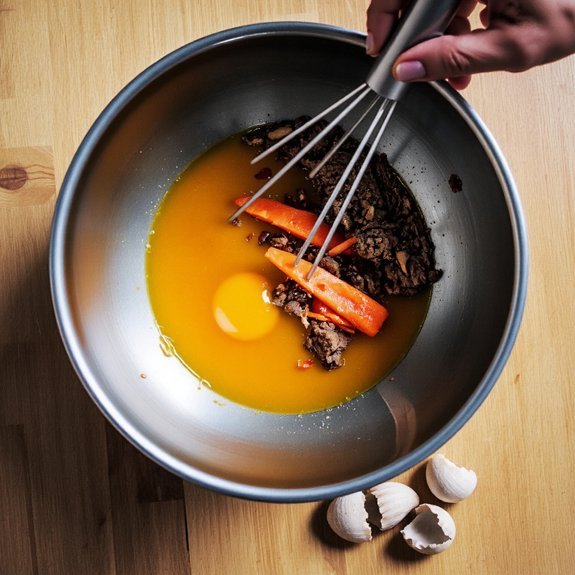
While your dry ingredients rest, you’ll prepare the wet components that bind everything together.
While your dry ingredients rest, prepare the wet components that bind everything together for a structurally sound cake.
Proper temperature control promotes ideal emulsification and texture development in your final product.
Combine these essential elements:
- Oil and eggs: Whisk together ¾ cup vegetable oil with three large eggs until thoroughly combined, or use egg substitutes like aquafaba for a plant-based alternative
- Applesauce and yogurt: Blend ½ cup unsweetened applesauce with ½ cup Greek yogurt to enhance moisture and richness
- Vanilla extract: Add two teaspoons of pure vanilla extract for depth and complexity
Maintain room temperature conditions for all ingredients—this prevents separation and promotes even mixing.
Whisk vigorously for approximately two minutes until the mixture achieves a homogeneous, slightly thickened consistency.
This preparation method guarantees your wet ingredients will fully incorporate with your dry mixture, creating a structurally sound, moist carrot cake that delivers exceptional results every time you bake.
6. Create the Batter

Now that you’ve combined your wet ingredients, you’ll mix your dry components—flour, baking soda, baking powder, salt, and spices—in a separate bowl to promote even distribution.
You’ll then blend the wet and dry mixtures together until you’ve achieved a smooth, lump-free batter that’s ready for the carrots and nuts. This methodical approach prevents overmixing while guaranteeing consistent texture throughout your cake.
Mixing Dry Ingredients
Before you combine wet and dry components, you’ll need to sift together all dry ingredients to guarantee even distribution and to aerate the flour.
Sifting benefits your carrot cake by:
- Breaking up flour clumps and incorporating air for superior crumb structure
- Ensuring uniform spice distribution throughout the batter
- Eliminating lumps that compromise texture and rise
Combine two cups all-purpose flour, two teaspoons baking soda, one and one-half teaspoons baking powder, and one teaspoon ground cinnamon in a medium bowl.
Whisk in one-half teaspoon ground nutmeg, one-quarter teaspoon ground cloves, and one-quarter teaspoon sea salt.
This meticulous approach guarantees your spices integrate evenly, preventing hot spots of concentrated flavor.
Proper spice distribution creates the balanced, sophisticated taste carrot cake demands.
You’re establishing the foundation for exceptional results—don’t skip this critical step.
Combining Wet Components
Combining your wet ingredients requires careful attention to emulsification and temperature control. You’ll whisk together eggs, oil, and applesauce until fully incorporated, establishing a stable emulsion that traps air and moisture throughout your batter.
Start by beating eggs at room temperature—this enhances emulsification techniques and promotes better volume. Gradually add oil in a thin stream while whisking continuously; this methodical approach prevents separation and guarantees uniform distribution.
Incorporate your applesauce next, whisking until the mixture reaches consistent density. Temperature control matters crucially here; cold ingredients resist proper emulsification, compromising texture and rise.
Finally, add your liquid vanilla extract and any remaining wet components. Your finished wet mixture should display a uniform, slightly thick consistency. Don’t over-mix beyond this point, as you’ll incorporate the dry ingredients separately to maintain ideal crumb structure in your finished cake.
Blending Until Smooth
With your wet components properly emulsified, you’ll now combine them with your dry ingredients to create the batter.
Understanding emulsion science helps your oil, eggs, and liquids integrate seamlessly with flour and leavening agents.
Pour your wet mixture into the dry ingredients gradually:
- Fold ingredients together until just combined—overmixing develops gluten unnecessarily
- Stir until no flour streaks remain and the batter reaches uniform consistency
- Add shredded carrots last, distributing them evenly throughout
Think of this process like motor maintenance: precision timing and proper sequencing prevent complications.
Work methodically rather than aggressively.
Your batter should flow smoothly without lumps, indicating successful emulsion integration.
This balanced approach yields ideal texture and rise, giving you control over your cake’s final quality.
Don’t rush this stage.
7. Bake to Perfection
How you’ll achieve the ideal crumb structure depends entirely on proper oven calibration and timing.
You’ll want to preheat your oven to 350°F, making sure your thermometer reads accurately—don’t rely on guesswork.
If you’re baking at high altitude, make altitude adjustments by increasing oven temperature by 25°F to compensate for faster moisture evaporation.
Pour your blended batter into a greased 9-inch round cake pan.
Bake for 35-40 minutes until a toothpick inserted near the center emerges with minimal crumbs.
The cake’s edges’ll pull slightly from the pan when done.
You’ll know you’ve succeeded when the top springs back under gentle pressure.
Remove the cake immediately and cool it in the pan for 15 minutes before turning it out onto a wire rack.
This prevents structural collapse and helps retain moisture throughout your finished product.
8. Make the Cream Cheese Frosting
Achieving the ideal frosting consistency requires using room-temperature cream cheese and butter—cold ingredients won’t emulsify properly and’ll result in a grainy texture.
Room-temperature cream cheese and butter are essential for proper emulsification and avoiding grainy frosting texture.
You’ll beat these foundational components until smooth, then gradually incorporate powdered sugar for sweetness and stability.
Your frosting needs:
- 8 oz cream cheese at room temperature for best blending
- 4 tablespoons unsalted butter to create richness and spreadability
- 2 cups powdered sugar whisked to eliminate lumps before mixing
For allergy substitutions, you can replace traditional cream cheese with dairy-free alternatives or use coconut oil instead of butter.
Store your finished frosting in an airtight container for up to five days, or freeze for extended preservation.
Apply your frosting once your cake layers reach room temperature for best results and professional appearance.
9. Frost and Decorate Your Cake
You’ll apply your cream cheese frosting between the cooled cake layers and across the exterior surface, ensuring an even, crumb-free coating.
Select decorative toppings—such as candied carrots, crushed walnuts, or cream cheese rosettes—that complement the cake’s flavor profile and visual presentation.
These finishing elements enhance both the aesthetic appeal and textural complexity of your finished carrot cake.
Cream Cheese Frosting Recipe
Frosting your carrot cake with a tangy cream cheese frosting elevates the dessert’s flavor profile and provides the perfect complement to the cake’s warm spices.
You’ll need these essential ingredients:
- 8 oz cream cheese, softened to room temperature for ideal blending
- 4 tablespoons unsalted butter, ensuring smooth consistency
- 2 cups powdered sugar, sifted for lump-free frosting
Beat cream cheese and butter together until you achieve a fluffy, light texture. Gradually incorporate powdered sugar, mixing thoroughly to eliminate lumps.
For flavor variations, you can add vanilla extract, lemon zest, or a hint of maple. If you’re managing allergy substitutions, dairy-free cream cheese alternatives work effectively while maintaining tanginess.
Apply frosting generously between layers and across the cake’s surface. Chill your finished cake for at least two hours before serving to set the frosting properly.
Decorative Topping Ideas
How can you transform your frosted carrot cake into a visually striking centerpiece? Elevate your presentation by strategically layering complementary elements atop your cream cheese frosting.
You’ll want to incorporate edible flowers—pansies, marigolds, or nasturtiums—for sophisticated color contrast.
These botanicals aren’t merely decorative; they’re edible components that enhance your cake’s visual appeal without compromising flavor integrity.
Candied nuts provide textural dimension and refined elegance.
Toast pecans or walnuts, then coat them in a light sugar syrup.
Once cooled, arrange them across the frosting’s surface in deliberate patterns.
Consider adding fresh carrot ribbons, created with a vegetable peeler, and a light dusting of cinnamon for aromatic warmth.
You’re not simply decorating—you’re curating an intentional, polished presentation that reflects your baking mastery and respects your guests’ discerning palates.
Frequently Asked Questions
Can I Substitute Oil With Butter in Carrot Cake Recipes?
Yes, you can substitute oil with butter in carrot cake recipes.
You’ll achieve Texture Differences—butter creates a denser, more tender crumb, while oil yields lighter moisture retention.
Expect Flavor Changes; butter introduces richness and subtle nutty notes that oil won’t provide.
Use equal parts butter by weight, melting it first.
This ingredient-focused swap demands precision: butter’s water content affects hydration differently than oil, so monitor your batter’s consistency carefully to maintain ideal results.
How Long Does Homemade Carrot Cake Stay Fresh?
Your homemade carrot cake stays fresh for 3-4 days at room temperature, though shelf life factors like frosting type and ingredient composition substantially affect longevity.
Cream cheese frosting requires refrigeration, extending freshness to 5-7 days.
You’ll recognize spoilage indicators through mold appearance, off-odors, or texture changes.
Store your cake in an airtight container to maximize freshness and prevent moisture loss, maintaining ideal quality throughout its edible window.
Can Carrot Cake Be Made Ahead and Frozen?
Yes, you can freeze your carrot cake successfully. Wrap unfrosted layers tightly in plastic wrap and aluminum foil to prevent freezer burn.
You’ll maintain peak quality for up to three months using proper freezing techniques. When you’re ready, employ gradual thawing methods by transferring your cake to the refrigerator overnight. This controlled approach preserves ingredient integrity and prevents condensation damage, ensuring you retain complete control over your baking timeline and final product quality.
What’s the Best Way to Store Frosted Carrot Cake?
You’ll achieve ideal preservation by refrigerating your frosted carrot cake in airtight containers.
This method prevents moisture loss and cream cheese frosting degradation.
Store it on a shelf away from pungent foods that’d compromise flavor integrity.
You’re guaranteed 3-4 days of peak quality.
For extended storage, wrap individual slices in parchment, then seal them in airtight containers before freezing up to three months.
Thaw overnight refrigerated before serving to maintain structural integrity and frosting texture.
Can I Use Canned Carrots Instead of Fresh Carrots?
You can substitute canned carrots, though you’ll sacrifice flavor intensity compared to fresh varieties. Canned carrots contain added moisture and often sugar, requiring you to reduce your recipe’s liquid content and make sugar adjustments accordingly.
Drain them thoroughly and consider patting them dry. For best results, you’ll want to use fresh carrots, but canned works in a pinch if you account for these ingredient modifications.


Leave a Comment