Key Takeaways
- Combine flour, sugar, salt, and yeast; add warm milk (110–115°F), melted butter, and eggs for smooth, elastic dough.
- Bulk ferment at 75–80°F for 1–2 hours until dough doubles; finger test confirms readiness when it springs back slowly.
- Spread room-temperature butter blended with brown sugar and cinnamon evenly across dough; roll tightly from long edge.
- Cut uniform pieces with serrated knife; arrange snugly in greased 9×13-inch pan and proof until rolls expand together.
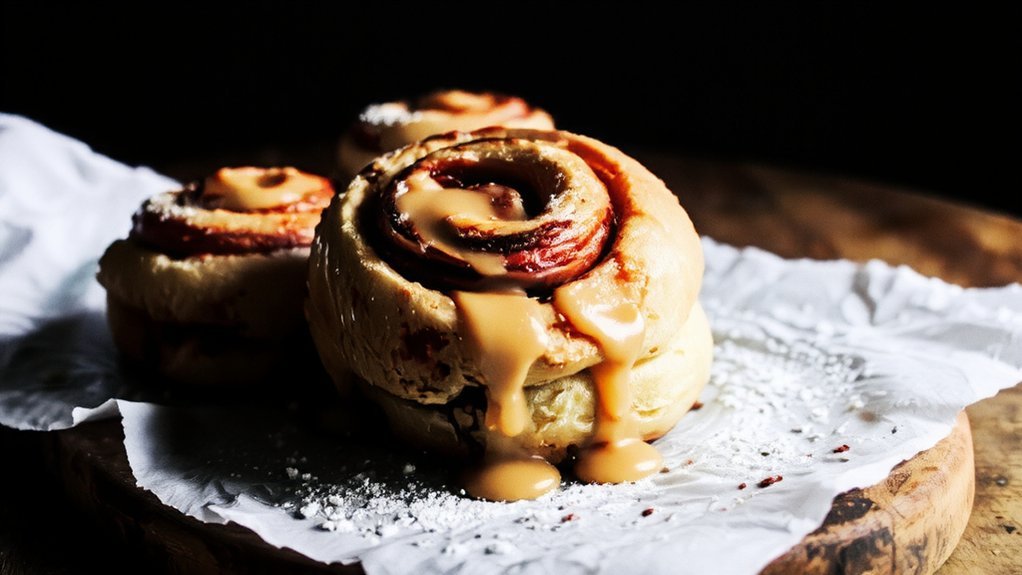
- Bake at 350°F for 20–25 minutes until golden; top with cream cheese frosting while warm for optimal melting.
Ingredients You’ll Need
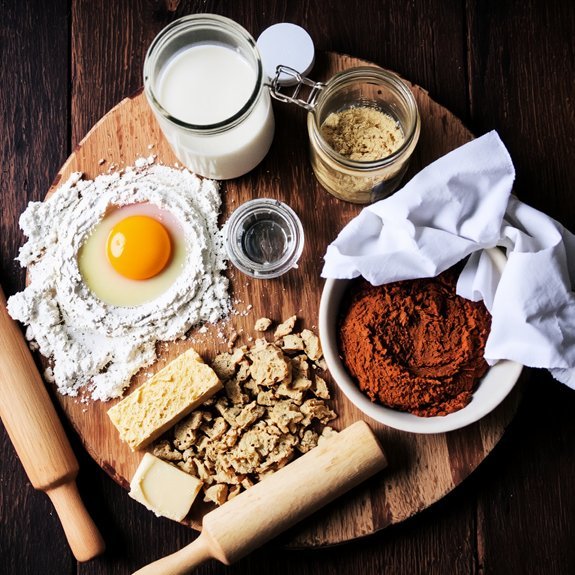
You’ll need eight essential components to create these golden, fragrant cinnamon rolls.
Start with all-purpose flour as your foundation, though you can substitute whole wheat flour for added nutrition.
Gather warm milk, active dry yeast, butter, eggs, brown sugar, ground cinnamon, and salt.
Source your yeast from reputable suppliers to guarantee maximum rising power.
Choose fresh cinnamon from specialty spice shops—it delivers superior flavor compared to standard grocery varieties.
High-quality butter creates richer dough and more decadent filling.
For ingredient substitutions, consider using coconut milk instead of dairy milk, or replace eggs with appleseed for vegan versions.
Brown sugar can be swapped with coconut sugar if desired.
Measure precisely: this recipe demands accuracy for perfect texture and rise.
Your freedom to experiment lies in these thoughtful substitutions, not careless deviations.
Equipment and Tools
You’ll need essential baking tools like a 9×13-inch baking pan, parchment paper, and a sharp knife to cut your dough into uniform rolls.
Your mixing and kneading equipment should include a large bowl, a stand mixer or your hands for working the dough, and a flat work surface dusted with flour to prevent sticking.
These implements guarantee you’re equipped to handle every stage of the cinnamon roll process, from initial dough preparation through final shaping.
Essential Baking Tools
To craft perfectly shaped and evenly baked cinnamon rolls, you’ll need a focused collection of equipment that handles dough manipulation and precise measurement.
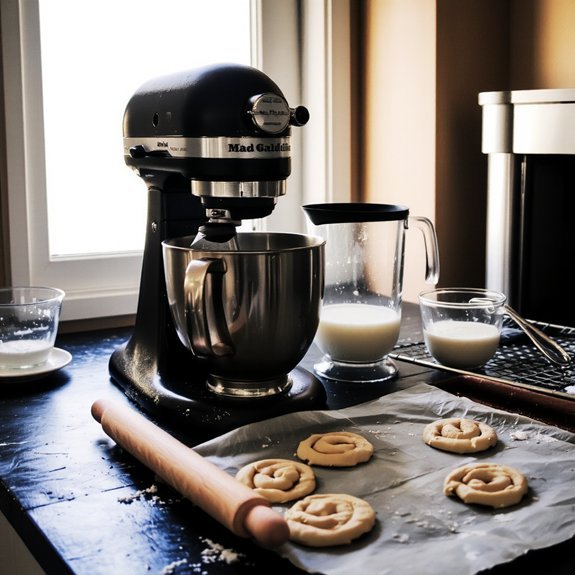
Grab a sturdy stand mixer with dough hook attachments—it’ll save your arms while developing gluten structure efficiently. You’ll want a digital scale for accuracy that cup measurements can’t match, giving you reproducible results every time.
Invest in a 9×13-inch baking pan with safety features like rolled edges to prevent burns. A bench scraper becomes your best friend for portioning dough without tearing.
Don’t overlook maintenance tips: wash your mixer bowl immediately after use, and wipe your scale clean to prevent dough buildup that compromises accuracy.
A sharp serrated knife guarantees clean cuts through your spiral without crushing layers. These tools grant you complete control over your baking process.
Mixing and Kneading Equipment
A stand mixer with a dough hook attachment transforms the physical demands of cinnamon roll preparation, mechanically developing gluten structure while you attend to other tasks. You’ll appreciate the freedom this equipment grants you—no hand-kneading fatigue, just consistent results. For quieter operation, consider models with noise reduction technology that won’t dominate your kitchen soundscape.
| Equipment | Function | Key Feature |
|---|---|---|
| Stand Mixer | Automates kneading | Dough hook attachment |
| Bench Scraper | Divides dough | Sharp, precise cuts |
| Mixing Bowls | Ingredient combining | Durable stainless steel |
Regular motor maintenance guarantees longevity and peak performance. You’ll notice the tactile difference—a well-maintained mixer produces smoother dough with superior texture. The sensory feedback from watching your dough transform from shaggy to silky smooth validates your equipment investment, delivering professional-quality rolls with minimal effort.
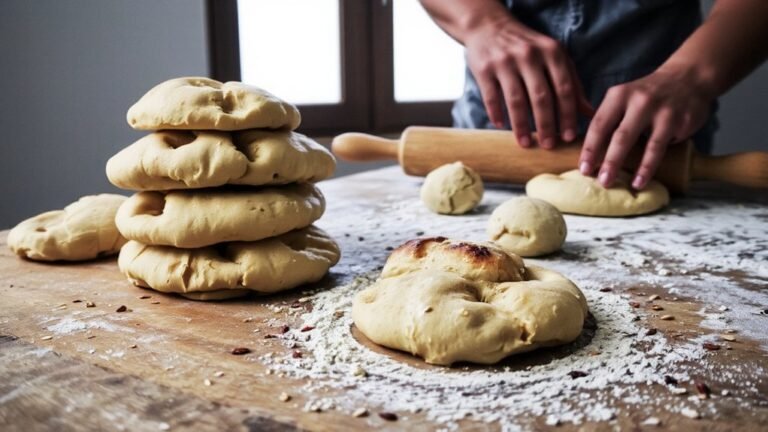
Preparing the Dough
You’ll combine your dry ingredients—flour, salt, and sugar—with warm milk, butter, and yeast, stirring until a shaggy dough forms.
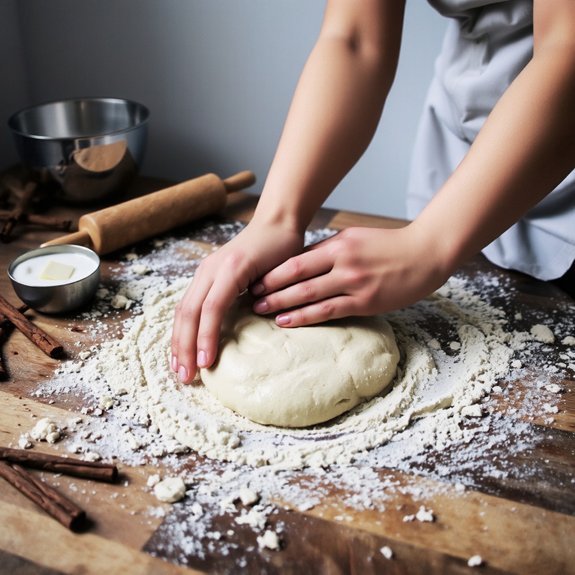
Then you’ll knead the mixture for 8-10 minutes until it becomes smooth and elastic, developing the gluten structure necessary for rise.
After kneading, you’ll let the dough rest in a warm, oiled bowl for 1-2 hours until it doubles in volume, allowing the yeast to ferment and create air pockets throughout.
Mixing Ingredients Together
Combining your dry ingredients—flour, sugar, salt, and instant yeast—in a large mixing bowl creates the foundation for your dough’s structure and rise.
Whisk these components thoroughly to distribute the yeast evenly, ensuring consistent fermentation throughout your batch.
Next, create a well in the center and pour in your warm milk, melted butter, and beaten eggs.
Temperature effects matter greatly; your liquid should measure between 110-115°F to activate the yeast without killing it.
Stir vigorously with a wooden spoon, incorporating the dry mixture gradually into the wet ingredients.
Once combined, knead the shaggy dough for 8-10 minutes.
This essential air incorporation develops gluten networks that trap gas bubbles, enabling proper rise.
You’ll feel the dough transform from rough to smooth, elastic, and slightly tacky—the hallmark of perfectly prepared cinnamon roll dough.
Kneading and Rising Time
Once your dough reaches that smooth, elastic state, transfer it to a lightly oiled bowl and cover it with a damp kitchen towel or plastic wrap.
You’re now entering the critical rising phase where gluten develops and flavors deepen.
Let your dough bulk ferment for 60-90 minutes at room temperature.
You’ll notice it’ll roughly double in size—that’s your signal of proper yeast activation.
This autolyse benefits your final texture by allowing glutens to relax naturally, reducing knead fatigue and creating superior extensibility.
During this wait, you’re not idle.
Press your finger into the dough; it should spring back slowly, indicating readiness for shaping.
Resist rushing this stage.
The time investment yields noticeably superior crumb structure and complexity in your finished rolls, giving you the quality you’ve earned through patience and precision.
Making the Cinnamon Filling
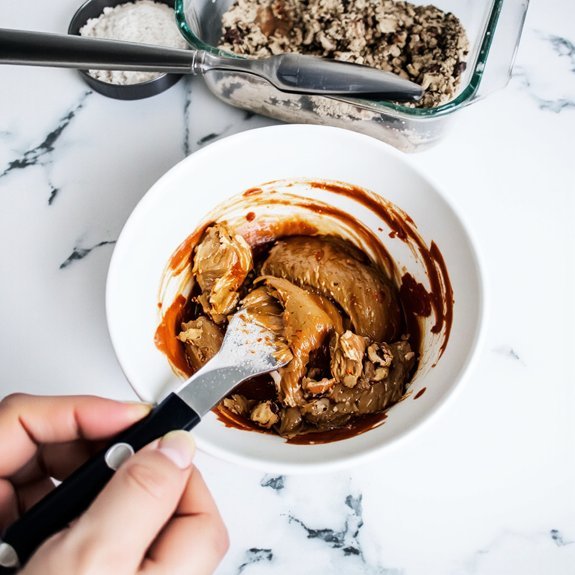
Blending soft butter with brown sugar and ground cinnamon creates the aromatic base that’ll transform your dough into decadent rolls. You’ll achieve ideal consistency by allowing butter to reach room temperature—this guarantees even distribution without clumping.
| Ingredient | Ratio | Purpose | Texture Adjustments |
|---|---|---|---|
| Butter | 4 tbsp | Binding agent | Add 1 tbsp if dry |
| Brown sugar | ½ cup | Sweetness | Reduce for lighter flavor |
| Cinnamon | 2½ tbsp | Spice depth | Increase for bold notes |
| Salt | ¼ tsp | Flavor enhancer | Balances sweetness |
Spread this mixture evenly across your dough for uniform flavor. Press firmly but gently to prevent air pockets. For presentation tips, make sure edges are fully coated—this creates visually appealing spirals when sliced. The filling’s moisture content directly impacts your rolls’ final texture, so precision matters.
Rolling and Shaping Your Rolls
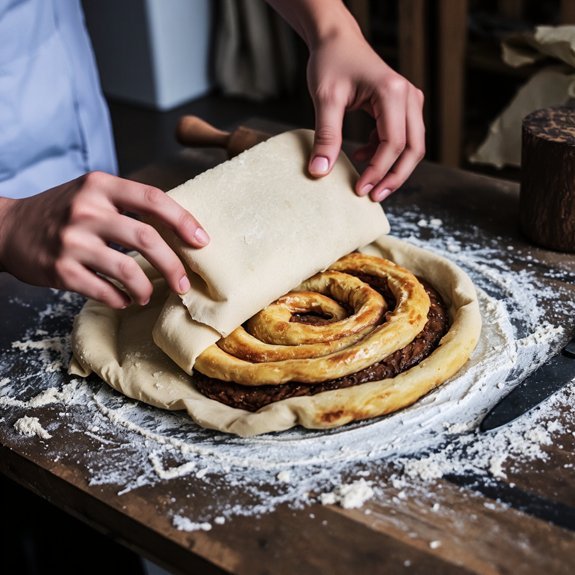
With your filling spread evenly across the dough, you’re ready to transform it into those iconic spirals.
Starting from the long edge, roll the dough tightly toward you, maintaining consistent spiral tightness throughout. Here’s how to nail this technique:
- Roll slowly and deliberately, pressing gently to seal each layer
- Keep tension even to prevent loose centers or overly compressed edges
- Use a sharp knife or dental floss to cut uniform pieces
- Consider decorative scoring on top before proofing for visual appeal
As you shape each roll, you’ll feel the dough’s resistance and elasticity working in your favor.
Position them snugly in your greased pan—they’ll expand into each other during proofing, creating those tender, connected edges you crave. This spacing determines your final texture.
The Rising Process
After you’ve nestled your rolls into the pan, they’ll enter a pivotal transformation where yeast fermentation develops flavor and structure. You’ll control this critical phase through temperature control and humidity effects, which directly impact rise quality and timing.
| Condition | Ideal Range | Effect |
|---|---|---|
| Temperature | 75–80°F | Ideal fermentation speed |
| Humidity | 70–75% | Prevents surface drying |
| Rising Time | 1–2 hours | Visual doubling indicator |
| Environment | Draft-free space | Consistent results |
| Proofing Box | 80–85°F with steam | Accelerated rise |
You’ll notice the dough expanding, becoming pillowy and responsive to gentle pressure. Proper humidity effects prevent your rolls from developing a skin, while temperature control promotes even fermentation. When they’ve roughly doubled, you’ve achieved the perfect proof—ready for baking’s final transformation into golden, aromatic perfection.
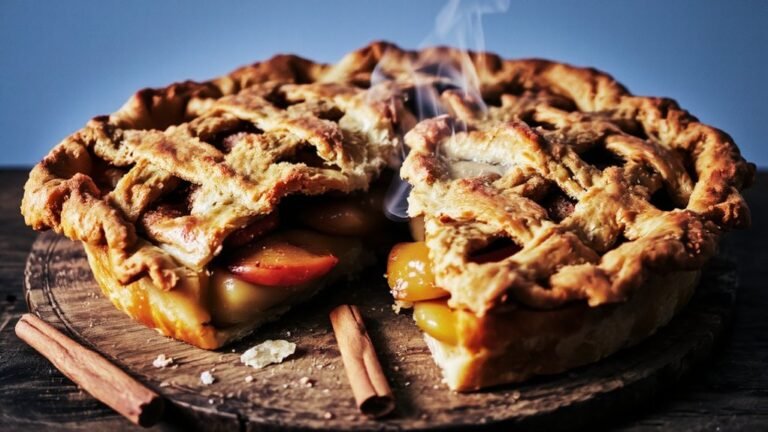
Baking to Perfection
Once your rolls’ve achieved that perfect doubled state, you’re ready to transfer them to the oven—the moment where yeast’s work concludes and heat takes command.
Once your rolls’ve doubled, you’re ready for the oven—where yeast’s work concludes and heat takes command.
Your baking success depends on executing these critical steps:
- Preheat your oven to 350°F, accounting for ambient humidity that affects internal moisture migration
- Position rolls with adequate spacing, allowing hot air circulation around each piece
- Bake for 20-25 minutes until golden-brown exteriors develop and interiors reach 190°F
- Monitor flavor balancing by catching that sweet spot before edges darken excessively
The Maillard reaction transforms your dough’s surface, creating complexity and depth.
You’ll recognize doneness when steam releases and caramelization peaks.
Trust your instincts—pull them out when golden, not pale, and you’ve earned that freedom to enjoy truly exceptional homemade cinnamon rolls.
Preparing the Cream Cheese Frosting
Your rolls’ve barely cooled when the real magic happens—transforming simple ingredients into the tangy, velvety frosting that defines an exceptional cinnamon roll.
Beat softened cream cheese and butter until smooth, then gradually incorporate powdered sugar, vanilla extract, and a pinch of salt. The mixture should reach silky perfection without overworking, which risks separation.
Explore flavor variations by adding lemon zest, maple syrup, or espresso powder for complexity.
Pour the frosting generously over warm rolls, letting it melt into crevices naturally.
For decorating techniques, drizzle excess frosting in artistic patterns, or pipe delicate swirls atop each roll.
Some bakers prefer partial frosting on cooled rolls for controlled presentation. Your restraint here determines whether frosting pools luxuriously or sits precisely—choose your freedom.
Storage and Reheating Tips
Because cinnamon rolls contain dairy and yeast, proper storage methods directly impact their texture and flavor longevity.
Proper storage methods directly impact cinnamon roll texture and flavor longevity because of dairy and yeast content.
You’ll want to master these techniques for maximum freshness:
- Refrigerate unfrosted rolls in airtight containers for up to five days, preventing moisture loss and staleness
- Freeze baked rolls for three months; wrap individually in parchment, then seal in freezer bags with labeling dates clearly marked
- Reheat frozen rolls at 350°F for fifteen minutes, restoring their tender crumb without drying them out
- Store frosted rolls separately to maintain moisture control and prevent icing from absorbing excess humidity
You’re maintaining the delicate balance between moisture and structure.
Proper storage lets you enjoy your homemade creation throughout the week without compromising that coveted soft texture or rich, spiced flavor profile.
Frequently Asked Questions
Can I Make Cinnamon Rolls Ahead of Time and Freeze Them Before Baking?
You can absolutely freeze unbaked cinnamon rolls before baking, giving you complete control over your schedule.
After shaping, you’ll flash freeze them on a baking sheet for two hours until solid. Then transfer them into airtight packaging methods—freezer bags or containers work great—to prevent freezer burn.
When you’re ready, bake directly from frozen, adding five to ten minutes to your baking time. This approach liberates your baking timeline entirely.
Why Did My Rolls Turn Out Dense and Heavy Instead of Fluffy?
You’ve likely underkneaded your dough or added excess flour, both culprits behind dense, heavy rolls.
Insufficient kneading prevents proper gluten development, robbing you of that airy structure you’re after.
Too much flour dries out the dough, creating a tight crumb.
Knead confidently for eight to ten minutes until your dough becomes silky and elastic.
Measure flour carefully, spooning it into your cup rather than scooping directly from the bag.
How Do I Know if My Dough Has Risen Enough During Proofing?
You’ll know your dough’s risen enough when you perform the poke test—gently press your finger into the surface. If the indentation springs back slowly and doesn’t completely disappear, you’ve hit the sweet spot.
Visual cues matter too: your dough should’ve roughly doubled in size, appearing puffy and soft. The texture’ll feel airy under your fingertips, signaling proper fermentation and gluten development for those light, fluffy rolls you’re after.
Can I Substitute Regular Cream Cheese Frosting With a Different Topping?
You’ve got complete freedom here—ditch that cream cheese frosting whenever you want.
Try drizzling a rich brown butter glaze for nutty complexity, or go bold with maple icing that’ll amplify those warm spices you’ve already built into your dough.
A brown butter glaze caramelizes beautifully as it sets, creating textural contrast against soft rolls.
Maple icing delivers sophisticated sweetness without heavy cream cheese binding you down.
Both options give you liberation from conventional choices.
What Causes Cinnamon Rolls to Have a Gummy Center After Baking?
You’ve got gummy centers because you’re not letting them bake long enough—those undercooked centers trap moisture that won’t evaporate. Excess filling compounds this problem; it creates a dense, wet barrier that insulates the dough’s interior.
You’re also likely wrapping them too tightly, which prevents steam circulation.
Bake until the internal temperature hits 190°F, use moderate filling amounts, and leave breathing room between rolls so heat penetrates thoroughly, giving you that perfectly set, tender crumb you’re after.


Leave a Comment