Key Takeaways
- Use cold butter cut into pea-sized pieces to create steam pockets that leaven biscuits upward for maximum fluffiness.
- Choose soft wheat or Southern cake flour (8–10% protein) instead of all-purpose for lighter, more tender results.
- Mix dry ingredients first, then add cold buttermilk gradually while stirring gently until just combined to avoid toughness.
- Preheat oven to 425°F on the upper-middle rack for at least 15 minutes to achieve rapid, even lift.
- Handle dough minimally with restraint—avoid kneading, twisting, or overworking to preserve delicate laminated structure and flaky layers.
The Science Behind Fluffy Biscuits

When you’re mixing biscuit dough, you’re creating a delicate balance of fat, flour, and liquid that determines your final texture.
Here’s what’s happening scientifically: cold butter creates steam pockets during baking, leavening your biscuits upward. Your flour’s starch undergoes starch gelatinization when heat hits, absorbing liquid and setting structure. Meanwhile, protein denaturation occurs as gluten proteins unfold and bond, creating elasticity.
Cold butter creates steam pockets that leaven biscuits upward while heat triggers starch gelatinization and gluten protein bonding for structure.
You’ll want minimal mixing to prevent overdeveloping gluten, which toughens your biscuits. Buttermilk’s acidity reacts with baking soda, producing carbon dioxide bubbles that expand in heat.
Keeping ingredients cold before baking preserves those vital fat pockets. Understanding these chemical reactions gives you complete control over your biscuit’s rise, fluffiness, and tender crumb.
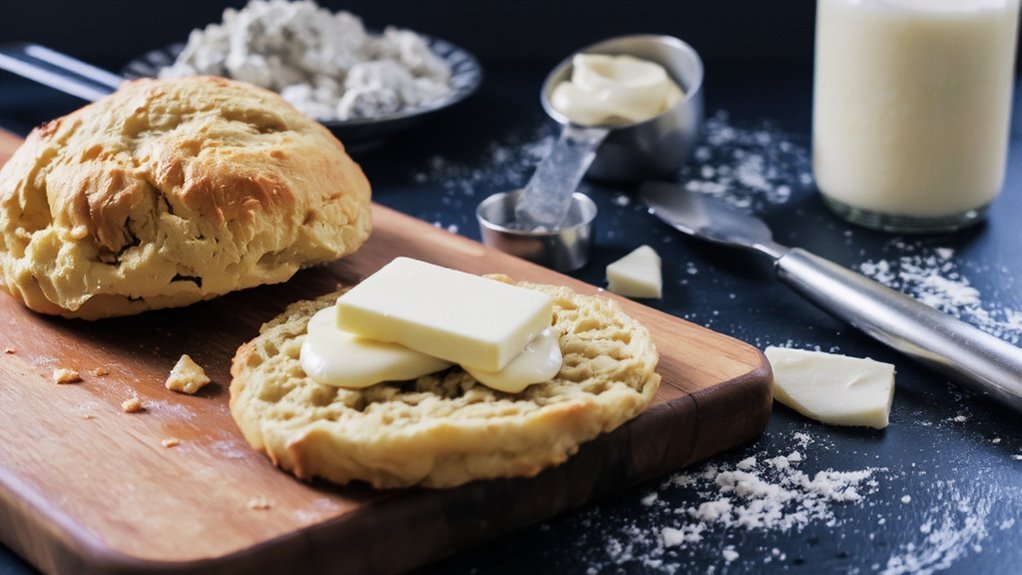
Essential Ingredients for Perfect Biscuits
Now that you understand the chemistry at work, let’s focus on selecting the right ingredients to make that science work in your favor.
You’ll need all-purpose or cake flour for structure, cold butter for flakiness, and buttermilk for tenderness.
Don’t skip the salt—it enhances flavor and controls gluten development.
Baking powder and baking soda work together to create lift.
Your ingredient choices determine your biscuit’s character.
Regional variations influence ratios; Southern biscuits favor more buttermilk, while others prefer cream.
Temperature matters critically—keep butter cold and liquids chilled.
Consider seasonal add-ins to customize your biscuits.
Summer calls for fresh herbs; autumn welcomes cheddar and jalapeño combinations.
Winter invites rosemary and cracked pepper.
You’re now equipped to source quality ingredients that’ll elevate your baking success.
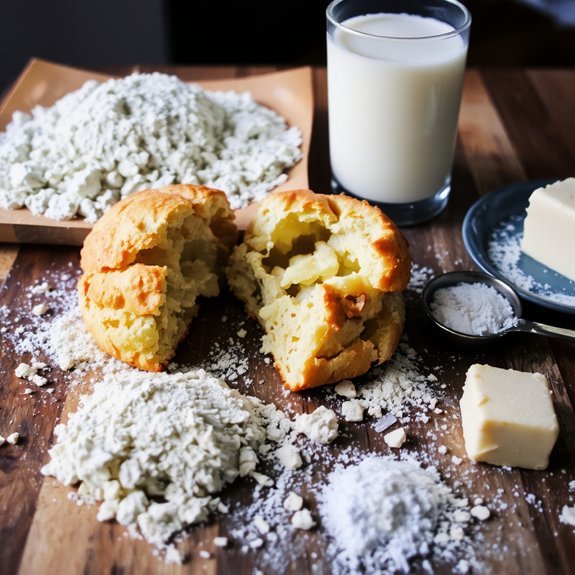
Choosing the Right Flour
Since flour’s protein content directly affects your biscuit’s texture and structure, you’ll want to select it carefully.
All-purpose flour works well for most recipes, containing around 10-12% protein.
For lighter, more tender biscuits, opt for soft wheat flour with 8-10% protein content.
Consider regional varieties available in your area—Southern cake flour produces exceptionally fluffy results, while bread flour yields denser biscuits.
Your cost comparison matters: all-purpose flour typically costs less than specialty options, making it budget-friendly without sacrificing quality.
Don’t purchase pre-sifted flour; sifting aerates it just before mixing, improving your biscuits’ rise and crumb structure.
Store your flour in airtight containers away from moisture and heat.
Fresh flour—used within six months of purchase—ensures ideal gluten development and consistent results every time you bake.
Why Cold Butter Matters

You’ll find that cold butter creates distinct layers throughout your dough because the solid fat resists blending with flour particles, leaving behind small pockets of separation.
When you work with chilled butter, you’re controlling how the dough structure develops—the fat won’t soften and distribute evenly, which would produce a dense crumb instead of a tender one.
As your biscuits bake, those butter pockets melt and release steam, forming the flaky, layered texture you’re after.
Flakiness Comes From Separation
The magic of a flaky biscuit hinges on one principle: cold butter must remain in distinct, solid pieces throughout mixing and into the oven. When you work cold butter into your flour, you’re creating tiny pockets—like paint flaking from a wall or skin peeling after sunburn. These separations matter enormously.
| Stage | Butter State | Result |
|---|---|---|
| Before mixing | Solid, cold | Distinct pieces |
| During mixing | Partially broken | Small pockets form |
| After baking | Melted | Steam creates layers |
| Final texture | Separated layers | Flaky, tender crumb |
You’ll achieve this by keeping your butter at 35-40°F, cutting it into quarter-inch cubes, and working quickly. Don’t let warmth compromise your ingredients. The separation between butter and flour creates steam pockets during baking, producing those coveted, crispy-edged layers you’re after.
Temperature Affects Dough Structure
Cold butter’s physical properties—its firmness, melting point, and resistance to blending—directly determine whether your dough develops the laminated structure that produces flakiness.
You’ll want to keep your butter between 65-68°F.
At this temperature, its thermal conductivity remains low enough that it won’t fully incorporate into your flour mixture.
Instead, cold butter creates distinct pockets throughout your dough.
As your biscuits bake, these butter pockets melt, releasing steam that separates flour layers.
This process directly controls your crumb density—denser pockets yield flakier results than homogenized dough.
Room-temperature butter eliminates this separation entirely.
You’re left with uniform crumbs instead of distinct flakes.
Don’t let your butter warm above 70°F, or you’ll sacrifice the structural advantage that separates exceptional biscuits from mediocre ones.
Melting Creates Steam Pockets
Keeping butter cold accomplishes something essential that room-temperature butter simply can’t: it traps moisture in discrete pockets throughout your dough. When you bake, these fat barriers melt and create steam that leavens your biscuits without relying on chemical agents alone.
You’ll hear acoustic cues—that satisfying crackle—as steam escapes during baking, signaling proper structure development. The aroma release intensifies as moisture converts to vapor, carrying rich buttery notes that indicate ideal lamination.
Cold butter remains solid longer during mixing, preventing gluten overdevelopment that’d toughen your results. This deliberate control over melting temperatures lets you engineer flaky layers and tender crumbs. Skip the softened butter; choose cold, cubed fat for superior texture and the freedom to create genuinely excellent biscuits.
Step-by-Step Mixing Instructions
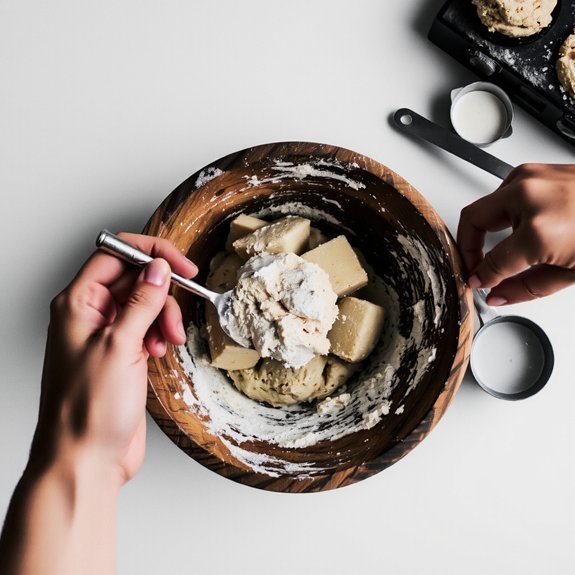
Combine your dry ingredients—flour, baking powder, salt, and sugar—in a large mixing bowl, whisking them together until they’re evenly distributed.
Your mixing order matters: dry ingredients first guarantees uniform leavening throughout your dough.
Next, cut cold butter into quarter-inch cubes and add them to your dry mixture.
Use a pastry cutter or two knives as your tool selection here—these create the essential pea-sized butter pieces that’ll generate steam pockets during baking.
Work quickly; don’t let the butter warm.
Add your cold buttermilk gradually, stirring gently with a fork until the dough just comes together.
You’re aiming for a shaggy, slightly wet texture—overmixing develops gluten and toughens your biscuits.
Stop mixing as soon everything’s incorporated.
Your dough’s ready for shaping.
Proper Dough Handling Techniques
Now that your dough’s come together, you’ll need to handle it with restraint to preserve those steam pockets you’ve worked to create.
Work on a lightly floured surface, avoiding excessive kneading that’ll compress your carefully developed air bubbles.
Use a bench scraper to fold the dough gently, rotating it a quarter turn with each fold.
This technique maintains structure without overworking the gluten.
When shaping, employ light finger pressing rather than aggressive manipulation.
Press your fingers straight down into the dough, allowing it to rise naturally around them.
Don’t knead or stretch aggressively.
Keep your bench scraping swift and efficient, clearing flour buildup without dragging the dough.
Handle your biscuits minimally between mixing and baking.
The less you touch the dough, the fluffier your final product becomes.
Respect your ingredients’ integrity throughout this critical stage.
Shaping and Cutting Your Biscuits
Once your dough’s rested and you’ve got it on your floured surface, you’ll want to gently pat it to an even thickness of about three-quarters of an inch—too thin and you’ll lose that tender crumb structure, too thick and the center won’t cook through properly.
Pat dough to three-quarters inch—too thin loses tender crumb, too thick won’t cook through properly.
Use creative cutters in your preferred shapes, pressing straight down without twisting, which seals edges and promotes vertical rise.
For extra definition, try edge crimping with a fork or specialized tool, creating decorative ridges that’ll brown beautifully.
Work quickly so your dough stays cold.
Place cut biscuits on parchment paper, leaving minimal space between them—they’ll support each other while baking.
Brush tops with buttermilk or egg wash for golden color.
Baking Tips for Golden, Fluffy Results
Your oven temperature is critical—preheat it to 425°F (220°C) for at least 15 minutes to guarantee consistent, rapid heat that’ll lift your biscuits before the exterior sets. Position your rack in the upper-middle section for ideal air circulation and browning.
Apply egg wash—a mixture of one beaten egg with one tablespoon water—using a pastry brush for a golden, glossy finish. This coating promotes even browning and seals moisture inside.
| Factor | Impact | Control | Result |
|---|---|---|---|
| Temperature | Rise speed | Preheat fully | Lift before setting |
| Rack placement | Heat distribution | Upper-middle position | Even browning |
| Egg wash | Surface finish | Thin, even coat | Golden exterior |
| Bake time | Doneness | 12-15 minutes | Fluffy interior |
Bake until the tops’re golden brown, typically 12-15 minutes. Don’t open the oven door—you’ll collapse the rising structure.
Troubleshooting Common Biscuit Problems
Even when you’ve followed every step perfectly, biscuits can still disappoint—but understanding what went wrong helps you correct it next time.
Understanding what went wrong with your biscuits helps you perfect them next time, even after following every step correctly.
Dense centers result from overmixing your dough or using too much liquid. Mix until ingredients just combine, and measure flour accurately by spooning and leveling.
If your biscuits develop soggy bottoms, your oven temperature’s likely too low or you’re baking on an improper rack position. Use the middle rack and verify your oven’s actual temperature with an independent thermometer.
Tough biscuits indicate overworking the dough or excess handling. Keep your butter cold throughout preparation. If they’re spreading too thin, your butter’s melting into the dough—work quickly and chill before baking. Dense, gummy interiors suggest underbaking; extend your bake time until golden brown.
Frequently Asked Questions
Can I Make Fluffy Biscuits Without Buttermilk or Use a Substitute Instead?
You can absolutely make fluffy biscuits without buttermilk.
Use a yogurt substitute by mixing plain yogurt with milk to achieve the acidity you need.
Alternatively, create lemon milk by combining regular milk with fresh lemon juice or vinegar—let it sit five minutes until it curdles.
Both methods replicate buttermilk’s chemical properties, giving you the tender crumb and rise you’re after.
Your biscuits’ll turn out just as fluffy and delicious.
How Long Can Biscuit Dough Be Stored in the Refrigerator Before Baking?
You can refrigerate your biscuit dough for up to 48 hours before baking. This storage limit actually enhances flavor development as the ingredients meld together, creating deeper complexity.
Keep your dough tightly wrapped to prevent drying. You’re free to bake whenever you’d like within this window—cold dough bakes beautifully, producing fluffier results than room-temperature alternatives.
Don’t exceed two days, though, as bacterial growth compromises quality and safety.
What Is the Best Way to Reheat Leftover Biscuits to Restore Fluffiness?
You’ll achieve the best oven revival by wrapping your biscuits in damp paper towels and microwaving them for 10-15 seconds.
For superior results, use a steam refresh method: wrap them in foil and heat at 350°F for 5-7 minutes.
This moisture-based approach rehydrates the gluten structure and restores that tender, fluffy crumb you’re after.
Avoid dry heat, which’ll harden them irreversibly.
Can I Freeze Unbaked Biscuit Dough and Bake Later if Needed?
You can absolutely freeze unbaked biscuit dough.
Wrap your formed biscuits tightly in freezer packaging, removing excess air to prevent freezer burn. Store them at 0°F or below for up to three months.
When you’re ready, you don’t need to thaw—simply bake from frozen, adding five to ten extra minutes to your standard baking time. This method preserves your dough’s integrity and delivers fresh, fluffy biscuits whenever you choose.
Why Do My Biscuits Turn Out Dense When Using Whole Wheat Flour?
Your whole wheat biscuits turn dense because bran particles interfere with gluten development, trapping fewer air pockets.
You’ll need hydration adjustment—whole wheat absorbs more liquid than all-purpose flour. Add 1-2 tablespoons extra buttermilk per cup of whole wheat flour.
Don’t overmix; handle your dough minimally to maintain lift. This hydration adjustment counteracts bran interference, yielding lighter, fluffier results that won’t compromise your baking freedom.


Leave a Comment