Key Takeaways
- Choux pastry base requires boiling water, butter, flour, eggs, salt, and sugar beaten until smooth and glossy for steam-leavened hollow shells.
- Bake choux at 400°F for 35–40 minutes without opening the oven; golden-brown and firm texture indicates proper steam release and structure.
- Pastry cream filling uses egg yolks, sugar, cornstarch, and milk tempered together, cooled completely, then piped into the bottom of baked shells.
- Chocolate glaze requires high-quality chocolate (70%+ cocoa), melted to 110–115°F, held at 88–90°F, and applied warm for smooth, glossy coating.
- Cool baked éclairs completely before filling to prevent soggy shells; avoid opening the oven during baking to prevent collapse from temperature fluctuations.
What You’ll Need: Ingredients and Equipment
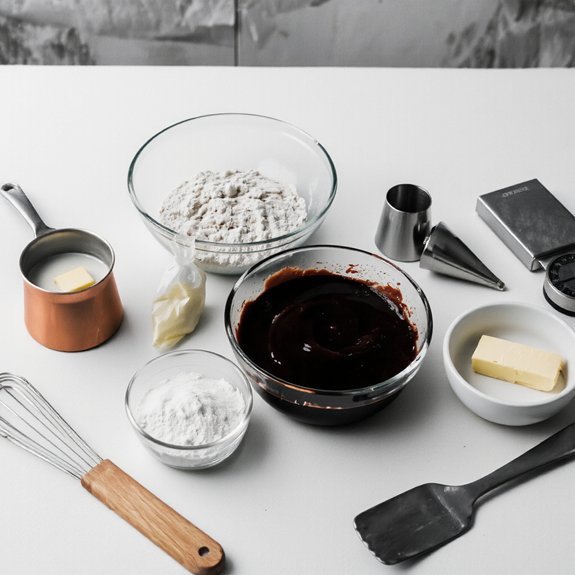
You’ll need all-purpose flour, water, butter, eggs, salt, and sugar for the choux pastry base.
All-purpose flour, water, butter, eggs, salt, and sugar form the foundation of your choux pastry base.
For the filling, gather whole milk, egg yolks, cornstarch, vanilla extract, and powdered sugar.
The chocolate glaze requires cocoa powder, butter, and milk.
Essential equipment includes mixing bowls, a whisk, a saucepan, and a piping bag with a round tip.
You’ll also need baking sheets and parchment paper.
A stand mixer works efficiently, though budget options like hand whisks deliver identical results with more elbow grease.
Tool alternatives give you flexibility—use a fork instead of a whisk, or substitute a fitted plastic bag for a piping bag by snipping the corner.
A regular spoon works for portioning dough onto sheets.
These substitutions don’t compromise quality or technique.
Understanding Choux Pastry: The Foundation
You’ll master eclairs by understanding choux pastry‘s unique chemistry, where steam creates structure rather than traditional leavening agents.
The precise ratio of eggs, butter, flour, and water you combine determines whether your pastry rises properly and develops those signature hollow centers.
You’ll discover the critical techniques—from achieving the correct paste consistency to executing proper piping and baking temperatures—that prevent common failures like deflated or unevenly cooked eclairs.
The Science Behind Choux
Because choux pastry relies on precise ingredient ratios and heat-driven chemical reactions, understanding its mechanics transforms you from following instructions to mastering the technique. You’ll notice how water transforms flour and eggs through evaporation and protein denaturation. This sensory perception—observing steam release and structural collapse—reveals when your pastry’s achieved the ideal consistency.
| Stage | Temperature |
|---|---|
| Hydration | 65°C |
| Gelatinization | 75°C |
| Protein Set | 85°C |
| Steam Release | 95°C |
| Acoustic Analysis | 180°C |
You’ll hear the acoustic analysis of your oven—that subtle crackling signals moisture escaping and shells setting. Each ingredient demands respect: butter emulsifies, eggs coagulate, flour structures, and water vaporizes. Master these reactions, and you’ll command complete control over your eclairs’ rise, shape, and texture.
Essential Ingredients Explained
The four core ingredients—water, butter, flour, and eggs—work in precise concert to create choux pastry’s distinctive structure.
You’ll want to source your butter ethically, as its fat content directly influences rise and texture.
Select unbleached flour for cleaner results and superior structure.
Room-temperature eggs emulsify seamlessly, creating the characteristic hollow interior you’re after.
Allergen awareness matters here—eggs and gluten present considerations for your guests.
You control these variables entirely.
Quality matters more than quantity; superior butter yields richer flavor and better puff than margarine substitutes.
You’re building something remarkable from simple components.
Each ingredient serves a specific function.
Water creates steam for lift, butter provides richness and structure, flour develops the framework, and eggs bind everything while adding lift through emulsification.
Understanding these roles transforms you from follower to confident baker.
Technique Mastery and Troubleshooting
Once your ingredients combine properly, choux pastry’s success hinges on controlling moisture and temperature throughout mixing and baking.
You’ll master this technique by understanding critical variables:
- Heat management: You’re preventing premature evaporation by maintaining precise oven temperatures; inconsistent heat causes collapsed eclairs
- Mixing precision: You’re developing sufficient steam by beating your dough to the correct consistency—neither too stiff nor too loose
- Equipment maintenance: You’re ensuring reliable results by keeping your mixer, piping bags, and baking sheets in proper condition
For fault diagnosis, examine your failures systematically.
Flat éclairs indicate insufficient steam or low oven temperature.
Soggy bottoms suggest excessive moisture or inadequate baking time.
Cracked shells mean your oven temperature spiked too quickly.
You’ll gain complete control over your results by addressing each variable methodically, freeing you from guesswork and guaranteeing consistent, professional-quality éclairs.
Making the Choux Dough Step by Step
You’ll start by heating your butter mixture to the precise temperature that activates the flour.
Then beat your eggs individually into the dough to achieve the correct consistency.
This three-step process—heating, combining wet and dry ingredients, and properly incorporating eggs—determines whether your choux pastry rises correctly and develops the characteristic hollow interior.
Each step requires attention to timing and technique, as rushing or skipping proper egg incorporation will compromise your éclairs’ structure.
Combining Wet and Dry
After removing your saucepan from heat, you’ll fold the flour mixture into the warm butter and water base using a wooden spoon or spatula with firm, deliberate strokes until the dough comes together.
This critical stage demands precision.
You’re creating the foundation for perfectly risen éclairs.
Here’s what you’ll observe:
- The mixture transforms from loose ingredients into a cohesive, glossy mass
- Steam escapes as you combine components, aiding gluten development
- The dough cools slightly, preparing it for egg incorporation
Maintain strict sanitation protocols throughout this process—ensure your utensils and workspace are pristine.
If preparing commercially or for those with dietary restrictions, implement allergen labeling protocols immediately.
Your technique here determines whether éclairs rise evenly and develop that signature hollow interior.
Don’t rush this foundation.
Heating Butter Mixture
Before you can fold in the flour, you’ll need to prepare the butter mixture—the wet base that’ll carry your dry ingredients into a proper choux dough.
Combine water, butter, salt, and sugar in a saucepan on medium heat.
Monitor your stovetop maintenance by ensuring the burner’s clean and functioning properly for consistent temperature control.
Once the butter melts completely, increase heat to medium-high until the mixture reaches a rolling boil.
Observe fire safety by keeping your workspace clear of flammable materials and never leaving the pan unattended.
The mixture should boil vigorously for approximately one minute—this step matters because it helps evaporate excess moisture.
Remove the pan from heat immediately when ready.
You’re now prepared to add your flour mixture.
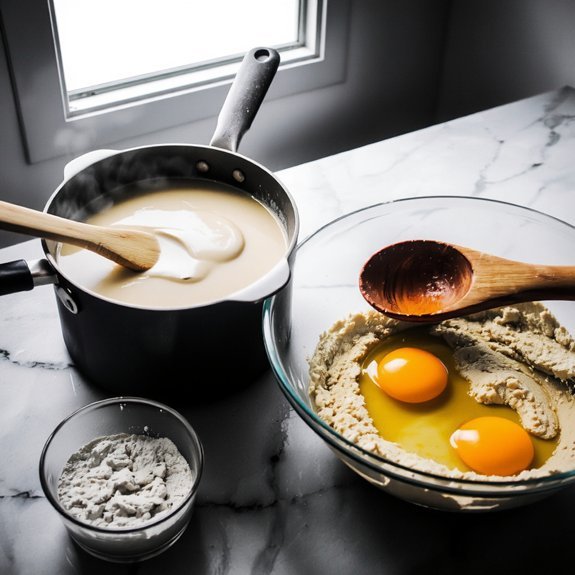
Beating Eggs Properly
Incorporate eggs one at a time into your cooled butter mixture, beating thoroughly after each addition until the dough becomes smooth and glossy.
This technique guarantees proper emulsification and structural integrity for your éclairs.
Follow these critical steps:
- Maintain temperature control: Cold eggs won’t incorporate properly; allow them to reach room temperature for ideal blending
- Use sanitation practices: Wash hands and utensils thoroughly before handling raw eggs to prevent contamination
- Beat each egg completely: Each addition requires 30-60 seconds of vigorous beating before adding the next
For allergy alternatives, consider pasteurized eggs or egg substitutes like aquafaba.
Your final dough should be thick yet pipeable, with a consistency resembling soft butter.
Proper beating creates the air pockets necessary for dramatic oven rise and hollow, tender éclair shells that hold your fillings perfectly.
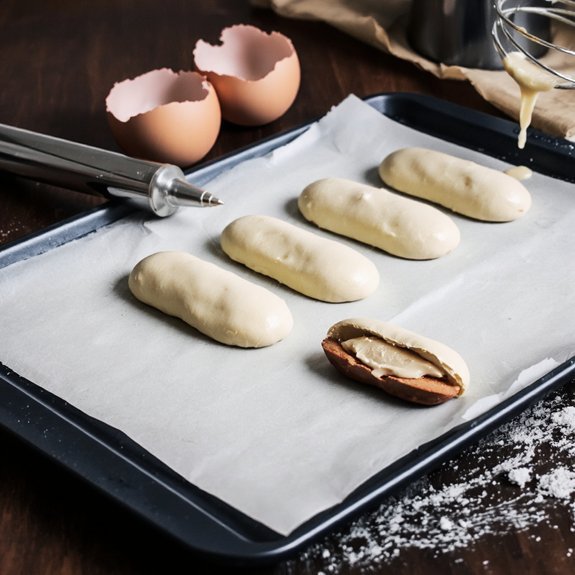
Piping and Baking Your Éclair Shells
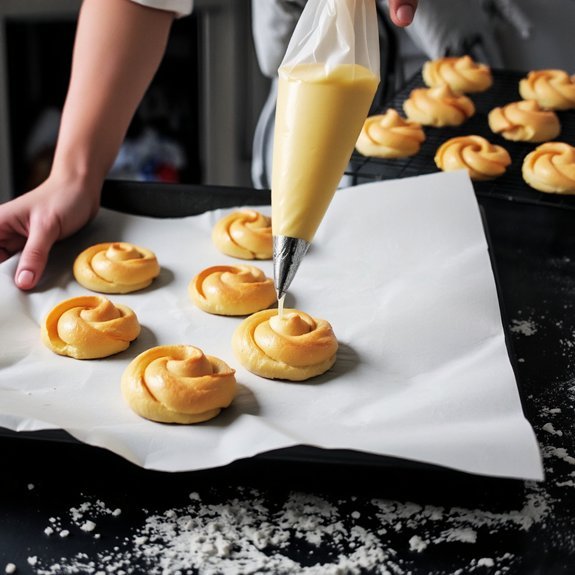
Transfer your choux pastry into a pastry bag fitted with a large round or éclair tip, then pipe 4-inch lengths onto parchment-lined baking sheets, spacing them about 2 inches apart.
Maintain consistent piping patterns by applying steady pressure and holding the bag at a 45-degree angle for uniform shells.
Position your oven rack at the middle level for ideal heat circulation and even browning.
Bake at 400°F for 35-40 minutes until the shells achieve a golden-brown exterior and feel firm when gently pressed.
Bake at 400°F for 35-40 minutes until shells turn golden-brown and feel firm when gently pressed.
Avoid opening the oven door during baking, as temperature fluctuations’ll cause collapse.
Once fully baked, transfer shells to a wire rack and cool completely.
This cooling period allows the interior to set properly, preventing soggy éclairs when you fill them later.
Preparing Pastry Cream for Filling
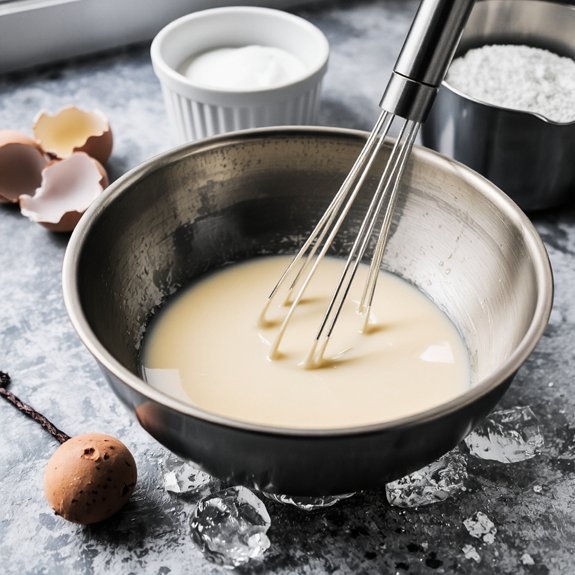
Creating a silky pastry cream requires precision timing and careful temperature control.
You’ll combine egg yolks, sugar, and cornstarch, then temper them with hot milk to achieve the perfect consistency without scrambling the eggs.
Follow these essential steps:
- Heat whole milk to 180°F to guarantee microbial safety and proper custard foundation
- Whisk yolks with sugar until pale, then add cornstarch to prevent lumps
- Slowly add hot milk while whisking constantly to temper eggs gradually
For allergen substitutions, you can use cornstarch or arrowroot powder instead of traditional flour-based thickeners.
Cool your cream completely before piping into baked shells—this prevents sogginess and maintains structural integrity.
Strain through fine mesh if you detect any lumps.
Your filling’s quality directly determines your éclair’s final texture and flavor profile.
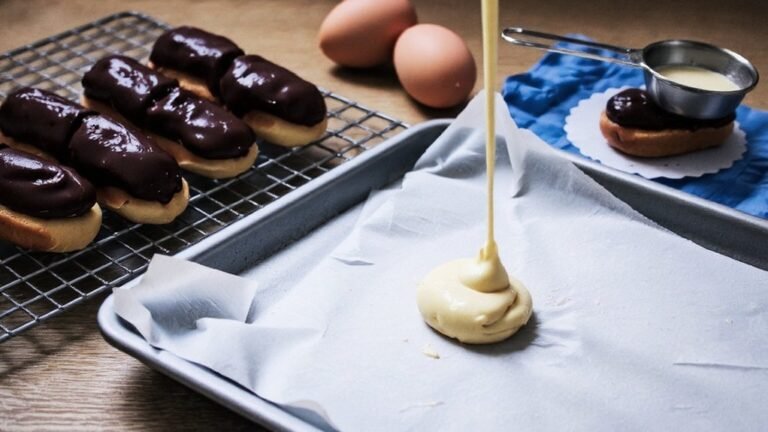
Creating the Perfect Chocolate Glaze
You’ll discover that selecting high-quality chocolate—preferably 70% cocoa or higher—forms the foundation of your glaze’s depth and smoothness.
Controlling your heating temperature precisely between 45-50°C prevents the chocolate from becoming too thick or developing a dull, streaky finish.
Once you’ve achieved the ideal consistency, you’ll create that signature glossy shine by ensuring your glaze cools slightly before application, allowing it to coat your éclairs evenly without sliding off.
Chocolate Selection Matters Most
The foundation of an exceptional éclair glaze rests entirely on your chocolate choice.
You’ll want to prioritize quality over convenience, selecting chocolate with intentional bean sourcing and balanced cocoa ratios.
Your glaze’s success depends on these critical factors:
- Single-origin chocolate from reputable sources delivers complex flavor profiles that commercial blends can’t match
- Cocoa ratios between 60-70% provide ideal richness without excessive bitterness that overwhelms the delicate pastry
- Couverture chocolate contains higher cocoa butter content, ensuring smooth application and professional finish
You’re not simply coating your éclairs—you’re crafting an experience.
High-quality chocolate with proper bean sourcing transforms your glaze from ordinary to extraordinary.
Don’t compromise on this foundational element; your éclairs deserve chocolate that reflects your commitment to excellence and precision.
Temperature Control Techniques
While premium chocolate provides the foundation for your glaze, proper temperature control determines whether that quality ingredient actually performs.
You’ll master thermal profiling by monitoring your chocolate’s exact temperature as it melts and cools, ensuring ideal viscosity for coating.
Zone management divides your workspace into distinct thermal areas: melting, holding, and application zones.
Keep your melting zone between 110–115°F to prevent scorching.
Maintain your holding zone at 88–90°F, preserving fluidity without degradation.
Your application zone stays slightly warmer at 92°F for smooth, glossy coverage.
You control these zones through precise heating methods—double boilers, warming plates, or heated bowls.
Invest in a reliable thermometer; guesswork sabotages your results.
This disciplined approach guarantees consistent, professional-quality glazes every batch.
Achieving Glossy Shine
Achieving that coveted glossy finish requires understanding how cocoa butter’s crystalline structure reflects light.
You’ll control shine through precise temperature management and ingredient selection.
Master these essential elements:
- Cocoa butter ratio: Use quality chocolate with 30-35% cocoa butter for ideal reflectivity
- Tempering precision: Maintain 31-32°C (88-90°F) for stable crystal formation and maximum sheen
- Ganache consistency: Balance cream and chocolate at a 1:2 ratio for smooth application
Your glaze’s appearance directly impacts serving aesthetics and display lighting effectiveness.
When you apply the glaze at the correct temperature, it sets with a mirror-like surface that catches light beautifully.
This professional finish elevates your eclairs’ visual presentation, transforming them into bakery-quality showpieces.
You’re not just creating desserts—you’re crafting edible art that demands attention.
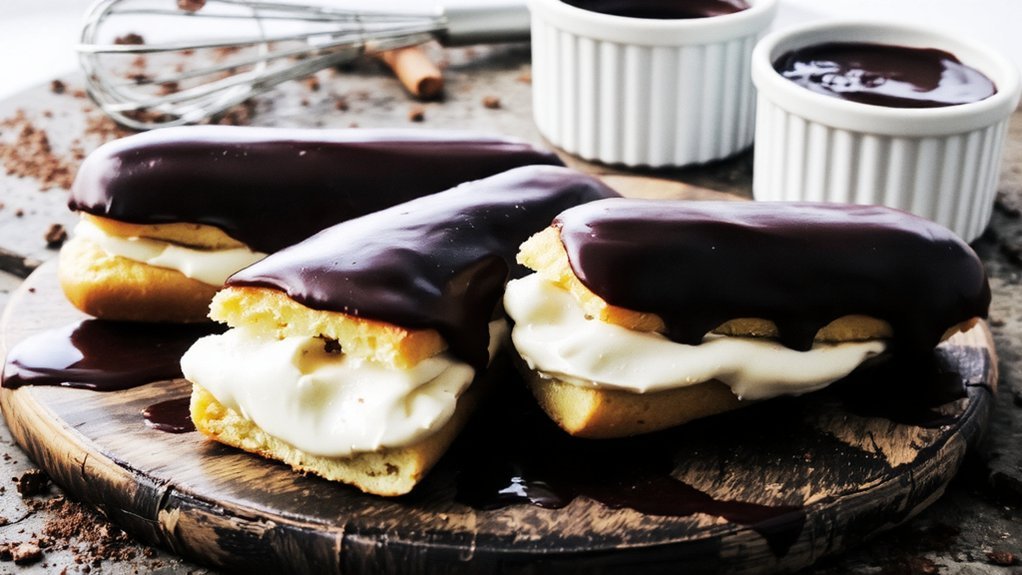
Filling Your Éclairs Like a Professional
Once you’ve baked your choux pastry shells to golden perfection, you’ll want to fill them with a pastry cream or crème pâtissière that’s been cooled to room temperature—this prevents the filling from melting through the delicate pastry. Use a piping bag fitted with a small round tip to inject filling into the bottom of each éclair, applying steady pressure for even distribution.
Work through your assembly workflow methodically, filling multiple éclairs before moving to the next stage. For plating presentation, arrange filled éclairs on a clean surface, ensuring uniform placement.
Keep your pastry cream at ideal consistency—too thick and you’ll tear the shells; too thin and it’ll leak. This precision technique transforms amateur attempts into professional results.
Glazing and Finishing Techniques
The final stage of éclair creation demands equal attention to detail as your filling work.
You’ll master glazing by tempering your chocolate to precise temperatures—around 88-90°F for dark chocolate guarantees a glossy finish without streaking.
Master glossy éclair glazes by tempering dark chocolate to precise 88-90°F temperatures, eliminating streaks and achieving professional results.
Consider these essential techniques:
- Apply glaze while éclairs are still warm, allowing ideal adhesion and smooth coverage
- Use textured toppings like crushed pistachios, toasted almonds, or pearl sugar immediately after glazing for professional results
- Implement strategic plating presentation by arranging éclairs on minimalist plates to showcase your craftsmanship
You’ll achieve restaurant-quality results by maintaining consistent glaze viscosity and working with precision.
The chocolate coating should set within minutes, creating that signature snap.
Your freedom to experiment with complementary toppings elevates each éclair from simple pastry to distinctive creation.
Storage and Make-Ahead Tips
While your glazed éclairs look stunning fresh from assembly, proper storage techniques will preserve that restaurant-quality finish and extend their enjoyment.
You’ll want to refrigerate filled éclairs in airtight containers for up to two days, keeping them away from moisture and odors.
For batch planning, you can prepare choux pastry and bake shells three days ahead, storing them in sealed containers at room temperature.
Freeze unfilled shells for up to three months.
You should assemble éclairs no more than four hours before serving to maintain crisp pastry.
A labeling system tracking assembly dates and filling types prevents confusion when managing multiple batches.
You can freeze completed éclairs for two weeks, thawing them in the refrigerator before serving.
This strategic approach maximizes your flexibility while guaranteeing consistent quality.
Flavor Variations and Creative Ideas
Beyond the classic vanilla bean and chocolate combinations, you’ll find that éclairs offer remarkable versatility through strategic ingredient substitution and complementary flavor pairings.
You can elevate your creations with global inspirations:
- Matcha-infused pastry cream paired with white chocolate ganache, inspired by Japanese confectionery traditions
- Pistachio praline filling with dark chocolate coating, drawing from Mediterranean flavor profiles
- Cardamom cream topped with rose-flavored glaze, reflecting Middle Eastern influences
Consider beverage pairings when developing flavors.
Coffee-filled éclairs complement espresso perfectly, while Earl Grey-infused cream pairs beautifully with afternoon tea.
You might experiment with salted caramel, lavender-honey, or citrus-based fillings to create memorable experiences.
Your creativity drives innovation here.
Don’t hesitate to source specialty ingredients—Valrhona chocolate, Madagascar vanilla, or premium spices—that distinguish your éclairs and deliver exceptional taste profiles your guests won’t forget.
Frequently Asked Questions
Can I Make Éclairs Without a Piping Bag or Pastry Decorator?
Yes, you can absolutely make éclairs without traditional piping equipment.
You’ve got two excellent alternatives: employ basic spoon techniques by dropping choux dough onto baking sheets using two spoons to shape elongated mounds, or fill a ziplock bag by snipping a corner to create an improvised piping tool. Both methods give you complete control over your batter’s placement and size, allowing you to craft professional-looking éclairs while maintaining ingredient precision and texture integrity.
Why Did My Éclair Shells Collapse After I Removed Them From the Oven?
Your éclair shells collapsed because you’ve got undercooked centers.
Don’t open the oven mid-bake—that temperature drop weakens your choux pastry’s structure.
Bake until they’re golden and firm throughout, roughly 35-40 minutes.
You’re aiming for crispy exteriors with set interiors that won’t deflate.
Resist the urge to check early.
Trust your timing, and you’ll achieve the sturdy shells you’re after.
How Long Can Filled Éclairs Sit at Room Temperature Before Serving Guests?
You shouldn’t leave filled éclairs at room temperature longer than two hours.
Beyond that window, cream stability deteriorates and bacterial growth accelerates in custard or pastry cream fillings.
Your best approach? Keep them refrigerated until serving, then display them for minimal time.
You’ve got the freedom to prepare them ahead, but you’re responsible for food safety.
Chill everything, serve promptly, and discard uneaten portions after two hours exposed to room temperature.
What’s the Best Way to Fix a Cracked or Broken Éclair Shell?
You’ve got options for salvaging your éclair.
Apply a chocolate ganache patch directly onto the crack—it’ll seal and reinforce the shell simultaneously.
For minor crumbles, use the Crumb Repair technique: dust the damaged area with fine cocoa powder, then coat with ganache.
This approach masks imperfections while strengthening structural integrity.
Both methods work best when you’re applying fillings immediately after, ensuring the chocolate sets properly and bonds your shell back together seamlessly.
Can I Freeze Unfilled Éclair Shells for Baking Later in the Week?
Yes, you can freeze unfilled éclair shells effectively.
Bake them completely, cool thoroughly, then store in airtight containers for up to two weeks.
When you’re ready, thaw them at room temperature for thirty minutes—this preserves their delicate texture and prevents condensation damage.
You’ll maintain that signature crispy exterior while keeping your baking schedule flexible.
Thawing tips matter: avoid refrigeration, which compromises crispness.


Leave a Comment