Key Takeaways
- Cream butter and sugar for 2 minutes, then add egg yolks and vanilla one at a time until fully incorporated.
- Mix flour, salt, and baking powder separately, then fold into wet ingredients gently to avoid overmixing the dough.
- Chill dough 30 minutes, roll into walnut-sized balls, and press thumb indentations about 1/4 inch deep for filling.
- Bake at 350°F for 10–12 minutes until edges turn golden while centers remain slightly underdone for chewy texture.
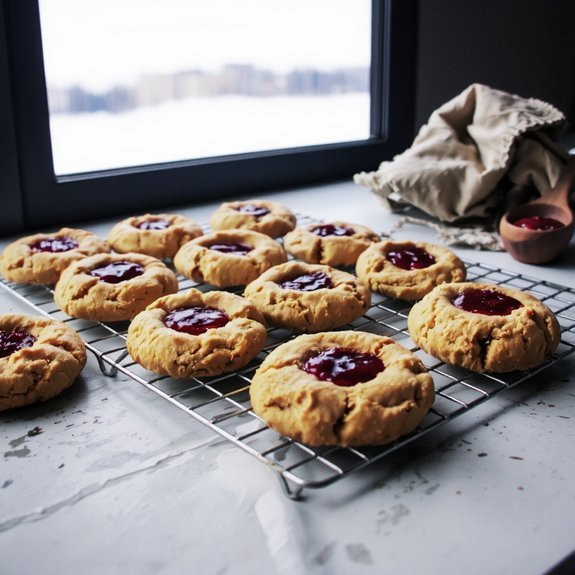
- Fill warm cookies with jam, ganache, or dulce de leche while baking; fillings set as cookies cool completely.
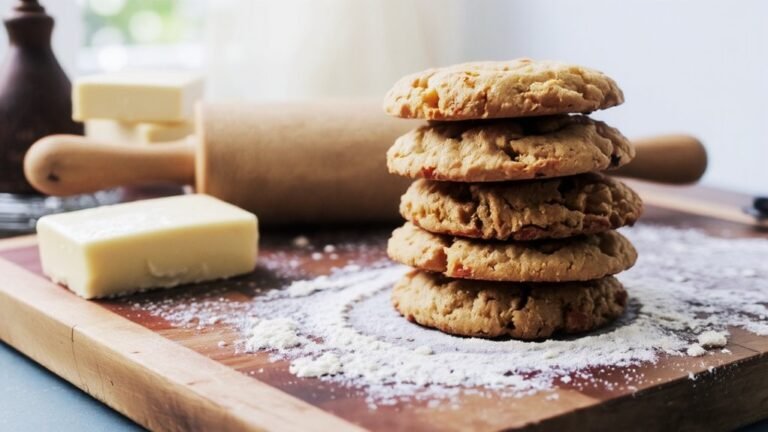
Ingredients You’ll Need
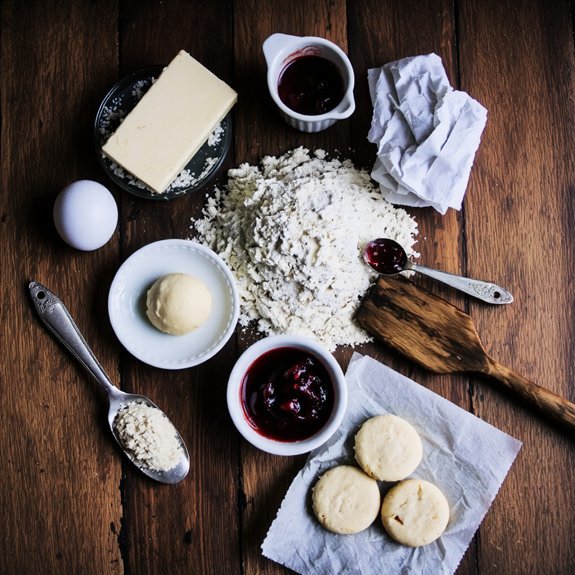
You’ll need just a handful of simple ingredients to whip up a batch of these delightful thumbprint cookies.
Start with two cups of all-purpose flour and half a teaspoon of salt from your pantry staples.
You’ll want one cup of softened butter, three-quarters cup of sugar, and two egg yolks for richness and binding.
Add a teaspoon of vanilla extract for warmth and depth.
For the filling, gather your favorite jam—raspberry and strawberry work beautifully, though you’ve got freedom to choose what suits your taste.
Consider ingredient substitutions like almond flour mixed with regular flour for nuttier flavor, or coconut oil instead of butter for a lighter texture.
You’re now ready to create these irresistible treats with ingredients you probably already have on hand.
Prep Your Dough
Once you’ve gathered all your ingredients, it’s time to build the foundation of these cookies by creaming together your butter and sugar.
Cream together your butter and sugar to build the perfect cookie foundation for success.
This essential mixing order sets you up for success—beat them for about two minutes until the mixture’s light and fluffy.
Next, add your eggs and vanilla extract one at a time, ensuring each is fully incorporated before proceeding.
In a separate bowl, whisk together your flour, baking powder, and salt.
Gently fold these dry ingredients into your wet mixture until just combined—don’t overmix.
Here’s where patience pays off: let your dough rest for thirty minutes in the refrigerator.
This resting time allows the flavors to meld and makes rolling much easier.
You’ll notice the dough firms up perfectly, giving you complete control over shaping those signature thumbprints.
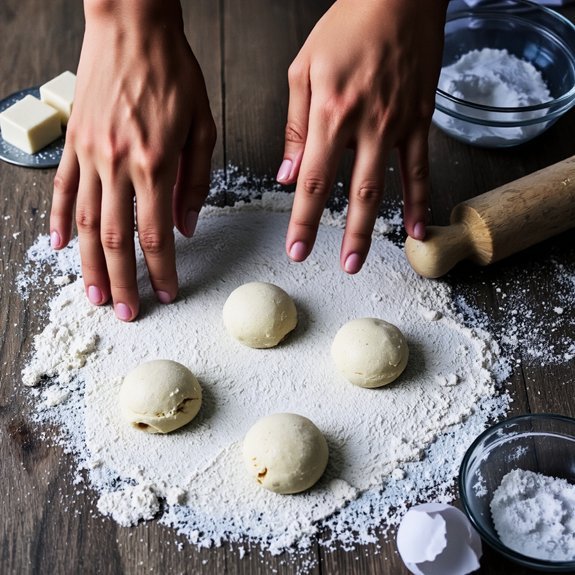
Shape and Make Impressions
Pull your chilled dough from the refrigerator and roll it into balls about the size of walnuts—this consistency makes them sturdy enough to hold their shape without cracking.
Place each ball on your baking sheet, spacing them two inches apart for even baking.
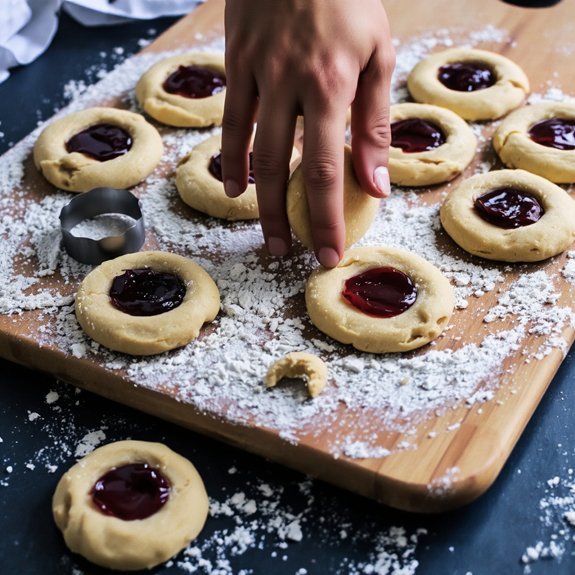
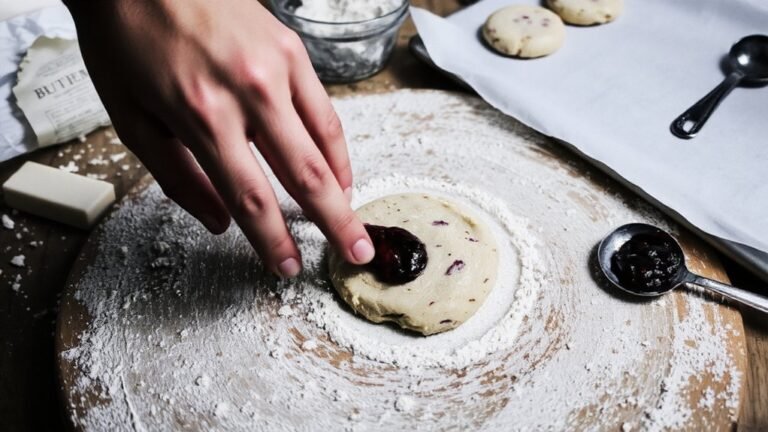
Now comes the fun part: creating those signature indentations.
Use your thumb to press a gentle crater into each cookie’s center. Want decorative patterns? Explore impression tools like the back of a spoon, a bottle cap, or specialized cookie stamps.
These tools let you customize your cookies while maintaining uniform depth—roughly a quarter-inch works best.
Press firmly but gently; you’re creating wells for your jam filling, not demolishing your hard work.
This simple step transforms basic dough into show-stopping treats that showcase your personal flair.
Bake to Perfection
Slide your prepared cookies into a preheated 350°F oven and watch the magic happen. You’ll want to bake them for 10-12 minutes until they’re golden brown around the edges.
Here’s where oven calibration becomes your secret weapon—every oven runs differently, so check your cookies at the nine-minute mark to monitor browning control. You’re aiming for that perfect balance: edges crispy and set, centers still slightly soft.
The cookies will continue cooking on the baking sheet after removal, so don’t overbake them. Pull them out when they look just barely underdone—they’ll firm up as they cool. This technique gives you those irresistible chewy centers and crisp edges that make thumbprint cookies absolutely addictive. Your patience pays off with perfectly baked cookies that’ll impress everyone.
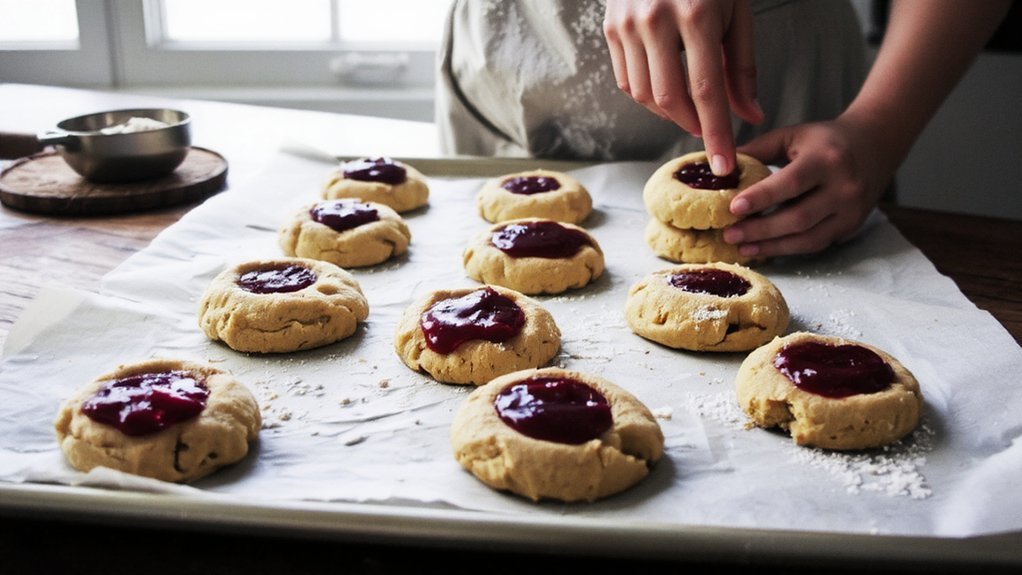
Add Your Favorite Fillings
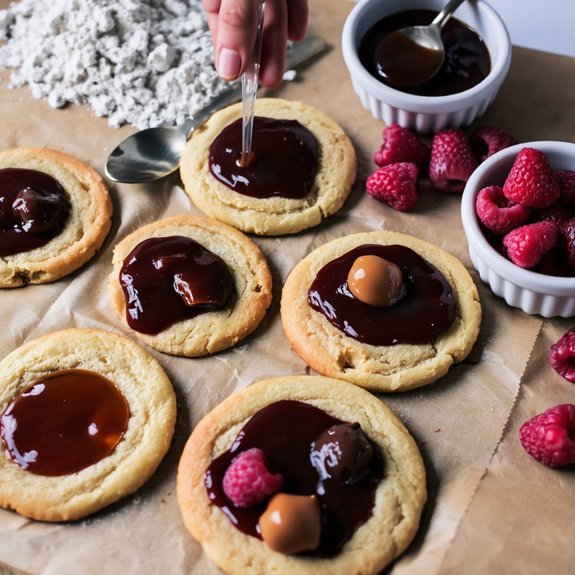
While your cookies cool slightly on the baking sheet, you’ve got the perfect window to add your fillings before they firm up completely. This is where you’ll release your creativity and make these cookies truly yours.
You can choose classic jam for simplicity, or go bold with chocolate ganache for richness. Consider seasonal pairings—cherry filling in summer, pumpkin spice in fall, peppermint chocolate in winter.
Don’t shy away from texture contrasts either; pair smooth preserves with crushed nuts or candied citrus pieces for added dimension.
You’re free to experiment with almond butter, dulce de leche, or lemon curd. Fill each thumbprint generously while the cookies remain warm—the fillings’ll set perfectly as everything cools, creating that signature burst of flavor in every bite.
Frequently Asked Questions
Can I Make Thumbprint Cookie Dough Ahead and Freeze It for Later?
You can absolutely freeze thumbprint cookie dough!
Try flash freezing individual dough balls on a baking sheet first, then transfer them to freezer bags for long-term storage.
When you’re ready to bake, you’ve got options—thaw them at room temperature for 30 minutes, or bake directly from frozen, adding a few extra minutes to your baking time.
This approach gives you complete freedom to enjoy fresh-baked cookies whenever you want!
What’s the Best Way to Store Baked Thumbprint Cookies to Keep Them Fresh?
You’ll want to store your baked thumbprint cookies in airtight containers to lock in that fresh, buttery taste.
Keep them at room temperature—they’ll stay delicious for up to five days.
For extra protection against moisture loss, toss humidity packs into your container. These little packets maintain perfect moisture balance, preventing your cookies from drying out while keeping them crispy on the edges. It’s the freedom to enjoy homemade cookies whenever you crave them!
How Can I Prevent My Cookie Dough From Cracking When Making Impressions?
You’ll prevent cracking by chilling your dough thoroughly before pressing impressions. Cold dough holds together beautifully and won’t splinter at the edges.
Flour your fingertips generously—this stops sticking and gives you better control. Press gently but confidently into each ball’s center.
You’re creating the perfect indent for your filling without compromising the cookie’s integrity. This simple prep work saves you from frustration and delivers picture-perfect results every time.
Can I Use Different Types of Jam or Fillings in the Same Batch?
You can mix different jams and fillings in one batch—it’s your call. Try combining raspberry, apricot, and chocolate fillings for visual variety that’ll impress anyone.
This approach lets you experiment with mixing flavors without committing to just one. You’re free to customize each cookie independently, creating a diverse spread that showcases your creativity and keeps things exciting.
Your thumbprint cookies become a personalized flavor adventure you’ve completely designed.
Why Did My Thumbprint Cookies Spread Too Much During Baking?
Your thumbprint cookies spread too much because you’re likely using softened butter that’s too warm. You’ve gotta chill your dough before baking—it’ll hold its shape better.
Also, check your oven calibration; if it’s running cool, cookies’ll spread excessively. Room-temperature butter gives you more control over consistency.
Trust your instincts, dial in that oven temperature accurately, and you’ll nail perfectly shaped cookies every single time.


Leave a Comment