Key Takeaways
- Combine 1 cup cornmeal, 1 cup flour, 1/4 cup sugar, 1 tbsp baking powder, and 1/2 tsp salt in a bowl.
- Whisk together buttermilk, eggs, and melted butter; fold wet ingredients into dry until just combined with visible lumps.
- Preheat oven to 400°F; fill prepared muffin cups two-thirds full and bake on center rack for 18–22 minutes.
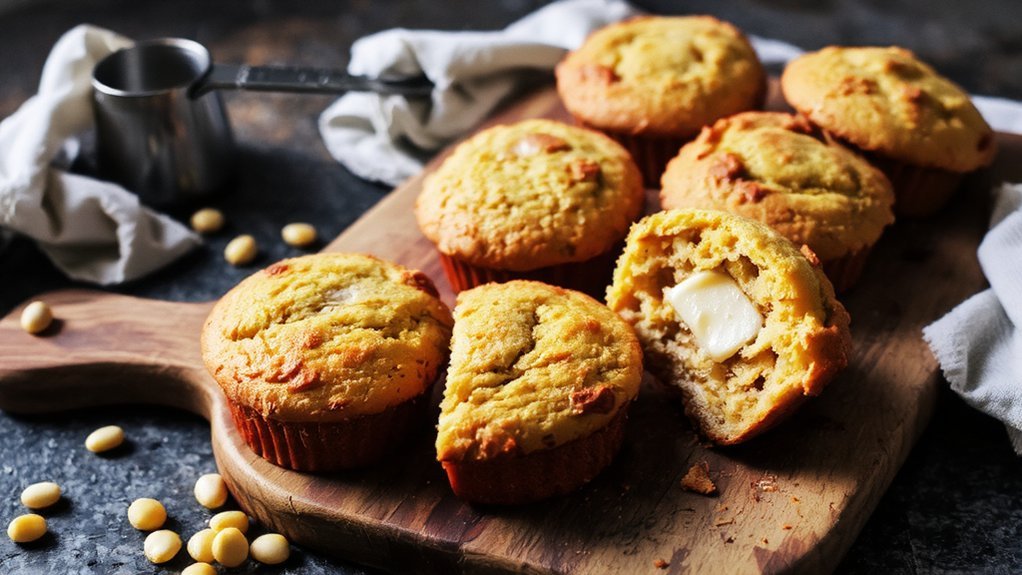
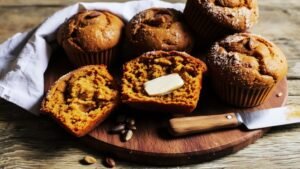
- Muffins are done when golden brown with clean toothpicks or moist crumbs; tops should be springy and domed.
- Cool in pan 5–10 minutes, transfer to wire rack, then store in airtight containers up to three days.
Ingredients You’ll Need
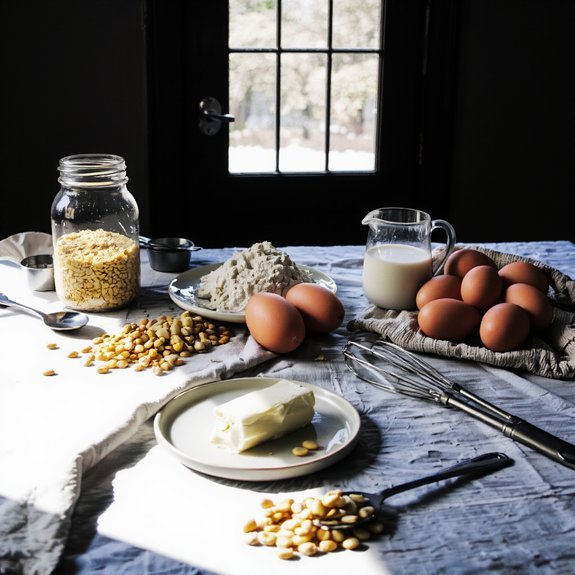
You’ll want to gather a dry mixture of one cup cornmeal, one cup all-purpose flour, one-quarter cup granulated sugar, one tablespoon baking powder, and one-half teaspoon salt.
You’ll want to gather a dry mixture of cornmeal, flour, sugar, baking powder, and salt for your cornmeal muffins.
For your wet components, you’ll need one cup buttermilk, two large eggs, and three tablespoons melted butter.
When sourcing ingredients, you’ll have freedom to choose quality options that align with your preferences.
Consider locally-sourced cornmeal for superior flavor complexity.
For allergen alternatives, you’ll find egg replacers and dairy-free butter work effectively.
Almond flour substitutes all-purpose flour for gluten-free versions without sacrificing texture.
Ensure your baking powder hasn’t expired—it’s essential for proper rise.
The buttermilk’s acidity activates the leavening agent, creating tender crumbs.
You’ll notice the cornmeal’s grainy texture provides authentic muffin structure and pleasant mouthfeel.
Fresh ingredients yield noticeably superior results compared to older pantry staples.
Equipment and Tools

Gathering your baking essentials—a standard muffin tin, mixing bowls, and measuring cups—sets the foundation for consistent results. You’ll want precision measuring tools to guarantee accurate ingredient ratios, which directly impact texture and rise.
Here’s what you need:
- A 12-cup muffin tin with nonstick coating for easy release
- Dry and liquid measuring cups for exact proportions
- Mixing bowls in varying sizes for efficient combining
- Safety gear including oven mitts and an apron
You’ll also benefit from a whisk for smooth integration, a rubber spatula for thorough scraping, and an oven thermometer for temperature verification. These tools eliminate guesswork, letting you bake confidently without compromise. Quality equipment transforms your baking experience, giving you control over every variable and freedom to create perfect corn muffins consistently.
Preparing Your Muffin Tin
Before mixing your batter, properly preparing your muffin tin promotes effortless release and even baking. You’ll want to choose grease techniques that suit your preferences—whether you’re using butter, oil, or nonstick spray. Each method creates a protective barrier between your batter and the pan’s surface.
| Preparation Method | Benefits |
|---|---|
| Butter coating | Rich flavor, golden edges |
| Vegetable oil | Neutral taste, easy cleanup |
| Nonstick spray | Quick application, minimal mess |
For rust prevention and longevity, thoroughly dry your tin after washing. If you’re using a well-seasoned cast iron muffin pan, a light oil coating maintains its protective patina. You’ll achieve consistent results by ensuring even coverage across all cups. This straightforward preparation step eliminates sticking, guarantees uniform browning, and grants you the freedom to focus on perfecting your corn muffin’s tender crumb and golden exterior.
Mixing the Dry Ingredients
With your muffin tin prepared and ready, it’s time to combine the dry components that form your corn muffin’s foundation.
You’ll want to master efficient sifting techniques to guarantee clump prevention and achieve that light, tender crumb structure you’re after.
Gather these essentials:
- All-purpose flour for structure and lift
- Cornmeal for distinctive texture and authentic flavor
- Baking powder for reliable rise and consistent results
- Salt for balanced seasoning throughout
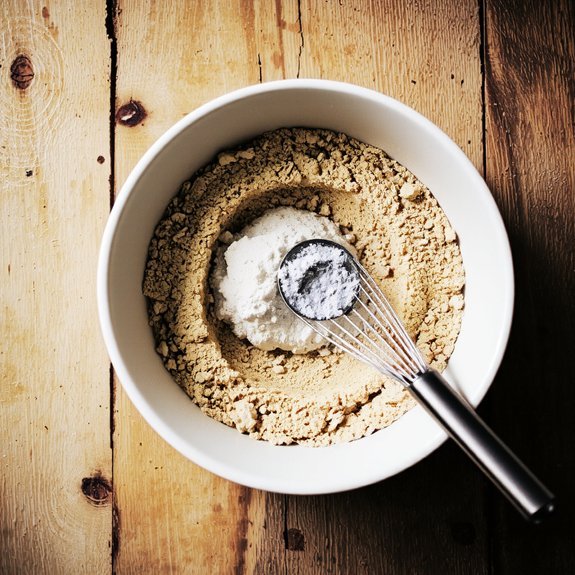
Sift your flour and cornmeal together into a large mixing bowl, breaking apart any compacted particles.
Sift flour and cornmeal together, breaking apart compacted particles for a smooth, lump-free foundation.
Add baking powder and salt, then whisk vigorously for about thirty seconds.
This combination aerates your mixture, eliminating lumps and distributing leavening agents evenly.
The result? A homogeneous blend that’ll give you muffins with superior crumb and reliable performance every single time.
Combining the Wet Ingredients
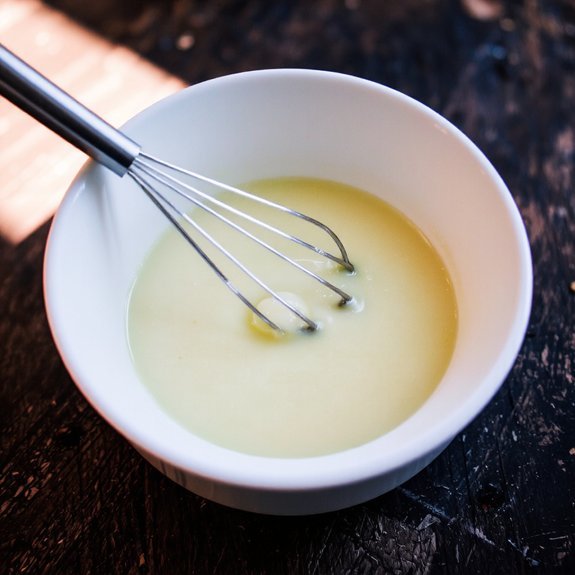
Whisking together your wet ingredients creates the moisture-rich base that’ll bind your dry mixture into a tender, cohesive batter. Combine three large eggs, one cup of buttermilk, and one-quarter cup of melted butter in a separate bowl.
Use vigorous whisking methods to fully incorporate each component—this aerates your mixture and promotes proper emulsification tips that make certain even fat distribution throughout your batter. Whisk for approximately one minute until your wet ingredients achieve a homogeneous, pale yellow consistency.
Don’t skimp on this step; inadequate whisking results in streaky, unevenly textured muffins. The emulsification process breaks down fat globules into microscopic droplets, allowing them to disperse uniformly.
This technical precision prevents greasiness and guarantees moist, crumbly muffins with excellent structure. Your combined wet ingredients should feel smooth and unified before meeting your dry components.
Bringing It All Together
Once you’ve prepared both your dry and wet components, you’re ready to combine them into a unified batter.
Pour your wet mixture into the dry ingredients, folding gently until just combined.
Don’t overmix—lumps are your friend here, keeping muffins tender rather than dense.
Consider your recipe pacing; timing matters when oven preheating’s underway.
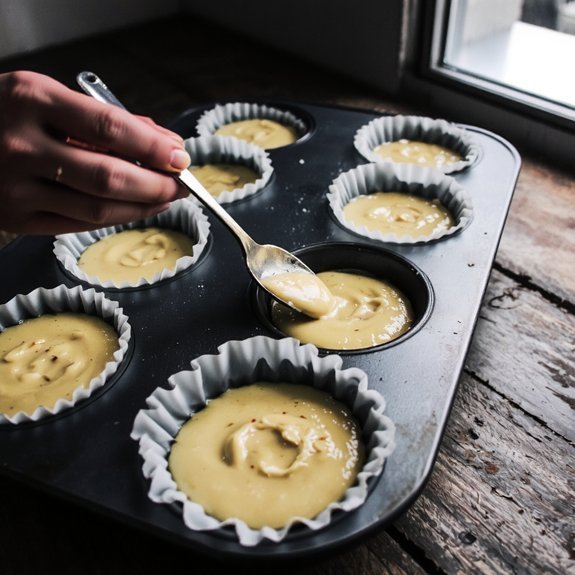
Before filling muffin cups, run through your final checklist:
- Batter consistency resembles thick pancake mix
- No flour streaks visible throughout
- Oven reaches proper temperature
- Liners or greased cups ready
Spoon batter evenly into prepared cups, filling each about two-thirds full.
The golden aroma’ll soon fill your kitchen as these golden-crusted treats bake.
You’ve earned the freedom to enjoy homemade corn muffins whenever you choose.
Baking Your Muffins
You’ll want to preheat your oven to 400°F and position your rack in the center to guarantee even heat distribution around each muffin cup.
Bake your filled muffin tin for 18-22 minutes until the tops turn golden brown and a toothpick inserted into the center emerges clean or with just a few moist crumbs.
The exact timing depends on your oven’s calibration and muffin size, so watch for that characteristic dome shape and listen for the subtle sizzle around the edges as your signal they’re nearing completion.
Temperature and Timing
Preheating your oven to 400°F guarantees your muffin batter rises evenly and develops that signature golden-brown crust while the interior stays tender and moist.
You’ll want to bake for 18-22 minutes, though seasonal variations and time zones affect your actual kitchen conditions. Monitor these critical factors:
- Oven calibration: Verify your temperature with a thermometer for accuracy
- Batter consistency: Dense batter requires longer baking; thinner batter cooks faster
- Pan material: Dark pans absorb more heat, reducing bake time by 2-3 minutes
- Altitude adjustments: Higher elevations demand increased temperature and extended timing
You’ll recognize doneness when a toothpick inserted into the center emerges clean or with minimal crumbs. The muffin tops should feel springy when lightly pressed. Don’t open your oven door during the first 15 minutes—sudden temperature drops compromise rise and structure.
Oven Rack Placement
Positioning your muffin pan on the middle rack guarantees even heat circulation around all sides of your batter, preventing the common problem of overdone tops with undercooked centers.
This central placement allows heat to radiate uniformly from both above and below, ensuring consistent baking results.
You’ll want to maintain adequate safety clearance between your pan and the oven walls—at least two inches on each side. This spacing prevents heat from concentrating unevenly and protects your hands during insertion and removal.
Don’t neglect cleaning access either.
A middle-rack position gives you comfortable reach when rotating your pan halfway through baking, a technique that further promotes uniform browning. If your oven runs hot or has uneven heating patterns, you can adjust slightly higher or lower, but avoid positioning near the top or bottom where temperature fluctuations become extreme.
Cooling and Storage Tips
You’ll want to let your corn muffins cool in the pan for about 5-10 minutes before transferring them to a wire rack, where air circulation prevents moisture from condensing on the bottoms.
Store your cooled muffins in an airtight container at room temperature for up to three days, or freeze them for up to three months—thawing at room temperature restores their tender crumb structure.
For extended freshness, you can also wrap individual muffins in plastic wrap before placing them in freezer bags, which protects them from freezer burn and allows you to grab single portions as needed.
Proper Cooling Techniques
Letting your corn muffins cool properly guarantees they’ll maintain their tender crumb structure and won’t crumble when you remove them from the pan.
You’ll want to understand thermal science principles—the muffins continue cooking from residual heat even after removal from the oven.
Follow these cooling steps for ideal results:
- Leave muffins in the pan for 5-10 minutes to set the exterior structure
- Transfer to a wire rack to allow air circulation underneath, preventing moisture accumulation
- Cool completely at room temperature for 30-45 minutes before wrapping
- Monitor humidity effects in your kitchen—high moisture environments require extended cooling time
This approach prevents condensation from softening your muffins’ texture.
You’re in control of the cooling process; patience guarantees you’ll achieve that perfect crumb consistency you’re after.
Storage and Shelf Life
Proper storage directly determines how long your corn muffins’ll maintain their moisture content and tender crumb structure.
You’ve got flexibility in your storage approach: keep them in airtight containers at room temperature for three days, or refrigerate them for up to five days.
For extended freezer duration, wrap individual muffins in parchment paper, then seal them in freezer bags—they’ll stay fresh for three months without degradation.
When you’re ready to enjoy frozen muffins, thaw them at room temperature for thirty minutes or microwave them for ninety seconds.
This method preserves their delicate texture.
Moisture control remains critical; avoid storing warm muffins immediately, as condensation’ll create sogginess.
Let them cool completely first, ensuring you retain that desirable crumb integrity and preventing mold development during storage.
Creative Variations to Try
Once you’ve mastered the basic recipe, it’s time to experiment with flavor combinations that’ll transform your corn muffins into something entirely new.
Master the basics, then transform your corn muffins with bold flavor combinations that break free from traditional sweetness.
Savory twists open exciting possibilities beyond traditional sweetness. Consider these flavor pairings:
- Jalapeño & Cheddar: Sharp cheese and heat create bold, zesty muffins perfect for breakfast or brunch
- Corn & Bacon: Crispy bacon bits add smoky depth and textural contrast to your batter
- Herb-Infused: Fresh cilantro, thyme, or rosemary deliver aromatic complexity for sophisticated palates
- Poblano & Cotija: Roasted pepper flesh with crumbly cheese produces authentic southwestern character
Each variation requires minimal adjustments—simply fold ingredients into your base batter before baking.
These creative directions liberate you from conventional sweetness, delivering muffins that satisfy adventurous tastes. You’ll discover that strategic ingredient swaps elevate your baking beyond predictable flavors, giving you complete control over your culinary expression.
Frequently Asked Questions
Can I Use Cornmeal Instead of Corn Flour in This Recipe?
You can swap cornmeal for corn flour, but you’ll notice texture differences. Cornmeal’s coarser granules create grittier, more rustic muffins with pronounced crunch, while corn flour yields smoother results.
For substitution ratios, use equal parts cornmeal to corn flour, though you might need slightly more liquid since cornmeal absorbs moisture differently. This swap gives you freedom to customize your muffin’s mouthfeel—dense and textured versus delicate and refined. Experiment boldly.
How Do I Know When Corn Muffins Are Fully Baked Inside?
You’ll know your corn muffins are fully baked when you insert a toothpick into the center and it emerges clean or with just a few moist crumbs clinging to it.
Check the internal temperature with a meat thermometer—you’re aiming for 205-210°F at the core.
The golden-brown exterior should feel firm to light pressure, and you’ll catch that unmistakable aroma of toasted cornmeal filling your kitchen.
Don’t let anyone dictate your doneness preferences; bake to your exact specifications.
What Causes Corn Muffins to Sink in the Middle While Baking?
Your corn muffins sink because you’re likely overmixing batter, which develops gluten and deflates air pockets during baking.
A leavening imbalance—too much baking soda or powder—causes rapid rising followed by collapse.
You’ll notice the golden dome suddenly craters as the structure fails. Keep your mixing minimal, just until ingredients combine. Trust your leavening ratios precisely. This gives you the freedom to bake muffins that stay beautifully domed throughout.
Can I Freeze Corn Muffin Batter for Baking Later?
You can absolutely freeze your corn muffin batter using proper freezing technique. Pour your prepared batter into muffin cups, freeze until solid, then transfer to freezer bags for storage up to three months.
When you’re ready to bake, skip thawing tips entirely—bake directly from frozen, adding just five extra minutes to your baking time. This straightforward method preserves your batter’s texture and rise, delivering golden, tender muffins whenever you choose.
Why Did My Corn Muffins Turn Out Dry and Crumbly?
Your corn muffins likely turned dry because you’ve overmixed the batter, overdeveloped the gluten structure, and created a dense crumb.
You’ve also probably baked them at too high an oven temperature, which causes the exterior to set rapidly while the interior dries out.
Lower your heat to 400°F, mix just until ingredients combine, and check doneness with a toothpick at 18-20 minutes.
You’ll achieve moist, tender muffins that actually taste like freedom.


Leave a Comment