
Key Takeaways
- Cream butter and sugar for 3 minutes until fluffy, then add eggs one at a time while beating continuously.
- Alternate adding dry ingredients and coconut milk to the mixture, beginning and ending with the dry ingredients.
- Bake at 350°F for 28–32 minutes in prepared pans, then cool 10 minutes before turning onto wire racks.
- Make cream cheese frosting by beating softened cream cheese and butter until pale, then gradually add powdered sugar.
- Layer cake with ¼-inch frosting, apply crumb coat, refrigerate 30 minutes, then add final coat and decorate with toasted coconut.
Ingredients You’ll Need

You’ll need two cups of all-purpose flour, one-and-a-half teaspoons of baking powder, half a teaspoon of baking soda, half a teaspoon of salt, one cup of unsalted butter (softened to room temperature), two cups of granulated sugar, four large eggs, one cup of sour cream, one teaspoon of vanilla extract, one-and-a-half cups of sweetened shredded coconut, and half a cup of coconut milk.
For ingredient substitutions, you can swap all-purpose flour with gluten-free flour if you’re avoiding gluten.
Swap all-purpose flour with gluten-free flour to accommodate gluten-free dietary needs without affecting results.
Consider organic alternatives like organic coconut milk and organic shredded coconut for enhanced quality.
You’ll find these premium options at most grocery stores.
Replace conventional sugar with organic cane sugar to maintain consistent sweetness.
If you’re seeking freedom from artificial ingredients, make sure your baking powder doesn’t contain aluminum compounds.
These strategic swaps won’t compromise your cake’s texture or flavor while elevating its nutritional profile.
Preparing Your Cake Pans

Preparing your cake pans correctly guarantees even baking and prevents sticking.
You’ll want to choose your grease options wisely—butter, coconut oil, or cooking spray all work effectively.
Apply your chosen grease in a thin, even layer across the pan’s bottom and sides.
For maximum protection against sticking, implement parchment lining by cutting rounds to fit your pan’s base.
Press the parchment firmly against the greased surface, then grease the parchment paper as well.
This dual-layer approach makes certain your coconut cake releases cleanly without damage.
Don’t skip this step if you’re serious about achieving professional results.
Proper pan preparation takes mere minutes and eliminates the frustration of stuck cake.
You’ll gain the freedom to focus entirely on mixing and baking your masterpiece.
Mixing and Baking Instructions

Combine your dry ingredients—flour, baking powder, baking soda, and salt—in a medium bowl, then whisk them together for about 30 seconds to guarantee even distribution.
In a separate bowl, cream together butter and sugar until light and fluffy, approximately three minutes. Add eggs one at a time, beating well after each addition.
Alternate adding your dry mixture and coconut milk, beginning and ending with dry ingredients. This mixing technique prevents overmixing, which’d toughen your cake. Fold in shredded coconut gently.
Pour batter into your prepared pans, filling each halfway.
Bake at 350°F for 28-32 minutes until a toothpick inserted in the center emerges clean. Your baking time depends on pan size and oven calibration.
Cool in pans for ten minutes before turning out onto wire racks.
Making the Cream Cheese Frosting
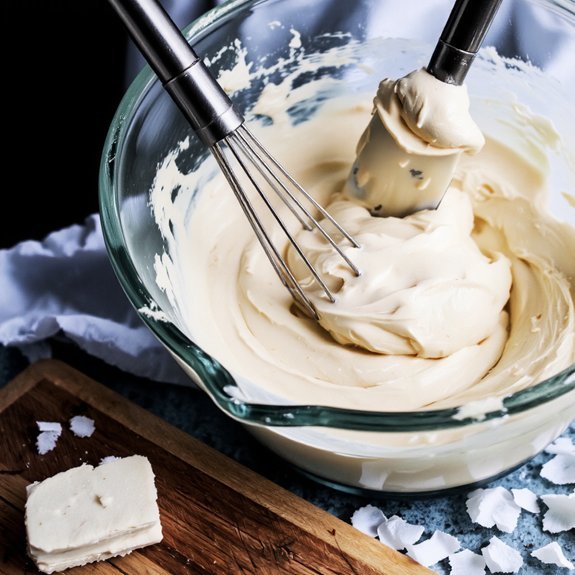
Beat softened cream cheese and butter together on medium speed for two to three minutes until the mixture becomes pale and fluffy.
Then gradually add powdered sugar while continuing to beat.
This process guarantees you’ll achieve a smooth, lump-free consistency that’ll spread beautifully across your cake layers.
Once you’ve incorporated all the powdered sugar, you can explore flavor variations by adding vanilla extract, coconut extract, or a touch of rum for depth.
For storage tips, refrigerate your frosting in an airtight container for up to five days, or freeze it for three months.
Before applying to your cake, let refrigerated frosting sit at room temperature for fifteen minutes to restore spreadability.
This approach gives you complete control over your frosting’s taste and texture while maintaining best freshness.
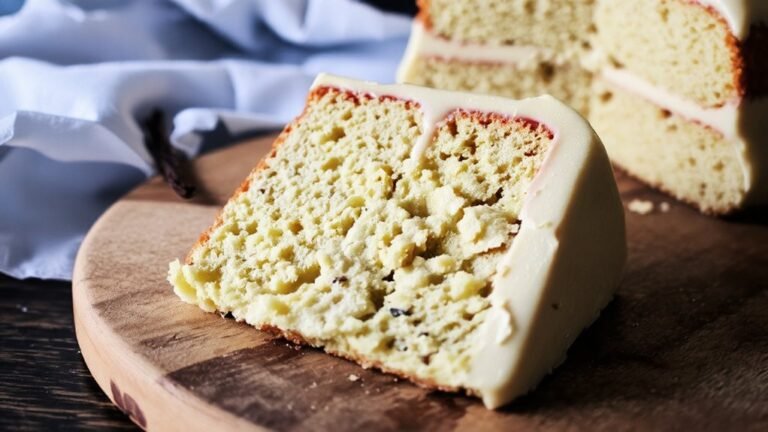
Assembling and Decorating Your Cake

Once your cake layers have cooled completely, you’ll want to place the first layer on your serving plate or cake board, then spread an even ¼-inch layer of cream cheese frosting across the top using an offset spatula.
Stack the second layer directly on top, ensuring proper layer alignment to prevent tilting.
Apply frosting between each subsequent layer with consistent thickness.
Crumb coat the entire cake with a thin frosting layer, then refrigerate for thirty minutes.
Apply your final frosting coat smoothly using an offset spatula.
For sophisticated finishes, explore fondant techniques by rolling fondant to ⅛-inch thickness and draping it over the frosted cake, smoothing out air bubbles methodically.
Toast shredded coconut in a dry skillet until golden, then press it firmly onto the cake’s sides and top.
This approach delivers professional results without compromise.
Frequently Asked Questions
Can I Make Coconut Cake Ahead of Time and Freeze It for Later?
You’ll get excellent results freezing coconut cake ahead. Layer freezing individual cake components separately before assembly maximizes quality retention.
Wrap unfrosted layers tightly in plastic wrap, then foil for up to three months. However, frosting stability matters—cream-based frostings don’t freeze well, while buttercream withstands freezing reliably.
Thaw your cake layers in the refrigerator overnight before frosting and serving. This approach gives you complete control over your baking timeline.
How Do I Know When the Cake Is Completely Baked Through?
You’ll know your cake’s completely baked when you insert a toothpick into the center—it should emerge clean or with just a few moist crumbs, not wet batter.
Alternatively, use an instant-read thermometer to check the internal temperature, which should reach 205-210°F at the cake’s thickest point.
The cake’s edges will pull away slightly from the pan’s sides. Don’t rely solely on appearance; these methods guarantee your cake’s fully cooked through.
What’s the Best Way to Toast Fresh Coconut for Decoration?
You’ll achieve ideal results through oven toasting.
Spread your fresh coconut flakes on a baking sheet, then roast at 325°F for 8-12 minutes, stirring every couple minutes to guarantee even browning.
You’re looking for golden edges without burning.
This method gives you control over the color intensity.
For presentation tips, layer your toasted coconut strategically on the frosted cake’s sides and top, creating texture contrast and visual depth that elevates your final product’s appeal.
Can I Substitute Regular Milk for Coconut Milk in This Recipe?
You can substitute regular milk for coconut milk, but you’ll experience significant flavor impact and texture differences. Regular milk won’t deliver coconut’s distinctive richness, resulting in a blander cake.
Your crumb structure may become denser since coconut milk’s higher fat content creates moisture and tender texture. You’re trading authentic coconut character for a more neutral taste profile. If you proceed, consider adding coconut extract to compensate for lost flavor complexity and maintain your cake’s intended depth.
How Long Does Coconut Cake Stay Fresh at Room Temperature?
Your coconut cake’s shelf life at room temperature extends 2-3 days when you’ve stored it properly.
You’ll want to use airtight packaging methods—sealed containers or plastic wrap work best—to prevent moisture loss and staleness.
Keep it away from direct sunlight and heat sources.
For extended freshness, you’re free to refrigerate it up to five days or freeze it for three months, maintaining quality while securing your independence from frequent baking.


Leave a Comment