
Key Takeaways
- Use pure pumpkin puree, all-purpose flour, brown sugar, eggs, oil, and warm spices like cinnamon, nutmeg, and cloves.
- Combine dry ingredients separately, whisk wet ingredients until emulsified, then fold together until just combined to avoid dense crumb.
- Preheat oven to 350°F, fill greased loaf pan three-quarters full, and bake 60–65 minutes until toothpick emerges with minimal crumbs.
- Cool bread in pan for 15 minutes, then transfer to wire rack for 2–3 hours until crumb fully sets.
- Store wrapped tightly at room temperature for three days or freeze for up to three months for extended shelf life.
Why Pumpkin Bread Is Perfect for Fall

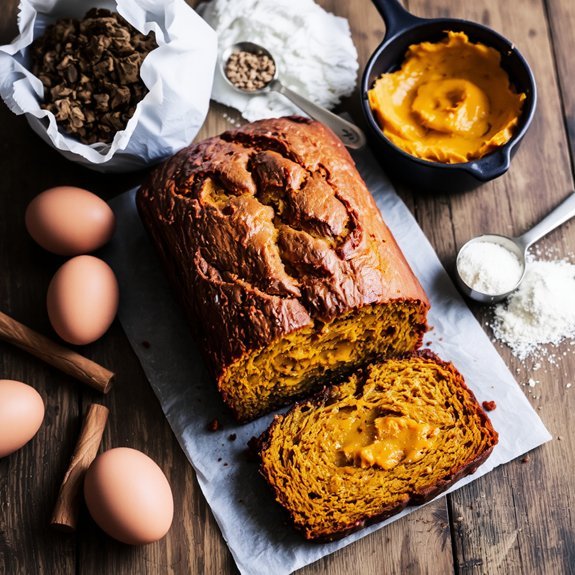
When autumn’s crisp air arrives, pumpkin bread captures the season’s essence in every slice.
You’ll experience cozy aromas that fill your kitchen, invoking seasonal nostalgia with their warm spice profile—cinnamon, nutmeg, and clove blend seamlessly into the moist crumb.
Cozy aromas fill your kitchen as warm spices—cinnamon, nutmeg, clove—blend seamlessly into moist, tender crumb.
This bread liberates you from summer’s constraints, celebrating bold flavors unapologetically.
The combination of pureed pumpkin, eggs, and oil creates a tender texture that defies density.
Brown sugar and molasses deepen the complexity, while the pumpkin itself provides natural moisture and subtle earthiness.
You’re not bound by tradition here—add chocolate chips, pecans, or cream cheese swirl to customize your creation.
The versatility makes pumpkin bread ideal for breakfast, dessert, or gifting.
It’s seasonal freedom on your plate.
Essential Ingredients You’ll Need
You’ll need pure pumpkin puree—not pumpkin pie filling, which contains added sugar and spices—as your foundation, along with all-purpose flour, granulated sugar, brown sugar, and eggs.
Beyond these basics, gather shelf stable staples: baking soda, baking powder, salt, and ground cinnamon.
Label reading matters here; verify your cinnamon’s freshness for best flavor.
You’ll also want nutmeg, ginger, and cloves to build warmth and depth.
Don’t overlook the fat component: vegetable oil keeps your bread moist and tender. Vanilla extract adds complexity without heaviness.
Organize everything before mixing. This mise en place approach prevents oversights and makes sure you’re not missing critical components mid-bake. Quality ingredients transform this straightforward formula into exceptional results worth your effort.
Equipment and Tools Required
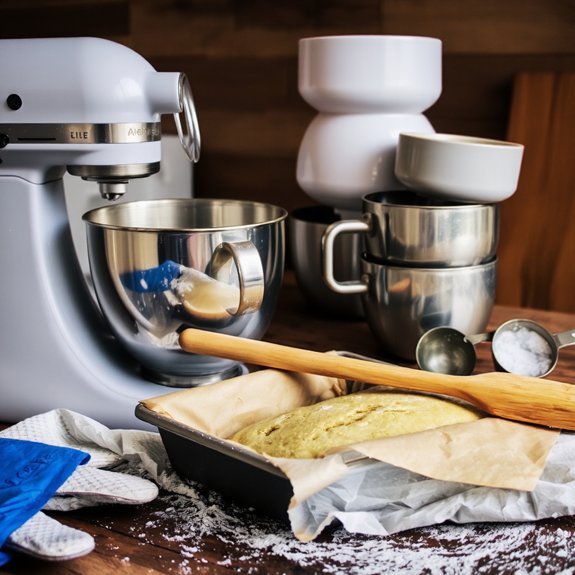
Gathering your ingredients is only half the battle—having the right equipment guarantees those quality components transform into perfectly textured bread.
You’ll need a sturdy loaf pan, preferably nonstick, to prevent sticking and promote even browning.
A mixing bowl, electric mixer, and whisk handle your wet and dry components efficiently.
Measuring cups and spoons guarantee accurate proportions for consistent results.
A rubber spatula scrapes every bit of batter, eliminating waste.
Your oven thermometer verifies accurate temperatures—critical for proper rise and crust development.
Don’t overlook tool maintenance; clean your mixer thoroughly after use to prevent pumpkin residue buildup.
Wear safety gear when handling hot bakeware, protecting yourself from burns.
These essentials transform baking from chaotic to controlled, delivering bakery-quality pumpkin bread you’ll genuinely enjoy.
Preparing Your Baking Pans
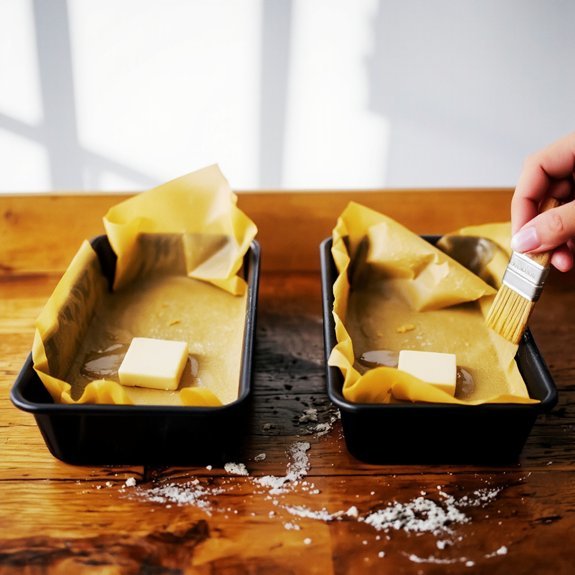
Properly preparing your baking pan separates bakery-quality pumpkin bread from soggy, stuck disasters.
You’ve got two solid greasing methods to choose from: butter and flour, or cooking spray.
Coat your pan thoroughly, ensuring you’ve covered every corner and crevice where batter’ll cling.
For maximum insurance, line your pan with parchment tips—cut a strip that extends up two sides, creating handles you’ll use later for effortless removal.
The parchment method’s your freedom move.
You’ll skip the frustrating process of coaxing bread from corners, preserving that golden crust intact.
If you’re using the butter-and-flour approach, tap out excess flour after coating.
Either way, you’re investing thirty seconds now to guarantee a pristine final product.
That’s smart baking strategy.
Mixing the Dry Ingredients
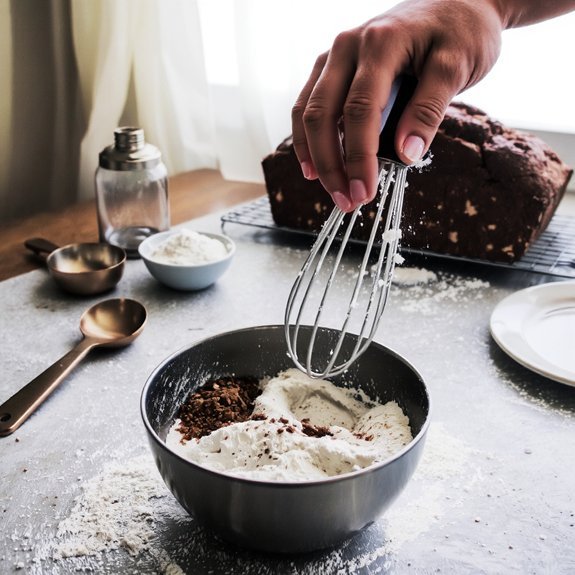
You’ll want to measure your flour carefully by spooning it into your measuring cup and leveling it with a knife to make sure you’re not packing in excess.
In a separate bowl, you’ll combine your spice blend—cinnamon, nutmeg, ginger, and cloves—with the flour, baking soda, and salt, whisking until the spices are evenly distributed throughout.
This dry mixture creates the aromatic foundation that’ll give your pumpkin bread its warm, complex flavor profile.
Measuring Flour Accurately
Why does flour measurement matter so much in pumpkin bread? You’ll achieve superior results by ditching the cup method entirely. Instead, you’ll use either the scoop method or a digital scale for precision. Scale calibration guarantees accuracy—reset to zero before each ingredient. Here’s your measurement comparison:
| Method | Accuracy | Speed | Consistency |
|---|---|---|---|
| Cups | Poor | Fast | Unreliable |
| Scoop | Good | Medium | Decent |
| Scale | Excellent | Slow | Perfect |
You’re not just mixing flour; you’re controlling moisture ratios that determine your bread’s crumb structure. Densely packed flour creates tough bread. Loosely measured flour produces crumbly results. You’ll weigh 2 cups of all-purpose flour at approximately 240 grams. This precision liberates you from guesswork, guaranteeing consistent, moist pumpkin bread every single time.
Combining Spice Blend
Now that your flour’s weighted and ready, it’s time to build the aromatic foundation that defines pumpkin bread.
Gather your spices: cinnamon, nutmeg, ginger, cloves, and allspice.
For maximum flavor impact, consider toasting spices lightly in a dry skillet before measuring—this awakens their volatile oils and intensifies their complexity.
Combine your measured flour with these spices, baking soda, and salt in a medium bowl.
Whisk thoroughly, ensuring even distribution throughout the dry mixture.
This uniform blending prevents spice pockets and guarantees consistent flavor in every slice.
Store your spice blend in an airtight container if preparing ahead; it’ll maintain potency for several days.
This approach gives you flexibility—prep when inspired, bake when ready.
Combining the Wet Ingredients
Before whisking your dry mixture, gather the pumpkin purée, eggs, oil, and vanilla extract in a medium bowl.
- Use room-temperature eggs for ideal emulsification techniques—cold eggs resist blending smoothly with oil
- Whisk eggs vigorously for 30 seconds until pale and frothy, creating an emulsion base
- Slowly drizzle oil while whisking continuously to prevent separation and guarantee proper incorporation
- Add vanilla extract last, stirring until the mixture achieves a unified, creamy consistency
This wet-ingredient combination forms your recipe’s foundation.
The room-temperature egg temperature matters because it allows lipids and proteins to bond effectively.
When you maintain steady whisking motion and control oil flow, you’re building an emulsification that prevents the wet and dry components from separating after mixing.
This technical precision yields dense, moist bread with superior texture and structure.
Bringing It All Together
You’ll fold your pumpkin purée mixture into the dry ingredients until you’ve just combined them—don’t overmix, or you’ll develop gluten and create a dense crumb.
The batter should be thick and studded with spice flecks, pouring smoothly into your greased loaf pan without resistance.
Once baked through and cooled completely, you’ll slice into moist, tender bread with a burnished golden crust that holds its shape perfectly.
Mixing Wet and Dry
Once your dry ingredients are whisked together in one bowl and your wet ingredients are combined in another, it’s time to unite them into a cohesive batter.
- Pour the wet mixture into the dry ingredients
- Use a folding technique with a spatula, cutting down the center and sweeping across the bottom
- Rotate the bowl and repeat until flour streaks disappear
- Stop mixing immediately—overmixing develops gluten and toughens your bread
Your pumpkin purée, oil, and eggs should integrate with the flour, cinnamon, nutmeg, and baking soda seamlessly.
The batter transforms into a thick, rust-colored consistency studded with spice specks.
Allow the resting batter to sit for five minutes.
This pause lets the leavening agents activate and the starches fully absorb moisture, guaranteeing a tender, moist crumb that respects your baking autonomy.
Perfecting the Baking Process
After your batter’s five-minute rest, it’s ready for the oven’s heat to work its transformation.
Preheat to 350°F, ensuring proper oven calibration with a reliable thermometer—temperature accuracy determines your bread’s rise and crumb structure.
Pour the spiced pumpkin mixture into your greased loaf pan, filling it three-quarters full.
The batter should settle evenly, revealing hints of cinnamon and nutmeg throughout.
Bake for 60-65 minutes until a toothpick inserted near the center emerges with minimal crumbs clinging to it.
Don’t rely solely on time; trust visual cues and the golden-brown exterior.
Consider altitude adjustments if you’re above 3,000 feet—increase oven temperature by 25°F and reduce baking time slightly.
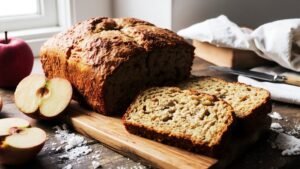
Cool in the pan for 15 minutes before turning out onto a wire rack, allowing the dense, moist crumb to set properly.
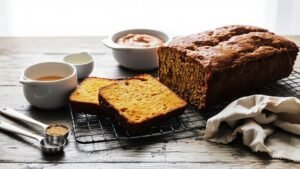
Cooling and Serving Tips
Allowing your pumpkin bread to cool completely on the wire rack—typically 2-3 hours—lets the crumb set and the flavors deepen.
You’ll notice the spiced aromas intensifying as the bread reaches room temperature, making it the perfect moment to slice and serve.
Consider these serving occasions and garnish suggestions to elevate your creation:
- Dust warm slices with cinnamon sugar for breakfast or brunch gatherings
- Top with cream cheese frosting for dessert-focused entertaining
- Serve alongside coffee at afternoon tea occasions
- Garnish with candied pumpkin seeds and a drizzle of caramel for upscale presentations
Store cooled bread wrapped tightly to maintain moisture.
You’ve earned the freedom to enjoy your homemade pumpkin bread however you choose.
Baking Time and Temperature
How does temperature affect your pumpkin bread’s rise and crust development? You’ll want your oven calibrated to 350°F for ideal results. This temperature allows your batter’s proteins and starches to set gradually, creating a tender crumb while developing a golden-brown exterior.
| Temperature | Baking Time | Result |
|---|---|---|
| 325°F | 65-70 minutes | Pale, underbaked |
| 350°F | 55-65 minutes | Perfect golden crust |
| 375°F | 50-55 minutes | Dark, dry edges |
| High altitude | 70+ minutes | Extended setting time |
At high altitude, you’ll need additional baking time since water evaporates faster. Insert a toothpick into the center—it should emerge with minimal moist crumbs, not wet batter. You’re aiming for that sweet spot where your pumpkin bread’s dense structure stays moist inside while its exterior turns beautifully caramelized.
Cooling and Storage Tips
Proper cooling prevents your pumpkin bread from becoming dense or developing a soggy interior.
You’ll want to let your loaf sit in the pan for 15 minutes before turning it out onto a wire rack.
For ideal crumb preservation, follow these storage guidelines:
- Cool completely at room temperature for at least two hours before wrapping
- Wrap tightly in plastic wrap or aluminum foil to lock in moisture
- Store at room temperature for up to three days
- Freeze for extended storage with freezer labeling that includes the baking date
You can confidently keep frozen pumpkin bread for up to three months.
When you’re ready to enjoy it, thaw at room temperature for several hours.
This method maintains the bread’s tender crumb structure and spiced pumpkin flavor without compromise.
Variations and Flavor Combinations
While the classic pumpkin bread recipe delivers reliable warmth and spice, you can easily transform it by experimenting with complementary flavors and textures. Try a Maple Pecan variation by drizzling pure maple syrup into your batter and folding in toasted pecans for nutty depth and caramel notes.
For chocolate lovers, incorporate a Chocolate Swirl by layering melted dark chocolate through the center before baking—the cocoa’s bitter edge balances pumpkin’s sweetness perfectly. You might also add crystallized ginger for sharp heat, or dust the top with cinnamon-sugar before baking for textural contrast.
Each variation maintains the bread’s moist crumb while expanding its flavor profile. These simple modifications let you customize your pumpkin bread to suit your taste preferences without compromising the original recipe’s reliable structure.
Frequently Asked Questions
Can I Substitute Canned Pumpkin Puree With Fresh Pumpkin in This Recipe?
Yes, you can substitute fresh pumpkin, but you’ll need to employ a puree technique first.
Roast and blend fresh pumpkin until silky smooth, then strain it through cheesecloth to remove excess water.
Fresh pumpkin contains substantially more moisture than canned, so you’ll need moisture adjustment—reduce your liquid ingredients by approximately one-quarter cup.
This extra step gives you control and delivers richer, more vibrant flavor to your bread’s crumb structure.
How Do I Know if My Pumpkin Bread Is Fully Baked Without Overbaking?
You’ll nail perfect doneness by inserting a toothpick into your bread’s center—it should emerge with just a few moist crumbs clinging to it, not wet batter.
That crumb texture indicates your pumpkin bread’s interior’s set while remaining tender and moist. Check around the 50-minute mark if baking at 350°F.
The top’ll turn golden-brown, and you’ll catch a fragrant pumpkin aroma wafting through your kitchen. Trust your instincts—slightly underbaked beats dry every time.
Can I Freeze Pumpkin Bread Batter Before Baking It Later?
Yes, you can freeze your pumpkin bread batter. Pour it into a freezer-safe container and store it for up to three months.
For ideal freezer timing, label your container with the date.
When you’re ready to bake, use proper thaw techniques—let the batter sit in your refrigerator overnight until it reaches room temperature. This preserves the pumpkin’s rich flavor and guarantees your bread rises beautifully, giving you the flexibility to bake fresh loaves whenever you want.
What’s the Difference Between Pumpkin Bread and Pumpkin Cake?
You’ll notice pumpkin bread’s denser, more compact crumb structure versus cake’s airy, fluffy texture.
Bread relies on oil and eggs for moisture, delivering deeper, earthier spice notes.
Cake incorporates butter and often sour cream, creating lighter sweetness with prominent vanilla undertones.
You’re choosing between a moist, substantial loaf showcasing pumpkin’s natural richness or an indulgent, tender dessert prioritizing delicate sweetness and lift.
Both leverage pumpkin puree, yet their ingredient ratios fundamentally define their contrasting eating experiences.
Why Did My Pumpkin Bread Sink in the Middle While Baking?
Your pumpkin bread sank because you’ve likely got a leavening imbalance—too much baking soda or powder relative to your acidic ingredients.
Excess moisture from the pumpkin puree also destabilizes the crumb structure, causing it to collapse mid-bake.
You’re not getting enough structural support.
Next time, measure your leavening agents precisely and don’t overmix your batter.
Consider reducing pumpkin slightly or increasing flour to achieve proper moisture balance.


Leave a Comment