Key Takeaways
- Melt 6 ounces dark chocolate (60–70% cacao) with 6 tablespoons butter using a double boiler at 50°C.
- Whisk 2 eggs, 2 yolks, and 1/4 cup sugar for 4 minutes; fold in flour, salt, and chocolate mixture gently.
- Pour batter into prepared 6-ounce ramekins and bake at 350°F for 12–14 minutes on center rack until edges set.
- Cake is done when edges pull slightly from ramekin and center jiggles slightly; internal core reaches 160–165°F for molten center.
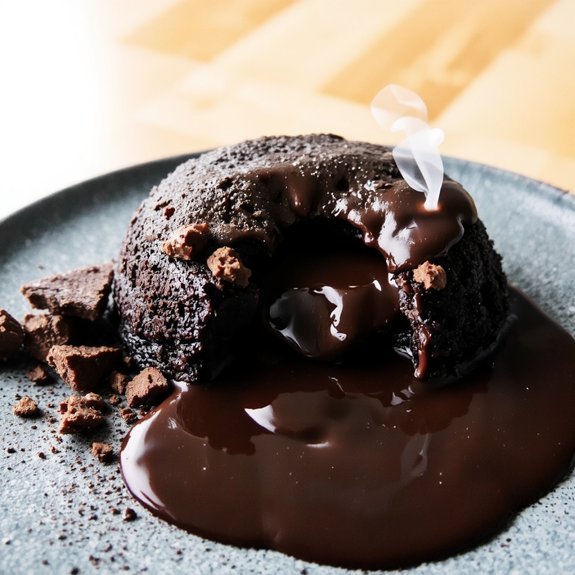
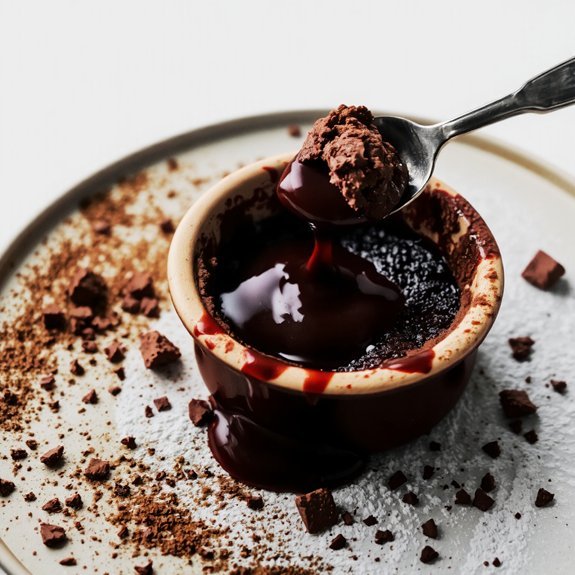
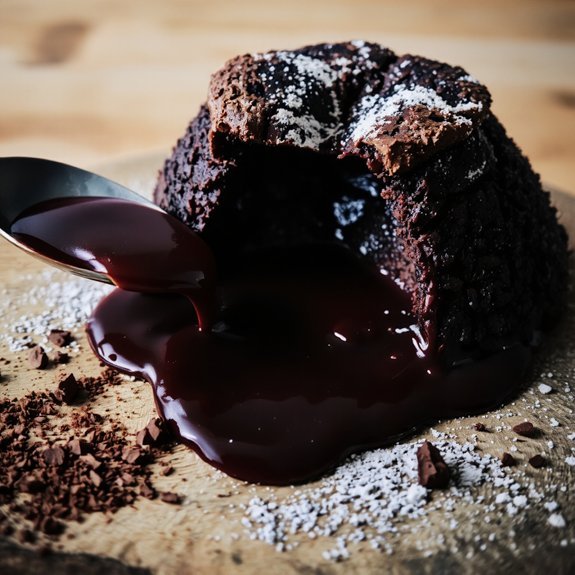
- Invert immediately onto serving plates to showcase flowing chocolate center; serve straight from oven for maximum visual and textural contrast.
Why Chocolate Lava Cake Is the Ultimate Dessert
Why does chocolate lava cake captivate dessert enthusiasts across culinary contexts?
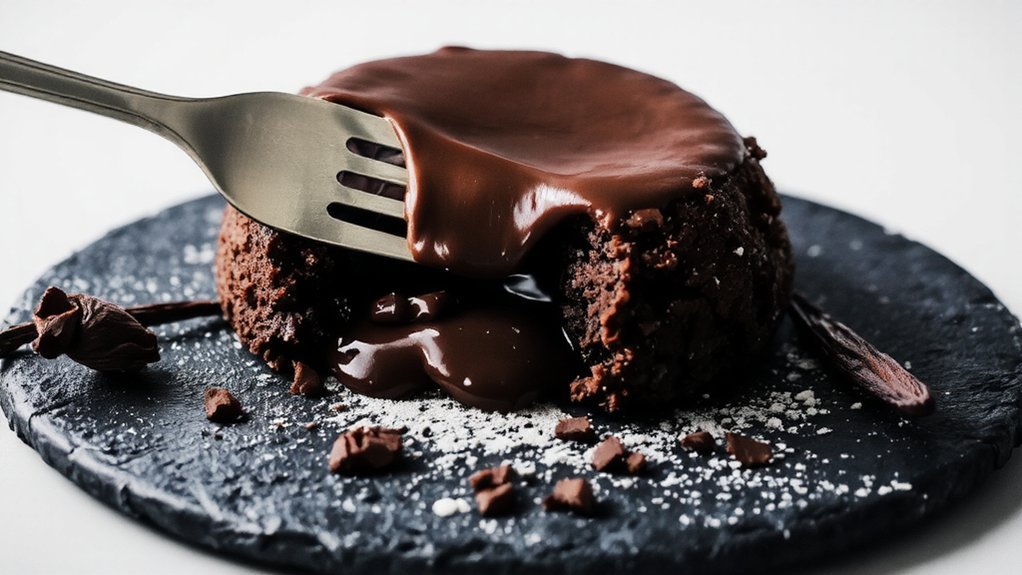
You’ll discover its magic lies in the sensory contrast—a crispy, caramelized exterior yields to a molten chocolate center that flows freely across your plate.
The magic unfolds in sensory contrast: a crispy exterior surrenders to molten chocolate flowing freely across your plate.
This textural duality creates an unforgettable experience.
The romantic appeal remains undeniable.
You can prepare this sophisticated dessert with precise measurements: 170°C oven temperature, 12-minute baking duration, and a 70% cocoa content chocolate base.
The technical methodology involves tempering chocolate, folding egg whites with exacting care, and achieving the ideal batter consistency.
You’re liberated from ordinary desserts when you master this technique.
The structured approach—careful timing and ingredient ratios—yields professional-quality results.
You’ve earned this indulgence: a dessert that commands attention, satisfies your palate, and reflects your culinary freedom.
Ingredients You’ll Need
To craft an exceptional chocolate lava cake, you’ll need to gather essential baking ingredients: all-purpose flour, granulated sugar, eggs, butter, vanilla extract, and baking powder.
Your chocolate selection is critical—you’ll want to source high-quality couverture chocolate with a cocoa content between 60-70% to achieve the ideal molten center and rich flavor profile.
Precision in measuring these components by weight rather than volume guarantees consistency and the proper molecular structure required for that signature lava flow.
Essential Baking Ingredients
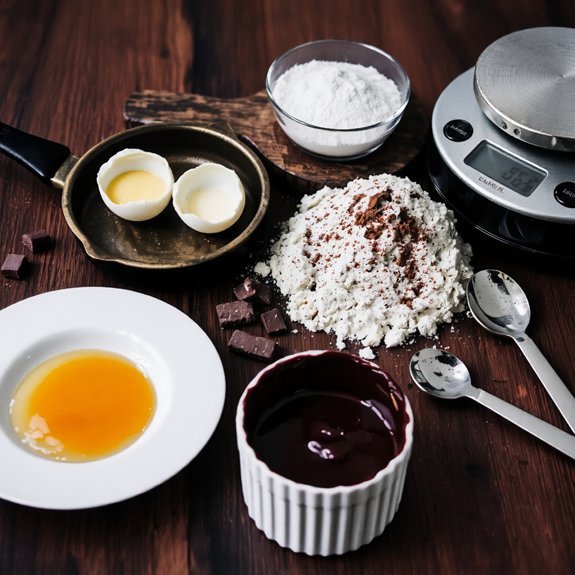
You’ll need precise measurements of several foundational components to execute this dessert properly. Start with 6 ounces of dark chocolate, chopped into uniform pieces for consistent melting. Add 6 tablespoons of unsalted butter, 2 large eggs, 2 egg yolks, 1/4 cup granulated sugar, 2 tablespoons all-purpose flour, and 1/4 teaspoon sea salt.
When sourcing ingredients, prioritize high-quality chocolate with 70% cocoa content for superior flavor development. Room-temperature eggs emulsify more effectively, creating your desired molten center.
Purchase butter with extended shelf life by selecting European-style varieties, which contain higher fat percentages. All-purpose flour maintains ideal potency for 6-8 months when stored in airtight containers. Your ingredient selections directly determine this cake’s structural integrity and decadent texture.
Quality Chocolate Selection
Since chocolate comprises nearly half the recipe’s volume, selecting the right variety directly impacts your cake’s flavor profile and texture.
You’ll want to choose between dark chocolate (60-70% cacao) for intensity or semi-sweet (50-60% cacao) for balanced sweetness.
Consider bean origin carefully—single-origin chocolates from Ecuador, Madagascar, or Ghana offer distinct flavor notes you can’t replicate with blended varieties.
Look for ethical sourcing certifications ensuring fair-trade practices and sustainable farming methods.
Purchase couverture chocolate rather than standard baking chocolate.
Its higher cocoa butter content (32% minimum) delivers superior melting properties and silky mouthfeel.
You’ll need 6 ounces for your lava cake base.
Store your chocolate in a cool, dark environment between 60-70°F to prevent bloom and maintain ideal consistency for melting and tempering.
Essential Equipment and Tools
Proper equipment makes the difference between a collapsed cake and a perfectly molten center.
You’ll need standard ramekin sizes—typically 6-ounce or 8-ounce ceramic dishes—to guarantee even baking and ideal lava flow.
Invest in a quality stand mixer or handheld electric mixer for precise incorporation of ingredients without overworking your batter.
You’ll want silicone spatulas for gentle folding and scraping, preventing air loss from your whipped egg whites.
A reliable oven thermometer guarantees accurate temperature control, critical for achieving that liquid chocolate core.
Select a heavy-bottomed baking pan or muffin tin as your water bath vessel.
Use an offset spatula for inversion and plating.
Gather a fine-mesh sieve for sifting cocoa powder and flour.
These tools give you complete control over your baking process, eliminating guesswork and guaranteeing consistent, restaurant-quality results.
Step-by-Step Instructions
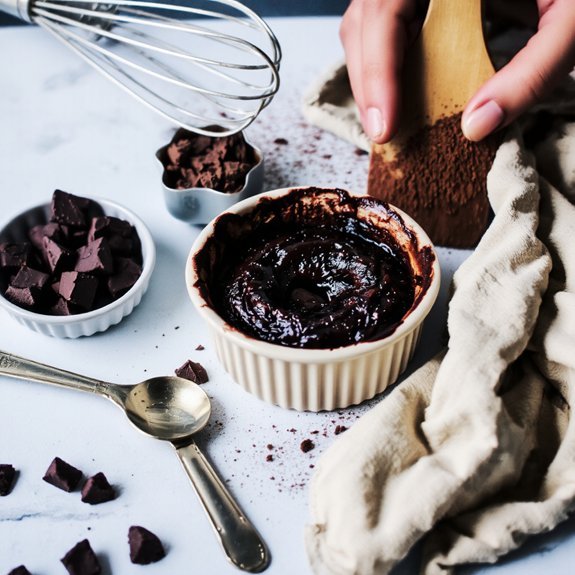
Mastering the chocolate lava cake requires methodical precision and attention to timing. You’ll combine melted chocolate with butter, then fold in eggs and flour. The sequential photos guide you through each phase, ensuring you nail the technique. Here’s your breakdown:
| Step | Action | Temperature | Duration |
|---|---|---|---|
| 1 | Melt chocolate and butter | 50°C | 3 minutes |
| 2 | Whisk eggs and sugar | Room temp | 4 minutes |
| 3 | Fold dry ingredients | N/A | 2 minutes |
| 4 | Bake in ramekins | 200°C | 12-14 minutes |
You’ll pour batter into prepared ramekins, then bake until edges set while centers remain molten. Clear verbs direct your movements: melt, whisk, fold, pour, bake. This systematic approach yields consistent results, giving you the freedom to perfect your dessert mastery.
Tips for the Perfect Molten Center
You’ll achieve the perfect molten center by maintaining precise temperature control—baking your cakes at exactly 425°F for 12-14 minutes makes certain the exterior sets while the interior remains fluid.
Your butter-to-chocolate ratio directly impacts the cake’s structural integrity and flow; use a 1:1 ratio by weight to guarantee ideal consistency.
Timing your bake requires vigilance, as even 60 seconds beyond your target window can transform that coveted lava into a fully cooked center.
Temperature Control Matters
Because baking’s success hinges on precision, temperature control becomes the critical factor separating a properly executed chocolate lava cake from a disappointing, fully-cooked dessert.
You’ll maintain your oven at 425°F (220°C) to achieve the ideal thermal inertia—the heat capacity that guarantees your cake’s exterior sets while preserving the molten interior.
You must account for microclimate effects within your oven.
Position your ramekins on the center rack, away from heating elements, to eliminate hot spots.
Use an oven thermometer to verify actual temperature; your oven’s dial often misrepresents reality by 25°F or more.
You’ll bake for precisely 12–14 minutes.
The cake’s edges should firm while the center jiggles slightly when you gently shake the ramekin.
This technical precision gives you the molten center you demand.
Timing Your Bake
The 12–14 minute baking window isn’t arbitrary—it’s the thermal threshold where your cake’s structural integrity develops while its core remains between 160–165°F (71–74°C), the precise temperature range for that signature lava consistency.
You’ll master this kitchen choreography by setting a timer for 12 minutes, then checking doneness at the 13-minute mark. The cake’s edges should pull slightly from the ramekin while the center jiggles subtly when gently shaken.
Your countdown rituals matter: don’t open the oven door before 11 minutes, as temperature fluctuations sabotage results. At 14 minutes, you’ve crossed into overbaked territory.
Remove immediately when the top firms but yields to light pressure—this precision determines whether you’ll achieve molten perfection or disappointment.
Butter and Chocolate Ratios
Achieving that coveted molten center hinges on maintaining a 1:1 butter-to-chocolate ratio by weight, typically 4 ounces each for a standard two-ramekin batch.
You’ll control texture modulation through precise measurement—deviating from this ratio compromises your dessert’s structural integrity.
Dark chocolate between 60-70% cacao solids provides ideal melt dynamics.
Higher percentages risk dryness; lower percentages yield excessive sweetness that masks complexity.
You’re balancing cocoa solids’ viscosity against butter’s emulsification properties.
Melt your chocolate and butter together using a double boiler, maintaining temperatures below 115°F to preserve cocoa butter’s crystal structure.
You’ll achieve superior flow characteristics and that signature molten ribbon when you respect these parameters.
This technical precision guarantees consistent results every time you bake.
Troubleshooting Common Mistakes
When you’re perfecting a chocolate lava cake, several technical errors can prevent you from achieving that ideal molten center.
1. Overmixed Batter – Excessive mixing incorporates excess air and develops gluten, causing dense cakes with compromised flow.
Fold ingredients gently until just combined for ideal texture.
2. Cracked Tops – Overbaking or excessive oven temperature creates surface fissures.
Maintain precise 350°F temperatures and reduce baking time to 12-14 minutes maximum.
3. Insufficient Molten Center – Under-filling the ramekin or using improper chocolate-to-butter ratios (typically 2:1) prevents that signature lava flow.
Measure accurately and position chocolate precisely in the ramekin’s center.
Master these technical adjustments, and you’ll consistently produce restaurant-quality chocolate lava cakes with that perfect, unapologetic molten interior you’re after.
Serving and Presentation Ideas
Once you’ve mastered the technical execution of your chocolate lava cake, presentation becomes your canvas for elevating the dining experience. Your plating techniques determine the dessert’s visual impact—center the warm cake on a chilled plate, positioning it off-center for dynamic composition.
Dust cocoa powder strategically around the perimeter using a fine sieve, maintaining clean plate edges throughout.
Incorporate complementary elements: quenelles of vanilla bean gelato, microgreens for textural contrast, and edible gold leaf for sophistication.
Your table styling should reflect the cake’s elegance—use white porcelain, minimize clutter, and employ understated garnishes.
Temperature control proves critical; serve immediately from the oven to maximize the molten core’s visual and textural appeal. This precision transforms a simple dessert into an unforgettable culinary statement.
Variations to Try Next Time
Building on your mastered technique, you can innovate with flavor profiles by adjusting the chocolate’s cocoa percentage and incorporating complementary ingredients. Explore global variations to expand your repertoire:
- High-cocoa formulations (70-85% cacao) deliver intense depth, requiring adjusted sugar ratios to maintain emulsification balance
- Textural contrasts through inclusions like crispy praline shards, sea salt flakes, or espresso powder create dimensional complexity
- Infused butters—lavender, cardamom, or chile-infused—introduce sophisticated flavor dimensions without compromising structural integrity
You’ll discover that manipulating cocoa solids percentage directly affects viscosity and set time. Experiment with ganache-to-batter ratios when incorporating global variations from Italian hazelnut to Japanese matcha formulations.
These modifications demand precision in measurement and timing, ensuring your molten center maintains ideal consistency while accommodating new ingredients.
Frequently Asked Questions
Can I Make Chocolate Lava Cake Ahead of Time and Reheat It Later?
You can employ partial baking techniques to prepare your cake ahead.
Bake at 375°F for 12 minutes, leaving the center deliberately underbaked.
Cool completely, then refrigerate up to 24 hours.
When you’re ready, reheat using a 350°F oven for 8-10 minutes until the center reaches ideal molten consistency.
Alternatively, microwave individual ramekins for 30-45 seconds.
You’ll maintain that signature flowing center while gaining scheduling flexibility and independence in your timing.
How Long Does Chocolate Lava Cake Stay Fresh in the Refrigerator?
You’ll keep your chocolate lava cake fresh for 3-4 days when you maintain a storage temperature of 34-40°F in an airtight container.
Monitor odor indicators—any sour or fermented scent signals spoilage.
Use precise measurements: store at ideal refrigeration specs to preserve structural integrity and prevent moisture loss.
This methodology guarantees you maintain control over your dessert’s quality, giving you the freedom to enjoy premium results without compromising safety or taste profiles.
Can I Freeze Chocolate Lava Cake Batter Before Baking?
You can absolutely freeze chocolate lava cake batter before baking.
Pour your prepared batter into ramekins or freezer-safe containers and store at 0°F or below for up to three months.
When you’re ready to bake, you’ve got options: thaw the batter overnight in your refrigerator, or bake directly from frozen, adding 2-3 minutes to your standard baking time.
This freezer storage method gives you the freedom to enjoy fresh lava cake whenever you want.
What’s the Best Chocolate Type to Use for Lava Cake?
You’ll want to use bittersweet chocolate with a cocoa percentage between 60-70% for ideal results.
This composition delivers the molten center you’re after without overwhelming bitterness.
Precisely measure your chocolate—typically 4 ounces per ramekin—and chop it uniformly for even melting.
Combine it with butter at a 1:1 ratio, then fold in your remaining ingredients following standard emulsification methodology.
This approach gives you complete control over your dessert’s decadent outcome.
How Do I Fix a Lava Cake That Didn’t Cook Properly Inside?
You’ve got two solid options for your undercooked lava cake.
For Quick Rebake, return it to a 425°F oven for 2-3 minutes, monitoring closely.
Alternatively, use Microwave Rescue: place it on a microwave-safe plate, heat at 50% power for 30-second intervals until the center reaches 165°F internal temperature.
You’ll regain that perfect molten center without sacrificing your dessert’s structural integrity or your evening’s freedom.


Leave a Comment