Key Takeaways
- Combine 2 cups flour, 1¾ tsp baking powder, ½ tsp salt, ¾ cup sugar, ⅓ cup oil, 2 eggs, 1 tsp vanilla, and 1 cup chocolate chips.
- Whisk dry ingredients separately, then fold wet ingredients into dry until just incorporated to avoid overmixing.
- Bake at 375°F for 18–22 minutes in a preheated oven until golden-brown with clean toothpick test.
- Cool muffins in pan for five minutes, then transfer to wire rack for complete cooling before storage.
- Store in airtight containers at room temperature for 2–3 days or freeze up to three months after cooling completely.
Ingredients You’ll Need
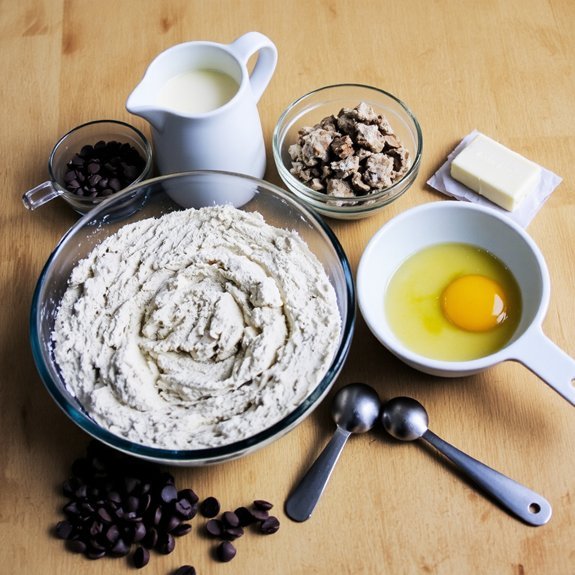
You’ll combine 2 cups of all-purpose flour, 1¾ teaspoons of baking powder, and ½ teaspoon of salt in a dry mixing bowl.
This foundational blend promotes proper leavening and structure throughout your muffins.
A foundational dry blend of flour, baking powder, and salt ensures proper leavening and structure throughout your chocolate chip muffins.
Next, gather your wet ingredients: ¾ cup granulated sugar, ⅓ cup vegetable oil, 2 large eggs, and 1 teaspoon vanilla extract.
You’ll whisk these together until fully emulsified before incorporating them into your dry mixture.
Consider ingredient sourcing carefully—select high-quality chocolate chips, ideally containing cocoa butter for superior flavor.
For allergen alternatives, you can substitute all-purpose flour with certified gluten-free blends or use aquafaba in place of eggs.
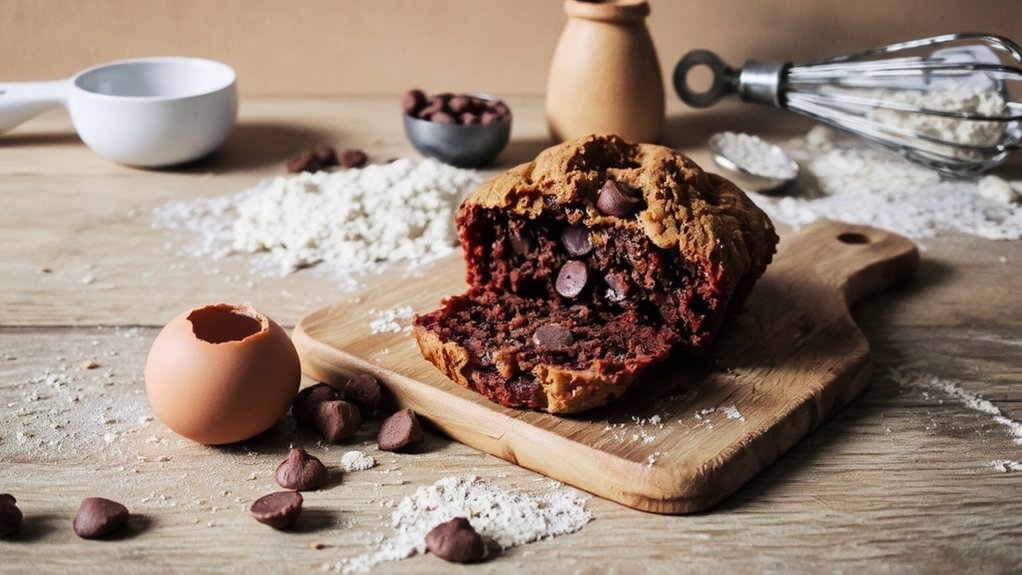
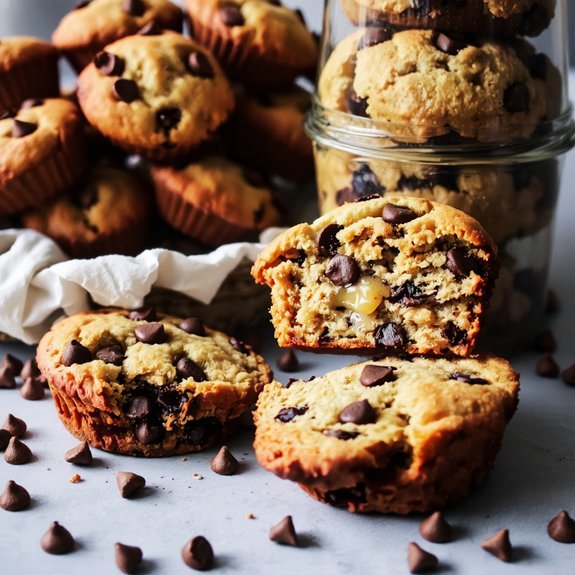
Add 1 cup chocolate chips to your batter, folding gently to distribute evenly.
These measured components form your muffin foundation, guaranteeing consistent results every time.
Step-by-Step Instructions
You’ll begin by preheating your oven to 375°F and preparing a standard 12-cup muffin tin with paper liners or a light coating of nonstick spray.
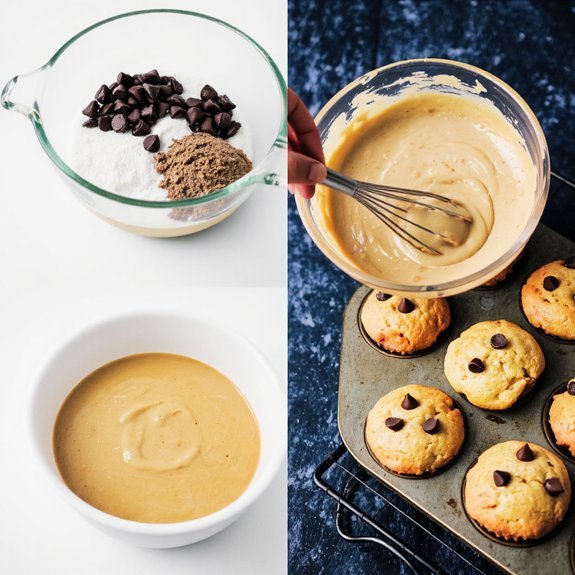
Next, you’ll combine your dry ingredients—all-purpose flour, baking powder, salt, and sugar—in one bowl, then whisk together your wet ingredients—eggs, milk, melted butter, and vanilla extract—in another before folding them together until just incorporated and studded with chocolate chips.
Finally, you’ll distribute the batter evenly among the muffin cups, filling each approximately two-thirds full, then bake for 18-22 minutes until a toothpick inserted in the center emerges clean.
Preparing Your Ingredients
Gather all ingredients and arrange them in small bowls or ramekins before mixing to guarantee an efficient workflow.
This mise en place approach streamlines your baking process and prevents mid-recipe scrambling.
Prepare your tools strategically:
- Preheat your oven to 350°F (175°C) for ideal muffin rise
- Line your muffin tin with paper liners or grease thoroughly
- Measure flour, sugar, baking powder, and salt into separate containers
- Whisk dry ingredients together in a large mixing bowl
Complete tool preparation by assembling your wet ingredient vessels.
Crack eggs into a measuring cup, combine melted butter and milk in another container, and have vanilla extract readily accessible.
This systematic organization allows you freedom to focus on technique rather than searching for components, ensuring consistent results and professional-quality muffins every time.
Mixing and Baking
With your mise en place complete, combine the wet ingredients by whisking the eggs, melted butter, milk, and vanilla extract together until fully emulsified.
In a separate bowl, whisk together flour, baking powder, salt, and sugar, creating an even dry mixture.
Fold the wet ingredients into the dry mixture using deliberate strokes—don’t overmix.
Minimal gluten development preserves your muffins’ tender crumb structure.
Gently incorporate chocolate chips into the batter, ensuring even distribution without excessive agitation.
Divide the batter among greased muffin cups, filling each three-quarters full.
This allows proper rise and batter aeration during baking.
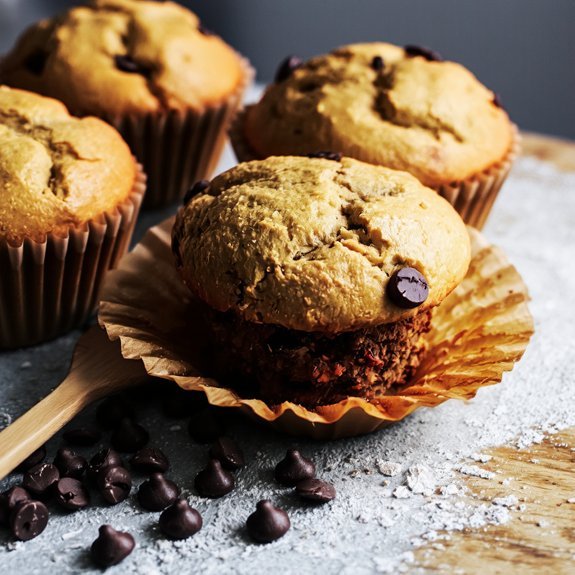
Bake at 375°F for 18-22 minutes until a toothpick inserted in the center emerges clean.
Cool muffins in the pan for five minutes before transferring to a wire rack.
Tips for Perfect Muffins
You’ll achieve consistently excellent results by measuring your dry and wet ingredients separately using the spoon-and-level method rather than scooping directly from containers.
Your mixing technique greatly impacts texture—combine dry ingredients first, then gently fold wet ingredients into the dry mixture until just incorporated to avoid overdeveloping gluten and creating dense muffins.
Preheat your oven to the precise temperature specified in your recipe and position your rack in the center, as uneven heat distribution or incorrect temperatures will result in uneven browning and improper rise.
Measuring Ingredients Accurately
Precision in measurement forms the foundation of consistent, high-quality muffins.
You’ll achieve superior results by using a digital scale for dry ingredients rather than relying on cup measurements. Scale calibration guarantees accuracy and eliminates measurement uncertainty that can compromise your batter’s texture and rise. Weigh flour, sugar, and cocoa powder in grams for repeatability.
Key measurement practices:
- Use a scale calibrated to zero before each ingredient
- Measure liquids in graduated cylinders at eye level
- Spoon flour into measuring cups, then level with a knife
- Acknowledge that environmental factors affect density and consistency
You’re freed from guesswork when you commit to precision. Room temperature, humidity, and ingredient compaction all introduce variables.
Mixing Techniques Matter Most
Once you’ve measured your ingredients precisely, the mixing method you select determines whether your batter develops the ideal crumb structure or becomes dense and tough. You’ll master muffin perfection by controlling your mixing cadence and listening for auditory cues that signal completion.
| Mixing Stage | Technique | Duration | Auditory Cue |
|---|---|---|---|
| Dry Ingredients | Whisk together | 30 seconds | Subtle swishing |
| Wet Ingredients | Blend thoroughly | 45 seconds | Smooth consistency |
| Combine | Fold gently | 15-20 folds | Minimal resistance |
| Final | Stop immediately | When just combined | No sloshing |
You’ll avoid overmixing by folding rather than stirring vigorously. This technique preserves air pockets essential for tender crumbs. The moment your batter achieves uniform color and texture—without visible flour streaks—you’ve reached the ideal stopping point. Restraint matters; continued mixing develops gluten, yielding tough, dense results. Your freedom to achieve bakery-quality muffins hinges entirely on respecting this critical window.
Oven Temperature and Timing
Because oven calibration directly impacts rise and browning, preheating to 400°F for 15 minutes guarantees consistent heat distribution before you introduce your batter.
Position your rack in the center of your oven for even heat circulation.
This rack positioning prevents uneven browning and promotes uniform muffin development.
Monitor your muffins between 18-22 minutes; they’re done when a toothpick inserted in the center emerges with minimal crumbs.
- Don’t skip the preheat duration—this establishes stable internal temperatures
- Rotate your pan halfway through if your oven has hot spots
- Test doneness by checking the golden-brown exterior and firm tops
- Remove muffins immediately to prevent overbaking and moisture loss
You’ve earned the freedom to bake confidently.
Trust your thermometer over guesswork, and you’ll achieve bakery-quality results consistently.
Storage and Freshness
You’ll want to store your chocolate chip muffins in an airtight container at room temperature, where they’ll maintain ideal freshness for approximately 2-3 days.
This shelf life extends considerably when you employ proper airtight storage techniques that prevent moisture loss and oxidation.
For extended preservation, you’ll freeze muffins in freezer-safe containers for up to three months.
Thaw them at room temperature for one hour before consuming.
If you prefer refrigeration, store them in airtight containers for up to one week, though this method accelerates staling through moisture migration.
You’ll maximize freshness by allowing muffins to cool completely before sealing containers—residual heat creates condensation that compromises texture.
Individual plastic wrap layering beneath container storage provides additional moisture barriers.
These methodologies guarantee best flavor retention and structural integrity throughout your chosen storage duration.
Variations and Customizations
How can you elevate basic chocolate chip muffins into distinctive creations that match your preferences?
You’ve got complete freedom to experiment with flavor pairings and dietary swaps that suit your lifestyle.
Consider these modifications:
- Espresso powder integration: Add 1-2 teaspoons to intensify chocolate notes without altering texture
- Nutty substitutions: Replace 25% of all-purpose flour with almond or hazelnut flour for depth
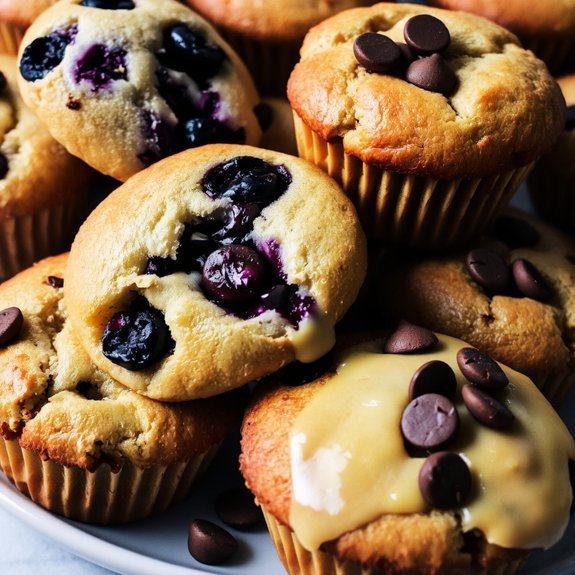
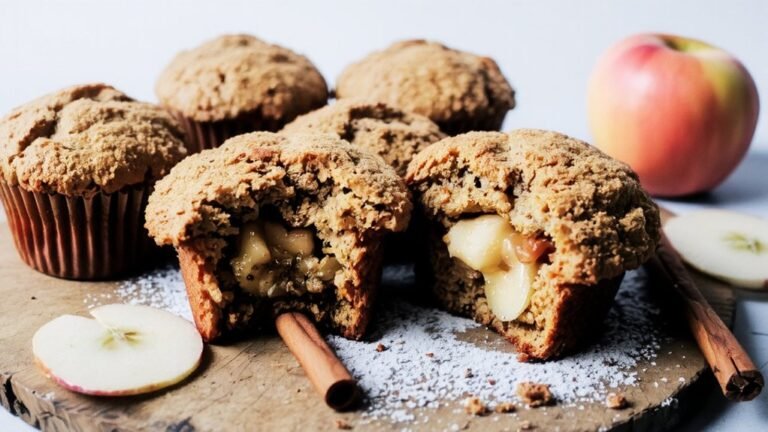
- Fruit inclusions: Incorporate dried cranberries, blueberries, or diced bananas alongside chocolate chips
- Oil alternatives: Swap butter for coconut or avocado oil for distinct flavor profiles
Implement these adjustments using precise measurements to maintain structural integrity.
For dairy-free applications, substitute whole milk with coconut or oat milk at 1:1 ratios.
These customizations preserve muffin crumb structure while delivering your desired taste profile and nutritional specifications.
Troubleshooting Common Issues
Even with meticulous attention to recipe parameters, you’ll encounter occasional batching inconsistencies that compromise texture and rise. Understanding root causes empowers you to recalibrate your technique and achieve consistent results.
| Issue | Solution |
|---|---|
| Soggy bottoms | Increase oven temperature by 25°F; use darker baking pans; position rack lower |
| Sunken tops | Reduce leavening agents; avoid opening oven door prematurely; verify oven calibration |
| Dense crumb structure | Incorporate dry ingredients gently; don’t overmix batter; check baking powder freshness |
| Uneven browning | Rotate muffin tin midway; ensure consistent batter distribution; calibrate oven thermostat |
You’ll prevent soggy bottoms by guaranteeing adequate heat distribution and proper pan selection. Sunken tops typically indicate excess leavening or temperature fluctuations during baking. Monitor your oven’s actual temperature with an independent thermometer—many household units vary noticeably from displayed settings. Adjust your methodology based on these diagnostic insights to eliminate inconsistencies and optimize your muffins’ structural integrity.
Frequently Asked Questions
Can I Make Chocolate Chip Muffins Without Eggs for Vegan Baking?
Yes, you can absolutely liberate your vegan baking by replacing eggs with flax eggs or aquafaba substitutes. Mix one flaxseed meal tablespoon with three water tablespoons per egg, letting it sit fifteen minutes for ideal binding.
Alternatively, use three aquafaba tablespoons—that’s chickpea liquid—whisked until foamy. Both methods create moisture and structure you need for perfectly risen chocolate chip muffins without compromising texture or flavor.
Your freedom to bake inclusively starts here.
How Many Muffins Does This Recipe Typically Yield?
You’ll typically yield 12 muffins from a standard batch. Your serving size depends on muffin cup capacity—standard muffin tins produce medium-sized portions.
For batch scaling, you’ve got flexibility: halve ingredients for 6 muffins or double them for 24. Precise measurements matter here; use volumetric or weight-based specifications consistently.
Professional terminology suggests using a #20 or #24 scoop for uniform portions, ensuring even baking and consistent results throughout your batch.
What’s the Nutritional Information per Muffin?
You’ll find that each muffin contains approximately 280 calories with a macronutrient profile of 8g protein, 35g carbohydrates, and 12g fat.
The calorie breakdown distributes roughly 29% from fats, 50% from carbohydrates, and 11% from proteins. You’re getting 2g dietary fiber and 18g sugars per serving. These precise measurements let you maintain complete control over your nutritional intake without compromising on indulgence or taste satisfaction.
Can Frozen Muffins Be Reheated, and How?
You can absolutely reheat your frozen muffins using two effective thawing techniques. For microwave reheating, place one muffin on a microwave-safe plate and heat at 50% power for 30-45 seconds, checking for even warmth.
Alternatively, thaw muffins at room temperature for 1-2 hours before serving. You’ve got the flexibility to choose whichever method fits your schedule best, ensuring ideal texture and taste recovery.
What Equipment Do I Need to Make These Muffins?
You’ll need muffin tins with standard 12-cup capacity for ideal baking results. Measuring cups—both dry and liquid varieties—ensure precise ingredient proportions critical to texture and rise.
Additionally, gather a mixing bowl, whisk, wooden spoon, and rubber spatula for thorough incorporation without overworking your batter. You’ll want an oven thermometer to verify accurate temperature calibration.
Finally, obtain a toothpick for doneness testing, demonstrating your command over the baking process from start to finish.


Leave a Comment