Key Takeaways
- Use two pounds of fresh Bing or Rainier cherries, pitted thoroughly, combined with sugar, cornstarch, and lemon juice.
- Create a laminated pie crust by combining cold butter with flour until breadcrumb-textured, then refrigerate disks before rolling.
- Bake at 375°F on the lower oven rack for 45–50 minutes until deep golden-brown with bubbling filling edges.
- Cool the pie completely for 4–6 hours at room temperature before slicing to ensure structural integrity and clean cuts.
- Refrigerate cooled pie up to four days in an airtight container or freeze for three months wrapped securely.
Ingredients You’ll Need
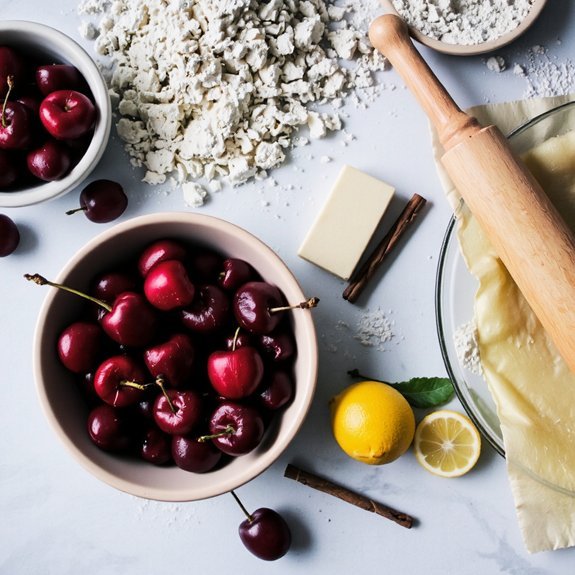
You’ll need several key components to construct this classic dessert. Start with two pounds of fresh cherries—your seasonal selection should feature dark, firm varieties like Bing or Rainier for ideal flavor and texture.
Start with two pounds of fresh cherries—dark, firm varieties like Bing or Rainier deliver ideal flavor and texture.
You’ll require all-purpose flour, granulated sugar, cornstarch, and lemon juice for the filling.
For the crust, gather unsalted butter, salt, ice water, and additional flour.
If you’re managing dietary restrictions, you’ve got allergy alternatives: substitute regular flour with gluten-free blends or almond flour, and replace butter with coconut oil or dairy-free options.
You’ll also need vanilla extract, nutmeg, and almond extract for depth.
Pit your cherries thoroughly—this step demands precision to prevent shell fragments.
Measure all ingredients by weight when possible for accuracy and consistency in your final product.
Preparing the Pie Crust
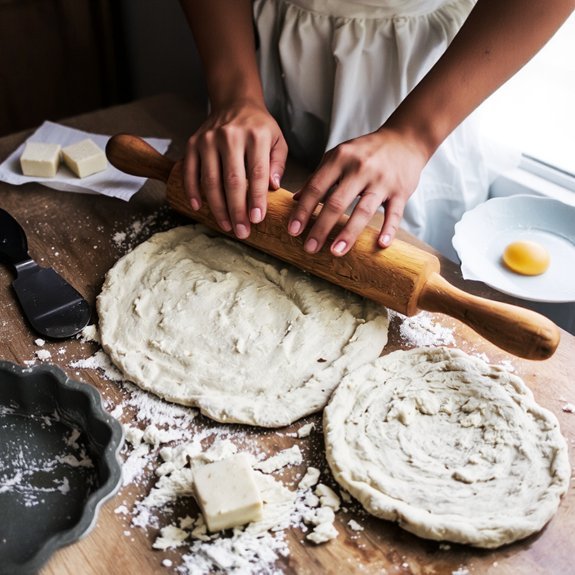
Once you’ve gathered your ingredients and prepped your cherries, it’s time to construct the foundation that’ll support your filling. You’ll combine flour, salt, and cold butter, cutting the butter into pea-sized pieces until the mixture resembles coarse breadcrumbs. This technique, known as lamination in pastry terminology, creates those desirable flaky layers.
Add ice water gradually, mixing until the dough just comes together—avoid overworking it, which toughens the crust.
Divide the dough in half, shape each into a disk, and refrigerate for at least thirty minutes. Regional variations exist; some bakers prefer all-butter crusts for richness, while others use shortening for superior flakiness. You can roll between parchment paper to prevent sticking.
Your crust is now ready for the pan, giving you complete control over your cherry pie’s structural integrity and flavor profile.
Making the Cherry Filling
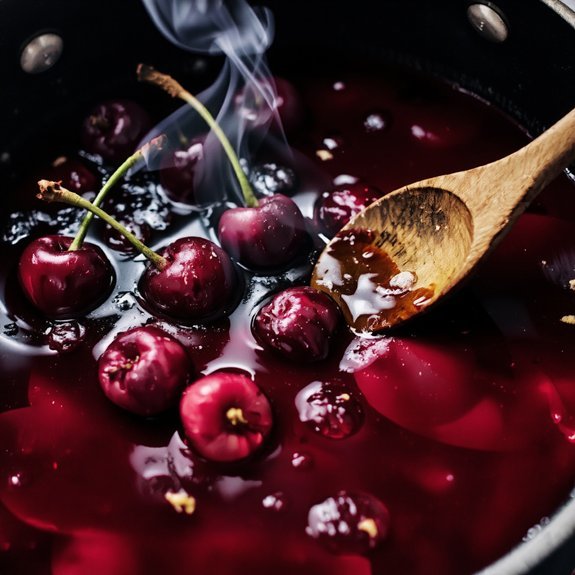
Combining your pitted cherries with sugar, cornstarch, and lemon juice creates the foundation for a perfectly textured filling.
You’ll want to measure precisely: two pounds of fresh cherries, three-quarters cup of sugar, and two tablespoons of cornstarch guarantee ideal consistency without excessive thickening.
Toss your ingredients together and let them macerate for fifteen minutes, allowing the cherries to release their natural juices.
This Texture Technique prevents a gummy, overcooked result.
You’ll notice the mixture begins transforming into a cohesive filling.
For Color Preservation, add one-eighth teaspoon of almond extract, which enhances the cherry’s vibrant hue without darkening it during baking.
Stir gently to distribute the cornstarch evenly, preventing lumps that compromise your filling’s professional appearance.
Your prepared filling is now ready to transfer into your waiting crust.
Assembling Your Pie
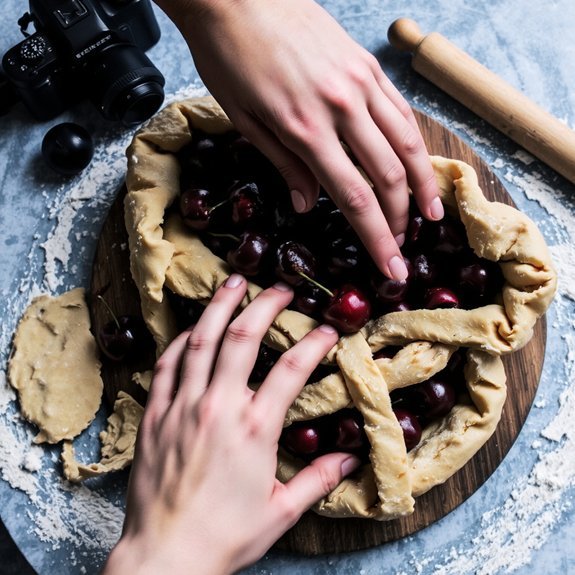
You’ll begin by placing your pre-chilled crust into a 9-inch pie dish, ensuring it fits snugly without stretching.
Next, you’ll pour your cooled cherry filling into the crust and apply an egg wash to the crust edges before positioning the top crust, then seal the edges using a fork or crimping technique.
Finally, you’ll cut vents into the top crust to allow steam to escape during baking.
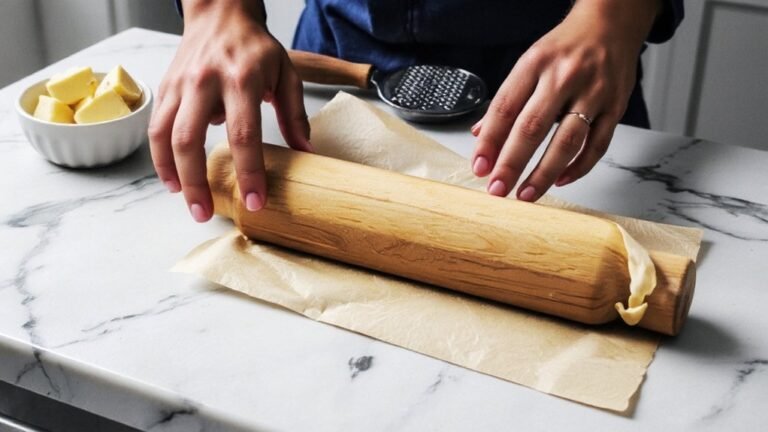
Crust Preparation Basics
Before assembling your pie, make sure your chilled dough’s been removed from refrigeration 5-10 minutes prior to rolling—this prevents cracking while maintaining its structural integrity.
Work on a lightly floured surface using a pastry cloth to minimize gluten management issues.
Roll your dough to 1/8-inch thickness, rotating it 90 degrees every two rolls for even distribution.
The lamination technique creates distinct butter layers that yield superior flakiness.
Apply gentle, consistent pressure without overworking the dough.
Transfer your rolled crust carefully to your 9-inch pie dish, allowing a half-inch overhang.
Trim excess dough with a knife, then crimp edges using your thumb and forefinger at half-inch intervals.
Chill the lined dish for 15 minutes before filling to stabilize the structure and guarantee ideal baking results.
Filling and Sealing Techniques
Layering your cherry filling requires precision to achieve even distribution and prevent a soggy bottom crust.
Spread a thin cornstarch mixture across the baked base before adding your prepared cherries.
This barrier absorbs excess moisture while maintaining structural integrity.
Pour filling to approximately ¾ inch below the rim, ensuring consistent depth throughout.
Position your top crust carefully, then seal edges using a fork or your fingertips with firm, even pressure.
This creates an airtight bond that traps steam effectively.
Cut decorative vents in your top crust using a sharp knife—these release steam gradually and prevent explosive bubbling.
Apply edge embossing with crimping tools or your thumb for both functional and aesthetic results.
Brush the surface with egg wash for golden color and professional appearance.
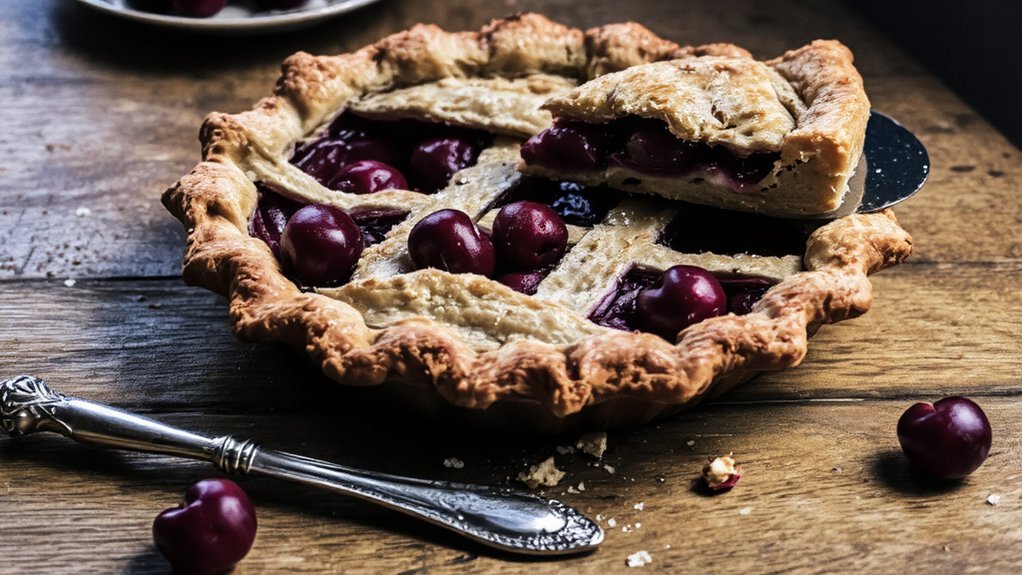
Baking Instructions
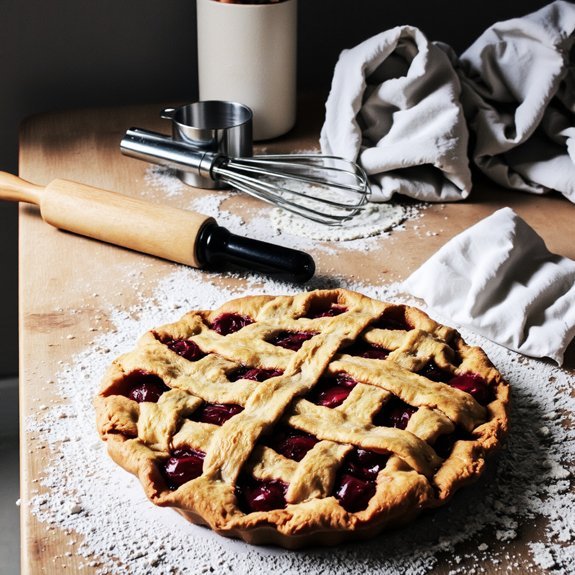
Preheat your oven to 375°F (190°C) and position the rack in the lower third to guarantee even heat distribution around your assembled pie.
You’ll place your filled pie shell directly on the preheated rack, allowing the bottom crust to set properly while the filling bakes through.
Bake for 45-50 minutes until the crust achieves a golden-brown exterior and the filling bubbles slightly at the edges.
Oven Temperature Guidelines
What’s the ideal temperature for achieving that perfect golden crust?
You’ll want to preheat your oven to 375°F (190°C) for best results.
This temperature balances heat distribution, ensuring your crust bakes evenly without burning while your filling cooks thoroughly.
Position your rack in the lower-middle section to promote bottom crust browning.
Consider energy efficiency by avoiding temperature fluctuations—don’t open the door during baking, which wastes heat and extends cooking time.
Bake for 45-50 minutes until the crust reaches a deep golden-brown hue.
Safety considerations demand you use oven mitts and maintain proper ventilation.
If edges brown too quickly, cover them with foil.
You’ve got complete control over this process—trust your instincts and adjust based on your oven’s individual characteristics.
Crust and Filling Assembly
Now that you’ve prepared your oven, you’re ready to assemble your pie.
Start by selecting appropriate tools—a rolling pin, pastry brush, and sharp knife—to streamline your process.
Organize your workspace efficiently by positioning your prebaked crust, filling, and assembly ingredients within arm’s reach.
Pour your cherry filling into the crust, distributing it evenly to prevent soggy spots.
Leave a half-inch border around the edges for sealing.
If you’re adding a top crust, brush the bottom edges with water to create an adhesive seal.
Carefully place the second crust over the filling, pressing the perimeters together firmly.
Trim excess dough and crimp the edges using a fork or your fingers for a professional finish.
Cut three to four steam vents into the top crust before baking.
Cooling and Serving Tips
Once you’ve removed your cherry pie from the oven, you’ll need to let it cool completely before slicing—typically 4-6 hours at room temperature or 2-3 hours if you’ve refrigerated it.
| Serving Element | Recommendation |
|---|---|
| Temperature | 65-70°F for ideal flavor release |
| Slice thickness | 1/4 to 3/8 inch for structural integrity |
| Plating suggestions | Center slice on chilled ceramic plate |
| Garnish pairing | Vanilla bean whipped cream or crème fraîche |
| Presentation timing | Serve within 2 hours of slicing |
Precision in cooling prevents filling separation and guarantees clean cuts. You’ll achieve superior texture and flavor stability by respecting these parameters. Plate immediately before serving to maintain structural integrity and visual appeal. Your freedom to customize accompaniments—whether bourbon-infused cream or lavender-dusted berries—elevates the presentation without compromising the pie’s integrity.
Storage and Make-Ahead Options
After you’ve mastered the serving fundamentals, extending your cherry pie’s shelf life becomes the next consideration.
You can refrigerate your cooled pie for up to four days in an airtight container.
For extended storage, freeze the pie at 0°F for up to three months.
Wrap it thoroughly in plastic wrap, then aluminum foil, preventing freezer burn and oxidation.
Implement systematic freezer labeling with the pie’s contents and freeze date for efficient inventory management.
When you’re ready to enjoy it, employ proper thawing methods by refrigerating the pie overnight rather than rapid room-temperature thawing.
Rapid room-temperature thawing compromises texture and safety.
You can also prepare unbaked pies ahead, freezing the assembled filling and crust separately for convenient assembly later.
This strategic approach grants you maximum flexibility while maintaining superior pie quality and food safety standards.
Frequently Asked Questions
Can I Use Frozen Cherries Instead of Fresh Cherries for This Recipe?
Yes, you can absolutely substitute frozen cherries for fresh ones in your pie.
You’ll want to thaw them completely before incorporating them into your filling—this prevents excess moisture from compromising your crust’s structural integrity. The thawing tips matter: drain any accumulated liquid thoroughly.
Note that frozen cherries often exhibit greater flavor concentration due to their processing method, potentially intensifying your pie’s taste profile. Adjust your sugar measurements accordingly to maintain ideal sweetness balance.
What’s the Best Substitute if I Don’t Have Cornstarch for Thickening?
You can substitute cornstarch with flour thickener or arrowroot powder.
Use a 1:1 ratio when replacing cornstarch with arrowroot powder for equivalent thickening power.
If you’re using flour thickener, you’ll need approximately 2 tablespoons per cup of filling instead of 1 tablespoon cornstarch.
Arrowroot powder won’t cloud your filling and creates a glossier finish.
Both options give you complete control over your pie’s consistency without compromising quality or texture.
How Do I Prevent My Pie Crust From Becoming Soggy on Bottom?
You’ll prevent soggy bottoms by blind baking your crust at 375°F for 8-10 minutes until partially set.
This pre-baking technique creates a moisture barrier.
Additionally, employ venting techniques by docking the crust with fork holes, allowing steam escape.
You’ve got the autonomy to brush melted butter or egg wash onto the pre-baked surface for extra protection.
These precise methods guarantee structural integrity and ideal texture in your finished pie.
Can I Prepare This Pie Filling One Day in Advance?
You can absolutely prepare your filling one day ahead.
Store it in an airtight container at 4°C for overnight chilling.
This method actually enhances your final product—flavor melding occurs as the cherries macerate with sugar and lemon juice, intensifying complexity.
Before assembly, make sure you’ve achieved proper temperature equilibration to room conditions.
This precision timing gives you complete autonomy over your baking schedule while optimizing taste development and textural integrity throughout your pie’s composition.
What’s the Difference Between Tart and Sweet Cherry Pie Recipes?
You’ll find tart cherry recipes deliver sharp, acidic flavor profiles requiring less added sugar, while sweet cherry varieties demand increased sweeteners to balance their natural mildness.
Tart cherries—typically Montmorency types—yield vibrant, complex tastes; sweet cherries produce subtle, delicate notes.
Your filling’s pH differs notably: tart cherries need minimal thickening agents, whereas sweet varieties require precise measurement adjustments.
Choose based on your desired tartness level and ingredient flexibility.


Leave a Comment