
Key Takeaways
- Use European-style butter with ≥82% butterfat; maintain 60–65°F plasticity for optimal lamination and flaky texture.
- Mix 500g flour, 300ml milk, 10g salt, 7g yeast, 25g sugar, and 50g butter for dough base.
- Execute three letter folds with 20–30 minute rests between turns to create 729 layers; chill 30 minutes minimum.
- Proof final shaped croissants at 75°F for 2–3 hours until 50–75% volume increase with visible layer definition.
- Monitor dough and butter temperatures continuously; work quickly to prevent butter from warming above 68°F or cooling below 60°F.
Ingredients You’ll Need
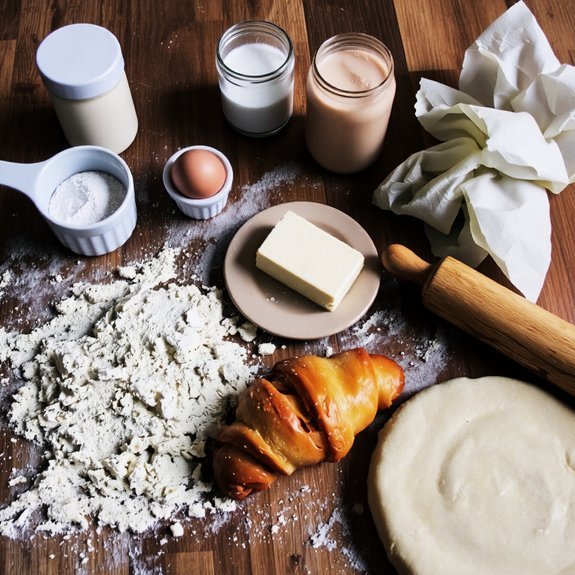
You’ll need 500g of bread flour, 300ml of cold whole milk, 10g of salt, 7g of instant yeast, 25g of caster sugar, 50g of unsalted butter for the dough, and 250g of cold unsalted butter for lamination.
You can experiment with flour varieties—try substituting spelt or heritage wheat for unique flavor profiles.
For milk substitutes, you’ve got freedom to choose almond, oat, or cashew options without compromising lamination quality, though whole milk delivers superior results.
You’ll also need filtered water for hydration adjustments and a reliable kitchen scale for precision.
Make sure all butter stays cold throughout preparation; this temperature differential proves critical for proper lamination.
You may want parchment paper and a bench scraper for handling dough efficiently during shaping phases.
Understanding the Dough
Creating the perfect croissant dough requires understanding how gluten development and hydration work together to build structure for lamination. You’ll control fermentation timing to achieve ideal flavor complexity without over-proofing your laminated layers.
| Component | Function | Target % |
|---|---|---|
| Flour | Gluten matrix formation | 60 |
| Water | Hydration level | 40 |
| Butter | Lamination separation | 50 |
You’re working with techniques refined across dough history and regional variations—from Vienna’s kipferl to France’s croissant moderne. You’ll maintain precise temperature control throughout bulk fermentation and lamination cycles. Each fold creates exponential butter-flour layers. You manipulate gluten networks deliberately, building strength without excessive mixing. Your freedom lies in mastering timing: cold retardation periods, controlled fermentation, and exact hydration ratios determine whether you’ll achieve those coveted, distinct, crispy-yet-tender layers that distinguish professional croissants from amateur attempts.
Preparing Your Butter Block
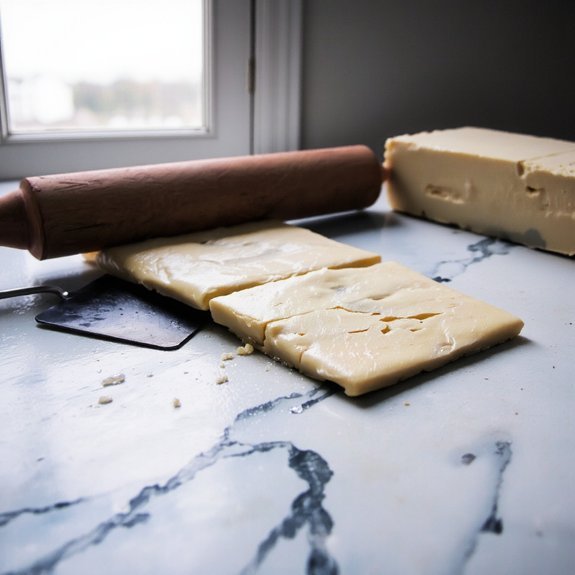
Tempering butter to the ideal plasticity is essential before lamination begins—it must be firm enough to maintain distinct layers yet pliable enough to roll without cracking or shattering.
You’ll want your butter block at 60-65°F for best workability.
Select European-style butter with at least 82% butterfat; superior brand ethics guarantee quality consistency.
Check butter aesthetics—the color should be pale yellow and uniform throughout, indicating proper churning standards.
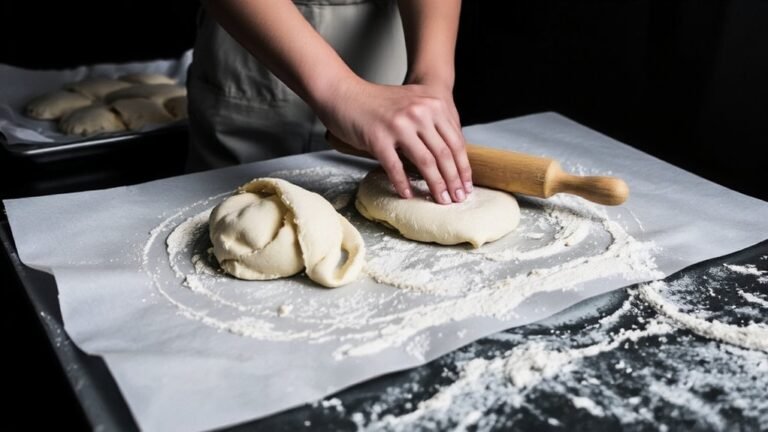
Cut your cold butter into a 6-by-8-inch rectangle, then pound it gently with a rolling pin to achieve even thickness.
This methodical approach prevents weak spots.
You’re establishing the foundation for precise lamination layers.
Work quickly to maintain temperature control, keeping your butter block cool between intervals.
Proper preparation guarantees the crisp, delicate texture that defines exceptional croissants.
The First Turn: Folding Technique
You’ll need to maintain your butter block at 60-65°F to achieve proper lamination without it breaking through the dough or becoming too soft.
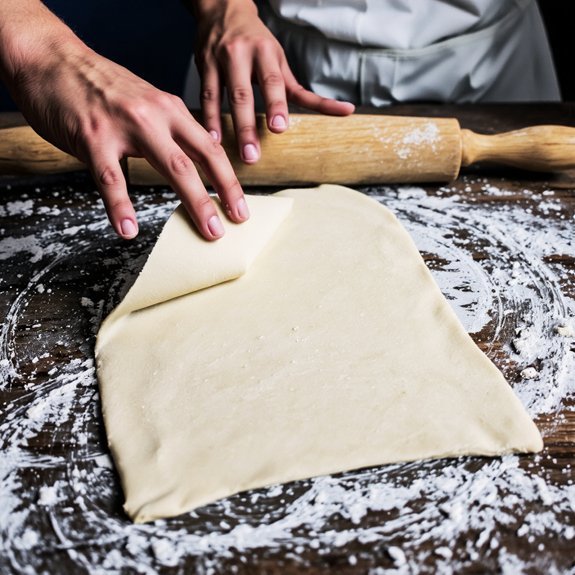
Execute your first fold by placing the dough on a floured surface, folding it into thirds (letter-fold style), then rotating it 90 degrees before rolling it back to your original dimensions.
Watch carefully for uneven thickness and air pockets that’ll compromise your layers—these common mistakes result from rushing the process or applying inconsistent pressure during the rolling phase.
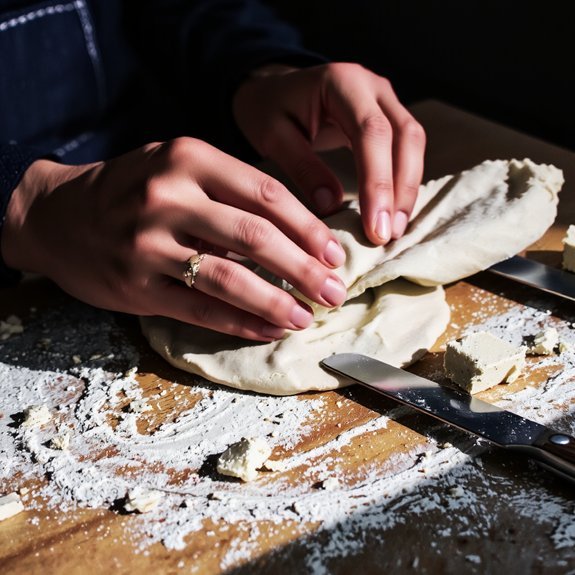
Laminating the Dough Properly
Once your dough’s rested for 30 minutes at room temperature, you’ll dust your work surface lightly with flour and gently roll the dough into a 16-inch square, roughly ¼-inch thick.
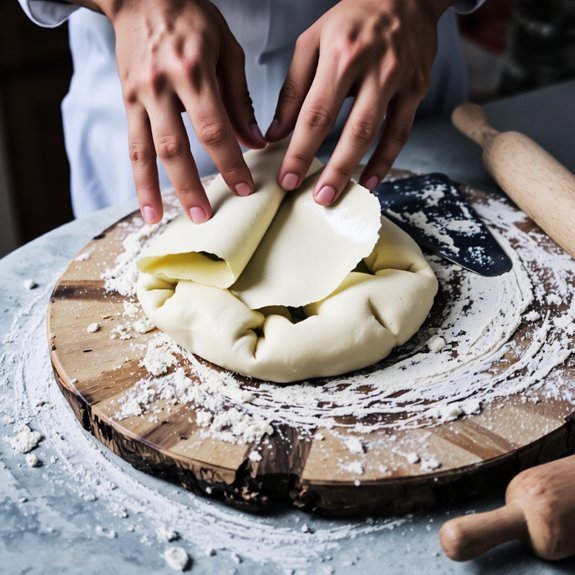
Position your cold butter block in the center, then fold all four corners inward, creating an envelope shape.
Seal the edges by pressing firmly with your rolling pin.
Roll this butter-enclosed dough into a 16-by-8-inch rectangle.
Fold it into thirds like a letter—this constitutes your first turn.
Rotate 90 degrees and repeat the rolling and folding process twice more, resting 20 minutes between turns.
Maintain proper workspace ergonomics by keeping your work surface at elbow height and ensuring your tool maintenance routine includes regular rolling pin cleaning to prevent dough sticking.
These precision steps guarantee ideal lamination.
Butter Temperature Essentials
Because butter’s plasticity directly determines lamination success, maintaining a temperature between 65-68°F throughout the folding process is critical.
You’re controlling fat crystallization patterns that affect your dough’s structural integrity.
Butter exhibits polymorphism types—beta, beta-prime, and alpha crystals—each with distinct melting points.
At your target temperature, you’ll achieve beta-prime crystals, which create ideal laminar sheets without bleeding through your dough or cracking during folds.
You’ll need a reliable thermometer to monitor butter consistency.
Cold butter becomes brittle and fractures; warm butter softens excessively and merges with dough layers, destroying separation.
This precise temperature window isn’t negotiable.
Between each fold, you’re free to rest your dough, but never exceed your butter’s temperature parameters.
Your croissant’s rise, flake structure, and golden-brown finish depend entirely on this fundamental control.
Preventing Common Folding Mistakes
The first turn demands deliberate precision: fold your dough in thirds, aligning edges perfectly to maintain even butter distribution across all layers.
You’ll avoid common mistakes by keeping your workspace clean—equipment maintenance prevents dough from sticking and compromising your lamination.
Position yourself comfortably; proper workstation ergonomics reduces fatigue and enhances accuracy during this critical step.
Don’t rush the process.
You’ve got to make sure your dough remains cool throughout folding.
If it warms beyond fifty-five degrees Fahrenheit, you’re risking butter integration failure.
Use a bench scraper with controlled, deliberate motions rather than aggressive pressure.
You’ll find that gentle, methodical folding produces superior layer separation.
Mark each completed turn on your dough’s surface using light indentations—this tracking system prevents costly mistakes and guarantees you’re executing the exact number of turns your recipe requires.
Mastering the Second and Third Turns
You’ll master the second and third turns by maintaining precise lamination technique—rotating your dough 90 degrees and executing identical folds to create the requisite 729 layers.
Temperature control’s critical during this stage; keep your dough between 65-68°F to prevent butter from breaking through the gluten matrix or becoming too soft.
Your fold precision and timing determine whether you’ll achieve the delicate, even layers that distinguish exceptional croissants from mediocre ones, so execute each turn within 20-30 minutes of the previous fold and rest periods.
Lamination Technique Essentials
Executing the second and third turns requires precision timing and controlled temperature management to develop the croissant’s signature 729 layers.
You’ll master lamination by maintaining well-organized workstation layout and selecting proper tools for your workflow.
Key essentials include:
- Temperature control: Keep your dough at 60-65°F between turns; chill for 30 minutes minimum
- Tool selection: Use a sharp bench scraper and calibrated rolling pin for consistent thickness
- Workstation layout: Organize your space to minimize dough handling and maximize efficiency
You’ll execute each turn by rolling your folded dough to ¼-inch thickness, then folding it into thirds.
Rotate 90 degrees before each subsequent turn.
This methodical approach creates independent, flaky layers that define superior croissants.
Your precision determines whether you achieve that coveted crispy exterior and tender interior.
Temperature Control Matters
As you progress through your second and third turns, maintaining precise temperature control becomes critical to preventing butter from breaking through the dough layers.
You’ll work between 65–68°F to achieve ideal lamination without compromising structure.
Monitor ambient variations in your kitchen closely.
Warmer conditions accelerate butter softening, risking blowouts during folding.
Colder environments demand longer resting periods between turns.
Verify thermostat calibration regularly using an accurate thermometer.
Your dough’s core temperature matters more than room temperature alone.
Rest your laminated dough for 30–45 minutes between turns in consistent conditions.
If butter leaks during folding, refrigerate immediately for 15 minutes before resuming.
You’re not fighting physics—you’re mastering it through disciplined temperature management.
This control separates mediocre croissants from exceptional ones.
Fold Precision and Timing
The second and third turns demand meticulous technique to maintain the laminated structure you’ve established.
Work with metronome pacing—consistent, unhurried movements prevent layer damage.
Your gesture economy matters; every motion should serve a purpose without wasted effort.
- Roll your dough to precisely ⅛-inch thickness, maintaining even pressure across the entire surface
- Fold with confidence using a single deliberate motion—hesitation creates compression and weakens lamination
- Rest 30 minutes between turns at 40°F to allow gluten relaxation and butter solidification
You’re building something that demands respect.
Each fold creates exponential layers; imprecision compounds.
Chill immediately after folding to lock in structure.
Your precision determines whether you’ll achieve those distinct, crackling sheets or dense, disappointing results.
Chilling and Resting Periods
Once you’ve completed your lamination folds, you’ll need to refrigerate the dough at 40°F (4°C) for a minimum of 30 minutes between each set of turns to allow the gluten to relax and the butter to re-solidify. This chilling period optimizes your workflow by preventing dough overheating during manipulation. Extended resting enables flavor maturation through enzymatic activity and fermentation development.
| Stage | Temperature | Duration |
|---|---|---|
| Between Turns | 40°F (4°C) | 30 minutes minimum |
| Final Proof | 75°F (24°C) | 2-3 hours |
| Overnight Rest | 36-40°F (2-4°C) | 8-16 hours |
You’ll achieve superior lamination definition and extensibility by respecting these intervals. Don’t rush the process—adequate resting periods directly correlate with superior croissant structure and butteriness, giving you the freedom to create exceptional pastries.
Shaping Your Croissants
You’ll now master the folding technique by executing precise tri-folds to create distinct laminated layers throughout your dough.
Roll your chilled dough to a uniform ¼-inch thickness, then fold it into thirds—fold the bottom third up, then fold the top third down over it—rotating 90 degrees between each fold.
You’ll repeat this rolling and folding sequence to build the hundreds of thin butter layers that give croissants their characteristic flaky, crispy texture.
Folding Technique Mastery
Laminating your dough requires precise folding to create the distinct butter layers that define a croissant’s flaky texture.
You’ll achieve mastery through mindful practice and ergonomic tools that reduce hand fatigue during this demanding process.
Execute these critical folding steps:
- Letter fold: Fold dough into thirds, aligning edges perfectly to maintain uniform butter distribution
- Book fold: Fold dough in half, rotating ninety degrees between folds to guarantee even lamination
- Rest periods: Chill dough twenty minutes between folds, allowing gluten relaxation and preventing butter breakdown
Your success depends on maintaining precise sixty-eight-degree Fahrenheit dough temperature.
Use a calibrated thermometer to monitor conditions.
Apply consistent, moderate pressure—never aggressive force—to preserve delicate butter sheets.
Between folds, dust your work surface lightly with flour to prevent sticking without compromising lamination integrity.
This disciplined approach liberates you from croissant failures.
Layering and Rolling
After your final fold and rest period, you’re ready to shape the laminated dough into croissants.
Roll your dough to ¼-inch thickness on a floured surface, maintaining proper rolling ergonomics by keeping your shoulders relaxed and elbows at ninety degrees.
Cut triangles measuring 4 inches at the base and 8 inches in length.
Starting from the base, roll each triangle tightly toward the point, creating the signature crescent shape.
Position your croissants point-side down on parchment paper, spacing them 3 inches apart to allow for expansion.
For enhanced pattern decoration, brush the surface with egg wash before the final proofing.
This meticulous shaping technique determines your croissant’s structural integrity and final rise, ensuring those coveted flaky layers remain distinct throughout baking.
The Final Proof
Once you’ve shaped your croissants, they’ll need their final rise before baking.
This proofing stage typically requires 2-3 hours at room temperature, or 8-12 hours refrigerated, allowing gluten relaxation and fermentation.
Proofing requires 2-3 hours at room temperature or 8-12 hours refrigerated, enabling gluten relaxation and fermentation.
Monitor these critical indicators:
- Visual cues: Croissants should increase 50-75% in volume, appearing puffy yet maintaining distinct lamination layers
- Aroma evolution: A subtle, pleasant yeasty scent signals proper fermentation and flavor development
- Touch test: Gently press the dough; it should spring back slowly, indicating readiness without over-proofing
Maintain 70-75°F ambient temperature for ideal results.
Avoid drafts and temperature fluctuations that compromise structure.
Once your croissants display these signs, you’re prepared for baking.
Don’t skip this stage—it’s essential for achieving that characteristic flaky texture and complex flavor profile you’re pursuing.
Baking to Golden Perfection
Preheat your oven to 400°F (200°C) with a baking stone or sheet positioned on the middle rack, allowing at least 30 minutes for thermal equilibration.
Before baking, apply your egg wash glaze applications evenly across each croissant’s surface using a pastry brush, ensuring complete coverage without pooling.
Bake for 18–22 minutes until deep golden-brown coloration develops.
Monitor browning reactions closely during the final five minutes; croissants brown rapidly once surface sugars caramelize.
You’ll know they’re done when the exterior achieves rich mahogany tones and the laminated layers separate visibly at the edges.
Remove from heat immediately and transfer to a wire cooling rack.
This halts residual cooking and prevents moisture accumulation beneath the croissant.
Allow them to cool for at least 10 minutes before serving, maximizing your freedom to enjoy ideal texture and flavor.
Tips for Success and Troubleshooting
Because croissant lamination demands precision, you’ll achieve ideal results by maintaining butter at 65–68°F throughout folding—too warm and it’ll leak between dough layers, too cold and it’ll crack.
Master these critical techniques:
- Kitchen sanitation: Sanitize your work surface and tools before starting; residual flour or debris compromises lamination integrity and final texture
- Time management: Schedule your lamination sessions strategically—rushing creates uneven folds, while excessive delays allow gluten relaxation and dough degradation
- Temperature monitoring: Use a thermometer consistently; even slight deviations derail your croissants’ flaky structure
Common troubleshooting issues include greasy, dense croissants (butter temperature too high), cracked dough (temperature too low), or uneven layers (inconsistent folding pressure).
You’ll prevent these problems through methodical adherence to specifications and systematic process control.
Frequently Asked Questions
Can I Use Margarine or Oil Instead of Butter for Croissants?
You shouldn’t substitute margarine alternatives or oil for butter in croissants.
Butter’s crystalline structure creates lamination—those flaky layers you’re after.
Oil won’t solidify properly between dough folds, destroying texture development.
Margarine alternatives lack butter’s melting point precision.
You’ll need 68% fat content minimum with specific plasticity characteristics.
If you’re seeking freedom from dairy, try European-style vegan butter blocks formulated for laminated doughs.
They’re engineered to match butter’s thermal properties and lamination capability exactly.
How Far in Advance Can I Prepare Croissant Dough Before Baking?
You can prepare your croissant dough up to three days ahead.
After laminating, you’ll fold and chill your dough, then perform overnight retardation at 38-40°F for 8-16 hours.
Multi-day proofing allows you to shape croissants and cold-proof them for 24-48 hours before final bulk fermentation.
This extended timeline gives you complete control—you’re not locked into one baking day, and the cold fermentation actually develops superior flavor complexity and better lamination definition.
What’s the Difference Between Croissants and Danish Pastries?
You’ll find that croissants and Danish pastries differ fundamentally in their lamination technique and cultural origins. Croissants use precise butter-to-dough ratios creating uniform, delicate layers with consistent texture contrast.
Danish pastries incorporate fillings and employ looser folding methods, yielding denser crumbs.
French croissants demand strict methodical precision; Danish pastries—originating from Vienna—allow you creative freedom with varied fillings and shapes. Both require cold fermentation, but you’ll achieve distinct results through their technical distinctions.
Why Did My Croissants Turn Out Dense Instead of Flaky?
You’ve likely encountered insufficient lamination or overproofed dough.
If you didn’t fold your butter layers precisely enough—aim for six distinct folds with exact quarter-turn rotations—you’ll lose that signature flakiness.
Overproofing causes your dough to collapse during baking, yielding dense results.
Control your bulk fermentation to 1-2 hours maximum at 75°F.
Execute tight lamination techniques and proof your shaped croissants only 45-60 minutes until they’re just puffy, not overly risen.
Can I Freeze Unbaked Croissants and Bake Them Later?
You can absolutely freeze unbaked croissants. Use flash freezing by placing shaped dough on parchment at -18°C for two hours before transferring to airtight containers.
When you’re ready, employ two thaw methods: refrigerate overnight at 4°C, then proof at room temperature for 90 minutes, or proof directly from frozen for 3-4 hours.
Both methods preserve your lamination’s integrity and deliver exceptional flaky results without compromising your baking schedule.


Leave a Comment