
Key Takeaways
- Whisk eggs and sugar until pale and fluffy, then gently fold in flour to create an airy sponge cake layer.
- Heat milk to 180–190°F, temper egg yolks with cornstarch and sugar, then combine and thicken for custard filling.
- Use high-quality couverture chocolate with 60–70% cacao and minimum 31% cocoa butter for glossy ganache topping.
- Spread pastry cream between cooled cake layers at 45-degree angle, then refrigerate assembled pie at least two hours.
- Chill ganache-topped pie for at least four hours at 35–40°F before slicing for clean, professional presentation.
Ingredients You’ll Need
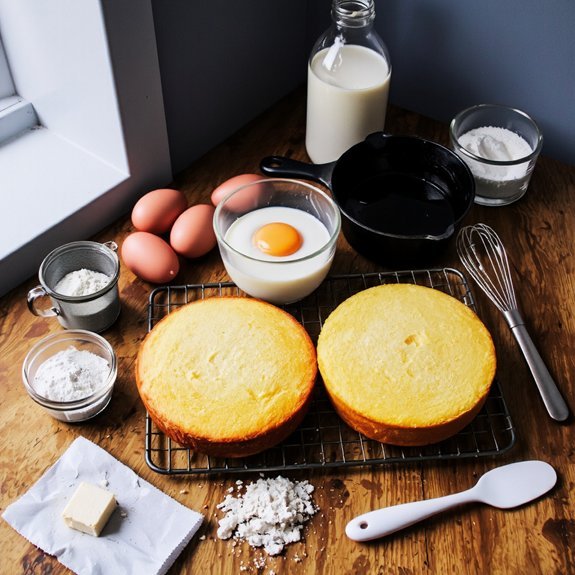
Since you’ll want to assemble your components before beginning, gather two cups of all-purpose flour, one cup of granulated sugar, three large eggs, half a cup of whole milk, one tablespoon of vanilla extract, two teaspoons of baking powder, and a quarter teaspoon of salt for the cake layer.
For the custard filling, you’ll need two cups of whole milk, five egg yolks, one-third cup of cornstarch, half a cup of granulated sugar, and one teaspoon of vanilla extract.
You’ll also require one cup of heavy whipping cream and two tablespoons of powdered sugar for the topping.
Stock these pantry staples beforehand to streamline your preparation.
Consider ingredient substitutions like cake flour for all-purpose flour or almond extract for vanilla, allowing you complete control over your final product’s flavor profile and texture.
Making the Sponge Cake
Creating the sponge cake foundation requires whisking together your eggs and granulated sugar until they’ve reached a pale, fluffy consistency—an essential step that incorporates air and establishes your cake’s tender crumb structure. Once you’ve achieved this ribbon stage, gently fold in your flour using a spatula, ensuring your batter folding technique maintains maximum airiness.
Avoid overworking the mixture, which collapses bubbles and toughens the final product. Pour the batter into your prepared pan and transfer it to a preheated 350°F oven.
Watch for oven spring—that vital rise during initial baking—which typically occurs within the first ten minutes. Bake until a toothpick inserted in the center emerges clean, approximately 30-35 minutes. Your sponge cake’s success depends entirely on respecting these precise techniques.
Preparing the Vanilla Custard Filling
While your sponge cake cools, you’ll prepare the custard that defines Boston cream pie’s indulgent character.
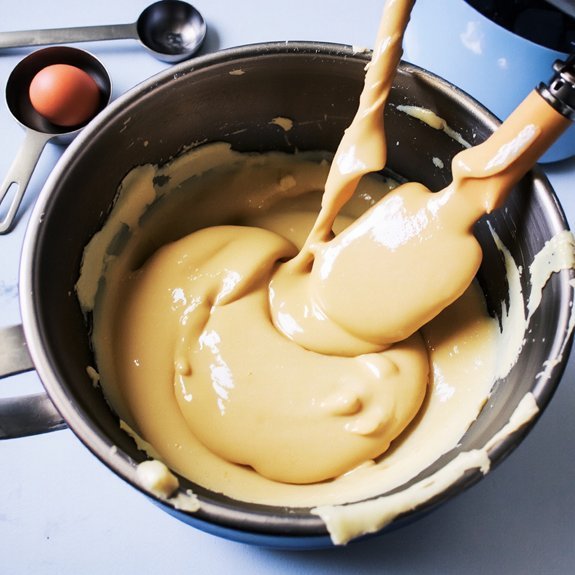
Combine egg yolks, sugar, and cornstarch in a bowl, whisking until pale.
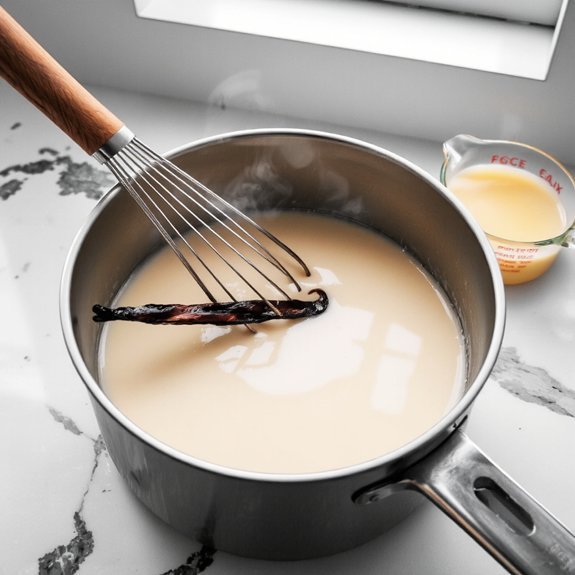
Heat whole milk with a vanilla bean, employing infusion techniques to extract maximum flavor.
Slowly temper your egg mixture by pouring the hot milk while whisking continuously, preventing scrambling.
Return the mixture to heat, stirring constantly until it thickens and coats the back of a spoon.
Consider stabilizer options like gelatin or cornstarch to assure your filling maintains its structure.
Strain through fine mesh to eliminate lumps and guarantee silky texture.
Cool completely before spreading between cake layers.
This custard foundation establishes the signature contrast that makes Boston cream pie exceptional.
Assembling Your Pie
You’ll layer your cooled custard filling between the two sponge cake layers, ensuring even distribution for consistent texture throughout each slice.
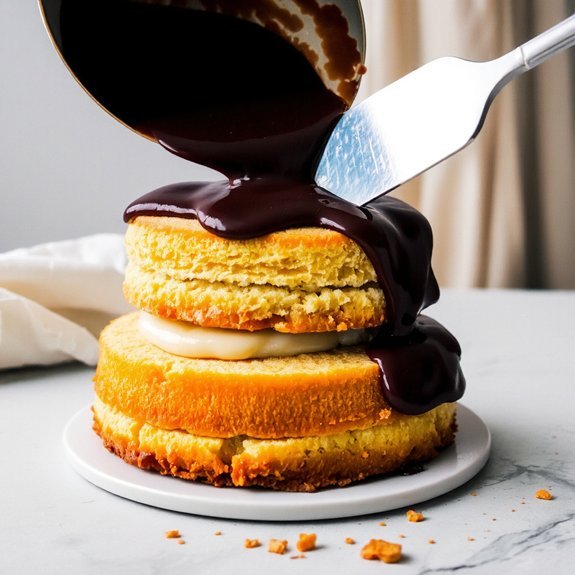
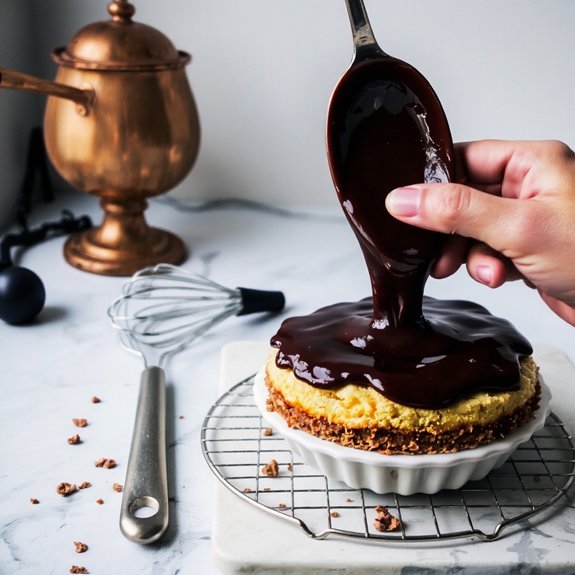
Next, you’ll crown the pie with a glossy chocolate ganache, spreading it smoothly across the top surface and letting it cascade slightly down the sides for an elegant presentation.
Finally, you’ll refrigerate the assembled pie for at least two hours—or preferably overnight—allowing the ganache to set firmly and the flavors to meld before serving.
Layering the Cream Filling
Building your Boston cream pie requires careful assembly to guarantee the pastry cream distributes evenly and the structural integrity remains sound throughout.
You’ll position your first sponge cake layer on a serving plate, then spread your pastry cream using a spatula at a 45-degree angle for ideal control. This spatula angle technique prevents air incorporation and maintains consistent thickness across the entire surface.
For even distribution, you’ll work methodically from the center outward, applying steady pressure without overworking the delicate cream. Once you’ve covered the first layer completely, you’ll position your second sponge cake layer directly on top, pressing gently to secure it.
Finally, you’ll refrigerate the assembled pie for at least two hours before applying your chocolate ganache topping. This chilling period allows everything to set properly, resulting in clean slices and professional results.
Topping With Chocolate Ganache
Preparing your ganache while the filled pie chills guarantees you’ll apply it at ideal temperature for a smooth, glossy finish.
You’ll combine equal parts heavy cream and chopped dark chocolate, heating the cream until it’s steaming but not boiling.
Pour it over your chocolate, let it sit for two minutes, then whisk until silky.
You’re free to customize your topping with flavor infusions—a hint of espresso, Grand Marnier, or vanilla extract elevates the classic profile.
Pour the ganache over your chilled pie’s surface, tilting it to achieve even coverage.
If you’re skilled, decorative piping creates elegant borders or patterns along the edges.
Let the ganache set at room temperature for thirty minutes, then refrigerate until firm.
This technique delivers a professional, restaurant-quality finish.
Chilling Before Serving
Once your ganache has set firm, the pie’s structure reaches its critical moment of stability.
You’ll want to refrigerate your Boston cream pie for at least four hours, allowing the custard and chocolate layers to fully set.
This chilling period isn’t optional—it’s essential for proper slicing and structural integrity.
Here’s what you need to know:
- Temperature control – Keep your pie at 35-40°F to maintain custard consistency without freezing the delicate cream filling
- Transport considerations – A thoroughly chilled pie resists movement and won’t shift during travel to your destination
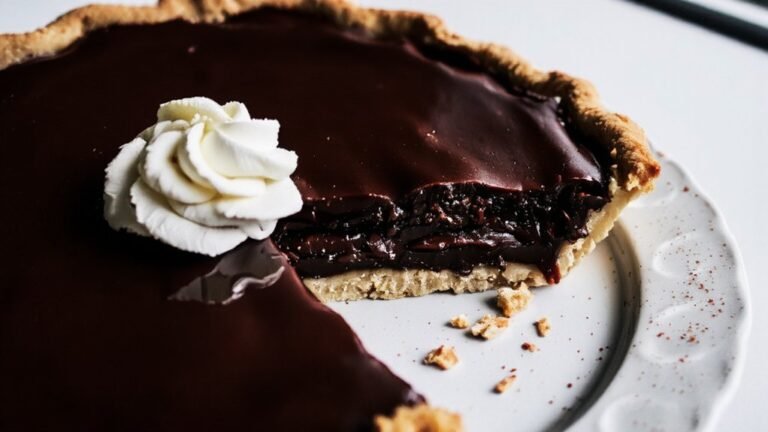
- Plate presentation – Cold pie cuts cleanly, delivering pristine portions that showcase each distinct layer
Store your pie on the lowest shelf to prevent temperature fluctuations.
You’re now ready to serve an exceptional dessert.
Creating the Chocolate Ganache Topping
You’ll want to select high-quality chocolate with at least 60% cocoa content to guarantee a rich, professional finish on your Boston cream pie.
Maintaining precise temperature control—heating your cream to 180–190°F and cooling your chocolate to room temperature before combining—prevents seizing and guarantees a silky ganache.
Once you’ve poured the mixture over your assembled pie, you’ll achieve that signature glossy, smooth coating by working quickly and using a offset spatula to spread it evenly before it sets.
Chocolate Selection and Quality
What makes the difference between a mediocre ganache and an exceptional one?
Your chocolate choice determines everything.
You’ll want to invest in quality couverture chocolate with 60-70% cacao content.
This range balances richness with workability.
Consider these three factors:
- Bean origin — Single-origin chocolates from Ecuador, Madagascar, or Ghana offer distinct flavor profiles that elevate your ganache beyond generic options.
- Ethical sourcing — You’re free to support producers who practice fair trade and sustainable farming, ensuring your ingredients align with your values.
- Cocoa butter content — Higher cocoa butter (minimum 31%) creates that signature glossy finish and smooth texture you’re after.
Don’t settle for commercial chocolate chips or compound coatings.
They’ll undermine your technique.
Seek out specialty chocolate suppliers who prioritize quality.
Your Boston cream pie deserves nothing less than premium chocolate that reflects your commitment to excellence.
Temperature Control Techniques
Selecting premium chocolate is only half the battle; how you handle it during ganache preparation determines whether your topping’ll be silky or grainy.
You’ll master temperature control by investing in thermometer calibration—verify your thermometer’s accuracy before heating cream and chocolate to precise temperatures.
Heat cream to 180°F for ideal chocolate incorporation without scorching.
Maintain your kitchen’s ambient temperature through oven mapping, identifying hot and cold zones affecting your work surface.
Keep chocolate between 110-115°F for ideal fluidity and sheen.
Cool your ganache strategically: allow fifteen minutes at room temperature before pouring over your cooled cake layers.
This methodical approach eliminates guesswork, ensuring professional results every time.
You’re not following recipes blindly—you’re controlling variables that guarantee success.
Achieving Glossy, Smooth Consistency
Once your cream reaches 180°F, pour it over finely chopped chocolate in a heat-safe bowl—the residual heat’ll begin melting the chocolate without direct flame exposure.
You’re harnessing rheology principles to achieve that coveted glossy finish.
Whisk gently for two minutes, allowing surface tension to distribute cocoa butter evenly throughout the mixture.
This creates a stable emulsion essential for consistency.
- Maintain precise temperatures between 90-95°F before pouring; cooler ganache thickens prematurely, disrupting your gloss.
- Incorporate butter incrementally to enhance fluidity while preserving structural integrity.
- Strain through fine mesh to eliminate cocoa particles that compromise smoothness.
You’ll notice the ganache transforming into a mirror-like coating.
This professional-grade technique guarantees restaurant-quality results on your homemade Boston Cream Pie without compromising control over your final product.
Tips for Perfect Results Every Time
How you’ll achieve bakery-quality results hinges on mastering three critical fundamentals: precise temperature control, ingredient preparation, and timing.
Bakery-quality results demand mastery of three fundamentals: precise temperature control, ingredient preparation, and timing.
Keep your custard between 160-180°F to prevent curdling while ensuring proper thickening.
Prep all components before assembly—you won’t have time mid-construction to hunt for supplies.
Your workflow optimization determines success.
Chill the cake layers thoroughly before filling; they’ll hold structure better and won’t compress.
Apply pastry cream while it’s still warm for seamless spreading.
For presentation tips, dust powdered sugar evenly across the top using a fine sieve.
Slice with a hot, wet knife between cuts for clean edges.
You’ll achieve that coveted bakery appearance by respecting these non-negotiable techniques and refusing shortcuts.
Frequently Asked Questions
Can I Make Boston Cream Pie Ahead of Time and Freeze It?
Yes, you can freeze Boston cream pie successfully.
Here’s how: wrap your completed pie tightly using plastic wrap and aluminum foil for ideal packaging methods.
Place it in a freezer-safe container.
For transport tips, keep it frozen in an insulated box with dry ice.
Thaw it overnight in your refrigerator before serving.
The custard filling maintains its creamy texture, and the sponge cake stays moist.
You’ll retain full flavor and quality for up to three months when you follow these professional storage techniques.
What’s the Best Way to Slice the Pie Without the Filling Squishing Out?
You’ll want to chill your pie thoroughly before slicing—ideally for several hours or overnight. Select a long, sharp serrated knife and dip it in hot water between cuts, wiping it clean each time. This technique prevents the filling from adhering to your blade.
Work decisively with downward pressure rather than sawing motions. You’re in control: proper chilling and precise knife selection give you clean, professional slices without messy filling displacement.
How Long Does Boston Cream Pie Stay Fresh in the Refrigerator?
You’ll want to consume your Boston cream pie within three to four days for ideal food safety and quality.
Store it in an airtight container on the refrigerator’s middle shelf, away from odor-causing foods.
Refrigerator longevity depends on your custard’s freshness and pastry integrity.
Don’t freeze it; the cream filling won’t maintain proper texture.
For maximum freedom from foodborne illness concerns, follow these storage guidelines strictly.
Can I Substitute the Vanilla Custard With a Different Flavor?
You can absolutely swap vanilla custard for alternatives that’ll elevate your pie. Chocolate custard delivers rich, decadent depth, while citrus curd brings bright, tangy sophistication.
When you’re substituting, maintain identical consistency and volume—these aren’t negotiable if you’re maintaining structural integrity. You’ve got creative freedom here: consider complementary fillings like espresso custard or lavender-infused variations.
Each substitution requires precision technique to guarantee your filling sets properly between cake layers. Balance flavors thoughtfully; let your custard choice guide your entire dessert’s profile.
What’s the Difference Between Boston Cream Pie and Boston Cream Donuts?
You’ll find the key distinctions lie in baking methods and filling variations.
Boston cream pie employs cake layers baked in round pans with pastry cream filling, while donuts use individual fried dough.
Pies showcase custard between sponge cake topped with chocolate ganache.
Donuts feature condensed, thicker filling injected into smaller portions.
Both celebrate that signature Boston cream flavor, but you’re choosing between elegant sliced dessert versus handheld indulgence based on your preparation preferences and serving style.

Leave a Comment