Key Takeaways
- Select Grade A blueberries with deep blue hue and silvery bloom, then rinse gently and pat dry thoroughly before use.
- Mix 3/4 cup sugar with 1/4 cup cornstarch, nutmeg, cinnamon, and clove; combine with blueberries to draw out juices.
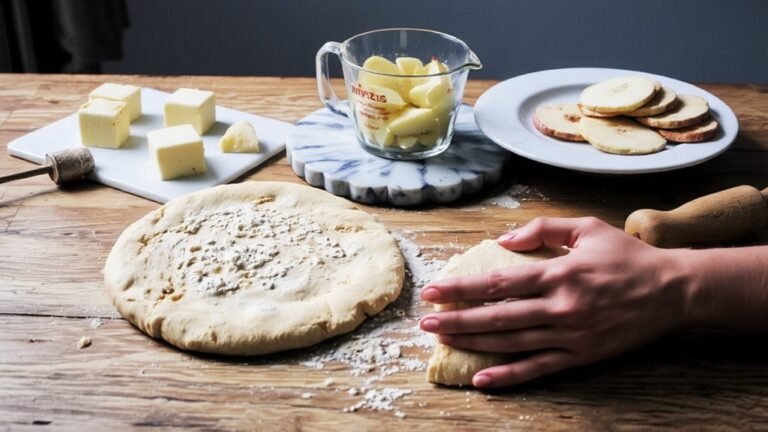
- Create flaky crust by cutting cold butter into flour until pea-sized, then add ice water gradually without overworking dough.
- Assemble pie with unbaked bottom crust, even filling layer, top crust sealed with crimped edges, and steam vents cut.
- Bake at 375°F for 45–50 minutes until golden brown, then cool at least 3 hours before slicing for best results.
Ingredients You’ll Need
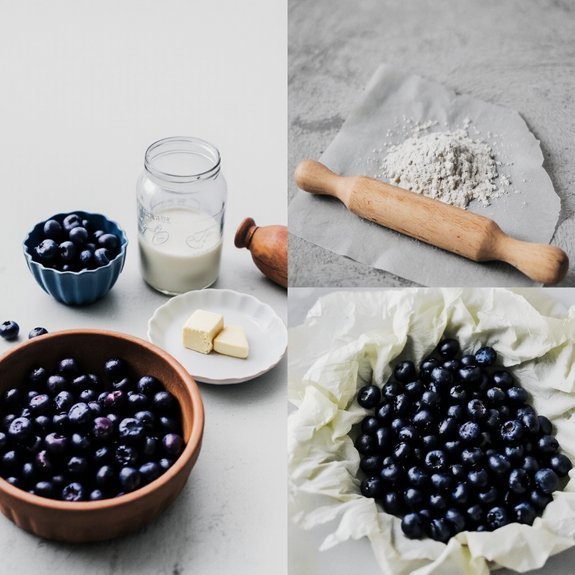
You’ll need one unbaked 9-inch pie crust, 5 cups fresh or frozen blueberries, 3/4 cup granulated sugar, 1/4 cup cornstarch, 1 tablespoon lemon juice, 1/2 teaspoon salt, and 1/4 teaspoon nutmeg.
For precision, you’ll want reliable measurement tools—specifically dry measuring cups and measuring spoons—to guarantee accurate proportions.
Select Grade A or premium quality blueberries; they’ll deliver superior flavor and texture.
Fresh berries work best during peak season, though frozen varieties maintain quality grades when properly processed.
You’ll also need butter for brushing the crust edge and an egg wash if you prefer a golden finish.
Consider having vanilla extract on hand as an optional enhancement.
Stock your pantry with these dry ingredients beforehand so you’re fully prepared.
Your freedom to create an exceptional pie depends on ingredient quality and precise measurements.
Preparing the Perfect Pie Crust
You’ll create a superior crust by combining cold butter, flour, and salt in precise proportions that you work together using a pastry cutter or your fingertips until the mixture resembles coarse breadcrumbs. Your mixing technique directly impacts texture—overworking the dough develops gluten and yields a tough crust, while insufficient mixing leaves you with an uneven, crumbly result.
You must chill your dough for at least thirty minutes, then roll it between parchment sheets to an even thickness before transferring it to your pie dish.
Ingredients for Success
A proper pie crust relies on precise ratios of flour, cold butter, salt, and ice water to achieve the ideal flaky texture.
You’ll need two and a half cups all-purpose flour, one cup cold unsalted butter cut into cubes, one teaspoon salt, and six to eight tablespoons ice water.
Your success depends on maintaining butter’s temperature throughout—this develops those coveted flaky layers.
Work with a growth mindset; mastering crust technique takes practice.
Manage your time by chilling ingredients beforehand and planning ahead.
Combine flour and salt, then cut in butter until the mixture resembles coarse cornmeal.
Add ice water gradually until dough just comes together.
Divide into two disks, wrap in plastic, and refrigerate for at least one hour before rolling.
You’re now ready to fill and bake.
Mixing Techniques Matter
Mastering the cut-in technique separates a tender, flaky crust from a tough, dense one.
You’ll want to work cold butter into your flour mixture using a pastry cutter or fork, creating pea-sized pieces that’ll steam during baking and produce those coveted layers.
Don’t overmix your dough.
Keep your mixing speeds low and deliberate—overworking develops gluten, which toughens your crust.
You’re aiming for just-combined ingredients, not a smooth ball.
When you’re ready to incorporate your liquid, use gentle folding techniques to bring everything together.
Add ice water gradually while folding with a spatula, combining until the dough just barely holds together.
This hands-off approach respects your ingredients and rewards you with exceptional results.
Your pie crust’s texture depends entirely on these precise, measured movements.
Chilling and Rolling Tips
Once you’ve brought your dough together with those careful folding motions, patience becomes your next critical tool.
Wrap your dough in plastic and refrigerate for at least thirty minutes—this surface chilling firms the butter, preventing a greasy, tough crust.
When you’re ready to roll, dust your work surface and rolling pin lightly with flour.
Apply even roller pressure as you work from the center outward, rotating the dough quarter-turns between passes.
This technique guarantees uniform thickness and prevents shrinkage during baking.
If your dough warms and becomes sticky, chill it again briefly.
You’re in complete control—work at your own pace.
A properly chilled, evenly rolled crust rewards you with a crisp, flaky texture that elevates your blueberry pie from ordinary to exceptional.
Selecting and Preparing Fresh Blueberries
Since quality blueberries form the foundation of an exceptional pie, you’ll want to select firm berries with a deep blue hue and a silvery bloom—the natural waxy coating that indicates freshness. You’ll rinse them gently under cool water to eliminate pesticide residues and debris without compromising texture preservation.
| Preparation Step | Purpose |
|---|---|
| Inspect individually | Remove moldy or damaged berries |
| Pat dry thoroughly | Prevent excess moisture in filling |
| Sort by size | Promote even cooking throughout pie |
| Chill before use | Maintain firmness during assembly |
You’re working with a delicate fruit, so handle them minimally. Don’t soak them—quick rinsing protects both safety and structural integrity. Properly prepared blueberries deliver superior flavor and texture to your finished pie.
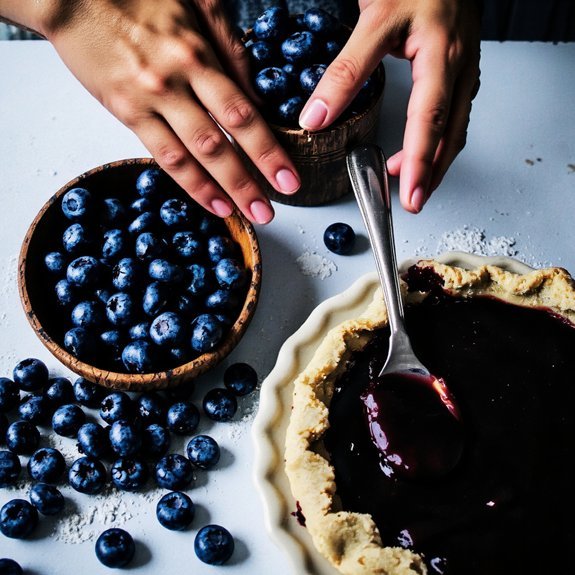
Making the Filling
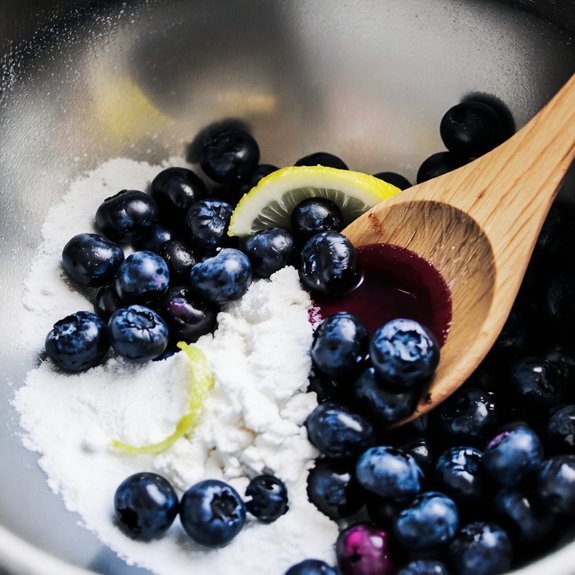
You’ll combine your fresh blueberries with a sugar and spice blend—typically granulated sugar, lemon zest, cinnamon, and nutmeg—that enhances their natural tartness without overwhelming their flavor.
You’ll then select a thickening agent, choosing between cornstarch for a clearer filling, tapioca starch for a glossy texture, or flour for a more traditional consistency.
Mix these components gently to coat the berries evenly, allowing the sugar to begin drawing out their juices before pouring into your prepared crust.
Sugar and Spice Blend
Combining your dry ingredients sets the foundation for a perfectly balanced filling.
You’ll blend three-quarters cup sugar with one-quarter teaspoon nutmeg, one-eighth teaspoon cinnamon, and one-sixteenth teaspoon clove.
These spices possess historical origins in ancient trade routes and offer documented health impacts through antioxidant properties.
Whisk these components thoroughly to distribute spices evenly throughout the sugar.
This prevents clumping and guarantees consistent flavor distribution across your blueberries.
You’re creating a flavor matrix that’ll enhance the fruit’s natural tartness without overwhelming it.
The sugar draws moisture from blueberries through osmosis, concentrating their juice while the spices amplify depth.
You’ll add two tablespoons cornstarch to this blend, which thickens your filling during baking.
Mix until the cornstarch’s white specks disappear completely into the sugar mixture, guaranteeing seamless integration when you combine it with your prepared blueberries.
Fresh Berry Selection
To achieve ideal filling consistency and flavor, you’ll select fresh blueberries that are firm, uniformly sized, and deeply colored—indicators of peak ripeness and sugar content. Avoid soft or discolored specimens, which compromise texture and introduce excess moisture.
You’re choosing berries rooted in rich culinary history; ancient cultures valued blueberries for both sustenance and medicinal properties. Berry folklore mentions their protective qualities, making them symbolically and nutritionally significant across generations.
When purchasing, inspect each batch carefully. You’ll notice superior berries feel dense and roll easily without crushing.
Store them unwashed until ready for use—moisture accelerates deterioration. You can refrigerate fresh blueberries for up to two weeks, preserving their structural integrity for your pie filling’s ideal consistency and taste.
Thickening Agent Options
Because blueberries release substantial liquid when heated, a thickening agent stabilizes your filling and prevents a soggy crust. You’ll choose based on texture comparison and acid stability requirements.
| Thickening Agent | Best For |
|---|---|
| Cornstarch | Quick set, glossy finish |
| Tapioca starch | Crystal-clear filling |
| Flour | Traditional, matte texture |
| Arrowroot | High-acid berries |
| Pectin | Jam-like consistency |
Cornstarch delivers immediate thickening and maintains clarity. Tapioca starch produces superior texture comparison without cloudiness. Flour creates rustic appeal but risks grittiness if undercooked. Arrowroot excels with acid stability, preventing breakdown from lemon juice or vinegar additions. Pectin promotes gel formation and grants you control over set time.
You’ll typically use 2-3 tablespoons per pie. Mix your chosen agent with sugar before combining with berries, preventing lumping and promoting even distribution.
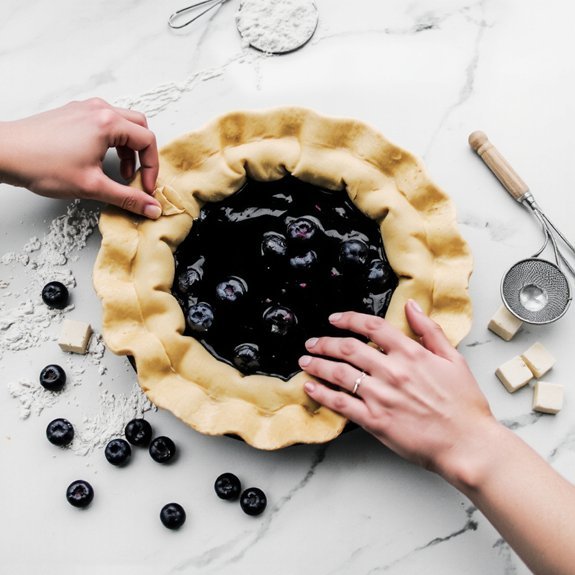
Assembling Your Blueberry Pie
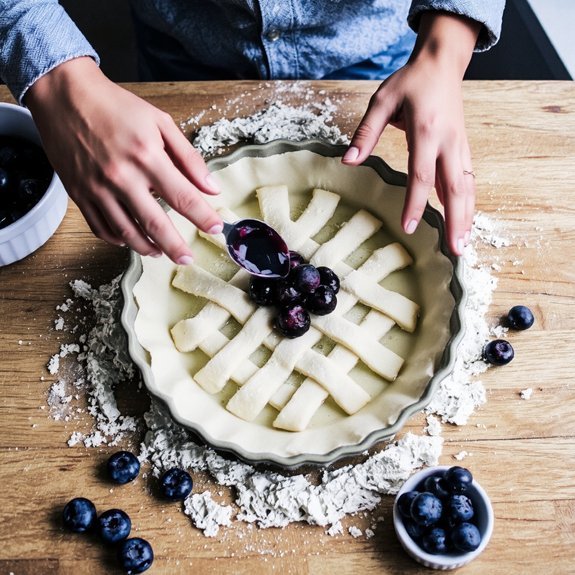
Once you’ve prepared your crust and filling, you’re ready to assemble the pie.
Pour your thickened blueberry mixture into the unbaked bottom crust, distributing berries evenly.
Add your top crust, crimping edges firmly to seal both layers.
Cut steam vents into the top to prevent bursting during baking.
Use your assembly checklist: verify crust thickness consistency, confirm filling temperature, guarantee proper edge adhesion, and check vent placement.
For transport methods, place the assembled pie on a flat, stable surface in your vehicle’s lowest position to minimize shifting.
Brush the top crust with egg wash for golden browning.
Chill the assembled pie for thirty minutes before baking.
This stabilizes your structure and improves your final result’s structural integrity.
Baking and Cooling Instructions
After you’ve chilled your assembled pie, preheat your oven to 375°F (190°C) and position the rack to the lower-middle section for even heat distribution.
Place your pie directly on the rack, allowing heat to circulate underneath the crust for ideal browning.
Place your pie directly on the oven rack to allow heat circulation underneath for ideal crust browning.
Bake for 45-50 minutes until the crust turns golden brown and the filling bubbles slightly at the edges.
If the crust darkens too quickly, cover it loosely with foil.
Remove your pie from the oven and let it rest on a wire rack.
The cooling duration is critical—allow at least three hours before slicing.
This time permits the blueberry filling to set properly, preventing a runny pie.
Complete cooling takes roughly six hours, but you’ll achieve the best texture and structure with patient cooling.
Serving Suggestions and Storage Tips
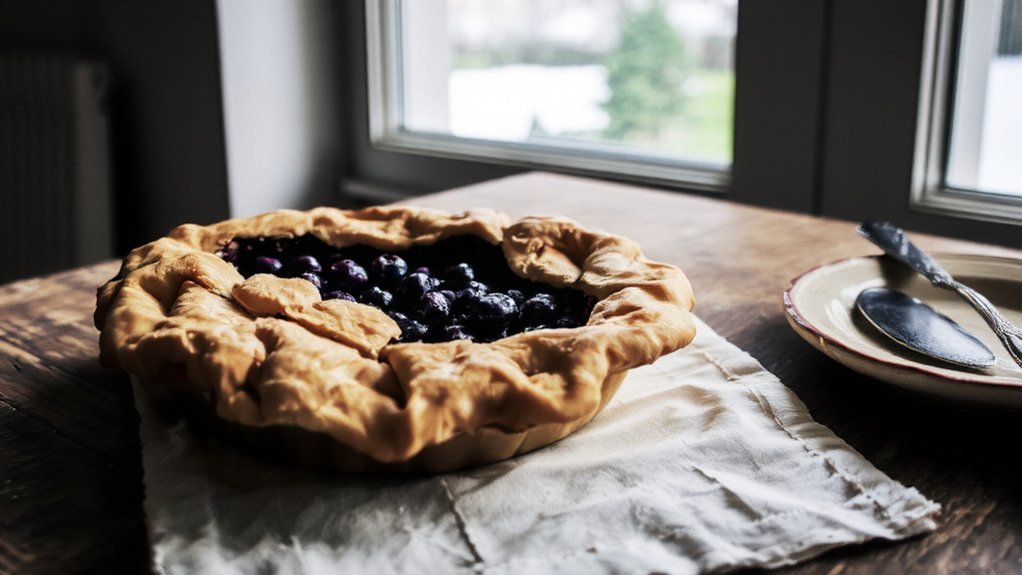
Your blueberry pie’s flavor profile peaks when you serve it at room temperature or slightly chilled, which allows the filling’s tartness and the crust’s buttery notes to fully develop on your palate.
Consider garnish ideas like fresh whipped cream, vanilla ice cream, or candied lemon zest to complement the blueberry’s natural acidity.
For storage, you’ve got flexibility.
Keep your pie covered at room temperature for up to two days.
Refrigerate it for extended freshness up to five days, wrapping it tightly to prevent moisture loss and flavor absorption from other foods.
Freezer storage works exceptionally well for blueberry pie.
Wrap the cooled pie thoroughly in plastic wrap and aluminum foil, then freeze up to three months.
Thaw it overnight in your refrigerator before serving, restoring its ideal texture and taste.
Frequently Asked Questions
Can I Make Blueberry Pie With Frozen Blueberries Instead of Fresh Ones?
You can absolutely use frozen blueberries for your pie. They’ll work great, though you’ll notice texture differences—frozen berries break down slightly more during baking, creating a thicker filling.
You won’t sacrifice flavor intensity; frozen berries often retain concentrated sweetness. Thaw them first and drain excess liquid to prevent a soggy crust.
This substitution gives you year-round pie-making freedom without compromising your final result’s quality.
How Do I Prevent My Pie Crust From Becoming Soggy or Watery?
You’ll prevent sogginess by blind baking your crust at 375°F for 10 minutes.
Apply an egg wash before filling—it’ll create a moisture barrier.
Consider adding a thin cornstarch layer to your crust’s interior.
When using frozen blueberries, don’t thaw them; they’ll release less liquid.
Mix your filling with thickening agents like cornstarch or tapioca.
These techniques give you complete control over your pie’s texture and moisture content.
Can I Prepare Blueberry Pie Filling Ahead of Time Before Baking?
You can absolutely prepare your blueberry filling ahead—overnight chilling actually improves flavor development and thaw stability.
Mix your blueberries, cornstarch, lemon juice, and sugar, then refrigerate.
This advance prep gives you complete assembly scheduling flexibility.
When you’re ready, pour your chilled filling into your crust and bake.
You’ll maintain ideal texture control and prevent that soggy bottom you’re working to avoid.
What’s the Best Way to Thicken Blueberry Pie Filling Without Cornstarch?
You’ll find Tapioca Thickener delivers excellent results—use about 2 tablespoons per pie filling for a clear, glossy finish.
Arrowroot Substitute works similarly, offering a neutral flavor that won’t mask your blueberries’ natural taste.
Both options thicken efficiently at lower temperatures than cornstarch, preventing overcooking.
You can also employ instant tapioca pearls, allowing them to hydrate in your filling for 15 minutes before baking.
These alternatives give you freedom from cornstarch’s potential chalkiness while maintaining superior texture control.
How Long Does Homemade Blueberry Pie Stay Fresh at Room Temperature?
You’ll keep your homemade blueberry pie fresh for two hours maximum at ambient limits before spoilage signs emerge.
The filling’s moisture content and egg-enriched custard accelerate bacterial growth.
After that window, refrigerate immediately.
Watch for mold, off-odors, or weeping filling—these indicate spoilage.
You’re responsible for monitoring texture changes and color shifts.
Proper cooling methodology prevents condensation that breeds decay, giving you control over your pie’s shelf life.


Leave a Comment