Key Takeaways
- Use 1 cup buttermilk with 1 tablespoon vinegar and 2 tablespoons cocoa powder for authentic crimson hue and tender crumb.
- Maintain 1:1:1 flour-to-sugar-to-fat ratio; cream butter and sugar for three minutes to develop proper structure and moisture retention.
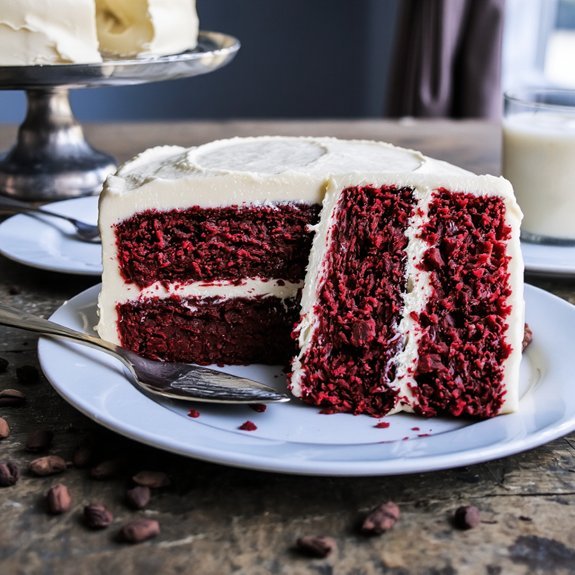
- Bake two 9-inch pans at 350°F for 30–35 minutes; cool 10–15 minutes in pans before turning onto wire racks.
- Combine 16 oz room-temperature cream cheese with 8 oz softened butter and 2–4 cups powdered sugar, beating at 65–70°F for stability.
- Mix until just combined to avoid overmixing; use gel or natural food coloring to control moisture; verify baking soda potency.
The History and Origin of Red Velvet Cake
When’d red velvet cake emerge as America’s beloved dessert? You’ll find its cultural origins trace back to the Victorian era, where the recipe combined buttermilk, cocoa, and acidic ingredients—typically 1-2 tablespoons cocoa to 2 cups flour—creating that signature crimson hue through a chemical reaction with cocoa’s anthocyanins.
The early twentieth century saw competing bakers claim invention rights, sparking trademark disputes over the formula’s exact proportions. You’re looking at roughly 2:1 fat-to-flour ratios and precise cream cheese frosting measurements for authentic results.
What makes this cake distinctly American? You’ve got the freedom to experiment with your own variations while respecting the original technical specifications: acidulated dairy, minimal cocoa content, and that unmistakable red coloration that defined generations of celebration cakes.
Key Ingredients for the Perfect Red Velvet Cake
You’ll need 1 cup of buttermilk combined with 2 tablespoons of unsweetened cocoa powder to achieve the cake’s signature tender crumb and subtle chocolate undertone.
Your cream cheese frosting base requires 8 ounces of softened cream cheese, 4 tablespoons of butter, and 2 cups of powdered sugar whisked to a stable emulsion.
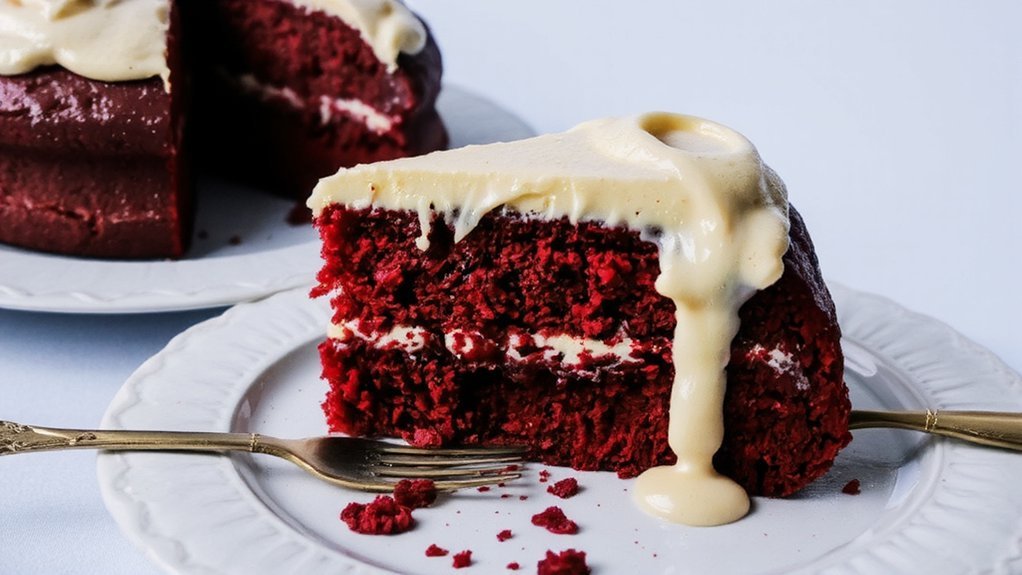
For the characteristic crimson hue, you can use 1 to 2 tablespoons of liquid red food coloring, gel coloring for more concentrated pigment, or natural alternatives like beet juice or beetroot powder.
Buttermilk and Cocoa Powder
Because buttermilk’s acidity reacts with baking soda to create the cake’s signature tender crumb and subtle tang, you’ll want to use the full 1 cup (240ml) called for in the recipe without substitution.
This 1:1 ratio guarantees proper chemical leavening and moisture balance.
Cocoa powder contributes depth without overpowering the cake’s delicate flavor profile.
Use 2 tablespoons (12g) of unsweetened cocoa powder—this modest quantity maintains the red velvet’s distinctive character while providing subtle chocolate notes.
The cocoa-to-flour ratio of 1:24 prevents density issues.
You’re not limited to traditional applications; consider beverage infusions by dissolving cocoa powder in your buttermilk beforehand for enhanced flavor distribution.
Alternatively, explore marinade uses by whisking cocoa powder into your cream cheese frosting base for complexity.
These techniques maximize ingredient efficiency and flavor control.
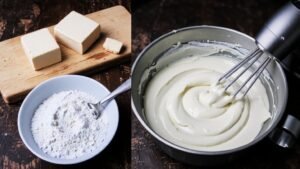
Cream Cheese Frosting Base
Since cream cheese’s fat content and acidity are fundamental to achieving the frosting’s signature tangy sweetness and stable structure, you’ll need 16 ounces (453g) of full-fat cream cheese at room temperature—a non-negotiable starting point that guarantees proper emulsification with butter and powdered sugar.
You’ll combine this with 8 ounces (227g) of unsalted butter, also softened, maintaining a 2:1 cream cheese-to-butter ratio for ideal consistency.
Add 4 cups (480g) of powdered sugar gradually, whisking continuously to prevent lumps.
Brand comparisons matter here—Philadelphia cream cheese consistently meets regulatory standards for moisture and fat content, ensuring superior results.
You’re looking for a frosting that reaches stiff peaks while remaining spreadable.
This precise formulation gives you complete control over your cake’s final texture and flavor profile.
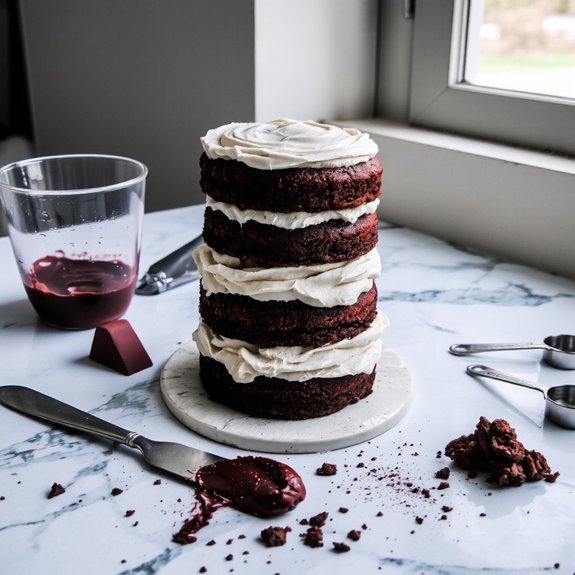
Red Food Coloring Options
How do you achieve that iconic deep crimson hue without compromising your cake’s flavor profile?
You’ve got three primary options: gel, liquid, or natural colorants.
Gel food coloring delivers concentrated pigment at 1/4 teaspoon per batch, eliminating excess moisture that weakens crumb structure.
Liquid variants require 1-2 teaspoons but thin your batter slightly.
Natural alternatives like beet juice demand 3-4 tablespoons, altering your liquid ratios substantially.
Consider regulatory limits: FDA-approved synthetic dyes maintain consistent results across supply chains, while natural options vary batch-to-batch.
Gel colorants offer superior stability without flavor interference, making them your most reliable choice for precision baking.
Your freedom to experiment matters, but gel coloring gives you control—delivering professional results with minimal formula adjustment and predictable supply chain availability.
Achieving That Signature Red Color Naturally
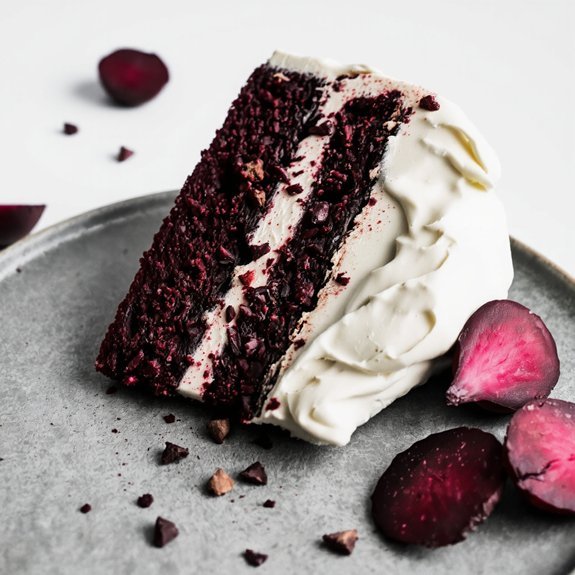
What’ll give you that iconic crimson hue without synthetic food coloring? You can achieve that signature red velvet shade through beet juice reduction and cocoa powder’s natural undertones.
Achieve that iconic red velvet hue naturally—beet juice reduction and cocoa powder create authentic crimson without synthetic coloring.
Start with one cup of fresh beets, juiced and reduced by half through simmering. This concentrated liquid delivers robust pigmentation without additives.
Combine your beet reduction with two tablespoons of unsweetened cocoa powder and one tablespoon of white vinegar—the acid intensifies color development.
Consider sourcing ethics when selecting organic beets from local farmers, reducing your sustainability impact. This approach supports regenerative agriculture while eliminating transportation emissions associated with synthetic colorant production.
Your ratio: one-half cup reduced beet juice per standard layer cake.
The result? A naturally crimson crumb that maintains authentic red velvet character while respecting your desire for clean, intentional ingredients.
Step-by-Step Cake Baking Instructions
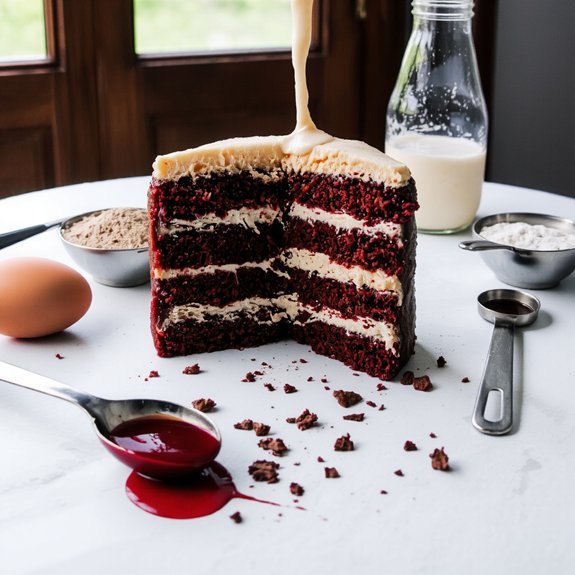
You’ll need to gather your dry ingredients—2 cups all-purpose flour, 1 teaspoon baking soda, 1 teaspoon salt, and 2 tablespoons cocoa powder—and whisk them together in a medium bowl before combining with your wet mixture.
Once you’ve creamed your butter and sugar, then incorporated your eggs, buttermilk, vinegar, and food coloring, you’ll fold in your dry ingredients in three alternating additions to achieve a smooth batter with proper emulsification.
Distribute your batter evenly between two greased 9-inch round cake pans, then bake at 350°F for 30-35 minutes until a toothpick inserted in the center emerges clean, allowing the cakes to cool in their pans for 15 minutes before turning them out onto wire racks.
Preparing Your Ingredients
Gathering and measuring your ingredients before mixing guarantees accuracy and prevents common baking errors.
You’ll need to organize your ingredients systematically for efficient preparation.
Start by assembling all components: two cups of cake flour, one and a half teaspoons of baking soda, half a teaspoon of salt, one and a half cups of granulated sugar, two large eggs, one cup of buttermilk, half a cup of vegetable oil, one tablespoon of white vinegar, one teaspoon of vanilla extract, and one ounce of red food coloring.
Use proper measuring techniques with dry ingredients: spoon flour into measuring cups and level with a knife rather than scooping directly.
For liquids, employ a glass measuring cup at eye level.
Accurate ingredient ratios create consistent results every time, giving you complete control over your baking outcome.
Baking and Cooling Process
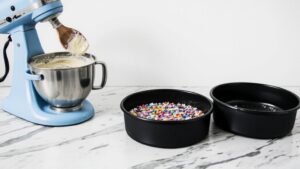
Once you’ve combined your wet and dry ingredients, preheat your oven to 350°F and prepare two 9-inch round cake pans by greasing and flouring them.
Divide your batter equally between pans, ensuring each receives approximately 2 cups of mixture for even baking.
Bake for 30-35 minutes until a toothpick inserted at the center emerges clean.
Monitor closely to prevent overbaking, which compromises moisture and texture.
- Remove pans from the oven and let them rest 10 minutes at room temperature
- Turn cakes out onto cooling racks to prevent thermal shock and condensation buildup
- Allow complete cooling for 2 hours before frosting application
This measured approach guarantees ideal crumb structure and frosting adhesion, giving you professional results you can confidently serve.
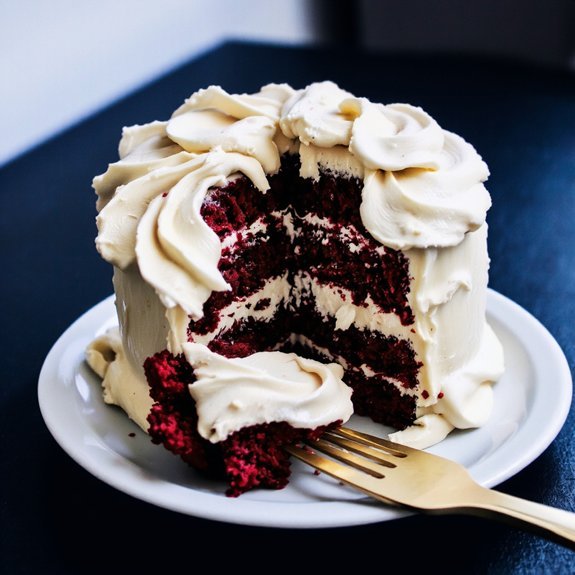
Mastering the Creamy Tangy Frosting
Creating the perfect cream cheese frosting requires balancing three critical components: 8 oz softened cream cheese, 4 oz softened butter, and 2 cups powdered sugar, combined at precise ratios to achieve ideal texture and flavor.
You’ll maintain whipping temperatures between 65-70°F to prevent butter separation.
Beat cream cheese and butter for 2-3 minutes until completely homogeneous.
Gradually incorporate powdered sugar in half-cup increments, beating 30 seconds between additions.
You’ve got control over consistency by adjusting ratios—add cream cheese for tanginess, butter for richness. Master piping techniques by filling your bag with frosting at 70°F, using a 1M tip for classic swirls.
You’ll achieve professional results through precise measurement adherence and temperature management, ensuring your red velvet cake showcases superior frosting every time.
Tips for Getting a Moist and Tender Crumb
You’ll achieve a moist crumb by incorporating buttermilk, which tenderizes the cake through its acidic properties and reacts with baking soda to create lift.
Balancing your fat ratio—using a 1:1 oil-to-butter blend—ensures moisture retention while maintaining structural integrity, as oil creates tenderness while butter provides stability.
Your crumb structure depends on precise mixing; overmixing develops gluten and toughens the cake, so fold your dry ingredients gently until just combined.
Buttermilk’s Role in Moisture
Why does buttermilk transform red velvet cake’s crumb structure so dramatically? You’re leveraging acidic tenderizing and protein interaction to achieve moisture retention without compromising structure.
Buttermilk’s lactic acid reacts with baking soda, creating CO₂ bubbles that generate a tender crumb. This acidic environment breaks down gluten strands, preventing overdevelopment that’d otherwise dry your cake.
The 1:½ buttermilk-to-flour ratio guarantees ideal hydration.
Key moisture mechanisms you’ll utilize:
- Acidic tenderizing: Lactic acid denatures proteins, shortening gluten chains for delicate texture
- Protein interaction: Casein proteins coat flour particles, reducing water absorption rates
- pH balance: Acidic conditions activate baking soda, creating steam for moisture distribution
You’re not just adding liquid—you’re orchestrating chemical reactions that guarantee a moist, tender crumb. This scientific approach gives you complete control over your cake’s texture and longevity.
Achieving Perfect Crumb Structure
Once you’ve mastered buttermilk’s chemical contributions, translating that knowledge into perfect crumb structure requires precise technique and ingredient ratios.
You’ll want to maintain a 1:1:1 ratio of flour, sugar, and fat to establish ideal moisture retention.
Cream your butter and sugar for exactly three minutes—this incorporates air while developing the protein network that traps moisture throughout baking.
Don’t overmix your batter once you add flour; excessive mixing overdevelops gluten, resulting in a dense cake.
Your oven temperature matters critically; 350°F allows starch gelatinization to occur gradually, creating a tender crumb rather than a tough one.
You’re fundamentally controlling how flour particles absorb and hold liquid, ensuring your red velvet cake delivers that signature velvety texture every single time.
Oil Versus Butter Balance
While controlling gluten development through mixing technique establishes your cake’s foundational structure.
The fat composition you choose determines its moisture longevity and crumb tenderness.
You’ll achieve superior results by balancing both fats strategically.
Oil contributes 100% moisture retention, while butter provides flavor but contains 15-20% water content.
A 1:1 ratio—approximately 1/2 cup oil to 1/2 cup melted butter per two-layer cake—optimizes texture contrast between moist interior and subtle crust.
Consider these factors:
- Moisture retention: Oil prolongs shelf life up to five days versus butter’s three-day window
- Flavor intensity: Butter adds richness; oil preserves buttermilk’s tangy notes
- Cost comparison: Oil typically costs 40% less while delivering superior hydration
This combination produces a tender, velvety crumb that resists drying while maintaining structural integrity throughout storage.
Common Mistakes to Avoid
Because precision matters when you’re baking red velvet cake, you’ll want to sidestep these common pitfalls that compromise texture and flavor.
| Mistake | Cause | Solution |
|---|---|---|
| Dense crumb | Overmixing; improper recipe scaling | Mix until just combined; maintain 1:1 buttermilk-to-vinegar ratio |
| Flat cake | Incorrect equipment selection; weak leavening | Use 9-inch round pans; verify baking soda potency |
| Bitter taste | Excess cocoa powder or food coloring | Use 1-2 tablespoons cocoa; limit coloring to ½ teaspoon |
You’ll achieve ideal results by measuring ingredients by weight, not volume. Don’t substitute buttermilk—its acidity activates the baking soda, creating lift. When scaling recipes, maintain precise ratios: adjust all ingredients proportionally. Select aluminum pans for even heat distribution. Avoid opening the oven door during baking; this disrupts temperature stability and causes structural collapse. Temperature control determines success—room-temperature ingredients blend uniformly, ensuring proper emulsification.
Troubleshooting Your Red Velvet Cake
What should you do when your red velvet cake doesn’t turn out as expected?
Take charge of your baking by addressing specific issues systematically before your next red velvet cake attempt.
Take charge of your baking by addressing specific issues systematically.
• Oven calibration: Your oven’s actual temperature may deviate 25°F from the dial setting.
Use an independent thermometer to verify accuracy before baking. Recalibrate if needed to guarantee proper Maillard reaction and crumb structure development.
• Altitude adjustments: High-altitude baking requires reducing sugar by 15%, increasing liquid by 2-4 tablespoons per cup, and boosting baking soda by 25%.
These modifications compensate for lower atmospheric pressure and faster moisture evaporation.
• Ingredient ratios: Verify your buttermilk-to-flour ratio (1:2.5) and cocoa powder measurement (2 tablespoons per 9-inch layer).
Even slight deviations affect pH balance and acid-base reactions critical to red velvet’s signature color and texture.
Document your adjustments for reproducibility.
Storage and Make-Ahead Options
Proper storage extends your red velvet cake’s shelf life by maintaining moisture content and preventing flavor degradation.
You’ll want to refrigerate your finished cake in an airtight container at 35-40°F for up to five days.
For longer preservation, you can freeze unfrosted layers at 0°F for up to three months—wrap each layer in plastic wrap, then aluminum foil to prevent freezer burn.
Consider vacuum sealing individual cake portions for ideal freshness and space efficiency. This method reduces oxidation and extends frozen storage to four months.
For party logistics, prepare your cake two days ahead by baking and freezing layers unwrapped. Assemble and frost the cake twelve hours before serving, allowing flavors to meld while maintaining structural integrity. This strategic timing eliminates last-minute stress while ensuring peak taste and texture.
Serving Suggestions and Flavor Pairings
Once you’ve perfected your cake’s storage and assembly timing, elevating the eating experience depends on thoughtful pairings that complement red velvet’s distinctive tangy-cocoa profile.
You’ll maximize flavor impact through strategic plating techniques and beverage pairings that enhance rather than compete with the cake’s nuanced notes.
Consider these complementary approaches:
- Beverage Pairings: Serve with cold brew coffee (1:1 ratio with cream), buttermilk, or champagne to cut through cream cheese frosting’s richness
- Plating Techniques: Use 3-inch diameter rings for uniform presentation; dust plates with cocoa powder at 2:1 ratio to powdered sugar for visual contrast
- Temperature Control: Present cake at 65-68°F for ideal flavor release and frosting texture
You’ll achieve professional results by respecting ingredient ratios and precise execution in every service element.
Frequently Asked Questions
Can I Substitute Buttermilk With Regular Milk in Red Velvet Cake?
You can substitute buttermilk with regular milk, but you’ll need acidity adjustment.
Mix one cup whole milk with one tablespoon lemon juice or white vinegar, then let it sit five minutes.
This compensates for buttermilk’s acidic component.
Without this modification, you’ll experience significant texture changes—your cake’ll become denser and less tender.
The acid reacts with baking soda, creating lift and crumb structure.
Maintaining proper ingredient ratios guarantees you won’t sacrifice that signature red velvet texture you’re after.
How Do I Convert This Red Velvet Cake Recipe to Cupcakes?
You’ll divide your cake batter equally among lined cupcake tins, filling each cavity 2/3 full.
Reduce your baking time from 30-35 minutes to 18-22 minutes at 350°F, checking with a toothpick for doneness.
Use standard pan size (12-cup muffin tins) and maintain the same ingredient ratios as your original recipe.
Monitor closely during the final minutes—cupcakes bake faster than sheet cakes, so you’ve got freedom to adjust timing based on your oven’s performance.
Is Red Velvet Cake Gluten-Free, and Can I Make a GF Version?
Standard red velvet cake isn’t gluten-free due to all-purpose flour. You can easily make a GF version by substituting a 1:1 gluten-free flour blend at identical ratios.
Be mindful of cross contamination—use dedicated utensils and surfaces. Verify your cocoa powder and buttermilk are certified GF. This substitution maintains proper structure while delivering that signature tender crumb you demand without compromise.
What’s the Difference Between Red Velvet and Chocolate Cake Exactly?
You’ll find red velvet‘s texture contrast stems from cocoa’s minimal inclusion—typically 1-2 tablespoons per batch versus chocolate cake’s 3-4 tablespoons.
The flavor chemistry differs dramatically: red velvet relies on buttermilk and vinegar’s acidic reaction with baking soda, creating its signature tender crumb and subtle cocoa notes.
Chocolate cake emphasizes cocoa’s depth through higher ratios.
You’re choosing between delicate tanginess or bold chocolatey richness when deciding between them.
Can I Freeze Red Velvet Cake Layers Before Frosting and Assembling?
You can definitely freeze your red velvet cake layers before frosting.
Wrap each layer tightly in plastic wrap, then aluminum foil to prevent freezer burn.
Your freezing technique preserves moisture and crumb structure for up to three months.
For thawing timing, remove layers to room temperature for two to three hours before assembly.
This gradual thawing maintains structural integrity and guarantees ideal frosting adhesion without condensation complications.


Leave a Comment