Key Takeaways
- Use light-colored aluminum or anodized aluminum sheets; they distribute heat evenly and prevent hot spots better than dark or stainless steel.
- Select insulated double-layer pans with air pockets to moderate temperature fluctuations and reduce uneven browning by 15–20°F.
- Choose thicker sheets (18-gauge aluminum, ≥0.13 inches) with rolled rims to prevent warping and eliminate edge over-browning hot spots.
- Maintain 1–2 inches clearance on all sides; stagger pans on upper and lower racks with mid-cycle rotation for consistent results.
- Rotate pans halfway through baking and use convection settings to actively circulate air and compensate for natural oven hot spots.
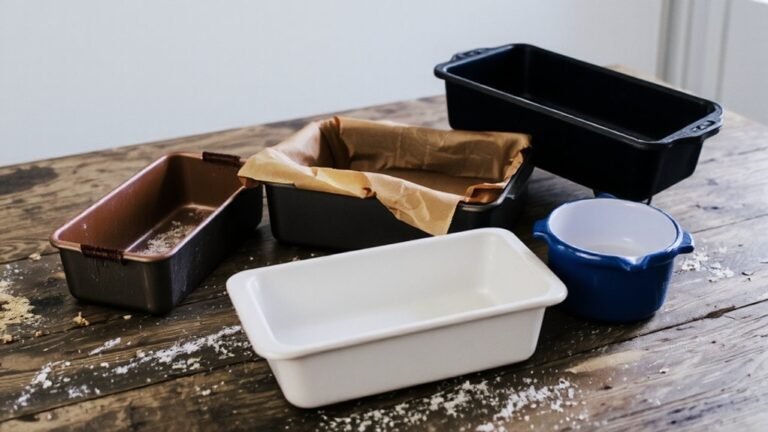
Understanding Heat Distribution and Cookie Sheet Materials
Because cookie sheets conduct and distribute heat differently based on their material composition, you’ll want to understand how each type affects your baking results. Dark steel sheets absorb more thermal energy due to higher surface emissivity, reaching elevated core temperatures faster than aluminum alternatives. This accelerates browning and can create uneven results if you’re not monitoring closely.
Aluminum distributes heat more evenly across the baking surface, maintaining consistent core temperature throughout the sheet.
Insulated double-layer sheets provide superior heat regulation by creating an air barrier that prevents hot spots and excessive bottom browning. Your choice directly impacts bake time and final product consistency. Consider your oven’s characteristics and desired outcomes when selecting materials that align with your baking standards and preferences for precision results.
The Impact of Cookie Sheet Color on Baking Results
How substantially does cookie sheet color influence your baking outcomes?
Color directly affects heat absorption and browning rates.
Dark sheets absorb more radiant energy, accelerating browning and potentially creating darker bottoms.
Dark cookie sheets absorb more radiant energy, accelerating browning and creating noticeably darker bottoms.
Light-colored sheets reflect heat, resulting in slower browning and more even baking.
You’ll notice significant differences in perceived doneness across sheet colors.
Dark sheets may make cookies appear done when they’re underbaked, while light sheets can mislead you into overbaking.
This presentation contrast between sheet colors matters because it affects your visual assessment reliability.
For consistent results, you’re best served using light-colored aluminum or stainless steel sheets.
They provide predictable heat distribution and accurate perceived doneness indicators.
If you prefer dark sheets, reduce oven temperature by 25°F to compensate for accelerated browning and maintain control over your baking outcomes.
Aluminum vs. Stainless Steel: Which Is Best for Even Baking

While light-colored sheets provide superior heat distribution, your material choice between aluminum and stainless steel determines how efficiently that heat transfers to your cookies.
Aluminum conducts heat approximately three times faster than stainless steel, delivering more consistent browning across batches. However, you’ll face allergen concerns with aluminum—acidic doughs can leach trace metals into your baking. Stainless steel eliminates this risk entirely, though it heats unevenly, potentially creating hot spots.
Consider environmental impact: aluminum’s recyclability makes it sustainable long-term, while stainless steel demands more energy for production and refinement. Your decision hinges on prioritizing efficiency versus safety and sustainability.
Many bakers compromise by using anodized aluminum sheets, which prevent leaching while maintaining thermal advantages. You’re ultimately choosing between superior performance and absolute safety—neither option is objectively superior.
Why Sheet Thickness Matters for Consistent Baking

Sheet thickness directly impacts your baking results by controlling heat penetration and thermal stability. Thicker sheets—typically 18-gauge aluminum—distribute heat more evenly, preventing hot spots that cause uneven browning and burnt edges.
Thicker baking sheets distribute heat evenly, preventing hot spots that cause uneven browning and burnt edges.
Thinner sheets conduct heat too rapidly, creating temperature fluctuations that compromise consistency.
You’ll notice manufacturing variability notably affects performance. Quality sheets maintain uniform thickness throughout, while cheaper alternatives often feature inconsistent gauges that undermine thermal properties. This variability directly influences baking outcomes.
Cost implications matter here: investing in thicker, properly manufactured sheets eliminates variables you can’t control during baking. Budget options might seem attractive initially, but poor heat distribution forces you to compensate with temperature adjustments and constant monitoring.
Ultimately, selecting appropriately thick sheets grants you greater baking predictability and freedom from troubleshooting batch-to-batch inconsistencies.
Non-Stick Coatings: Benefits and Drawbacks for Cookie Baking

Non-stick coatings fundamentally alter how cookies interact with sheet surfaces, reducing friction and facilitating easier removal while simultaneously introducing thermal and chemical considerations you’ll need to evaluate.
Traditional PTFE coatings deliver superior release properties but raise chemical safety concerns regarding PFOA exposure during manufacturing and potential off-gassing at high temperatures.
Ceramic alternatives offer reduced environmental impact and lower chemical safety risks, though they’re less durable and may degrade after repeated use.
You’ll find that ceramic coatings typically maintain effectiveness for 300-500 baking cycles before deteriorating.
Conversely, quality PTFE coatings persist for thousands of uses.
Your decision hinges on balancing non-stick convenience against long-term health implications and environmental responsibility, ensuring your baking choice aligns with your values and practical requirements.
How to Prevent Warping and Maintain Flat Pans
You’ll prevent warping by selecting aluminum or steel sheets with thicker gauges (at least 0.13 inches), which resist thermal stress and temperature fluctuations better than thin materials.
Proper storage—stacking sheets flat in a cool, dry environment and avoiding humidity exposure—maintains structural integrity and prevents the gradual warping that occurs when moisture seeps into pan surfaces.
These two factors directly impact your pans’ flatness and, consequently, the consistency of your baking results.
Material Quality Matters
Because aluminum conducts heat unevenly and warps under thermal stress, premium-grade steel and commercial-weight materials deliver superior performance in preventing pan deformation.
You’ll want sheets meeting strict manufacturing standards that guarantee consistent thickness and structural integrity.
Look for material certifications from reputable organizations verifying heat resistance ratings and durability benchmarks.
Commercial-grade pans typically measure 0.8mm or thicker, resisting the warping that compromises baking results.
You’ll notice inferior products buckle within 50-100 thermal cycles, while quality construction withstands thousands.
Steel’s superior thermal stability prevents the hot spots and uneven browning that plague aluminum-only designs.
Your freedom to achieve consistent baking outcomes depends directly on material specifications.
Invest in sheets backed by transparent manufacturing documentation and third-party testing data, not marketing claims alone.
Proper Storage Techniques
Storing cookie sheets flat in a cool, dry environment preserves their structural integrity and prevents the warping that degrades baking performance.
You’ll maintain ideal pan flatness by keeping them in temperature-controlled spaces, avoiding humidity fluctuations that cause material expansion and contraction.
Implement systematic inventory management to track your pan conditions and identify warping early.
Stack sheets with parchment separators to eliminate direct metal-to-metal contact that creates pressure points.
You’re protecting your investment by rotating seasonal use—heavy baking periods demand fresh pans while lighter seasons allow maintenance cycles.
Store vertically when possible to reduce gravitational stress on pan surfaces.
Keep them away from direct heat sources and moisture exposure.
This disciplined approach guarantees your sheets remain flat, delivering consistent results across every baking session while maximizing equipment longevity.
Insulated Cookie Sheets vs. Standard Pans
When choosing between insulated and standard cookie sheets, you’re fundamentally selecting between two distinct heat distribution systems that directly impact baking outcomes.
Insulated pans feature an air pocket layer that moderates temperature fluctuations, reducing bottom browning by 15-20 degrees Fahrenheit.
You’ll appreciate their superior heat retention, though they’re pricier—typically $30-50 versus $10-20 for standard sheets.
Standard pans conduct heat more aggressively, producing crispier edges and faster baking times, ideal if you prefer control over your results.
Consider cost comparison carefully: insulated sheets require less frequent replacement due to superior durability.
Warranty options vary considerably—premium insulated models often include lifetime guarantees, while standard pans typically offer limited coverage.
Your choice depends on prioritizing efficiency or economy.
Size and Spacing: Maximizing Oven Capacity for Batch Baking
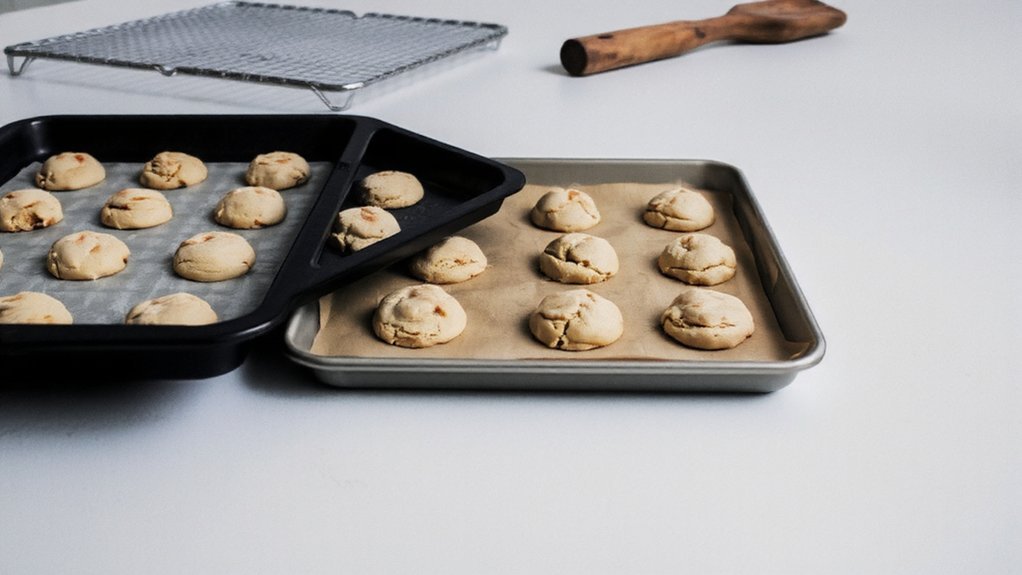
You’ll maximize your batch-baking efficiency by understanding standard sheet pan dimensions—typically 18″ x 13″ for full-size commercial pans or 16″ x 12″ for half-sheet variants—which directly impact how many cookies you can fit per load.
Proper spacing between pans matters critically; you’ll need to maintain at least 1-2 inches of clearance on all sides to guarantee consistent airflow and prevent heat from concentrating in specific zones.
Strategic arrangement of multiple batches accounts for your oven’s hot spots and air circulation patterns, allowing you to rotate pans systematically and achieve uniform browning across all cookies.
Standard Sheet Pan Dimensions
The standard half-sheet pan measures 18 by 13 inches and accommodates most home ovens’ interior dimensions of approximately 30 inches wide by 16 inches deep.
This translates to roughly 45.7 by 33 centimeters—metric equivalents you’ll find on European equipment. However, regional variations exist.
Commercial kitchens often use full sheet pans at 26 by 18 inches, while some manufacturers offer quarter sheets at 9.25 by 13 inches for smaller batches.
Understanding these dimensions empowers you to maximize your oven space efficiently. You’ll fit two half-sheets side-by-side on most racks, enabling batch production without sacrificing air circulation. Knowing precise measurements eliminates guesswork and guarantees consistent baking results across multiple batches.
Arranging Multiple Batches Efficiently
Fitting multiple sheet pans into a single oven requires strategic planning beyond simply knowing dimensions.
You’ll maximize capacity by positioning pans on different racks, allowing adequate airflow around each batch.
Stagger pans so they don’t directly overlap, preventing heat shadows that compromise baking uniformity.
Implement timer syncing across batches to prevent overcooking or underbaking.
Use cookie labeling systems—marking pans with baking start times and temperatures—to track each batch independently.
This prevents confusion when rotating multiple sheets simultaneously.
Position upper-rack pans slightly higher than lower ones to account for heat distribution variations.
Rotate pans halfway through baking cycles for consistency.
You’ll achieve ideal results by respecting airflow dynamics rather than cramming maximum capacity into available space.
Airflow and Heat Distribution
Because hot air circulates unevenly throughout oven cavities, proper pan spacing directly determines baking consistency across multiple batches.
You’ll achieve superior results by leaving at least two inches between sheets and the oven walls, allowing unrestricted airflow around each pan.
Rack positioning matters considerably—stagger your sheets on upper and lower racks rather than stacking them directly above one another.
This strategy prevents heat shadowing and guarantees even browning.
Leverage convection settings when available; they actively circulate air, compensating for natural hot spots and creating uniform temperatures.
You’re fundamentally taking control of your oven’s environment rather than accepting its inherent limitations.
Monitor your batches closely during the first rotation.
You’ll quickly identify which racks run hotter, allowing you to rotate strategically for consistent results every time.
Edge Design and Raised Sides: Their Role in Even Baking
When you’re selecting a cookie sheet, the perimeter design substantially impacts heat distribution and baking consistency.
You’ll find that rolled rims and rounded corners aren’t merely aesthetic choices—they’re functional features that directly affect your results.
Rolled rims and rounded corners serve functional purposes—they’re performance features, not mere design aesthetics affecting your baking results.
Raised sides serve critical purposes:
- Prevent heat from concentrating at sheet edges, reducing over-browning
- Create airflow channels that distribute heat more uniformly across the baking surface
- Minimize warping from thermal stress during high-temperature cycles
- Allow you to rotate sheets freely without cookies sliding
- Enable consistent browning from edge to center
You’re basically choosing between performance specifications.
Shallow rolled rims (typically 1/2 to 3/4 inch) provide ideal balance, while rounded corners eliminate hot spots.
You’ll achieve superior baking consistency by prioritizing these design elements over flashy marketing claims.
Maintenance Tips to Keep Your Cookie Sheets in Top Condition
You’ll extend your cookie sheets’ lifespan by implementing proper cleaning protocols—hand-washing with mild soap immediately after use prevents detergent buildup and thermal shock that degrades the surface.
Storing them flat in a dry environment mitigates moisture exposure and oxidation, while stacking them with parchment paper between surfaces reduces warping caused by uneven weight distribution.
Regular inspection for rust spots and microscopic deformations allows you to address corrosion early through targeted maintenance rather than premature replacement.
Cleaning and Storage Methods
Maintaining your cookie sheets’ performance requires consistent cleaning protocols that prevent buildup and oxidation.
You’ll achieve ideal results by establishing sanitizing schedules that align with usage frequency.
Implement these evidence-based cleaning practices:
- Hand wash with hot soapy water immediately after cooling to prevent residue hardening
- Use baking soda paste for stubborn stains and odor elimination
- Dry thoroughly to prevent moisture-related corrosion
- Store flat in cool, dry environments away from humidity
- Inspect quarterly for warping or surface degradation
You’ll extend sheet longevity by avoiding dishwashers, which accelerate material breakdown.
Store sheets separately to prevent scratching and maintain their flat surface integrity.
Consistent maintenance reduces uneven baking caused by surface irregularities.
Your freedom to bake confidently depends on keeping equipment in peak condition through disciplined care routines.
Preventing Rust and Warping
Beyond routine cleaning lies the critical management of two primary degradation mechanisms: rust formation and metal warping.
You’ll prevent oxidation by controlling moisture through environmental monitoring—maintain humidity below 60% in your storage space. For steel sheets, apply food-safe mineral oil coating quarterly to establish a protective barrier.
You’ll minimize warping by avoiding extreme temperature fluctuations; store sheets away from heat sources and direct sunlight.
During transport protection, wrap sheets individually in breathable cloth rather than plastic, which traps moisture. Stack them flat on stable surfaces, never vertically, to distribute weight evenly.
You should inspect sheets monthly for early corrosion signs. This proactive maintenance strategy extends sheet lifespan substantially, preserving their structural integrity and baking performance across years of consistent use.
Frequently Asked Questions
How Often Should I Replace My Cookie Sheets Before They Become Unsafe?
You’ll want to replace your cookie sheets when you notice coating flaking or rust presence, typically every 5-10 years depending on use frequency.
Don’t wait for deterioration to compromise your independence in the kitchen.
Inspect them regularly for warping, discoloration, or surface degradation.
When nonstick coatings show visible wear or rust develops, replacement becomes necessary to maintain food safety and baking quality.
You’re responsible for monitoring your equipment’s condition.
Can I Use Parchment Paper or Silicone Mats on All Cookie Sheet Types?
You can’t use parchment paper or silicone mats on all cookie sheet types without considering material compatibility and heat transfer properties.
Aluminum sheets work excellently with both, while dark non-stick surfaces may overheat delicate items.
You’ll want to verify your sheet’s maximum temperature rating before adding liners.
Stainless steel accommodates both options reliably.
Always check manufacturer specifications to confirm you’re maintaining ideal baking performance and avoiding potential damage.
What’s the Ideal Oven Temperature for Achieving Perfectly Even Cookie Baking?
You’ll achieve ideal results at 350°F, though you shouldn’t ignore oven calibration—it’s critical.
Your oven’s actual temperature often deviates from its display. Invest in an oven thermometer to verify accuracy.
Cookie thickness directly impacts baking uniformity; maintain consistent 1/4-inch thickness for predictable outcomes.
You’re free to adjust temperatures 25°F based on your specific equipment’s performance characteristics. Monitor bake times closely, as calibration variations substantially affect browning and evenness.
Should I Preheat My Cookie Sheet Before Placing Dough on It?
You should preheat your cookie sheet to achieve ideal surface temperature control. Preheating guarantees consistent heat distribution and prevents uneven spreading when you place dough on it.
Higher surface temperatures create immediate bottom-crust formation, giving you precise spread control over your baking results. This technical approach eliminates variables that compromise consistency. You’ll gain predictable outcomes and take command of your baking process through this straightforward methodology.
How Do I Know if My Cookie Sheet Is Causing Uneven Browning Issues?
You’ll notice uneven browning when your cookies develop dark spots while others stay pale—that’s your sheet’s hot spots working against you.
Inspect your pan’s surface; warped surfaces prevent consistent heat distribution.
Rotate your sheet halfway through baking to compensate.
If you’re getting burnt edges with underbaked centers repeatedly, you’ve got a problematic sheet. Consider upgrading to commercial-grade aluminum pans that won’t warp under high temperatures.


Leave a Comment