Key Takeaways
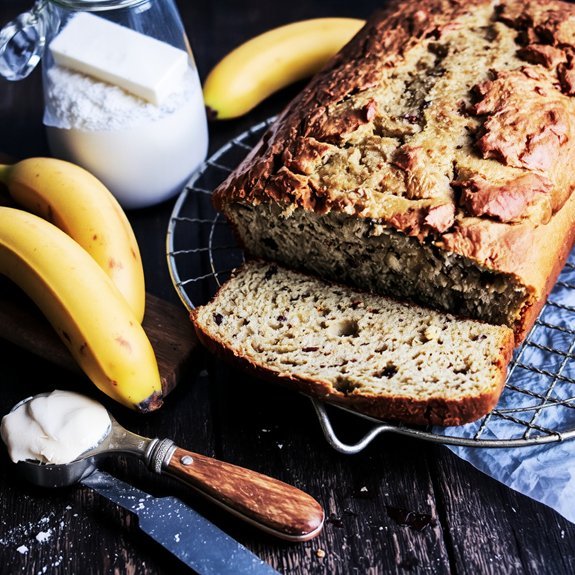
- Use three overripe bananas with brown spots for maximum natural sweetness and moisture in your batter.
- Fold wet and dry ingredients together minimally to avoid overdeveloping gluten, ensuring a tender crumb.
- Bake at 350°F on the middle rack for 55–65 minutes, rotating halfway for even browning.
- Test doneness with a toothpick that emerges with just a few moist crumbs, never completely clean.
- Store cooled loaf in an airtight container for three days at room temperature or freeze for three months.
Ingredients You’ll Need
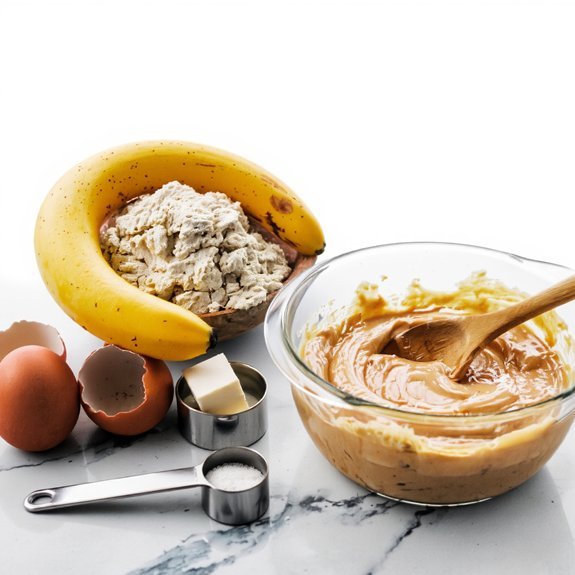
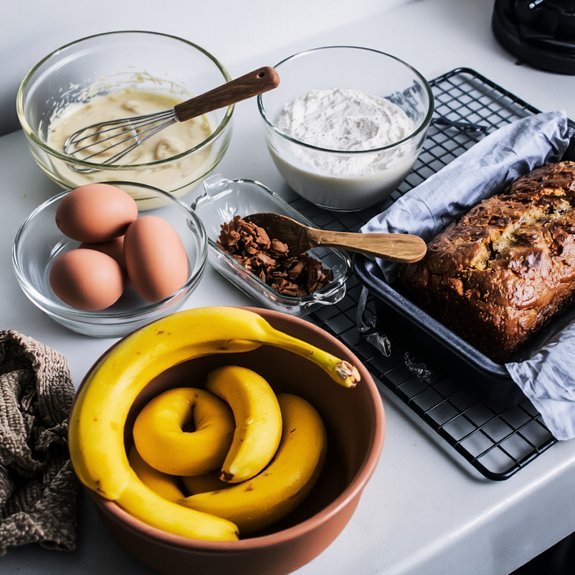
You’ll want to gather three overripe bananas (the spottier, the better—they’re sweeter and more flavorful), two cups of all-purpose flour, three-quarters teaspoon of baking soda, half a teaspoon of salt, half a cup of softened butter, one cup of granulated sugar, two large eggs, and a teaspoon of vanilla extract.
For ingredient sourcing, you’ve got freedom to choose organic or conventional options based on your preferences. The nutritional breakdown reveals that this combination delivers natural sweetness from bananas while baking soda activates for proper rise. Softened butter creates moisture and richness without compromise.
The eggs bind everything together, ensuring structural integrity throughout baking. This straightforward lineup requires no exotic substitutions, giving you complete control over your final product’s quality and taste profile.
Why Overripe Bananas Matter
Because overripe bananas contain higher sugar content and softer flesh, they’re essential for achieving banana bread’s signature moisture and flavor. You’ll notice enzymatic changes transforming starches into simple sugars, intensifying sweetness without additional ingredients. The darkened peel signals peak ripeness—don’t shy away from those brown spots.
| Stage | Sugar Level | Texture |
|---|---|---|
| Yellow | Low | Firm |
| Spotted | High | Soft |
| Brown | Maximum | Very Soft |
Aroma development accelerates as bananas mature, releasing volatile compounds that deepen your bread’s complexity. You’re harnessing natural fermentation processes that create depth store-bought alternatives can’t match. This enzymatic progression breaks down cell walls, yielding moisture that prevents dryness. You’ll achieve superior crumb structure and authentic banana flavor by respecting this ripening window. Don’t settle for underripe fruit—embrace full maturation for uncompromised results.
Step-by-Step Instructions
Transform your overripe bananas into loaf perfection by mastering the fundamental technique: mashing fruit until it reaches a chunky-smooth consistency, then layering that base with your dry ingredients.
Master banana bread by mashing overripe bananas to chunky-smooth perfection, then layering with dry ingredients.
You’ll combine flour, baking soda, and salt in one bowl while whisking together eggs, melted butter, and sugar in another.
Fold the wet mixture into the dry blend using minimal strokes to avoid overdeveloping gluten.
Pour batter into your greased loaf pan—a visual aid for progress milestones is checking when the top cracks slightly during baking.
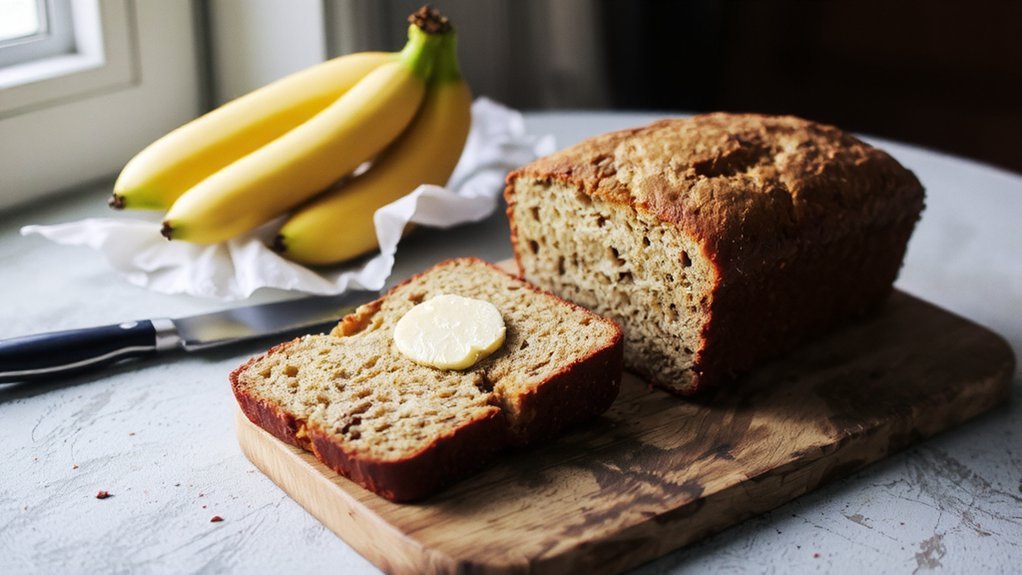
Insert a toothpick at the center; when it emerges clean, you’ve achieved that golden-brown exterior with a tender crumb.
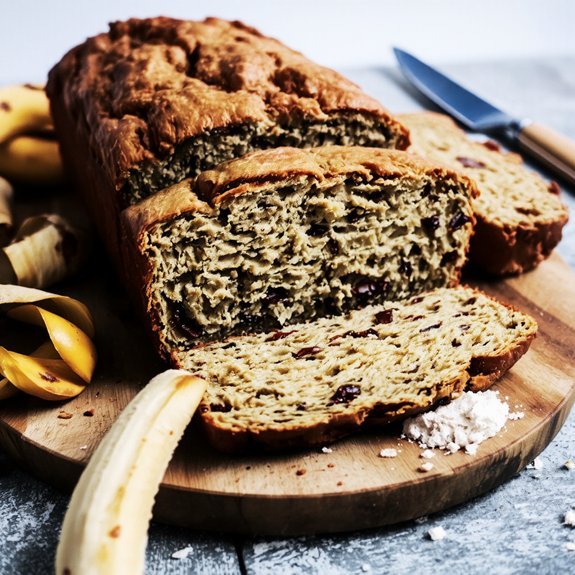
Your freedom to customize comes through add-ins: walnuts, chocolate chips, or vanilla extract.
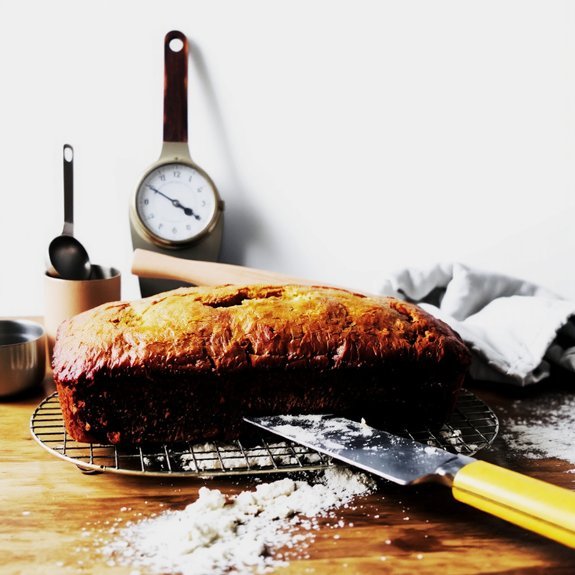
Cool before slicing into perfect wedges.
Pro Tips for the Perfect Loaf
You’ll achieve the perfect loaf by balancing moisture through ripe bananas and wet ingredients with flour to prevent a dense, gummy crumb.
Timing matters—fold dry ingredients into your wet mixture just until combined, then add mix-ins last to avoid overdeveloping the gluten. The sequence of ingredient incorporation directly determines whether your bread rises evenly or bakes with a tough, uneven texture.
Moisture and Texture Balance
While achieving the ideal banana bread texture hinges on understanding how moisture interacts with your dry ingredients, the real magic happens in the ratio of mashed bananas to flour.
You’ll want overripe bananas—they’re wetter and sweeter, giving you better moisture distribution throughout your crumb structure.
Here’s your freedom: don’t overmix.
Gentle folding preserves air incorporation, creating that tender, open crumb you’re after.
Too much stirring compacts everything, resulting in dense, gummy bread.
Balance wet and dry ingredients precisely.
If your batter looks too thick, you’ve likely used bananas that weren’t ripe enough.
Too thin? Reduce liquid slightly next time.
These adjustments guarantee your loaf stays moist without becoming soggy, delivering that perfect bite every single time.
Ingredient Timing Matters
Because banana bread’s success relies on chemical reactions happening in the right sequence, when you add each ingredient dramatically impacts your final loaf. You’ll want to master order precision—combine your wet ingredients first, then fold in your dry mixture during a tight mixing window.
Don’t overthink it; you’re simply giving your leavening agents the ideal moment to activate. Add your bananas early so they’re thoroughly incorporated, then introduce leavening agents last to maximize their potency.
Your mixing windows matter tremendously—work swiftly but deliberately. Overmixing after you’ve added flour develops gluten unnecessarily, creating a dense crumb.
Baking Time and Temperature Guide
You’ll want to bake your banana bread at 350°F, which allows the cake to rise evenly while the exterior develops a golden crust without burning.
Set your loaf pan on the middle oven rack to promote consistent heat circulation, and bake for 55-65 minutes until a toothpick inserted in the center comes out clean or with just a few moist crumbs clinging to it. Rotate your pan halfway through if you notice uneven browning, and remember that ovens vary—start checking for doneness around the 50-minute mark.
Optimal Temperature Settings
Getting your oven to the right temperature makes all the difference between a moist, tender crumb and a dry, overbaked loaf.
You’ll want to preheat your oven to 350°F for standard banana bread. This temperature allows your batter to bake through evenly while developing a golden crust without burning the exterior.
| Temperature | Result |
|---|---|
| 325°F | Slower bake, extra moist |
| 350°F | Standard, balanced texture |
| 375°F | Faster bake, drier crumb |
Thermostat calibration matters substantially—your oven might run hot or cold, affecting your final product. Check with an oven thermometer to verify accuracy.
Ambient humidity also impacts baking time. In humid conditions, your bread’ll take slightly longer to set. You’re aiming for a toothpick that comes out clean, not wet, indicating your loaf’s perfectly done.
Duration and Doneness Tests
Once your banana bread’s been in the oven for 50-60 minutes at 350°F, it’s time to test for doneness. You’ll notice aroma indicators—a rich, caramelized banana scent filling your kitchen signals proper baking progress.
Perform the springback test by gently pressing the top with your finger. If it springs back immediately, you’ve achieved the ideal crumb structure. The bread should feel firm yet slightly yielding.
Insert a toothpick into the center; it should emerge with minimal moist crumbs, though a few cake-like bits are acceptable. You’re seeking that perfect balance between moist interior and set exterior.
Don’t overbake—the residual heat continues cooking after removal. Your finished loaf should display a golden-brown exterior with a tender, dense interior that holds together beautifully when sliced.
Oven Rack Positioning Tips
Where should your banana bread actually sit in the oven?
You’ve got freedom here—don’t overthink it.
Your rack height directly impacts how your banana bread bakes, affecting moisture retention and crust development.
- Middle rack – Your best bet for even baking; airflow patterns circulate consistently around all sides
- Lower third – Use if you want a darker bottom crust; reduces top browning
- Upper third – Choose this for lighter bottoms when your oven runs hot
- Rotate halfway – Spin your loaf 180 degrees midway through baking for uniformity
Position your banana bread where it’ll receive balanced heat.
Proper rack height guarantees your batter rises evenly, the crumb sets properly, and those moist, tender pockets develop throughout.
You’re controlling the bake, not letting your oven dictate results.
Common Mistakes to Avoid
Since banana bread’s success hinges on balancing moisture and structure, you’ll want to avoid overmixing your batter, which develops gluten and yields a dense, tough crumb instead of the tender texture you’re after.
Avoid overmixing banana bread batter—excess gluten develops, yielding a dense, tough crumb instead of the tender texture you’re after.
Don’t skimp on ripe bananas—underripe fruit won’t deliver the sweetness and moisture your loaf demands.
You’re also risking failure by ignoring allergies in your ingredient selections; always verify your additions accommodate dietary needs.
Overbaking dries out your bread unnecessarily, so pull it from the oven when a toothpick emerges with just a few moist crumbs.
Finally, master your slicing technique by using a sharp, serrated knife with gentle sawing motions rather than pressing down, which crushes the crumb structure you’ve worked to build.
Storage and Make-Ahead Options
To extend your banana bread’s shelf life, store the cooled loaf in an airtight container at room temperature for up to three days, where the residual moisture keeps the crumb tender.
- Refrigeration: Your fridge lifespan extends to five days when you wrap the loaf tightly in plastic wrap or foil, slowing starch retrogradation.
- Freezer portioning: Slice your banana bread before freezing, allowing you to thaw individual portions without defrosting the entire loaf.
- Long-term freezing: Properly wrapped banana bread maintains quality for three months in your freezer.
- Thawing technique: Remove frozen portions to room temperature for two hours, preserving the tender crumb structure you’ve carefully developed through your baking technique.
Variations and Creative Add-Ins
Once you’ve mastered the classic banana bread formula and perfected your storage methods, you’re ready to customize your loaf with creative add-ins that transform the base recipe into something uniquely yours.
Fold in chocolate chips, walnuts, or macadamia nuts for textural depth. Swirl in peanut butter or Nutella for richness. Add coconut flakes, fresh blueberries, or diced pineapple for brightness.
Experiment with spices like cardamom or cinnamon to elevate complexity.
For gift giving, consider decorative presentation ideas that showcase your creation. Wrap cooled loaves in parchment paper and tie with twine.
Layer sliced pieces in clear cellophane bags. These thoughtful touches demonstrate care and craftsmanship, making your personalized banana bread an impressive homemade gift that recipients’ll genuinely appreciate.
Frequently Asked Questions
Can I Use Frozen Bananas Instead of Fresh Ones for Banana Bread?
You can absolutely use frozen bananas for your bread.
You’ll want to thaw them completely at room temperature or in the refrigerator—don’t use heat.
Here’s the key: frozen bananas release extra liquid when they thaw, so you’ve got to adjust your moisture content by reducing other wet ingredients slightly.
This technique guarantees you’ll nail that perfect crumb texture without ending up with a dense, soggy loaf.
What’s the Difference Between Banana Bread and Banana Cake?
You’ll notice banana bread relies on denser batters with less sugar, creating a moist loaf you slice and enjoy plain or lightly buttered. Banana cake, conversely, uses lighter, airier batter with more sugar and eggs, demanding icing presence for serving occasions.
You’re working with different fat ratios and mixing techniques—bread favors oil while cake benefits from creaming butter and sugar. Your choice determines texture, sweetness, and presentation entirely.
How Do I Know When My Banana Bread Is Fully Cooked Inside?
You’ll know your banana bread’s done when you insert a toothpick into the center and it comes out clean or with just a few moist crumbs—not wet batter.
You’ve also got freedom to rely on internal temperature; aim for 205-210°F at the thickest part.
The bread’s edges should pull slightly from the pan’s sides, and the top’ll be golden brown.
Trust your instincts: that perfect texture comes from nailing these technique markers every time.
Can Banana Bread Be Made Without Eggs for Vegan Diets?
You can absolutely make vegan banana bread by ditching eggs entirely.
Try using a flax substitute—mix one tablespoon ground flaxseed with three tablespoons water per egg, then let it sit five minutes until it’s binding.
Alternatively, you’ll find aquafaba binding works brilliantly; three tablespoons of this chickpea liquid replaces one egg perfectly. Both methods deliver moisture and structure, giving you that tender crumb you’re after without compromising your dietary freedom.
Why Does My Banana Bread Have a Dense, Gummy Texture Inside?
You’re likely overmixing your batter, which develops gluten and creates that dense, gummy crumb you’re fighting against. Stop stirring once you’ve barely combined your ingredients—lumps are your friend here.
Also check your insufficient leavening. You need adequate baking soda or powder to give your bread proper rise and structure.
Under-leavened banana bread won’t achieve that light, tender crumb you’re after. Trust your instincts; don’t overthink it.


Leave a Comment