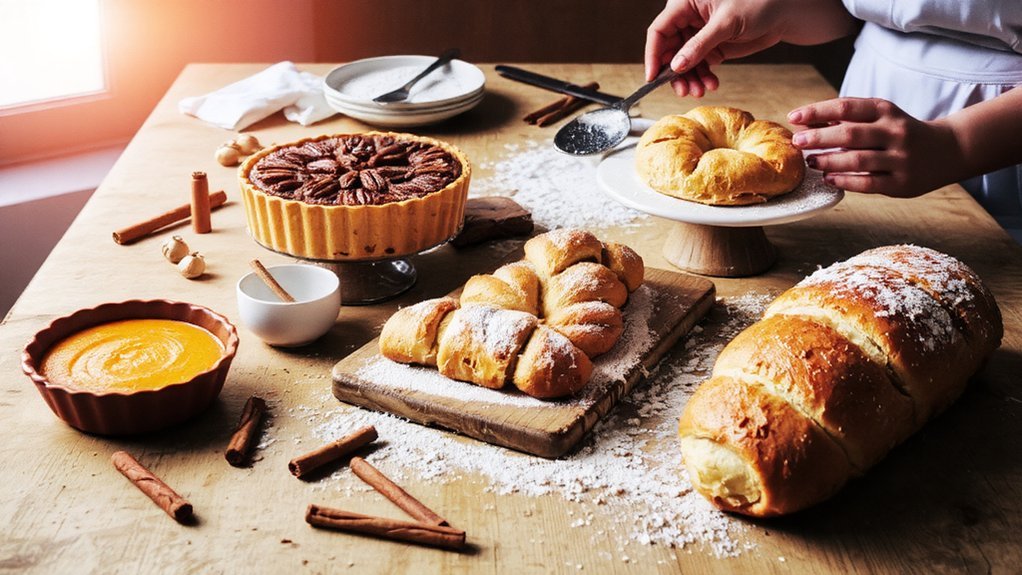
Key Takeaways
- Pumpkin pie with classic spices (cinnamon, ginger, nutmeg, cloves) baked at 425°F then 350°F until filling sets completely.
- Buttery dinner rolls require yeast proofing, 90-minute first rise, shaping into 12 portions, then 18 minutes at 375°F.
- Cranberry bread balances tart-sweet flavors with lemon zest, orange zest, and reduced sugar for sophisticated autumn dessert option.
- Maple glazed pear galette features firm Bosc pears arranged in circular pattern with pure maple syrup reduction drizzle.
- Herb-infused cornbread with rosemary and fresh chives bakes 20–25 minutes at 425°F in preheated cast-iron skillet for golden finish.
Classic Pumpkin Pie Recipe
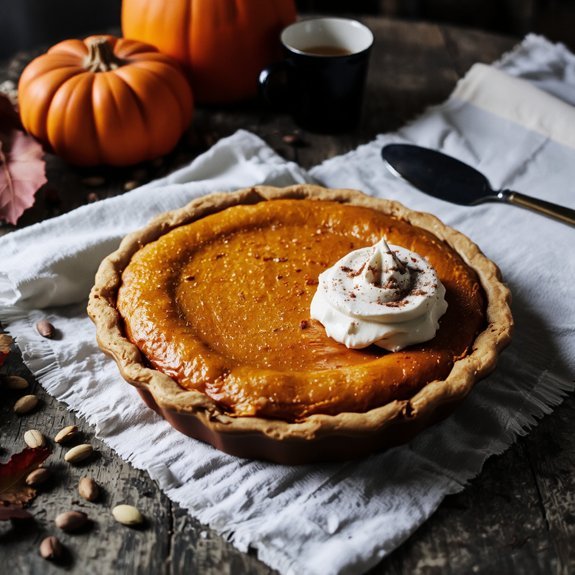
Combining pure pumpkin puree, evaporated milk, and warm spices creates the foundation for an authentic pumpkin pie.
You’ll blend one 15-ounce can of pumpkin puree with three-quarter cup evaporated milk, then incorporate cinnamon, ginger, nutmeg, and cloves to taste.
The custard technique requires whisking two eggs with half-cup granulated sugar until fully combined.
Gradually add your pumpkin mixture to this base, ensuring smooth integration without lumps.
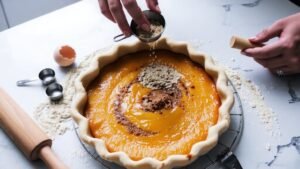
Pour the filling into your unbaked pie shell immediately.
You’ll bake at 425°F for 15 minutes, then reduce heat to 350°F for 40-50 minutes.
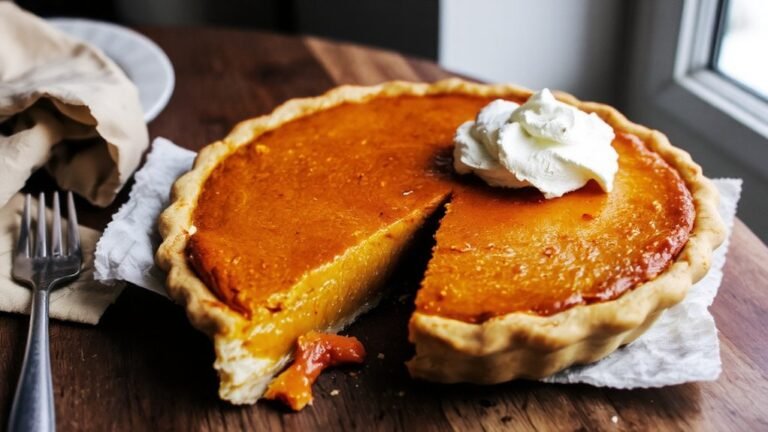
The pie’s done when a knife inserted near the center emerges clean.
Your filling shouldn’t jiggle when you gently shake the pan.
Cool completely before serving.
This straightforward method yields consistent, professional results every time.
3. Buttery Dinner Rolls
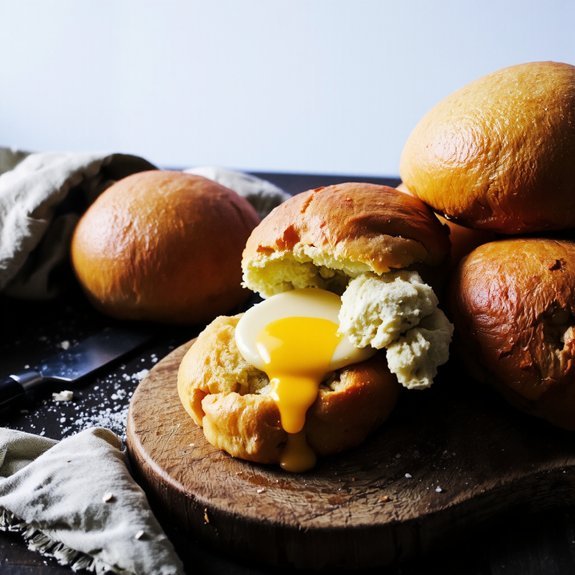
While your pumpkin pie cools, you’ll prepare a tender complement to the holiday table with buttery dinner rolls.
You’ll need bread flour, whole milk, butter, yeast, salt, and sugar for this straightforward formula.
Combine warm milk with active dry yeast and sugar, allowing proper proofing timing—roughly five minutes—until foamy.
Mix in flour and salt, then knead in softened butter until the dough’s smooth and elastic.
Your first rise takes about ninety minutes until doubled.
Divide the dough into twelve portions using shaping methods that work best for you: simple rounds or classic knots.
Place rolls on a buttered pan for their second proofing timing of forty minutes.
Brush with melted butter, then bake at 375°F for eighteen minutes until golden.
You’ve earned rolls that justify their rich, indulgent reputation.
4. Pecan Tarts With a Twist
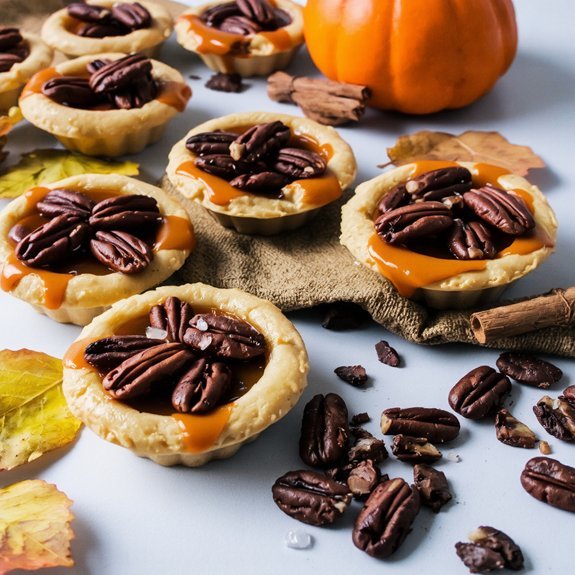
You’ll elevate traditional pecan tarts by incorporating unexpected flavor elements like bourbon, cardamom, or a hint of espresso into your filling.
To achieve a superior buttery crust, you’ll want to work cold butter into your flour using a pastry cutter, then chill your dough before rolling and pressing it into your tart pans.
This methodical approach—cold ingredients, minimal handling, and proper resting periods—ensures a crisp, golden crust that contrasts beautifully with your creamy, complex filling.
Unique Flavor Combinations
How can you elevate the traditional pecan tart beyond its familiar sweet-nutty profile?
You’ll discover liberation through bold ingredient combinations.
Consider crafting a Miso Caramel filling—fermented miso paste adds umami depth and subtle saltiness that amplifies the pecans’ richness.
Whisk white miso into your caramel base for complexity that transcends conventional sweetness.
Alternatively, infuse your filling with Cardamom Fig.
Toast cardamom pods, grind them fresh, and fold the spice into a fig purée mixed with your pecan mixture.
The cardamom’s warm, citrusy notes complement figs’ deep earthiness while cutting through richness.
Both approaches demand precision: measure your miso or cardamom carefully—these potent ingredients require restraint.
Toast nuts separately for maximum flavor development.
Layer your components methodically, ensuring even distribution throughout your tart shell.
These techniques reward experimentation and reward your palate.
Buttery Crust Techniques
A stellar filling demands an equally sophisticated crust that won’t crumble under the weight of bold flavors. You’ll master pecan tarts by perfecting fat incorporation—the critical step that creates structural integrity.
Cut cold butter into flour using quick, deliberate motions until you achieve a coarse, sandy texture. This technique distributes fat evenly, ensuring flaky layers without dense pockets.
Add ice water gradually, mixing until dough just holds together. Don’t overwork it; excessive handling develops gluten, compromising your crust’s delicate texture.
Dough chilling is non-negotiable. Wrap your dough and refrigerate for at least two hours—longer overnight if possible. Cold dough resists shrinking during baking and maintains crisp edges.
Roll between parchment sheets to prevent sticking. Press firmly into tart molds, then chill again before filling. This methodical approach guarantees a buttery, structurally sound foundation for your distinctive pecan filling.
5. Cranberry Bread Guide
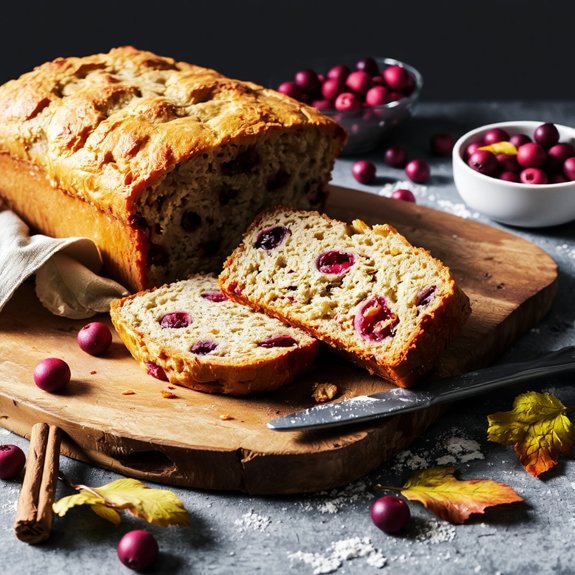
You’ll master the classic cranberry bread recipe by balancing tart berries with sweetened batter, adjusting sugar ratios to achieve complexity without overwhelming the bread’s crumb structure.
To maintain ideal moisture, you’ll incorporate sour cream or buttermilk while monitoring baking time—typically 55-65 minutes at 350°F—to prevent dryness. For storage, you’ll wrap cooled loaves tightly in plastic wrap and refrigerate up to five days, or freeze for three months to preserve the bread’s tender texture and bright cranberry flavor.
Classic Cranberry Bread Recipe
Transform fresh or frozen cranberries into a moist, tangy quick bread by combining 2 cups all-purpose flour, 1½ teaspoons baking powder, ½ teaspoon baking soda, and ½ teaspoon salt in a large bowl.
In another bowl, whisk together 1 cup sugar, ⅓ cup melted butter, 2 eggs, and 1 cup sour cream.
Fold this mixture into your dry ingredients until just combined. Stir in 1½ cups cranberries and your chosen zest variation—lemon, orange, or vanilla extract all work beautifully.
Pour batter into a greased loaf pan. Top with an almond topping made from sliced almonds mixed with brown sugar and cinnamon.
Bake at 350°F for 55-60 minutes until a toothpick emerges clean. Cool before slicing to preserve that perfect crumb structure.
Tart and Sweet Balance
How do you strike the perfect equilibrium between the cranberries’ natural tartness and your bread’s sweetness?
You’ll control this balance through three key adjustments.
First, reduce granulated sugar to 1¼ cups—this prevents cloying density.
Second, incorporate citrus acidity by adding one tablespoon of fresh lemon juice and ½ teaspoon of orange zest to your batter.
This brightens flavors without additional sweetness.
Third, master your salt balance.
Use ¾ teaspoon of kosher salt, which enhances tartness perception and subdues excessive sugar notes.
The salt doesn’t make bread taste salty; it sharpens contrasts between flavors.
Finally, fold in fresh cranberries (not dried) for their superior acidic punch.
This methodical approach gives you complete control over your final product’s flavor profile, ensuring tart and sweet elements work in harmony rather than competing for dominance.
Moisture and Storage Tips
Because cranberry bread’s crumb structure depends on proper moisture retention, you’ll need to master cooling and wrapping techniques immediately after baking.
Allow your loaf to cool completely on a wire rack—roughly two hours—before wrapping.
This prevents condensation from creating sogginess.
For storage, wrap cooled bread tightly in plastic wrap, then aluminum foil.
This dual-layer approach maintains ideal humidity control without trapping excess moisture.
You can refrigerate your loaf for up to five days using this method.
For extended preservation, vacuum sealing offers superior results.
Portion your cranberry bread, vacuum seal individual slices, and freeze for up to three months.
When you’re ready to enjoy it, thaw at room temperature for two hours.
This approach preserves your bread’s texture and tart-sweet flavor profile perfectly.
6. Sweet Potato Biscuits
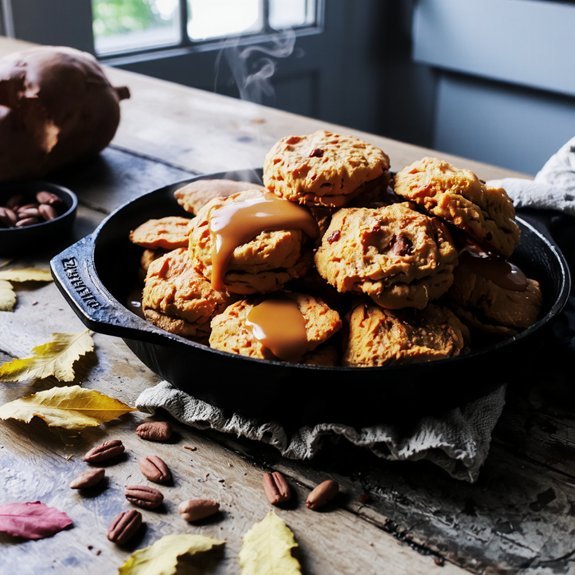
When you’re looking for a twist on classic Thanksgiving biscuits, sweet potato adds moisture, subtle sweetness, and a beautiful golden hue to your dough.
| Ingredient | Measurement |
|---|---|
| Grated yam | ¾ cup |
| All-purpose flour | 2 cups |
| Buttermilk | ⅔ cup |
Start by incorporating grated yam into your dry ingredients—flour, baking powder, salt, and butter. The yam’s natural moisture eliminates excessive liquid additions, yielding tender crumbs. Mix until breadcrumb texture forms, then add buttermilk until dough just comes together.
Roll to ½-inch thickness on a floured surface. Cut into rounds and arrange on a skillet baking sheet. Brush tops with egg wash for golden finish. Bake at 425°F for 14-16 minutes until golden brown.
These biscuits deliver freedom from bland Thanksgiving sides—complex flavor, superior moisture retention, and visually striking presentation without compromise.
7. Apple Cinnamon Coffee Cake
You’ll create distinct spiced layers by combining cinnamon, nutmeg, and brown sugar in both the batter and crumb topping, which builds complexity and textural contrast throughout the cake.
This make-ahead breakfast option lets you prepare the batter the evening before and bake it fresh in the morning, saving you valuable time on Thanksgiving day.
The interplay between the tender, moist cake crumb and the crispy cinnamon-sugar streusel gives you the satisfying bite you’re after without requiring last-minute assembly.
Spiced Layers and Texture
Layering cinnamon-spiced streusel with tart apples and tender cake crumb creates the textural complexity that defines this Thanksgiving staple.
You’ll achieve aromatic layering by distributing your spice mixture—cinnamon, nutmeg, and brown sugar—across multiple cake sections rather than concentrating it in one stratum.
This technique builds flavor depth while preventing overwhelming spice concentration.
Your texture contrast emerges from deliberate construction: crisp streusel topping, moist cake interior, and soft apple chunks work in concert.
Slice your apples uniformly to promote even moisture distribution and consistent baking.
Press your streusel firmly into the batter’s surface, creating defined layers that won’t compress into homogeneity during baking.
You’re free to customize your spice ratios—adjust cinnamon and nutmeg according to your preference.
This methodical approach guarantees a coffee cake with distinguished layers and satisfying textural variety throughout each bite.
Make-Ahead Breakfast Option
Beyond the careful layering that makes this cake visually and texturally appealing, its make-ahead qualities make it an ideal Thanksgiving breakfast solution.
You’ll prep the batter the night before, allowing flavors to meld while you rest.
Simply combine your dry ingredients—flour, baking powder, cinnamon, nutmeg—with diced apples and a crumb topping.
Cover and refrigerate overnight.
Come morning, you’ve got flexibility. Bake it fresh for warm slices alongside coffee, or treat it like overnight oats—grab individual portions for grab-and-go convenience.
You can even construct breakfast sandwiches using thick cake slices with cream cheese or butter between them.
This approach eliminates morning stress. You control the timeline, bake when convenient, and serve on your schedule. No last-minute scrambling, just straightforward execution and freedom to focus on other Thanksgiving preparations.
8. Herb-Infused Cornbread
Elevating cornbread with fresh herbs transforms a traditional side into a sophisticated complement to your Thanksgiving table.
You’ll combine cornmeal, flour, baking powder, and salt in your dry mixture.
Whisk together eggs, buttermilk, and melted butter separately, then merge both components.
Fold in finely chopped rosemary—approximately one tablespoon—for earthy depth that complements poultry and stuffing.
Pour your batter into a preheated cast-iron skillet or greased baking pan.
Bake at 425°F for 20-25 minutes until golden and a toothpick emerges clean.
The real distinction comes from your chive topping: scatter fresh chives across the cornbread’s surface during the final five minutes of baking.
This rosemary pairing with bright chives creates layers of herbaceous flavor you control entirely, freeing your Thanksgiving menu from predictable monotony.
9. Brown Butter Chocolate Chip Cookies
When you brown butter—cooking it until the milk solids caramelize and turn golden—you’ll reveal a nutty depth that transforms ordinary chocolate chip cookies into a Thanksgiving standout.
This toasting technique demands attention; watch for the amber hue signaling readiness.
Your mixing method matters equally. Cream the browned butter with brown and white sugars until fluffy, then incorporate eggs and vanilla.
Whisk dry ingredients—flour, baking soda, salt—separately to guarantee even distribution. Fold in chocolate chips and optional nuts with precision.
Chill your dough for at least two hours; this prevents spreading and deepens flavor development.
Bake at 350°F for 11-13 minutes until edges set but centers remain slightly underbaked. You’ll achieve cookies with crispy exteriors and chewy interiors, elevated by sophisticated brown butter notes that’ll impress your guests.
10. Maple Glazed Pear Galette
A rustic galette showcases pears’ delicate sweetness while requiring less precision than traditional pies.
A rustic galette celebrates pears’ subtle sweetness while demanding far less precision than traditional pie.
You’ll start with pear selection—choose firm Bosc or Anjou varieties at peak ripeness for ideal flavor balance.
Prepare your pastry dough with cold butter, flour, and salt.
Roll it thin between parchment sheets, then arrange your sliced pears in a circular pattern, leaving a two-inch border.
Fold the dough’s edges over the filling, creating natural pleats.
Brush with egg wash and bake at 400°F for thirty-five minutes until golden.
While baking, prepare your maple reduction by simmering pure maple syrup with a pinch of sea salt.
Drizzle this glaze over the finished galette immediately after removing it from the oven.
You’ve created an impressive, unfussy dessert that delivers sophisticated flavor without demanding perfection.
11. Spiced Gingerbread Loaf
Since gingerbread’s warm spices demand balanced proportions, you’ll combine two cups all-purpose flour, one and a half teaspoons baking soda, and one teaspoon each of ground ginger, cinnamon, and cloves in a bowl.
The molasses ratio—three-quarters cup—determines your loaf’s moisture and depth.
Whisk together softened butter with brown sugar until pale, then incorporate eggs individually.
Add the molasses mixture alternately with your dry ingredients, starting and ending with flour.
This methodical approach guarantees even crumb structure without overmixing.
Pour batter into a greased loaf pan and bake at 350°F for fifty-five minutes until a toothpick emerges clean.
The dense, moist crumb structure you’ll achieve makes this loaf perfect for Thanksgiving’s bold flavors.
Cool completely before slicing.
Frequently Asked Questions
Can I Prepare Thanksgiving Baked Goods in Advance and Freeze Them?
Yes, you can freeze most Thanksgiving baked goods successfully.
Your freezing timeline depends on the item: unfrosted cakes and quick breads last three months, cookies two months, and pie dough up to four months.
For thawing methods, refrigerate items overnight before serving, or leave them at room temperature for two to four hours.
Wrap everything airtight to prevent freezer burn and maintain quality.
This approach gives you complete control over your baking schedule.
What Are the Best Substitutes for Common Baking Allergens Like Nuts and Dairy?
You’ll find seed butters—sunflower, tahini, and pumpkin—replace nuts seamlessly in your recipes.
For dairy, you’re free to substitute with coconut milk, oat milk, or vegan butter at 1:1 ratios.
Aquafaba meringues deliver that signature peaks-and-valleys texture without eggs. Replace each egg with three tablespoons aquafaba, whipped to stiff peaks.
These substitutions maintain structural integrity and moisture balance, ensuring your baked goods rise properly and achieve desired crumb structure without compromise.
How Do I Adjust Baking Recipes for High Altitude Cooking?
You’ll master high-altitude baking by making two critical adjustments. Increase flour by 1-2 tablespoons per cup to combat dryness. Reduce leavening agents—baking powder and baking soda—by 25% to prevent over-rising and collapse.
Lower oven temperature by 15-25°F for even baking. You’re also decreasing liquid slightly and increasing eggs for structure. These methodical modifications give you complete control over your Thanksgiving creations at elevation, ensuring consistent, reliable results you’ll trust.
What Equipment Is Essential for Successfully Baking Multiple Recipes Simultaneously?
You’ll need multiple oven racks positioned strategically through oven calibration to guarantee even heat distribution. Invest in quality baking sheets, parchment paper, and timer systems—don’t rely on guesswork.
Arrange your rack placement so you’re rotating trays independently without crowding airflow. You’ve got the freedom to bake simultaneously when you’ve got precise temperature control, accurate measurements, and disciplined rack arrangement.
This methodology lets you maximize your oven’s capacity while maintaining consistent results.
How Can I Prevent Common Baking Failures Like Dry Cakes or Soggy Crusts?
You’ll prevent dry cakes by measuring flour accurately and using proper mixing methods—cream butter and sugar thoroughly, then fold in ingredients gently.
For soggy crusts, you’ll dock bottoms before baking and pre-bake shells partially.
Master pan preparation by greasing thoroughly and using parchment paper.
Don’t overbake; you’re done when a toothpick shows moist crumbs.
Control your oven temperature precisely—invest in a reliable thermometer.


Leave a Comment