Key Takeaways
- Classic gingerbread cookies with warm spices deliver traditional holiday flavor; bake 8–10 minutes at 350°F for ideal texture.
- Chocolate peppermint bark combines dark chocolate base with crushed candy and milk chocolate layers for festive gifting.
- Ginger loaf cake with citrus zest and candied ginger improves over 24 hours as flavors meld sophisticatedly.
- Buttery shortbread fingers showcase Scottish simplicity with precise butter-sugar-flour ratios for melt-in-mouth elegance.
- Snowball cookies offer delicate, nutty texture with double powdered sugar coating resembling fresh snow for presentation appeal.
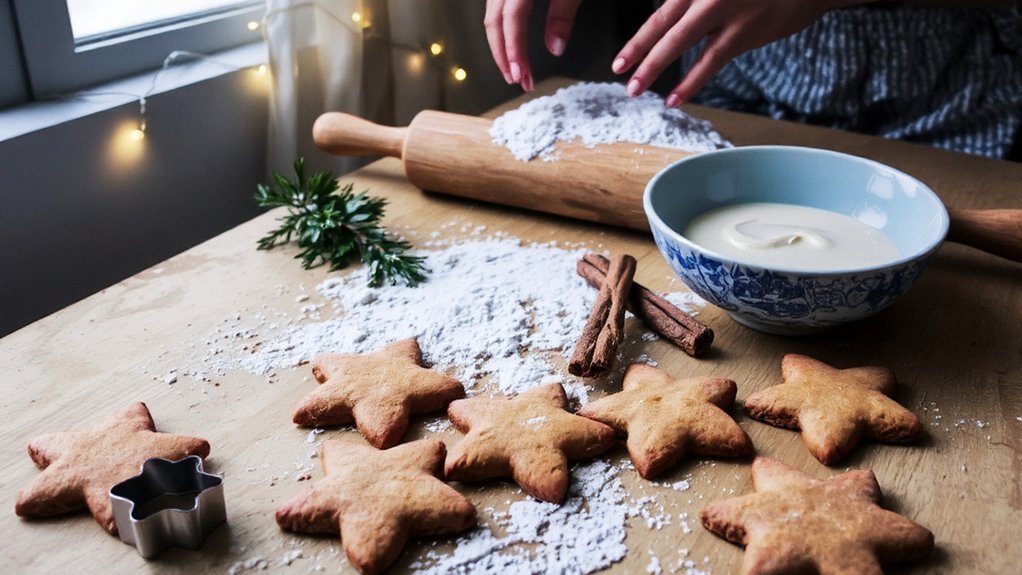
Classic Gingerbread Cookies
The warm spice blend of ginger, cinnamon, and cloves defines this timeless holiday staple.
You’ll craft these cookies by creaming butter and brown sugar, then incorporating molasses for depth.
Cream butter and brown sugar together, then incorporate molasses to add depth and richness to your cookie dough.
Add your dry ingredients—flour, baking soda, and spices—with precision to guarantee proper structure.
You’re free to customize your cookie cutters, choosing shapes that reflect your personal style and creativity.
Roll your dough to quarter-inch thickness for ideal texture.
Your bake time of eight to ten minutes at 350°F produces perfectly chewy centers with slightly crisp edges.
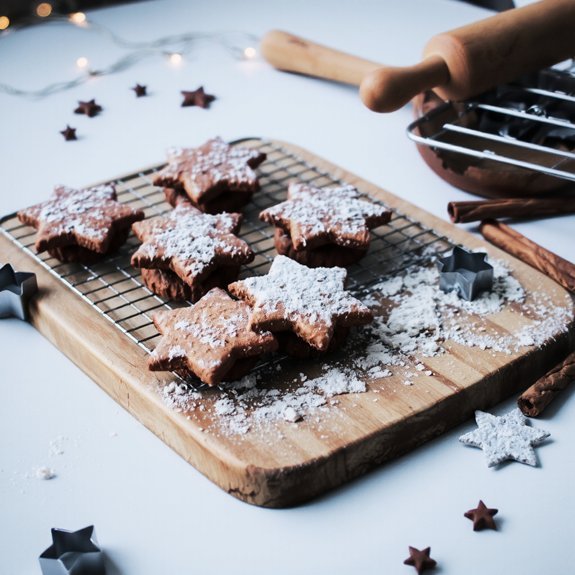
Remove them just before they’re fully set; they’ll continue cooking as they cool.
These cookies deliver sophisticated flavor without unnecessary complexity, allowing you to master this classic with confidence and independence.
2. Traditional Fruitcake
You’ll discover that traditional fruitcake traces its roots to medieval England, where preserved fruits and spices created a cake designed for longevity and celebration.
When you select ingredients for authentic fruitcake, you must prioritize high-quality dried fruits, nuts, and spirits that’ll develop complex flavors through proper aging.
Your success depends on understanding how each component—from candied citrus peel to brandy or rum—contributes to both texture and taste in this time-honored confection.
History and Origins
Dating back to ancient Rome, fruitcake emerged as a practical preservation method that combined dried fruits, nuts, and honey with a grain-based batter. You’ll find this dessert became embedded within cultural traditions across Europe during the medieval period, evolving from necessity into festive symbolism.
| Era | Region | Key Ingredients | Significance |
|---|---|---|---|
| Medieval | England | Spices, dried fruit | Luxury item |
| 18th Century | Europe | Brandy preservation | Extended shelf life |
| Victorian | Britain | Elaborate decorations | Status symbol |
| Modern | Global | Refined recipes | Holiday centerpiece |
You can trace fruitcake’s transformation from utilitarian food to celebratory centerpiece through your own family kitchen. The cake’s longevity—both literal and cultural—reflects humanity’s desire to preserve abundance and mark significant moments with intentional craftsmanship, granting you creative freedom within time-honored tradition.
Ingredient Selection Guide
Since fruitcake’s preservation power derives from ingredient quality and proportions, you’ll want to source dried fruits and nuts with particular attention to moisture content and freshness.
Select fruits from reputable suppliers where ingredient provenance is documented—this guarantees ideal shelf stability and flavor integrity.
Examine allergen labeling meticulously; fruitcakes typically contain multiple tree nuts and may include traces of gluten or soy.
Choose candied citrus peels and glacé cherries from producers maintaining rigorous quality standards.
Source brandy or rum with adequate alcohol content to facilitate preservation.
Verify that dried currants, raisins, and apricots contain no added sulfites if that concerns you.
Your ingredient selection determines whether your fruitcake achieves legendary longevity or deteriorates prematurely.
3. Buttery Shortbread Fingers
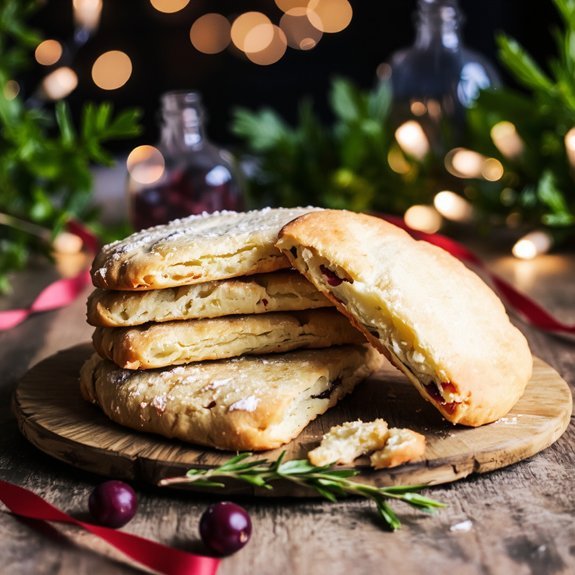
Originating from Scottish tradition, shortbread’s appeal lies in its elegant simplicity—just three core ingredients create a tender, melt-in-your-mouth texture that defines this Christmas classic.
You’ll combine butter, sugar, and flour in precise ratios to achieve the ideal crumbly consistency.
Your shape variations matter notably.
You can pipe uniform fingers, cut classic rectangles, or press dough into decorative molds.
Each approach yields different aesthetic results while maintaining the same delicate crumb structure.
Cooling techniques directly impact your final product’s integrity.
You’ll want to cool shortbread in the pan initially, allowing residual heat to set the structure without brittleness.
Transfer to a wire rack for complete cooling, which prevents moisture accumulation and maintains that coveted crisp texture.
This methodical approach guarantees perfectly executed buttery fingers every time.
4. Chocolate Peppermint Bark
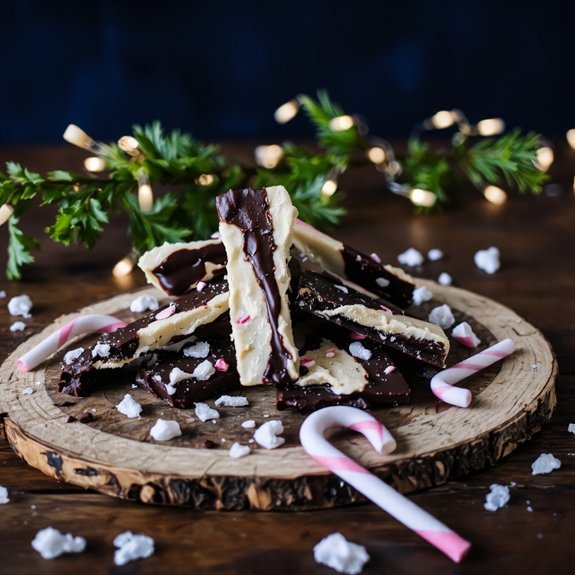
You’ll need to master melting chocolate perfectly to achieve a smooth, glossy base without seizing or burning the cocoa solids.
Next, you’ll crush peppermint candy to your desired consistency—whether you prefer fine shards or chunky pieces—ensuring uniform distribution across each layer.
Finally, you’ll execute precise layering and setting techniques, alternating chocolate and peppermint while allowing each layer to firm adequately before adding the next.
Melting Chocolate Perfectly
Achieving the ideal consistency when melting chocolate requires precise temperature control and careful technique to prevent seizing or blooming.
You’ll want to use the double boiler method, placing chocolate over gently simmering water rather than direct heat.
This approach gives you superior temperature control and prevents scorching.
Monitor your chocolate’s temperature closely—dark chocolate should reach 113–122°F, while milk and white varieties need 104–113°F.
You’re free to experiment with tempering techniques to develop your preferred texture.
Stir frequently with a dry spatula, ensuring even melting without introducing moisture.
Once melted, you can work quickly and confidently.
For peppermint bark, pour your chocolate onto parchment immediately, then spread crushed peppermints before it sets.
This precision yields professional results and gives you complete control over your creation’s quality.
Peppermint Candy Crushing
With your chocolate melted to the precise temperature and ready for assembly, the next critical step involves preparing the peppermint candy component.
You’ll crush hard candies into varied sizes—from fine powder to quarter-inch fragments—creating textural complexity.
Tool comparisons matter here.
A food processor delivers consistent results with minimal effort, while a mallet offers tactile control and noise reduction in quieter kitchens.
Seal candies in a sturdy bag before crushing to contain debris and muffle sound effectively.
Your crushing technique directly influences the final product’s character.
Finer particles distribute evenly throughout the bark, while larger shards create pronounced peppermint bursts.
Aim for a mixed granulation that balances visual appeal with flavor impact.
Work efficiently once chocolate cools slightly—you’ve got a narrow window before it sets.
Layering and Setting
Once your crushed peppermint reaches the ideal consistency, it’s time to execute the layering sequence that defines this confection.
You’ll build structural integrity through deliberate temperature control at each stage.
Start by melting your dark chocolate base layer and spreading it evenly across parchment paper.
Allow it to set completely—this foundation matters.
Next, apply your milk chocolate layer, maintaining consistent thickness throughout.
Here’s your layering strategy:
- Temper chocolate to 88-90°F for ideal snap and shine
- Pour base layer and cool to 65°F before proceeding
- Apply peppermint-studded chocolate layer with uniform pressure
- Seal with final chocolate coating, then refrigerate at 55°F
Your bark’s success hinges on respecting these temperature thresholds.
Rapid cooling prevents bloom and guarantees clean breaks.
This precision transforms simple ingredients into elegant holiday confections that you’ll proudly serve.
5. Sugar Cookies With Royal Icing
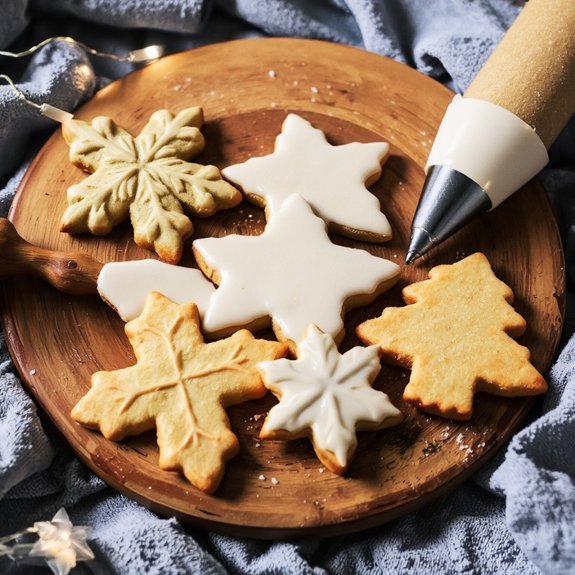
The appeal of sugar cookies lies in their versatility—you’ll find that a simple dough of butter, sugar, eggs, and flour transforms into an elegant canvas for royal icing’s glossy finish.
You’ll master Cookie Cutting by chilling your dough thoroughly, ensuring clean edges and consistent shapes that showcase your design work.
For ideal results, you’ll control your Icing Consistency by adjusting egg white and powdered sugar ratios.
Thicker consistency creates structured outlines; thinner mixtures fill seamlessly. You’ll pipe decorative details with precision, then allow adequate drying time between layers.
Your finished cookies display professional sophistication—intricate patterns, vibrant colors, and that signature glossy appearance that distinguishes homemade excellence.
You’re not simply baking; you’re crafting edible art that reflects your commitment to quality and creative expression.
6. Cranberry White Chocolate Biscotti
Biscotti’s twice-baked structure creates the perfect vessel for tart cranberries and creamy white chocolate, delivering contrasting flavors and textures that develop throughout the baking process.
Biscotti’s twice-baked structure creates the perfect vessel for tart cranberries and creamy white chocolate, delivering contrasting flavors and textures.
You’ll craft an elegant confection that showcases your baking mastery while offering versatile enjoyment.
The recipe demands precision:
- Toast your almonds beforehand to intensify their nutty complexity
- Fold dried cranberries gently to preserve their tartness without crushing them
- Temper white chocolate carefully to achieve a glossy, snappy finish
- Slice biscotti at precise angles for uniform baking and professional appearance
These twice-baked cookies pair exceptionally with espresso or dark roast coffee, enhancing their sophisticated character.
You’ll appreciate their longevity—they remain fresh for weeks, making them ideal for gift presentation.
Package them in clear cellophane with ribbon for an upscale, artisanal appearance that reflects your craftsmanship and independence.
7. Eggnog Cheesecake Bars
Layering creamy custard-infused filling atop a buttery graham cracker crust, you’ll create a dessert that captures eggnog’s quintessential warmth and richness.
This dessert grants you complete control over flavor intensity through strategic spice balancing—nutmeg, cinnamon, and cloves work harmoniously without overpowering the delicate custard base.
You’ll achieve ideal texture by baking until the edges set while the center maintains slight jiggle, ensuring creamy perfection.
The alcohol variations offer flexibility: traditional rum extract provides authenticity, while brandy or bourbon introduces deeper complexity. Alternatively, omit spirits entirely for family-friendly versions.
After cooling gradually to room temperature, refrigerate overnight. This resting period allows flavors to meld beautifully, creating sophisticated bars that rival any holiday bakery offering.
Your finished creation delivers elegant simplicity with remarkable depth.
8. Peppermint Bark Brownies
You’ll create striking visual contrast and complex flavor by layering rich chocolate with crisp peppermint elements throughout your brownies.
Crushing candy canes or peppermint bark into varied sizes—from coarse chunks to fine fragments—lets you control both texture distribution and sweetness intensity across each bite.
Proper cooling and airtight storage will preserve the candy’s crispness while keeping your brownies fudgy, making them ideal for gift-giving or extended enjoyment.
Chocolate and Peppermint Layers
When chocolate and peppermint unite, they create a dessert that’s both indulgent and invigorating.
You’ll craft stunning layers that showcase remarkable color contrast—deep cocoa against bright white candy—while delivering dynamic texture contrast between fudgy brownie and crisp peppermint bark.
Your layering technique demands precision:
- Bake your brownie base to chewy perfection, ensuring structural integrity
- Pour melted chocolate ganache over the cooled layer for glossy richness
- Crush premium peppermint candies and scatter evenly across warm chocolate
- Set final chocolate drizzle for visual elegance and binding power
This composition gives you complete control over sweetness levels and peppermint intensity.
You’re not confined to commercial confections—you craft each element deliberately.
The result? A sophisticated dessert reflecting your exact preferences, unburdened by mass-produced limitations.
Crushing Candy for Topping
Crushing premium peppermint candies requires deliberate control to achieve the ideal texture for your topping. You’ll want to select equipment choices that grant you precision—a heavy-bottomed mortar and pestle work exceptionally well, though a food processor offers speed for larger batches.
Implement safety techniques by securing your workspace and wearing protective eyewear if using mechanical equipment. Place candies in a sturdy plastic bag before crushing by hand to contain fragments and prevent airborne shards.
You’re aiming for varied particle sizes: some fine powder for even distribution, others coarser chunks for textural contrast. Avoid over-processing, which creates excessive dust and diminishes the candy’s visual appeal.
Crush just before topping your brownies to maintain the peppermint’s vibrant color and crisp snap against warm chocolate layers.
Storage and Serving Tips
Because peppermint bark brownies contain chocolate and crushed candy that’ll soften in warm conditions, proper storage directly determines their shelf life and texture retention.
You’ll maximize freshness by following these essential practices:
- Store brownies in airtight containers at room temperature for up to five days
- Refrigerate for extended preservation, keeping them at 35-40°F in sealed packaging
- Freeze for long-term storage up to three months, wrapping individually in parchment paper
- Label dates clearly on all containers to track freshness and prevent waste
Serve your brownies at 65-70°F for ideal chocolate texture and candy crispness.
Avoid exposing them to humidity or direct sunlight. You’ll maintain superior quality and flavor by respecting these storage temperatures and labeling dates consistently, ensuring each bite delivers the intended indulgence.
9. Snowball Cookies
Delicate and buttery, snowball cookies deliver the quintessential texture that defines holiday baking: a tender crumb that dissolves on your palate, enveloped in a generous coating of powdered sugar.
You’ll craft these confections by combining butter, flour, nuts, and vanilla into a cohesive dough.
Proper dough chilling for at least two hours promotes manageable handling and prevents spreading during baking.
This critical step solidifies the fat structure, yielding that signature tender bite.
You can explore shape variations—traditional balls, crescents, or flattened rounds—each offering distinct presentation appeal.
Roll your baked cookies immediately in powdered sugar while warm, then again once cooled, creating layers of sweetness.
This double-coating technique guarantees the characteristic snowlike appearance you’re after.
Store these delicate morsels in airtight containers, where they’ll maintain their refined texture for up to five days.
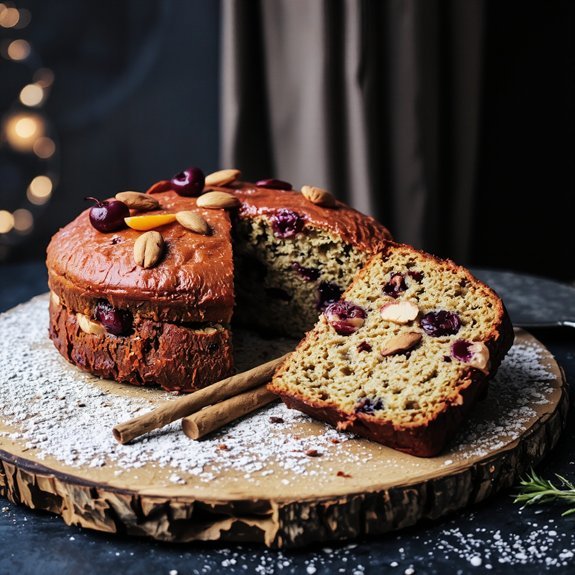
10. Candied Ginger Loaf Cake
Infusing warm spices with the bright, zesty bite of candied ginger creates a sophisticated loaf cake that balances sweetness with subtle heat.
You’ll discover this recipe rewards patience and precision.
The aging benefits emerge as flavors meld over 24 hours, intensifying the ginger’s complexity.
Your zest infusion technique—incorporating lemon and orange zest—brightens the crumb’s depth.
Consider these essential elements:
- Candied ginger chunks folded into batter create textural contrast
- Molasses deepens the spice profile’s richness
- Cream cheese glaze cuts through sweetness with acidic tang
- Room-temperature ingredients promote even distribution and ideal crumb structure
You’ll find this loaf cake’s sophisticated flavor profile satisfies discerning palates while remaining accessible.
The interplay between candied warmth and citrus brightness demonstrates how technical precision yields genuinely exceptional results.
11. Spiced Apple Cinnamon Rolls
Layering tart apples with warm spices and tender dough creates cinnamon rolls that elevate the classic pastry into something genuinely distinctive.
Tart apples and warm spices layered with tender dough transform classic cinnamon rolls into something genuinely distinctive.
You’ll control fermentation through strategic proofing schedules, allowing the dough to develop complex flavor while maintaining structural integrity.
Your rolling methods determine texture consistency—tight coils guarantee even baking, while deliberate layering distributes apple compote and spice mixtures uniformly.
The combination of cardamom, nutmeg, and cinnamon with Granny Smith apples produces sophisticated depth that surpasses conventional recipes.
You’re not bound by tradition; adjust sweetness levels and spice ratios to match your preferences.
Precision in timing and technique yields rolls with caramelized exteriors and moist interiors.
This approach grants you complete mastery over your baking outcomes.
12. Dark Chocolate Peppermint Fudge
When you temper dark chocolate properly, you’ll achieve a glossy finish and satisfying snap that distinguishes professional fudge from amateur attempts.
This no bake confection demands precision and restraint—qualities you’ll appreciate when crafting holiday gifts that showcase your skill.
You’ll combine these essential elements:
- High-quality dark chocolate (70% cacao minimum) melted to exact temperatures
- Peppermint extract at precise measurements to avoid overpowering bitterness
- Butter and condensed milk for ideal texture and consistency
- Optional keto variations using sugar substitutes and cream cheese
Layer your peppermint-infused chocolate into parchment-lined pans, allowing proper cooling time.
The result? Dense, luxurious fudge that snaps cleanly and melts deliberately on your palate.
You’ve liberated yourself from complex baking processes while delivering sophisticated flavor that commands respect.
Frequently Asked Questions
How Far in Advance Can I Prepare Christmas Baked Goods for Storage?
You’ll maximize your freezing timeline by preparing most baked goods 2-3 months ahead.
Cookies, breads, and cakes maintain peak quality when frozen properly.
Your shelf lifespan extends substantially in freezers versus room temperature storage.
Frosted items you’ll preserve for 1-2 months, while unfrosted goods last 3 months.
Thaw items gradually in your refrigerator before serving, restoring their intended texture and flavor.
This strategic approach grants you complete freedom from last-minute baking stress.
What Are the Best Substitutes for Common Allergens in Holiday Baking Recipes?
You’ll find egg replacers like aquafaba or commercial substitutes work excellently in your holiday formulations.
For nut alternatives, you can confidently employ seeds—sunflower or pumpkin—ground into fine textures that replicate traditional binding properties.
You’re not limited by allergen constraints; coconut flour, sunflower seed butter, and flax-based binders deliver comparable structural integrity. These substitutions maintain your desserts’ textural sophistication while expanding your creative autonomy in the kitchen, ensuring everyone enjoys your festive creations without compromise.
How Do I Ship Homemade Christmas Baked Goods Safely to Distant Relatives?
You’ll want to use insulated packaging with gel packs or dry ice to maintain ideal temperatures during transit.
Choose sturdy boxes and wrap items individually in parchment paper.
Select shipping services offering tracking insurance—this protects your investment should damage occur.
Ship Monday through Wednesday to avoid weekend delays.
Include detailed handling instructions.
Denser baked goods like fruitcakes travel better than delicate pastries.
Your recipients deserve goods arriving fresh, undamaged, and precisely as you intended.
What Equipment or Tools Are Essential for Decorating Christmas Baked Goods Professionally?
You’ll master professional decoration with essential tools: piping tips in varying sizes for intricate detail work, a turntable stand for 360-degree access and precision application, offset spatulas for smooth frosting, bench scrapers for clean edges, and quality pastry bags.
You’re investing in control—these instruments let you create sophisticated designs without compromise. Add a reliable icing smoother and you’ve got everything you need to execute your creative vision independently.
How Can I Adapt Traditional Christmas Recipes for Dietary Restrictions Like Vegan or Gluten-Free?
You’ll successfully adapt recipes by substituting dairy with coconut milk or aquafaba, replacing eggs with flax or chia mixtures.
For gluten-free versions, you’ll employ rice flour blends for texture restoration.
Maintain flavor balancing through increased vanilla extracts and spice intensities.
You’re free to experiment with almond flour’s richness or tapioca starch’s binding properties.
These technical adjustments preserve your baked goods’ integrity while honoring dietary autonomy.
Leave a Comment