
Key Takeaways
- Mix 3 cups flour, 1 tablespoon sugar, 1½ teaspoons salt, 1 teaspoon baking powder with 12 ounces beer.
- Bake the thick dough at 375°F for 50–60 minutes until golden brown and a toothpick comes clean.
- Choose pilsners for crispy lighter crumb or stouts for rich roasted depth; avoid IPAs due to aggressive bitterness.
- Cool completely on wire rack before slicing; serve warm with butter, cheese, or soups around 140°F.
- Store airtight at room temperature up to 3 days or freeze wrapped for up to 3 months.
Ingredients You’ll Need
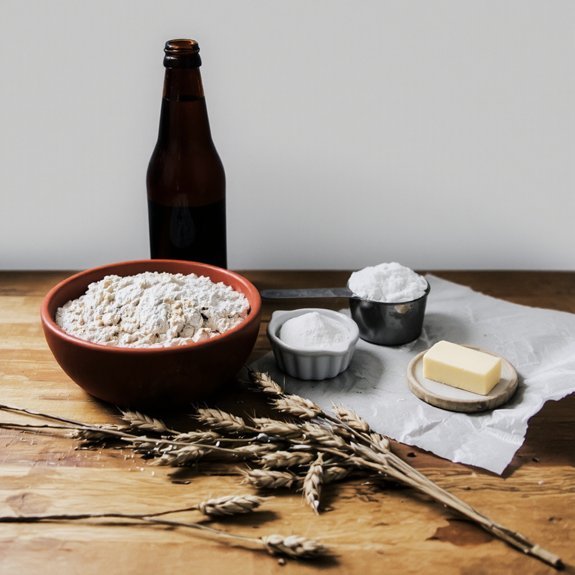
You’ll need just a handful of simple ingredients to make this foolproof beer bread: three cups of all-purpose flour, one tablespoon of sugar, one and a half teaspoons of salt, one teaspoon of baking powder, and one twelve-ounce bottle of beer.
(any style works, though lighter beers won’t overpower the flavor).
You’re not locked into all-purpose flour—you can experiment with whole wheat or rye flour options for different textures and depths.
For leavening agents, baking powder does the heavy lifting here, creating that rise without requiring yeast or lengthy fermentation.
The beer itself contributes carbonation and subtle flavor complexity.
That’s genuinely it. No eggs, no butter, no elaborate prep work.
You’ve got complete freedom to customize your loaf while keeping things delightfully simple.
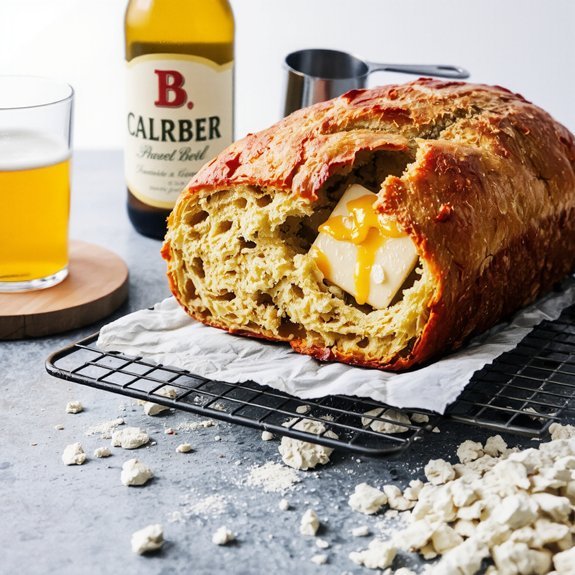
Choosing the Right Beer

You’ll want to select a beer whose style characteristics complement your bread’s final flavor profile—a crispy pilsner creates a lighter crumb, while a rich stout delivers deeper, more complex notes. Consider how the beer’s inherent flavors, from hoppy bitterness to fruity or caramel undertones, will interact with your other ingredients and influence the finished loaf.
Match your beer choice to the occasion: reach for a pale ale if you’re craving subtle tang, or grab a wheat beer for a softer, more delicate result.
Beer Style Characteristics
What makes one beer perfect for bread and another completely wrong?
You’re choosing based on fermentation profiles and aroma descriptors that’ll directly impact your final loaf’s flavor and texture.
Light lagers bring clean, crisp notes—they won’t overpower your bread’s subtle complexity.
Wheat beers contribute banana and clove aroma descriptors, adding warmth and depth.
IPAs? Skip them.
Their aggressive hop bitterness fights against bread’s natural sweetness.
Stouts and porters deliver rich, roasted character that transforms ordinary bread into something extraordinary.
Their fermentation profiles create subtle sweetness that complements the crust beautifully.
You’ll want carbonation levels that boost rise without creating massive holes.
Lower-carbonation styles work best.
Consider alcohol content too—higher ABV affects fermentation speed during baking.
Choose beers that enhance, never dominate, your bread’s identity.
Flavor Pairing Considerations
Beyond understanding how different beers behave in your dough, it’s time to think about what flavors you’re actually building into your loaf.
You’re not just baking bread—you’re crafting a flavor experience that’ll define every bite.
Consider your beer’s dominant notes.
Hoppy IPAs contribute citrus and pine; stouts bring chocolate and coffee depth.
Match these characteristics to your palate’s preferences.
Think about temperature contrasts too—warm bread intensifies certain beer flavors while releasing others.
Follow a tasting sequence when deciding.
Start by sampling your chosen beer straight, noting its complexity and finish.
Then imagine those qualities baked into golden-brown crust and tender crumb.
Does it excite you?
That’s your answer.
You’ve got complete control here, so trust your instincts and experiment boldly.
Step-by-Step Instructions

Making beer bread’s surprisingly simple—just combine your dry ingredients in a large bowl, whisking together the flour, sugar, and salt until they’re evenly distributed.
- Pour your chosen beer into the mixture, stirring until you’ve got a thick, shaggy dough—don’t overmix, as this keeps your crumb tender.
- Transfer everything into a greased loaf pan, smoothing the top with a wet spatula for even baking.
- Bake at 375°F for 50-60 minutes until golden brown and a toothpick emerges clean.
Reference your equipment checklist before starting—you’ll need basic baking tools.
Keep a troubleshooting guide handy for dense loaves or underproofed results.
Let it cool completely before slicing into that warm, beer-infused goodness.
Baking Tips for Success
Now that you’ve got your dough in the oven, you’ll want to focus on a few key techniques that’ll transform your beer bread from good to exceptional.
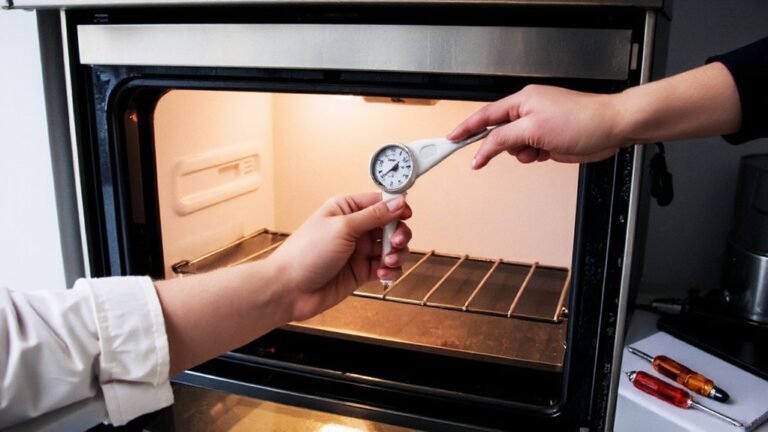
Start by ensuring proper oven calibration—your actual temperature might differ from what you’ve set, so invest in an oven thermometer for accuracy. This prevents under or over-baking.
Watch for a deep golden-brown crust developing around the 30-minute mark. Don’t open the oven door excessively; you’ll release steam needed for that crispy exterior and ideal crumb structure.
Watch for deep golden-brown crust around 30 minutes, resisting the urge to open your oven door and release essential steam.
Remove your loaf when it’s beautifully bronzed and sounds hollow when tapped on the bottom. Let it cool completely on a wire rack before slicing. This resting period allows the crumb structure to set properly, ensuring clean, satisfying cuts every time.
Serving and Storage Suggestions

Your perfectly baked beer bread deserves to be enjoyed at its peak, so serve it while it’s still warm with softened butter, creamy cheese, or hearty soups that’ll soak up every last crumb.
Serving temperatures matter—aim for warm but not scorching, around 140°F, to highlight the bread’s complex flavors.
For storage and leftover revivals, you’ve got options:
- Room temperature storage – Keep your bread in an airtight container for up to three days, maintaining its tender crumb.
- Freezer method – Wrap cooled bread tightly and freeze for up to three months; thaw at room temperature when ready.
- Reviving stale slices – Lightly spritz bread with water, wrap in foil, and warm in a 350°F oven for ten minutes to restore freshness.
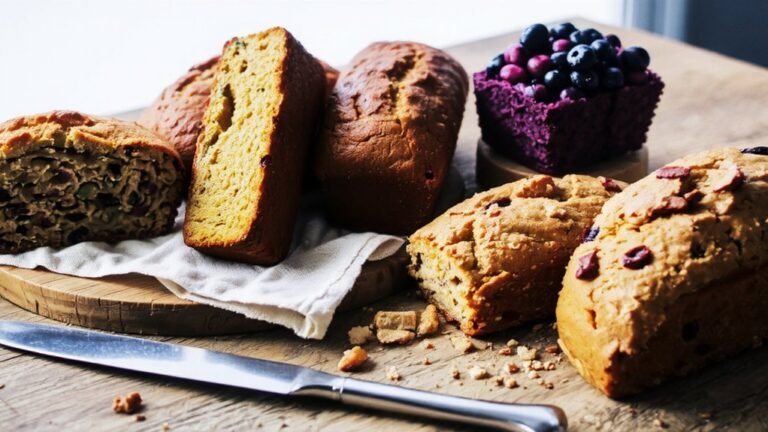
Variations to Try
Once you’ve mastered the classic beer bread recipe, you’ll want to experiment with flavor combinations that’ll keep this versatile loaf exciting on your table.
Explore regional inspirations by incorporating ingredients tied to beer’s heritage—try Irish soda bread elements or German pretzel-style add-ins like coarse salt and caraway seeds.
Seasonal themes let you adapt your bake throughout the year.
Summer calls for lighter beers paired with fresh herbs like rosemary and thyme.
Fall welcomes pumpkin ales with pumpkin puree and warming spices.
Winter invites stout varieties with chocolate chips or coffee for depth.
Don’t hesitate to swap beer styles entirely.
Wheat beers create airier crumbs, while IPAs add subtle bitterness.
You’re free to push boundaries and discover what resonates with your palate.
Frequently Asked Questions
Can I Make Beer Bread Without Yeast or Baking Soda?
You can’t make traditional beer bread without yeast or baking soda—they’re essential for rise. However, you’ve got options to break free from conventional methods.
Try using a sourdough starter as your leavening agent; it’ll give you that tangy complexity. Alternatively, fold in whipped eggs to create lift and airiness.
These substitutions won’t replicate beer bread exactly, but they’ll deliver a flavorful, textured loaf that honors the spirit of independence you’re after.
How Long Does Beer Bread Stay Fresh After Baking?
You’ve got about three to four days before your beer bread peaks in freshness. Keep it in a breathable cloth bag or paper—avoid plastic, which traps moisture and spoils your crust.
Storage methods matter: room temperature works best for maintaining that crusty exterior. For longer retention, slice and freeze portions.
Moisture retention naturally happens as the bread ages, so you’ll notice it getting softer each day. Enjoy it fresh while you can.
Is Beer Bread Suitable for People With Gluten Intolerance?
Standard beer bread isn’t suitable for you if you’re gluten intolerant—it’s made with wheat flour.
However, you’ve got gluten free options available.
You can substitute all-purpose gluten free flour blends that work beautifully in this recipe.
Watch out for cross contamination risks when preparing your ingredients and using shared kitchen tools.
Many breweries offer gluten free beers too, giving you complete control over your baking freedom.
Can I Freeze Beer Bread Dough Before Baking It?
You can absolutely freeze your beer bread dough before baking it.
Your freezing technique matters—wrap it tightly in plastic wrap and aluminum foil to prevent freezer burn.
When you’re ready to bake, follow these thawing tips: let it sit in your refrigerator overnight, then bring it to room temperature for about an hour.
This method gives you complete control over your baking schedule without compromising quality.
What’s the Nutritional Content and Calorie Count per Slice?
You’ll find each slice packs roughly 150-180 calories, depending on thickness.
The calorie breakdown skews toward carbs from flour and beer, with minimal fat.
Your macronutrient profile includes about 30g carbs, 4g protein, and 1g fat per slice.
This straightforward composition means you’re enjoying pure, honest sustenance without unnecessary additives—bread that respects your desire for simple, quality ingredients without compromise.


Leave a Comment