Key Takeaways
- Measure ingredients by weight using a digital scale in grams for precise, consistent baking results.
- Verify your oven’s actual temperature with a thermometer, as most ovens drift 25–50°F from dial settings.
- Bring butter, eggs, and dairy to room temperature before mixing to ensure uniform batter and proper rise.
- Read the entire recipe before starting to identify equipment needs, measurements, and sequence of steps.
- Cream butter and sugar until light and fluffy, then use proper folding techniques to preserve air and texture.
Measure Your Ingredients Accurately
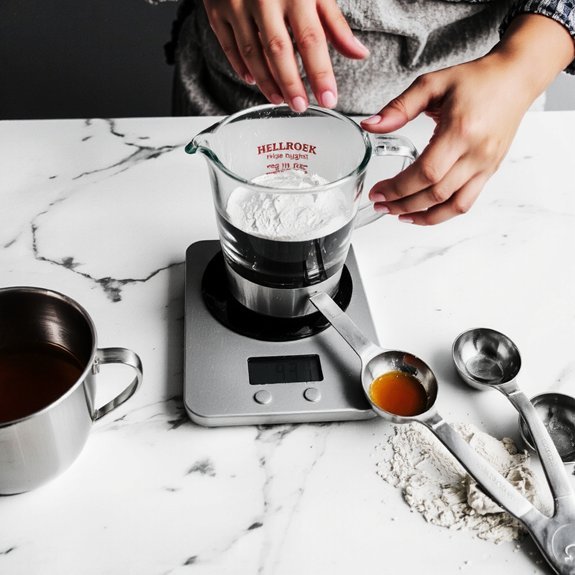
Since baking is a science that depends on precise ratios, you’ll want to measure your ingredients carefully every time.
Baking demands precision—measure your ingredients carefully every time since it’s a science built on exact ratios.
Invest in a digital scale to eliminate guesswork—weight measurements are far more reliable than volume estimates.
Consider metric adoption for consistency across recipes, as grams provide standardized precision that cups and teaspoons can’t match.
You’ll find density tables invaluable for converting between measurement types.
Flour, for instance, varies considerably in density depending on how it’s packed.
Spoon flour into your measuring cup and level it off rather than scooping directly from the bag.
Don’t eyeball liquids either.
Use liquid measuring cups for wet ingredients and dry cups for solids.
This distinction matters because different cup types measure differently.
Bring Ingredients to Room Temperature
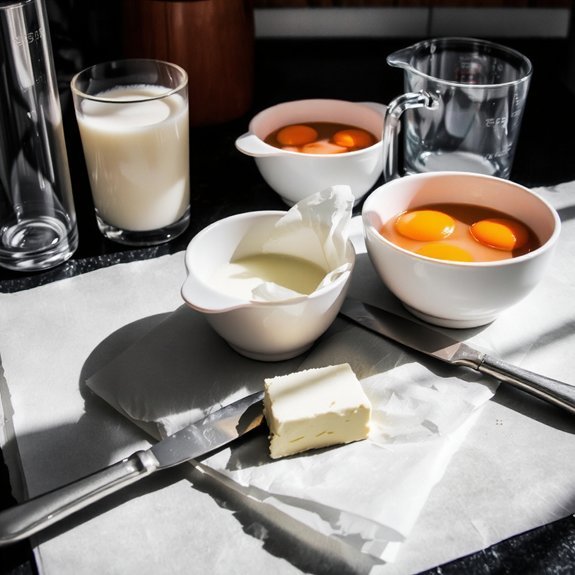
When you’re ready to mix your ingredients, bringing them to room temperature—particularly butter, eggs, and dairy products—ensures they’ll blend smoothly and create a uniform batter.
Remove items from sealed storage and place them on your counter placement area about an hour before baking.
This simple step prevents lumpy mixtures and guarantees better incorporation of air, which is essential for proper rise and texture.
Cold butter won’t cream properly with sugar, and chilled eggs won’t emulsify correctly, compromising your final product’s structure.
Dairy products behave similarly, affecting moisture distribution throughout your batter.
You’ll notice improved results immediately.
Room temperature ingredients bond seamlessly, creating the foundation for consistent, professional-quality baked goods.
Plan ahead, and you’ll streamline your baking process while eliminating common beginner mistakes that stem from temperature-related complications.
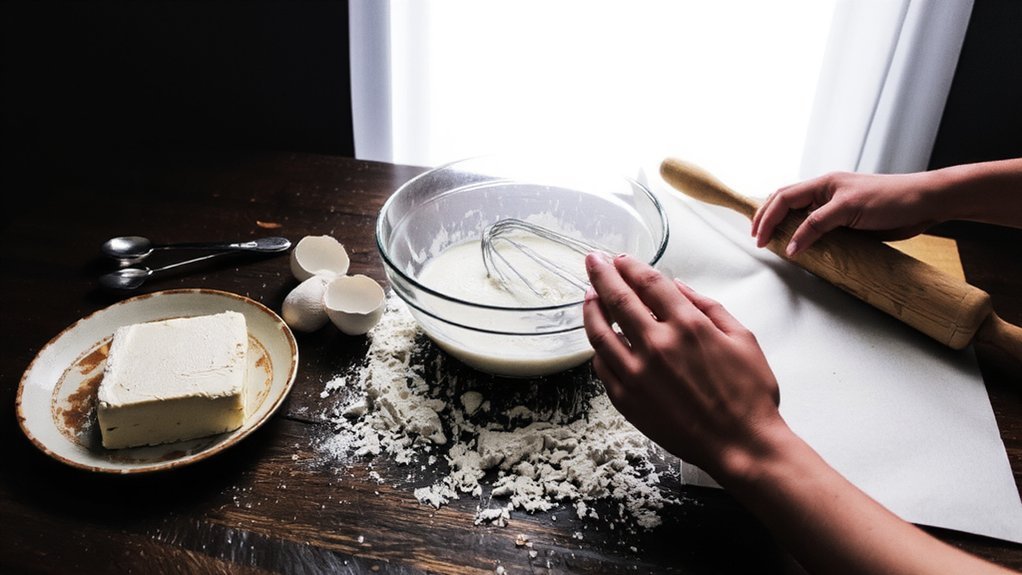
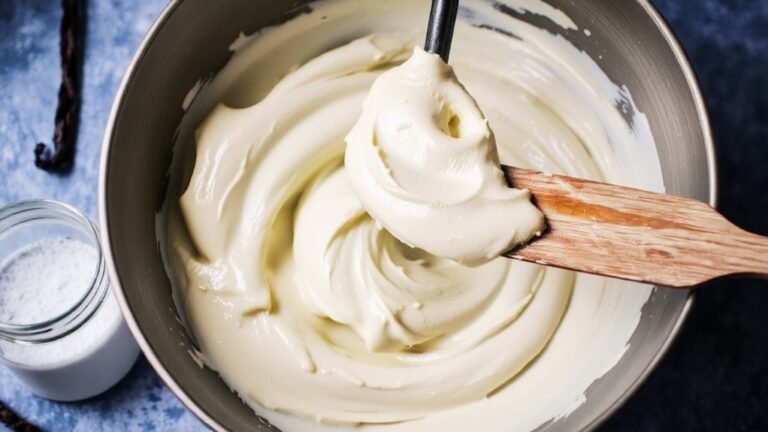
Understand the Difference Between Mixing Techniques
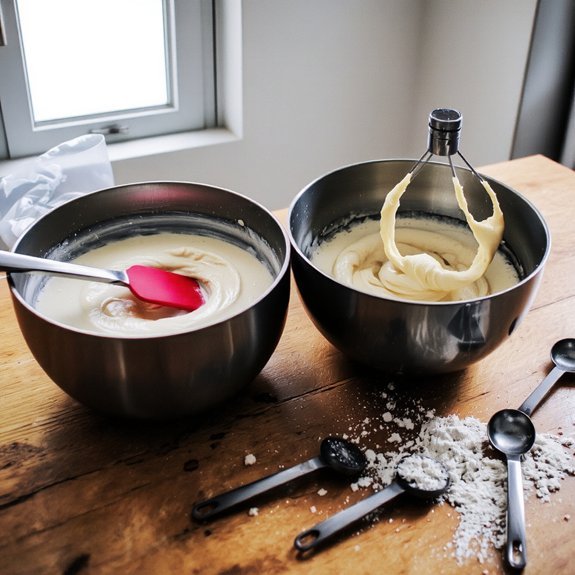
Different mixing techniques serve distinct purposes in baking, and you’ll need to master several fundamental methods to achieve ideal results.
1. Creaming Method – Beat butter and sugar together until light and fluffy.
Incorporating air helps your baked goods rise properly.
2. Folding Technique – Gently combine delicate ingredients like whipped egg whites or flour into heavier mixtures using a spatula.
This preserves volume and texture.
3. Whisking – Vigorously beat ingredients to develop structure and incorporate air.
This is essential for meringues and sponge cakes.
Each method directly impacts your final product’s texture and rise.
The Creaming Method produces tender cakes with fine crumbs.
The Folding Technique maintains airiness in mousses and soufflés.
Understanding when to apply each technique gives you control over your baking outcomes and guarantees consistent, professional results every time.
Invest in Quality Baking Tools
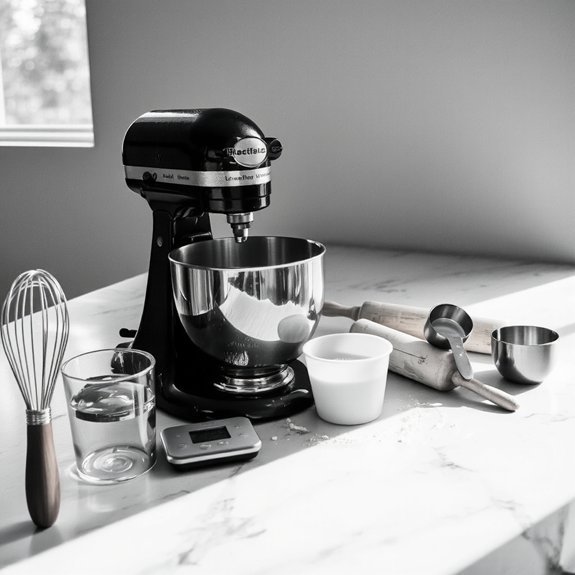
You’ll find that investing in quality baking tools—like sturdy mixing bowls, accurate measuring cups, and reliable baking sheets—makes a measurable difference in your results. While budget constraints are real, you don’t need every tool available; instead, prioritize essential equipment that you’ll use regularly and that’ll withstand repeated use.
Quality tools perform consistently and last longer, ultimately saving you money and frustration as you build your baking skills.
Essential Tools for Success
Quality baking equipment forms the foundation of your success in the kitchen.
You’ll want to establish a functional workspace layout that lets you move freely and access tools without constraint. Here’s what you need:
- Measuring cups and scales – Accurate measurements guarantee consistent results and give you control over your baking outcomes
- Mixing bowls and utensils – Durable stainless steel options withstand repeated use and cleaning
- Baking sheets and pans – Quality non-stick or metal surfaces distribute heat evenly
Beyond these essentials, invest in safety gear like oven mitts and an apron.
Organize your workspace strategically so you’re not fumbling for items mid-recipe.
You’re building independence in the kitchen—proper tools remove obstacles and let you bake with confidence and precision.
Quality Over Budget Concerns
While it’s tempting to stock your kitchen with budget-friendly equipment, investing in quality baking tools pays dividends through durability and performance.
You’ll find that reputable brands deliver consistency you can rely on, eliminating frustration from warped pans or inaccurate measurements.
Choose tools with brand reputation established through years of baker feedback.
Quality equipment lasts longer, reducing waste and saving money over time.
This aligns with sustainable choices—fewer replacements mean less environmental impact.
You’re not locked into expensive everything at once.
Prioritize essentials: a reliable oven thermometer, sturdy mixing bowls, and accurate measuring cups.
Upgrade gradually as your skills develop.
Your baking success depends on tools that perform predictably, not on cutting corners.
Quality equipment frees you from equipment-related failures, letting you focus entirely on mastering technique.
Learn How to Properly Prepare Your Pans
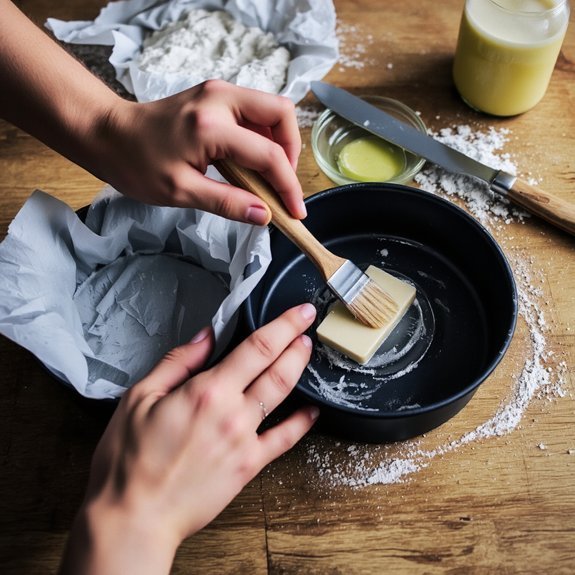
Because improper pan preparation can ruin even the best batter, it’s essential to master this foundational technique before baking.
You’ll find that proper preparation directly impacts your results and your freedom to experiment confidently in the kitchen.
Here’s what you need to do:
- Grease your pans thoroughly with butter or oil, ensuring complete coverage on all surfaces and corners
- Line your pans with parchment cutting to fit precisely, preventing sticking and guaranteeing easy removal
- Consider pan seasoning with flour after greasing for extra insurance against adhesion
These steps take minimal time but yield significant payoffs.
You’re not wasting ingredients or effort on failed batches.
Master these techniques now, and you’ll eliminate frustration while gaining the confidence to tackle any recipe without hesitation or worry about your baked goods sticking.
Master the Art of Reading a Recipe
How many bakers skip reading a recipe entirely, only to discover missing ingredients halfway through?
Don’t join their ranks.
Start by reviewing the entire recipe before you begin.
This practice prevents frustrating surprises and guarantees you’re equipped with everything needed.
Focus on terminology decoding—understand what terms like “fold,” “cream,” and “temper” actually mean.
Misinterpreting instructions can derail your results.
Master format navigation by identifying sections clearly: ingredients, instructions, baking temperature, and time.
Note any special equipment required upfront.
Check ingredient measurements twice.
A tablespoon differs vastly from a teaspoon, and precision matters in baking.
Read instructions sequentially to understand the process flow.
You’ll know when to preheat, when to add components, and what techniques you’ll employ.
This deliberate approach gives you complete control over your baking success, eliminating guesswork and building confidence for your next project.
Know Your Oven and Its Hot Spots
Every oven’s got quirks—and you’ll need to discover yours before it sabotages your bakes.
Your oven likely has hot spots—areas that bake faster than others.
Take control by performing rack mapping: bake a sheet of sugar cookies simultaneously on each rack, then compare browning patterns.
You’ll identify exactly where heat concentrates.
Once you’ve mapped your oven, adjust your pan orientation strategically.
Rotate pans halfway through baking if you notice uneven browning.
Position sensitive items away from heating elements.
Consider these practical steps:
- Bake test batches using parchment paper to track browning differences
- Keep detailed notes on rack positions and timing for each recipe
- Rotate or relocate pans mid-bake based on your findings
This knowledge frees you from guessing games and elevates your results substantially.
Practice Timing and Temperature Control
You’ll need to verify your oven’s actual temperature with an oven thermometer, since most ovens run hotter or cooler than their displays indicate.
Master baking time management by setting a timer for the minimum suggested time, then checking your baked goods early rather than discovering an over-baked disaster.
Adjusting both temperature and duration based on your oven’s behavior guarantees consistent, successful results across different recipes.
Oven Temperature Accuracy
Why’s oven temperature so critical to baking success?
Inaccurate temperatures sabotage your results—undercooked centers, burnt edges, or collapsed structures.
You’ll gain control by understanding your oven’s quirks and applying calibration techniques.
Most ovens drift 25-50°F from their settings due to manufacturing tolerances.
You’re not at the mercy of factory defaults:
- Use an independent oven thermometer to identify your actual temperature versus the dial reading
- Adjust your baking temperature accordingly, documenting differences for future projects
- Allow proper preheating time—typically 15-20 minutes for consistent heat distribution
This knowledge empowers you to troubleshoot failed batches and replicate successes.
Don’t assume your oven’s accuracy.
Test it, learn its behavior, and adapt your technique.
You’ll transform from guessing baker to confident operator.
Baking Time Management
Once you’ve mastered oven calibration, baking time management becomes your next critical skill. You’ll want to develop a systematic approach to batch scheduling, allowing you to work efficiently without compromising quality. Set timers for each item—don’t rely on memory or guesswork.
| Task | Duration |
|---|---|
| Prep ingredients | 10-15 min |
| Mix batter | 5-8 min |
| Baking time | Varies by recipe |
| Cooling period | 15-30 min |
Factor cleanup timing into your workflow. You’ll maintain momentum by washing dishes between batches rather than facing a mountain of work afterward. Track actual baking times versus recipe recommendations in a notebook. This data gives you freedom to adjust future sessions confidently, transforming you from a reactive baker into a proactive, strategic one.
Understand How Ingredients Work Together
Baking’s success relies on understanding how flour, sugar, fat, eggs, and leavening agents interact to create structure, texture, and flavor. You’ll master the fundamentals by recognizing these critical relationships.
Master baking fundamentals by understanding how flour, sugar, fat, eggs, and leavening agents interact to create structure, texture, and flavor.
- Flour provides structure while sugar adds sweetness and promotes browning through caramelization
- Fat creates tenderness and contributes to texture development by coating flour particles
- Eggs bind ingredients while leavening agents (baking soda or powder) create rise and lightness
You’ll discover flavor synergy when you balance these components intentionally. Too much sugar overwhelms delicate notes; insufficient fat yields dry results.
Each ingredient serves a purpose beyond its individual contribution. When you understand these interactions, you’re liberated from blindly following recipes.
You’ll confidently adjust formulations, troubleshoot failures, and create superior baked goods. This knowledge transforms you from a recipe follower into an informed baker who controls outcomes.
Common Beginner Mistakes to Avoid
You’ll dramatically improve your baking results by avoiding three critical mistakes that trip up most beginners.
First, you must read recipes completely before starting, as missing a single step or ingredient can ruin your final product.
Second, you need to measure ingredients accurately using proper techniques—not estimating or packing flour into cups—
and third, you should resist opening your oven door frequently, which causes temperature fluctuations that compromise rising and browning.
Not Reading Recipes Thoroughly
Before you start mixing ingredients, take time to read the entire recipe from beginning to end.
Skipping this step invites disaster into your kitchen.
When you neglect thorough recipe review, you’ll face unnecessary complications.
Kitchen distractions combined with decision paralysis can derail your baking project entirely.
You might discover missing ingredients halfway through, forcing costly trips to the store.
Here’s what happens when you skip recipe reading:
- You’ll miss essential preparation steps like sifting flour or bringing eggs to room temperature
- You’ll encounter surprise equipment needs you don’t possess, halting progress mid-bake
- You’ll misread proportions or baking times, producing subpar results
Reading recipes completely gives you control.
You’ll understand the exact sequence, gather necessary tools beforehand, and set realistic expectations.
This foundational habit separates successful bakers from frustrated beginners.
Make it your non-negotiable first step.
Incorrect Measuring Techniques
Because precision determines baking success, mastering proper measuring techniques is essential.
You’ll find that visual guessing compromises your results dramatically.
Don’t rely on measurement superstition or assumptions about what “a pinch” or “a handful” means—these vague terms sabotage consistency.
Instead, invest in proper measuring tools: dry measuring cups, liquid measuring cups, and a kitchen scale.
Spoon flour into your dry measuring cup, then level it with a knife for accuracy.
Never scoop directly from the bag, which compacts flour and throws off ratios.
Weigh ingredients when possible—it’s the most reliable method.
For liquids, place your measuring cup on a flat surface and check measurements at eye level.
You’ll transform your baking immediately by abandoning guesswork and embracing precision.
Opening Oven Door Frequently
Opening your oven door repeatedly during baking disrupts the internal temperature and causes baking failures.
You’re losing heat every time you peek, which directly affects how your baked goods rise and cook.
Here’s what happens when you can’t resist checking:
- Your cakes sink in the middle because they don’t have stable heat to set the structure
- You risk steam burns from the sudden heat release when cracking the door open
- Gasket damage occurs from repeated exposure to extreme temperature fluctuations
Instead, trust your timer and use the oven window to monitor progress.
If you must open the door, do it quickly near the end of baking when your creation’s already set.
This discipline separates successful bakers from frustrated beginners who wonder why their results disappoint.
Frequently Asked Questions
How Long Can I Store Baked Goods Before They Go Stale or Spoil?
You’ll find shelf life guidelines vary by item.
Store bread at room temperature for 3-4 days, then freeze it.
Cookies last 5-7 days in airtight containers.
Cakes stay fresh 2-3 days refrigerated.
You’ll maximize longevity by following storage temperatures carefully—keep items cool and dry, away from humidity.
Freezing extends shelf life considerably; you can store most baked goods for months frozen.
Always use airtight containers to prevent staleness and spoilage.
What Should I Do if I Don’t Have a Specific Ingredient the Recipe Calls For?
You can substitute missing ingredients through pantry improvisation and flavor matching.
Analyze your recipe’s function—if you need a leavening agent, baking powder replaces baking soda with adjustments.
For dairy, use alternatives like yogurt or plant-based options.
When substituting fats, maintain proper ratios.
Don’t let ingredient limitations restrict your baking freedom.
Experiment confidently with what you’ve got, understanding how each component contributes to your final product’s success.
Why Did My Baked Good Turn Out Dry, Dense, or Undercooked Despite Following Instructions?
Your baked goods turned out dry, dense, or undercooked because you’ve likely overmixed your batter, which develops gluten excessively and deflates leavening agents like baking powder or baking soda.
You’re either overbaking, underbaking, or using incorrect oven temperatures.
Don’t skip sifting dry ingredients—it aerates them.
Check your mixing technique: fold gently rather than stir vigorously.
Verify your leavening agents aren’t expired.
Use an oven thermometer for accuracy.
How Do I Know When My Baked Goods Are Completely Done Baking Inside?
You’ll know your baked goods are done when you insert a toothpick into the center—it should come out clean or with just a few moist crumbs. For cakes and dense items, check the internal temperature using a thermometer; most reach doneness at 200-210°F.
You’re in control: don’t rely solely on baking time. Trust these objective tests to verify your baked goods are thoroughly cooked through, giving you consistent, perfectly baked results every time.
What’s the Best Way to Troubleshoot When My Recipe Doesn’t Turn Out as Expected?
Start batch testing identical recipes to isolate problems systematically. Control variables by changing one ingredient or technique at a time—never multiple factors simultaneously.
Document each attempt’s temperature, timing, and modifications. Compare your results against the original recipe’s specifications. This methodical approach reveals exactly what’s causing inconsistencies, letting you master baking without guesswork or wasted ingredients.


Leave a Comment