
Key Takeaways
- Creaming combines softened butter and sugar to incorporate air, creating a pale, fluffy base for quality crumb structure.
- Whipping vigorously beats ingredients to trap air bubbles, while folding gently preserves existing air using a rubber spatula.
- Proofing is controlled fermentation allowing yeast dough to rise; temperature directly impacts timing from 1–2 hours to 8–16 hours.
- Emulsifying breaks fat into microscopic particles for even suspension, requiring mechanical action and stabilizers like eggs for tender crumbs.
- Room-temperature ingredients (68–72°F) enable stable emulsions and proper air incorporation; chilling relaxes gluten and stabilizes dough structure before baking.
Creaming

Combining softened butter with sugar creates an emulsion that incorporates air into your batter.
You’re effectively trapping tiny air bubbles through mechanical action, a process called butter aeration.
This technique’s fundamental to achieving proper texture development in cakes, cookies, and other baked goods.
When you cream butter and sugar together, the sugar crystals cut into the softened butter, creating space for air incorporation.
Sugar crystals cut through softened butter, creating microscopic spaces where air gets trapped during mixing.
You’ll know you’ve creamed correctly when your mixture becomes pale, fluffy, and noticeably lighter in volume—typically two to three minutes with an electric mixer.
Temperature matters crucially.
Your butter must be softened, not melted or cold.
Room temperature butter blends smoothly, allowing maximum air incorporation without becoming greasy.
Proper creaming directly impacts your final product’s crumb structure, rise, and overall quality.
Don’t skip this critical step; it’s non-negotiable for professional results.
Folding

Gently incorporating delicate ingredients into heavier batters requires a specialized technique that preserves the air you’ve carefully worked into your mixture during creaming.
Folding demands precision and restraint—you’re not mixing, you’re layering.
Use a rubber spatula for ideal folding direction control. Cut vertically through the batter’s center, sweep along the bottom, and turn the bowl slightly with each motion. This systematic approach prevents deflating your carefully aerated mixture.
Tool selection matters considerably. A flexible spatula outperforms wooden spoons, which crush bubbles and incorporate too much air unnecessarily. Your folding technique directly determines your cake’s final texture and rise.
Practice develops the subtle touch you’ll need. You’re mastering restraint—knowing when to stop before over-mixing ruins your results. This skill separates adequate bakers from excellent ones.
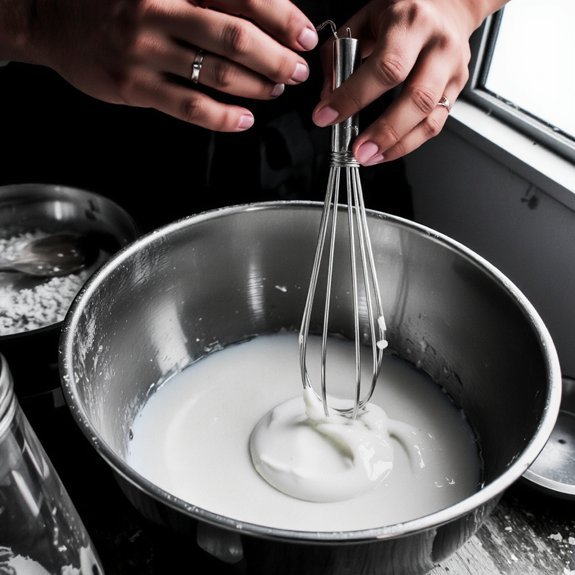
Whipping
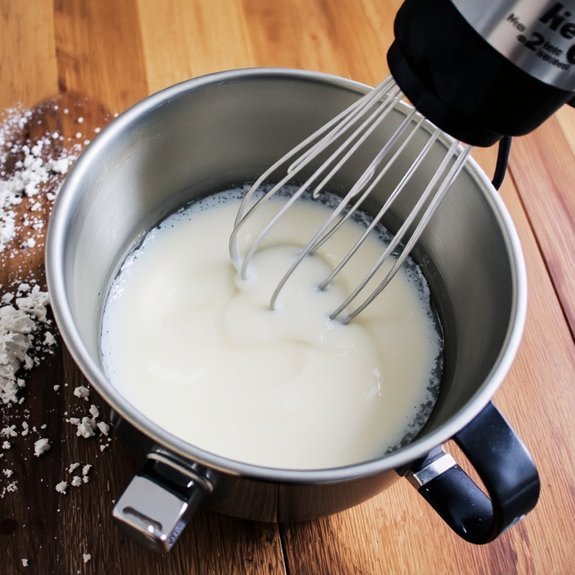
While folding preserves the air already in your mixture, whipping actively creates it. You’re incorporating oxygen by vigorously beating ingredients, whether eggs, cream, or butter.
Folding preserves existing air; whipping actively creates it by incorporating oxygen through vigorous beating of eggs, cream, or butter.
This process denatures proteins, enabling them to stabilize air bubbles and trap moisture—essential for meringues, mousses, and sponge cakes.
The term “whipping” derives from the Middle English “whippen,” meaning to move quickly. Whipping history traces back centuries when cooks used whisks and paddles manually; modern electric mixers revolutionized efficiency. Understanding whipping’s mechanics empowers you to control texture and structure independently.
You’ll recognize proper whipping when volume increases dramatically and the mixture gains stability. Egg whites whip to stiff peaks; cream reaches soft or stiff stages depending on your needs. Master this fundamental technique, and you’ll unleash countless baking possibilities.
Beating
Vigorous mixing of ingredients at high speed, beating differs fundamentally from whipping in both intensity and purpose.
You’re breaking down ingredient structures and developing gluten networks or emulsifying fats into batters with forceful, sustained motion.
When beating by hand, you’ll establish a consistent rhythm that maximizes efficiency without sacrificing control. Your arm movements should be deliberate and powerful, ensuring uniform incorporation throughout the mixture.
Electric mixers demand proper mixer care—use appropriate speeds for each task and monitor temperature changes that can affect results. Never overbeat, as excessive action creates toughness in cakes or separates emulsions.
You’ll know beating’s complete when your batter achieves the desired consistency: smooth, homogeneous, and ready for transformation through heat. Precision here determines your final product’s success.
Mixing

Combining ingredients with controlled motion, mixing differs fundamentally from beating in both speed and intention.
Mixing employs controlled motion to integrate ingredients evenly, fundamentally differing from beating in both speed and intention.
You’re integrating components evenly without incorporating excessive air or developing gluten unnecessarily.
When you mix, you’re employing deliberate, moderate techniques—typically using a spatula, whisk, or wooden spoon rather than electric mixers.
This controlled approach prevents overworking your batter or dough, which compromises texture and crumb structure.
Consider your mixing ergonomics: maintain proper posture and grip to reduce fatigue during extended preparation.
Work methodically, using folding or stirring motions appropriate to your recipe’s requirements.
Strategic mixing intervals matter substantially.
You’ll alternate between adding dry ingredients and liquid components, allowing each addition to incorporate fully before proceeding.
This staged approach guarantees uniform distribution while maintaining your recipe’s intended structure and rise characteristics.
Master this fundamental technique, and you’ll gain freedom in your baking precision.
Sifting
Sifting aerates dry ingredients and breaks up compacted particles, guaranteeing uniform distribution throughout your batter or dough.
You’ll want to master this technique because it directly impacts your baked goods’ texture and rise.
When you sift flour, you’re not just removing lumps—you’re incorporating air that helps create lighter, more tender crumbs.
Flour aeration increases the volume of your dry mix, which affects how your recipe performs.
Particle uniformity makes certain that leavening agents, salt, and cocoa powder distribute evenly, preventing bitter spots or uneven browning.
You can sift using a fine-mesh strainer or dedicated sifter.
Push your ingredients through multiple times if they’re particularly compacted.
This simple step transforms your results, giving you professional-quality baked goods every time.
Proofing
You’ll find that proofing is the controlled fermentation process where you allow yeast-leavened dough to rest and rise before baking, enabling the yeast to produce carbon dioxide gas that creates volume and texture.
The success of your final product depends critically on managing both temperature and time—typically ranging from 1-2 hours at room temperature (68-72°F) or 8-16 hours in cold fermentation (38-40°F).
Underproofing yields dense crumbs with poor rise, while overproofing causes your dough to collapse and produces a gummy, uneven texture.
What Is Proofing?
Proofing is the controlled fermentation period during which yeast-leavened dough rises before baking.
During this phase, you’re allowing yeast activity to generate carbon dioxide gas, creating the texture and structure your final product needs.
Understanding fermentation indicators is essential—you’ll observe volume increase, typically doubling in size, and notice the dough becoming lighter and more extensible.
Temperature directly impacts proofing duration.
Warmer environments accelerate fermentation, while cooler temperatures slow it.
You control this process by selecting your proofing location deliberately.
Proper proofing develops flavor complexity through slow fermentation and strengthens gluten networks through gas expansion.
Underproofed dough yields dense, gummy crumbs.
Overproofed dough collapses during baking, producing flat, poorly structured bread.
Master proofing timing, and you’ll consistently achieve superior results.
Temperature and Time
How drastically do temperature fluctuations alter your proofing timeline? You’ll find that even minor deviations substantially impact fermentation rates. Precise oven calibration guarantees consistent results—don’t rely on dial readings alone. Use an independent thermometer to verify actual temperatures.
| Temperature (°F) | Proofing Time | Crust Development |
|---|---|---|
| 70-75 | 4-6 hours | Moderate |
| 75-80 | 2-3 hours | Strong |
| 80-85 | 1-2 hours | Rapid |
You’ll control your baking destiny by understanding cooling rates post-bake. Slower cooling preserves crust structure, while rapid cooling prevents over-browning. Master these variables, and you’ll achieve predictable, professional-quality results every time. Temperature precision isn’t optional—it’s fundamental to your success.
Blind Baking
You’ll want to understand blind baking, a technique that pre-bakes pie crusts partially or fully before adding fillings, to prevent soggy bottoms and guarantee even browning.
Pre-baking becomes essential when you’re working with wet fillings or shorter baking times that won’t cook the crust thoroughly on its own.
Mastering the proper techniques—including crust preparation, weight selection, and temperature management—will markedly improve your pie’s structural integrity and texture.
What Is Blind Baking
Partially or fully baking a pie crust or pastry shell without its filling guarantees an even golden color and crispy texture while preventing a soggy bottom.
You’ll master this essential technique by understanding its critical components:
- Docking Technique – You prick the crust with a fork to prevent air pockets and uneven rising
- Steam Venting – You allow moisture to escape during baking, ensuring uniform browning
- Weight Distribution – You use pie weights or dried beans to keep the crust flat against the pan
- Temperature Control – You maintain consistent oven heat between 375-425°F for ideal results
Blind baking demands precision. You’ll achieve superior crusts by respecting these fundamentals, giving you complete control over your baked goods’ structural integrity and flavor profile.
Why Pre-Bake Pie Crusts
Because pie fillings release moisture during baking, blind baking—the practice of pre-baking a crust before adding its filling—prevents the bottom crust from absorbing excess liquid and becoming soggy.
You’ll achieve soggy prevention by partially or fully baking your crust at a higher temperature before the filling goes in.
This technique creates a moisture barrier that protects the crust’s structural integrity.
When you blind bake, you’re fundamentally setting the starches and proteins, which locks in a crisp texture that won’t deteriorate during subsequent baking.
You can blind bake with pie weights, dried beans, or rice to prevent the crust from puffing.
This method guarantees your finished pie delivers the textural contrast you want—a flaky, golden crust complementing creamy or juicy fillings.
You’re taking control of your baking outcome through precision.
Techniques and Best Practices
Mastering blind baking requires attention to temperature, timing, and weight distribution.
You’ll achieve superior results by following these essential practices:
- Prick your crust with a fork to prevent air pockets and uneven rising
- Use parchment paper over pie weights for even heat distribution and easy removal
- Pre-heat your oven to 375-425°F for ideal crust structure
- Bake for 12-15 minutes until edges are golden, adjusting based on your oven’s performance
Your tool maintenance directly impacts success.
Keep your pie weights clean and store them properly to prevent rust.
Maintain sanitation practices by washing all equipment thoroughly before use.
Monitor your crust’s color progression closely.
You’re seeking a light golden hue, not dark browning.
This technique gives you complete control over your final crust texture, ensuring crispy, flaky results every time.
Tempering
Controlling chocolate’s crystalline structure through precise temperature manipulation guarantees you’ll achieve the smooth, glossy finish and satisfying snap that distinguish professional-quality chocolate work.
Chocolate tempering involves heating, cooling, and reheating cocoa solids to specific temperatures, stabilizing beta crystals that resist bloom and deliver superior texture.
Custard tempering demands equal precision.
You’ll gradually raise egg temperatures by whisking them while slowly incorporating hot liquid, preventing curdling that ruins custard’s silky consistency.
This technique requires constant vigilance—temperature control separates success from scrambled eggs.
Both methods demand respect for thermodynamic principles.
You’re not following arbitrary steps; you’re manipulating molecular behavior.
Master these fundamentals, and you’ll command complete freedom in chocolate and custard applications, elevating your baking from adequate to exceptional.
Emulsifying
When you’re emulsifying, you’re breaking down fat globules into microscopic particles that can suspend evenly throughout your batter.
This process stabilizes the interaction between wet and dry ingredients, preventing them from separating and creating a uniform, homogeneous mixture.
You’ll typically accomplish this by vigorously combining fats with liquids or using emulsifying agents like eggs and lecithin to maintain that essential balance.
Breaking Down Fat Globules
Emulsification’s critical role in baking involves breaking fat into microscopic droplets that’ll disperse evenly throughout your batter or dough.
You achieve this through two primary mechanisms:
- Mechanical disruption—whisking, blending, or beating forces fat globules into smaller particles
- Enzyme action—lecithin and other emulsifiers in eggs chemically stabilize fat-water interfaces
- Surface tension reduction—emulsifiers lower resistance between incompatible ingredients
- Uniform distribution—properly broken fat creates consistent texture and rise
When you skip emulsification, fat pools separate from wet ingredients, producing dense, greasy results.
Conversely, well-emulsified batters yield tender crumbs and predictable baking outcomes.
Understanding this process gives you control over your final product’s structure and quality, ensuring you’re not at the mercy of guesswork.
Stabilizing Wet and Dry
How do you keep water and fat from separating during mixing?
You’ll need emulsifiers—ingredients that bridge the gap between incompatible elements.
Emulsifiers contain both hydrophilic and lipophilic properties, allowing them to suspend fat globules throughout your wet ingredients without breaking down.
Lecithin, egg yolks, and mono- and diglycerides function as powerful emulsifying agents.
They’re essential for creating stable batters and doughs that maintain consistent texture throughout baking.
Beyond mixing, you’ll control moisture migration and humidity control by managing your storage environment.
Proper ventilation and temperature regulation prevent unwanted water movement between layers.
This stabilization guarantees your final product retains its intended crumb structure and moisture content, giving you complete control over your baked goods’ quality and consistency.
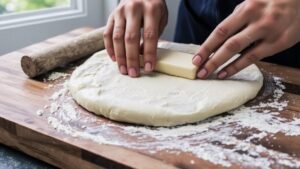
Laminating
Creating alternating layers of fat and dough through repeated folding and rolling, lamination produces the characteristic flaky, crispy texture you’ll find in croissants, Danish pastries, and puff pastry.
Lamination’s alternating fat and dough layers create the flaky, crispy texture defining croissants, Danish pastries, and puff pastry.
You’ll master this technique by understanding its mechanics and regional variations.
- Historical origins: French bakers perfected lamination in the 17th century, revolutionizing pastry-making
- Precision folding: You must maintain consistent dough temperature and fold thickness for even layer distribution
- Regional variations: Austrian, Danish, and French methods differ in fold sequences and butter incorporation
- Strategic resting: You’ll allow adequate time between folds so gluten relaxes and prevents shrinkage
You’ll achieve superior results by respecting these fundamentals.
Temperature control is critical—warm dough spreads butter unevenly, while cold dough cracks.
Your patience during the lamination process directly determines final texture and rise quality.
Caramelizing
Caramelization transforms sugars through controlled heat, developing complex flavors and rich brown hues that define countless baked goods.
You’ll achieve superior results by mastering two critical elements: Pan Selection and Acid Addition.
Choose heavy-bottomed pans—they distribute heat evenly and prevent scorching.
Stainless steel or copper conducts temperature precisely, giving you complete control over the caramelization process.
Acid Addition stabilizes your caramel and prevents crystallization.
You can introduce lemon juice or cream of tartar when your sugar reaches light amber.
This technique lets you push further into darker stages without seizing.
Monitor your sugar’s color progression carefully.
Light amber delivers subtle sweetness; dark amber provides bold, bitter-forward complexity.
Your freedom lies in timing—pull from heat before reaching your target shade, as residual heat continues darkening the mixture.
Blooming
Rehydrating dry ingredients in liquid before mixing transforms their texture and flavor integration in your baked goods.
Blooming refers to this essential hydration process that activates flavors and improves structural integrity.
When you bloom ingredients, you’re allowing them to absorb moisture fully:
Blooming allows ingredients to fully absorb moisture, activating flavors and improving how they integrate into your baked goods.
- Cocoa powder and chocolate develop deeper flavor profiles and integrate smoothly into batters
- Gelatin bloom strength determines setting time; higher bloom ratings require less gelatin for proper gelling
- Spices and coffee release volatile compounds that intensify taste complexity
- Bloom test measures gelatin’s gel strength using standardized weight measurements
You’ll notice bloomed ingredients distribute more evenly throughout your mixture, eliminating dry pockets and ensuring consistent results.
This technique’s precision directly impacts your final product’s quality, giving you greater control over texture, flavor development, and overall baking success.
Chilling
Chilling serves as the counterpoint to blooming—while rehydration activates and develops ingredients, cold temperatures slow down molecular activity and stabilize your dough or batter. You’ll find this technique essential for gluten development control and preventing unwanted spreading during baking.
| Chilling Purpose | Recommended Duration |
|---|---|
| Gluten relaxation | 30 minutes to 2 hours |
| Flavor infusion | 24 hours or longer |
| Shelf stability enhancement | Variable by recipe |
| Temperature management | 32–40°F refrigeration |
When you chill dough, you’re giving fats time to solidify, which creates superior lift and texture. Extended chilling promotes flavor infusion as ingredients meld together, deepening complexity. You’ll also gain improved shelf stability, extending your baked goods’ freshness. Cold dough resists over-spreading and develops superior crust formation. Master this fundamental technique to elevate your baking precision and product quality.
Room Temperature
You’ll find that room temperature substantially affects how your ingredients interact during mixing and baking, directly influencing texture, rise, and browning outcomes.
When you bring butter, eggs, and dairy to approximately 68–72°F, you achieve ideal emulsification and incorporation of air, which creates the perfect consistency for most batters and doughs.
Neglecting this step can result in dense crumbs, uneven baking, or poor structure because cold ingredients resist blending and trap less air.
Why Temperature Matters
Because ingredients behave differently at various temperatures, controlling room temperature‘s impact on your mise en place—particularly butter, eggs, and chocolate—directly affects how your batter combines, rises, and sets.
You’ll optimize baking outcomes by understanding these temperature-dependent factors:
- Emulsification: Room-temperature butter and eggs create stable emulsions, preventing separation and ensuring uniform crumb structure
- Shelf Stability: Proper ingredient temperatures enhance your finished product’s longevity and resistance to degradation
- Flavor Development: Controlled temperatures facilitate chemical reactions that intensify taste complexity and aromatic compounds
- Gluten Activation: Temperature influences hydration rates, affecting dough elasticity and final texture
You maintain precision by tempering ingredients before mixing.
Cold components inhibit proper incorporation; overheated ones compromise structure.
This technical mastery grants you independence from inconsistent results, delivering reproducible excellence across your baking endeavors.
Achieving Perfect Consistency
Stabilizing your ingredients at room temperature—typically 68–72°F (20–22°C)—establishes the foundation for consistent emulsification and predictable texture development.
You’ll achieve superior results by allowing butter, eggs, and dairy to equilibrate before mixing, preventing temperature shock that compromises batter structure.
Your equipment calibration directly impacts precision.
Use an accurate thermometer to verify ingredient temperatures, not assumptions.
Cold ingredients resist incorporation, creating dense, uneven crumbs.
Conversely, overheated components separate and break emulsions.
Altitude adjustments further refine consistency.
Higher elevations demand compensatory modifications: reduced leavening agents, increased liquid ratios, and adjusted baking temperatures.
You’re controlling variables that influence rise rates and moisture retention.
This systematic approach—respecting temperature standards, calibrating tools, and accounting for environmental factors—grants you control over your baking outcomes without guesswork or compromise.
Mise En Place
The French culinary principle of mise en place—literally “everything in its place”—establishes the foundation for efficient, organized baking.
You’ll streamline your workflow mapping and eliminate unnecessary interruptions by preparing all ingredients and equipment beforehand.
Implement mise en place through these essential steps:
- Conduct tool inventory of all required equipment before starting
- Measure and arrange ingredients in order of use
- Prepare your workspace with proper organization and accessibility
- Review your recipe thoroughly for technique requirements
This systematic approach grants you complete control over your baking process. You’re free to focus entirely on technique and precision rather than scrambling for ingredients mid-project. You’ll reduce errors, save time, and consistently achieve superior results.
Mise en place isn’t merely preparation—it’s your operational framework for baking mastery.
Crumb Coat
You’ll apply a crumb coat—a thin, initial layer of frosting—to seal loose crumbs and create a smooth foundation for your final frosting layer.
Your technique requires you to spread approximately 1/8 inch of frosting over the cake’s entire surface, then refrigerate until set, which typically takes 15-30 minutes.
You’ll achieve ideal results by using a thin offset spatula and maintaining consistent pressure, ensuring your frosting thickness remains even across all sides.
Purpose and Application
A crumb coat serves as a preparatory layer that seals loose cake particles before applying the final frosting coat.
Understanding its ingredient function and process rationale empowers you to achieve professional results.
The crumb coat’s primary benefits include:
- Stabilization: Traps crumbs, preventing contamination of your final frosting layer
- Foundation: Creates an even base that supports smooth frosting application
- Efficiency: Reduces frosting consumption by requiring less product for final coating
- Precision: Enables you to apply thinner, controlled layers with superior finish quality
You’ll apply this thin frosting layer directly to your cooled cake, then refrigerate for 30 minutes.
This technique respects your creative freedom while delivering consistent, polished results.
The process rationale helps you maintain control over your baking outcomes without compromising structural integrity.
Technique for Success
Applying your crumb coat with deliberate, controlled movements guarantees that you’ll achieve an even base layer without embedding additional crumbs into the frosting.
This mindful practice demands precision and focus.
You’ll use an offset spatula at a shallow angle, applying thin frosting layers with minimal pressure.
Your skill transfer from previous baking projects directly impacts execution quality.
Work methodically around your cake’s perimeter, rotating the turntable consistently.
Don’t rush; deliberate strokes prevent crumb migration.
Your technique relies on temperature control—ensure frosting consistency remains ideal throughout application.
Once your crumb coat sets, you’re free to apply your final frosting layer with confidence.
This foundational step separates amateur results from professional finishes.
Mastering this technique enables your ability to create flawless cake presentations that showcase your baking expertise and dedication to excellence.
Frosting Thickness Guidelines
Since the crumb coat functions as a preparatory layer rather than a finished surface, it’s critical that you apply frosting at a thickness of approximately 1/8 inch—thin enough to seal crumbs without creating excess that’ll require removal.
Your crumb coat strategy directly impacts both aesthetic norms and transport durability:
- Seal effectively: A thin layer traps loose crumbs without compromising structural integrity
- Optimize coverage: Confirm complete surface contact to prevent exposed cake during handling
- Reduce waste: Minimal frosting thickness eliminates unnecessary material removal
- Enhance stability: Proper adherence supports your final frosting layer and strengthens cake stability during transport
This foundational technique gives you control over your finished product’s appearance while guaranteeing your cake withstands movement from kitchen to table without degradation.
You’re establishing professional standards through precise application.
Scoring
Making shallow cuts into dough’s surface before baking serves multiple critical functions in bread production.
You’ll control oven spring—the rapid dough expansion when heat hits—by directing where your loaf expands.
Strategic slash patterns determine your bread’s final appearance and structural integrity.
You’ll master scoring angles to achieve your desired results.
Angled cuts at 30-45 degrees create distinctive ears, those crispy flaps that form along cuts.
Deeper, more aggressive angles produce dramatic scoring effects, while shallow angles yield subtle definition.
You’re not limited to decorative choices alone.
Scoring prevents unwanted splitting in weak points, allowing steam to escape predictably.
Sharp blades or scoring lames give you precision control.
Your understanding of these techniques transforms bread from ordinary to professionally crafted, demonstrating your command of fundamental baking principles.
Gluten Development
Developing gluten networks determines your dough’s strength, elasticity, and final crumb structure.
You’ll strengthen your dough through mechanical action—mixing, kneading, and folding—which aligns proteins into organized matrices.
Key Development Methods:
- Mixing: Hydrates flour proteins, initiating gluten formation immediately
- Kneading: Builds protein alignment through sustained mechanical stress
- Autolyse: Allows natural hydration and partial network development without mixing
- Stretch-and-fold: Develops network strength while maintaining dough extensibility
You’ll recognize proper development when your dough shifts from shaggy to smooth and elastic.
Properly developed gluten creates an interconnected matrix that traps gas during fermentation, delivering superior oven spring and consistent crumb structure.
Under-developed dough yields dense, gummy results.
Over-developed dough becomes tough and resistant to shaping.
You’ll master gluten development by understanding these protein interactions and applying appropriate techniques for your specific dough type.
Slack Dough
High-hydration doughs—those exceeding 75% water content relative to flour weight—present distinct handling challenges that require adapted techniques.
You’ll find slack dough considerably wetter than standard formulations, making it stickier and more difficult to shape conventionally.
Your hydration levels directly influence fermentation speed and crumb structure.
Higher water content accelerates gluten hydration and promotes open, irregular crumb development—desirable in artisan breads.
You’ll need to adjust your approach, using stretch-and-fold techniques instead of traditional kneading.
Storage methods matter substantially with slack dough.
You should refrigerate these formulations to slow fermentation and improve workability.
Cold temperatures give you extended bulk fermentation windows, typically 12-24 hours, allowing better flavor development and easier handling when shaping.
Mastering slack dough expands your baking capabilities considerably.
Frequently Asked Questions
What Is the Difference Between Baking Powder and Baking Soda?
You’ll find baking soda’s a pure base requiring acidic ingredients for a neutralization reaction, while baking powder‘s pre-mixed with acid and filler. Baking soda acts instantly; powder activates when heated.
You’ve got freedom choosing ingredient substitutions—use three parts baking powder replacing one part soda, or add acid to soda if you’re substituting powder. Each demands precision; miscalculations compromise your final product’s rise and texture substantially.
Why Do My Baked Goods Sometimes Turn Out Dry?
You’re likely experiencing dryness from two primary culprits: Overbaking Time and Insufficient Fat.
When you exceed recommended baking duration, you’ll evaporate excess moisture from your goods.
Similarly, inadequate fat—whether butter, oil, or eggs—fails to retain moisture effectively.
You’ve got complete control here: monitor your oven temperature precisely, use a toothpick test religiously, and measure fat ingredients accurately.
Don’t skimp on these components if you’re pursuing ideal texture and moisture retention in your finished products.
How Do I Measure Flour Correctly for Accurate Baking Results?
You’ll achieve accurate flour measurement through two reliable methods.
First, use weight measurement with a kitchen scale—the gold standard for precision that eliminates guesswork.
Second, employ the spoon-and-level technique: spoon flour into your measuring cup without compacting, then level off excess with a knife.
Avoid scooping directly from the bag, which compresses flour and throws off your ratios.
Either approach guarantees consistent, predictable baking results you can depend on.
What Causes Cracks on Top of My Cakes or Cookies?
You’ll experience cracking when you’re not controlling your oven temperature precisely—excessive heat causes rapid surface setting before the interior fully rises.
Your cooling technique matters equally; you’re rushing the process if you move baked goods immediately from the oven. Let them cool gradually in the pan first.
You’ve also got control over your mixing and leavening ratios. Too much baking soda or powder, or overmixing your batter, creates excessive rise that splits the surface.
Why Is It Important to Use Room Temperature Ingredients?
You’ll achieve improved emulsification when you use room temperature ingredients because fats and liquids blend uniformly, creating a stable, homogeneous batter consistency.
Cold ingredients won’t incorporate properly, leaving lumps and weak structure.
Room temperature mixing allows you to control your baking outcomes precisely—you’re not fighting against ingredient resistance. This technical mastery gives you the freedom to execute recipes exactly as intended, yielding consistent, professional results every time you bake.


Leave a Comment