Key Takeaways
- Mix Granny Smith and Honeycrisp apples for balanced tartness and sweetness in every bite.
- Whisk dry ingredients (flour, baking powder, baking soda, salt, cinnamon) for 30 seconds to prevent dense muffins.
- Fold wet and dry ingredients gently until barely combined; overmixing creates tough, dense texture.
- Bake at 375°F for 18–22 minutes; toothpick should emerge clean with few crumbs.
- Cool muffins on wire rack 15 minutes, then store in airtight container up to three days.
Ingredients You’ll Need
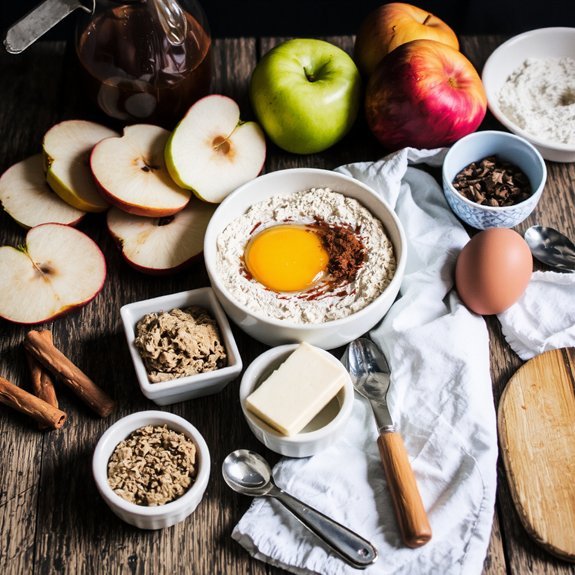
You’ll want to gather a few staples before you get started.
Stock your pantry with all-purpose flour, baking powder, and baking soda—the foundation of any solid muffin.
Stock your pantry with all-purpose flour, baking powder, and baking soda—the foundation of any solid muffin.
You’ll need two eggs, milk (or dairy alternatives like oat or almond milk if you prefer), and melted butter for moisture and richness.
For your apples, choose crisp varieties like Granny Smith or Honeycrisp.
You’ll peel and dice them into bite-sized chunks.
Brown sugar brings depth, while granulated sugar adds sweetness and structure.
The star ingredient? Cinnamon.
You’ve got options here—traditional cinnamon works perfectly, but spice substitutes like nutmeg or allspice add interesting complexity.
A touch of vanilla extract rounds everything out beautifully.
That’s it.
Simple, straightforward ingredients that transform into something delicious.
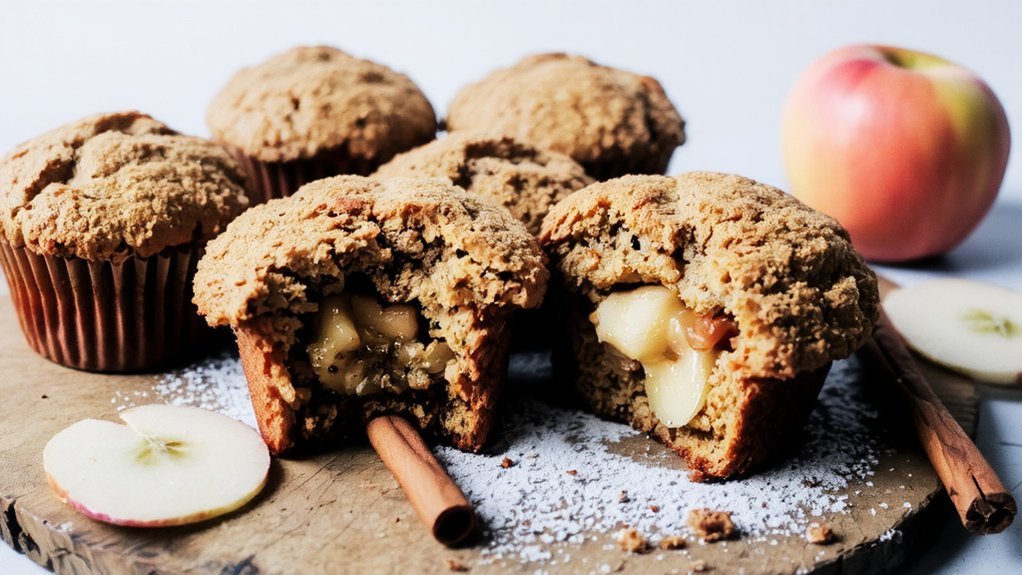
Choosing the Perfect Apples

You’ll want to choose apple varieties that’ll give your muffins depth—Granny Smiths bring tartness, while Honeycrisps and Fujis add sweetness.
The best approach is mixing two types so you’re not stuck with one-note flavor.
That balance between tart and sweet is what transforms a good muffin into one you’ll actually crave.
Best Apple Varieties
The right apple makes all the difference in your muffins—it’s what transforms a decent bake into something truly memorable.
You’ll want varieties that balance sweetness with tartness, giving you complex flavor without mushiness.
Granny Smith apples are your reliable choice—crisp, tart, and holding their shape beautifully.
Their nutritional profile packs fiber and vitamin C, supporting your wellness goals.
Honeycrisp offers natural sweetness and juicy texture, though they’re pricier.
Braeburn gives you that perfect tart-sweet combo with excellent structure.
Here’s what matters: avoid mealy varieties that collapse into sauce during baking.
Mix two types for depth—pair a tart apple with a sweeter one.
Most baker-friendly apples have cross-pollination requirements, meaning they develop better flavor complexity when grown near compatible varieties.
Choose what speaks to your palate.
Sweetness and Tartness Balance
Once you’ve picked your apples, the real magic happens in understanding how their flavors work together in your batter. You’re not just combining fruit—you’re orchestrating palate harmony. Tart apples cut through sweetness, preventing that cloying muffin that leaves you unsatisfied. Sweet varieties add depth and richness. The trick? Mix them.
| Apple Type | Sweetness Level | Tartness Level | Best Use |
|---|---|---|---|
| Granny Smith | Low | High | Flavor contrast |
| Honeycrisp | High | Low | Sweetness backbone |
| Braeburn | Medium | Medium | Balanced base |
| Pink Lady | High | Medium | Complexity |
| Jonathan | Medium | High | Accent notes |
You’re free to experiment here. Try equal parts sweet and tart for ideal balance, or go bold with seventy-thirty ratios. Trust your instincts—your muffins, your rules.
Preparing Your Muffin Tin
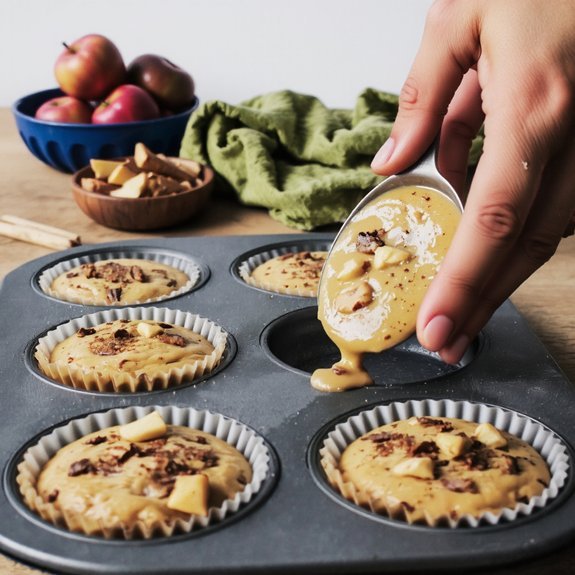
Before you pour your batter, you’ll need to decide whether you’re greasing your tin with butter or oil, or if you’d rather line it with paper liners for easy cleanup.
The right muffin tin matters too—standard 12-cup tins work beautifully for most recipes, though you might prefer jumbo cups if you want fewer, larger muffins.
Either way, you’re setting yourself up for muffins that bake evenly and pop out without sticking.
Greasing and Lining Options
To prevent your muffins from sticking, you’ll want to prepare your tin properly—and you’ve got options.
The easiest route? Silicone liners. Pop them into your cups, and you’re done—no greasing needed.
They’re reusable, eco-friendly, and give you complete freedom from cleanup hassles.
Plus, your muffins slide right out without fuss.
Prefer the classic approach? Nonstick sprays work brilliantly. A quick two-second spray on each cup creates a protective barrier that keeps your baked goods from clinging to the metal.
Make sure you coat the bottom and sides evenly.
You could also brush melted butter into each cup, though it’s messier than sprays.
Paper liners are another solid choice—they peel away cleanly and require zero prep work.
Pick whatever method suits your style. Each option delivers perfectly released muffins every time.
Choosing the Right Tin
What makes the difference between muffins that release cleanly and ones that stick stubbornly to the pan? Your tin choice matters more than you’d think.
You’ve got freedom with tin material options.
Steel conducts heat efficiently and won’t warp, giving you reliable results.
Silicone offers flexibility—literally—making extraction effortless.
Ceramic heats slower but distributes warmth evenly.
Size options depend on your preference.
Standard 12-cup tins work for regular muffins.
You might prefer jumbo cups if you’re making statement-sized treats, or mini tins for bite-sized portions.
Here’s the reality: quality tins prevent sticking and guarantee even baking.
Invest in what suits your baking style.
Whether you’re a minimalist or a baker who loves options, the right tin sets you up for success.
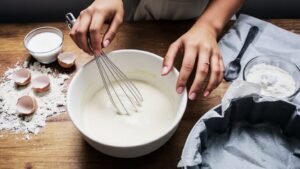
Mixing the Dry Ingredients
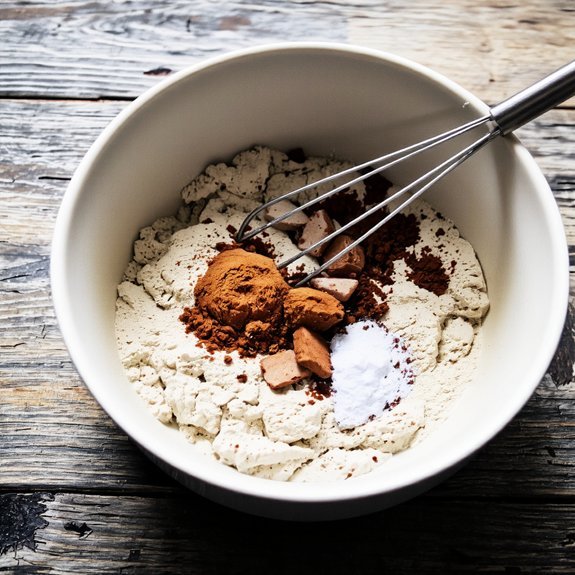
Once you’ve gathered your flour, baking powder, baking soda, salt, and cinnamon, grab a medium bowl and whisk them together until they’re well combined.
This step matters more than you’d think.
You’re not just mixing—you’re creating aeration importance that’ll give your muffins that light, fluffy texture you’re after.
You’re not just mixing—you’re creating the aeration that gives muffins their light, fluffy texture.
Whisk vigorously for about thirty seconds.
You’ll see the mixture lighten slightly as air incorporates throughout.
This aeration prevents dense, heavy muffins.
Plus, whisking guarantees clump prevention, breaking up any baking soda or powder clusters that’d otherwise create bitter pockets in your finished product.
Don’t skip this.
A few seconds of actual effort here pays dividends in your final result.
You’ve got the freedom to make exceptional muffins—this dry mixture is your foundation.
Combining the Wet Ingredients
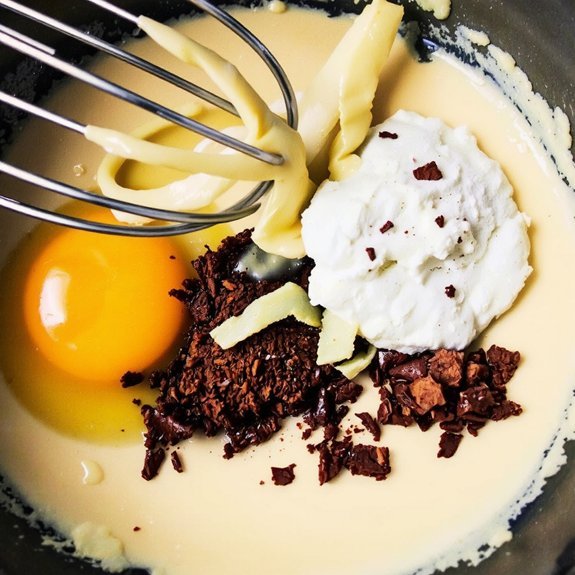
While your dry mixture rests in the bowl, grab another medium bowl and combine your eggs, melted butter, milk, and vanilla extract.
Whisk these ingredients together vigorously until you’ve created a smooth, cohesive blend.
This is where emulsion techniques matter—you’re binding fat and liquid together into a unified mixture that’ll distribute evenly throughout your batter.
Pay attention to temperature control here.
If your butter’s too hot, it’ll cook the eggs; too cold, and it won’t incorporate properly.
Aim for warm, not scorching.
Your mixture should look creamy and homogeneous, with no streaks of egg white visible.
This wet base is your muffins’ moisture foundation.
Don’t skimp on the whisking—you’re building structure and ensuring every bite has consistent flavor and texture.
Folding Everything Together
Bringing your two mixtures together is where patience becomes your greatest asset.
You’ll want to use a spatula for gentle folding—don’t grab a mixer or you’ll deflate all that air retention you’ve worked to build.
Pour your wet ingredients into the dry mixture, then fold until you’ve just barely combined everything.
Stop when you still see streaks of flour; overmixing creates tough, dense muffins nobody wants.
The batter should look slightly lumpy and loose.
Now fold in your diced apples and cinnamon swirl with the same restraint.
Each motion should be deliberate, controlled.
You’re honoring the structure you’ve created, respecting the rise that’ll happen in the oven.
This gentle approach transforms separate components into something greater than the sum of its parts.
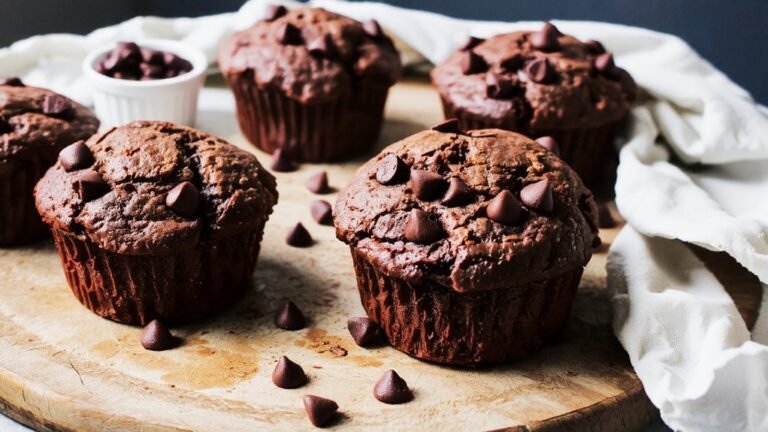
Baking Instructions
As you’ve carefully prepared your batter, your oven’s now doing the heavy lifting. Preheat to 375°F, but don’t skip oven calibration—many ovens run hot or cold, which’ll mess with your results. Use an oven thermometer to verify the actual temperature.
Pour your batter into greased muffin cups, filling each about two-thirds full. Slide the pan in and set your timer for 18-22 minutes.
Here’s where doneness tests matter. You’ve got options: a toothpick inserted into the center should come out clean with just a few crumbs, or gently press the top—it should spring back immediately. The muffins’ edges’ll pull slightly from the cup when they’re ready.
Don’t open that oven door repeatedly; you’ll lose heat and extend baking time. Trust the process, and you’ll pull out golden, perfectly baked muffins.
Cooling and Storage Tips
Patience pays off once those golden muffins come out of the oven—don’t rush to dig in just yet.
Let them cool on a wire rack for at least 15 minutes; this prevents them from getting soggy.
For short-term storage, keep your muffins in an airtight container at room temperature for up to three days.
Want them lasting longer? Freezer storage is your best bet. Wrap each muffin individually in plastic wrap, then place them in a freezer-safe bag. They’ll keep beautifully for three months.
Here’s a pro tip: prevent condensation prevention matters when thawing. Remove muffins from the freezer and let them sit wrapped at room temperature for an hour. This stops moisture from pooling and ruining that perfect crumb structure you worked hard to achieve.
Variations and Add-Ins
Why settle for the classic when you can make these muffins truly your own?
You’ve got total control here.
Swap out walnuts for pecans or almonds—whatever nut substitutions speak to you.
Prefer no nuts at all?
Skip them entirely.
Your choice.
Explore bold fruit pairings beyond apples.
Pears and cinnamon deliver elegance.
Blueberries create a beautiful swirl.
Try diced pineapple for tropical flair.
Cranberries add tart sophistication.
Push boundaries further.
Drizzle brown butter on top.
Sprinkle turbinado sugar for crunch.
Add a hint of cardamom or nutmeg.
Stir in toffee bits or chocolate chips if you’re feeling rebellious.
The beauty?
These muffins bend to your vision.
You’re not following recipes—you’re creating them.
Make them exactly how you want.
Frequently Asked Questions
Can I Use Applesauce Instead of Fresh Apples in This Muffin Recipe?
Yeah, you can totally swap applesauce for fresh apples. You’ll notice the flavor concentration intensifies since applesauce’s already cooked down.
Here’s the thing though—watch that puree viscosity. It’ll make your batter wetter, so you might need to reduce other liquids slightly or add a bit more flour.
The texture shifts a little, but you’ll still get delicious, moist muffins without the prep work.
How Do I Prevent My Muffins From Becoming Dry During Baking?
You’ll nail moist muffins by nailing your ingredient ratios—don’t skimp on wet components like oil or applesauce.
Your mixing technique matters too; you’re not making bread, so don’t overwork that batter.
Fold ingredients together gently until just combined.
Bake at the right temperature, and don’t leave those babies in longer than needed. Check for doneness early. You’ve got this—pull them out when a toothpick shows just a few moist crumbs.
Can This Recipe Be Made Gluten-Free or Vegan?
You’ve got total freedom to customize these muffins!
For gluten-free, you’ll swap regular flour with almond or coconut flour—just adjust your liquid ratios since they absorb differently.
Going vegan? Replace eggs with flax eggs or applesauce as binding alternatives.
Your dairy? Coconut or oat milk works beautifully.
These tweaks keep your muffins moist and delicious while honoring your dietary choices.
You’re in control of every ingredient.
What’s the Best Way to Freeze These Muffins for Later?
You’ll want to master flash freezing for maximum freedom in your muffin game.
Lay those beauties on a baking sheet, freeze ’em solid for a few hours, then transfer to freezer bags—no clumping allowed.
When cravings hit, you’ve got options: thaw at room temperature for that fresh-baked texture, or reheat straight from frozen in your oven at 350°F for about 12 minutes.
You’re basically giving yourself muffin independence whenever you want it.
Can I Prepare the Batter the Night Before Baking?
You can absolutely prepare your batter the night before baking. Overnight resting lets flavors deepen while you sleep in.
Just cover it tightly and refrigerate. Come morning, you might need a slight leavening adjustment—add a pinch of baking soda to compensate for lost lift.
Your muffins’ll bake up fluffy and golden, tasting like you’ve been in that kitchen since dawn. Freedom tastes like fresh-baked muffins without the early wake-up grind.


Leave a Comment