
Key Takeaways
- Cream room-temperature butter and sugar 2–3 minutes until pale and fluffy, then add eggs individually for proper aeration and structure.
- Shape dough into two 12-inch logs, bake at 325°F for 25–30 minutes until firm, then cool before slicing at 45-degree angles.
- Slice cooled biscotti at ½-inch thickness using a sharp serrated knife with gentle sawing motions to prevent crumbling and ensure uniform pieces.
- Second bake sliced pieces upright at 325°F for 15–20 minutes, rotating halfway through, to develop signature crispness and remove residual moisture.
- Store completely cooled biscotti in an airtight container up to two weeks, or freeze wrapped in parchment for up to three months.
What You’ll Need: Ingredients and Equipment
To prepare authentic almond biscotti, you’ll need all-purpose flour, granulated sugar, eggs, whole almonds, baking powder, salt, and vanilla extract.
For sourcing almonds, select raw or roasted varieties based on your flavor preference—raw almonds deliver subtle earthiness, while roasted varieties provide bold intensity.
Essential equipment includes measuring cups and spoons for precise portions, a stand mixer or whisk for incorporating ingredients, a baking sheet, and a serrated knife for slicing.
You’ll also want parchment paper to prevent sticking and promote even browning.
Tool maintenance directly impacts your results.
Keep your mixing bowl clean and dry before starting.
Maintain your serrated knife’s sharpness for clean cuts through baked biscotti—dull blades crush rather than slice, compromising texture.
Verify your oven’s calibration accuracy using a reliable thermometer for consistent baking outcomes.
Preparing Your Ingredients
Before you combine your dry and wet components, you’ll need to measure each ingredient with precision to guarantee consistent results. Check freshness indicators on all items—almonds shouldn’t appear discolored or rancid, and baking soda must be unexpired to achieve proper leavening.
| Ingredient | Measurement | Preparation |
|---|---|---|
| Almonds | 1½ cups | Blanch and slice |
| All-purpose flour | 2 cups | Sift twice |
| Eggs | 3 large | Room temperature |
| Sugar | ¾ cup | Granulated, dry |
| Baking soda | ½ tsp | Aerated |
Consider allergen substitutions before measuring. Replace almonds with pistachios or hazelnuts if needed. Swap all-purpose flour with gluten-free blend in equal proportions. These modifications maintain structural integrity while accommodating dietary restrictions. Weigh ingredients using a digital scale rather than volume measurements for superior accuracy and reproducibility throughout your baking process.
Making the Dough
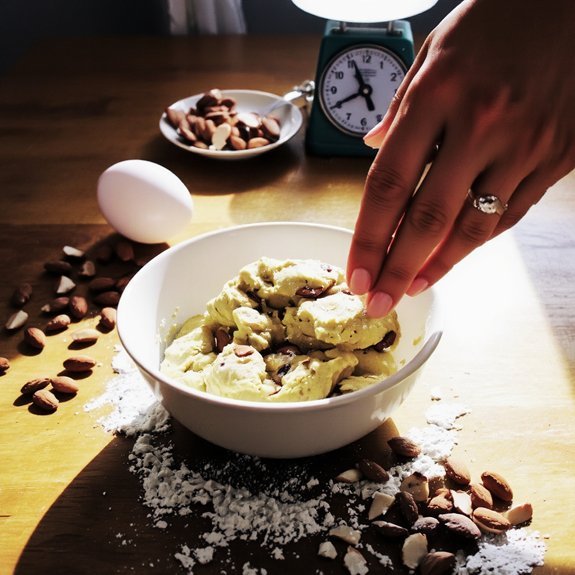
You’ll combine your measured ingredients by adding the dry components to a mixing bowl, then incorporate the wet ingredients while maintaining consistent incorporation throughout.
As you knead the dough, you’re developing gluten structure that’ll give your biscotti its characteristic texture and bite.
Work the mixture until you’ve achieved a cohesive, slightly stiff dough that holds together without excessive stickiness.
Ingredient Preparation and Measuring
Since proper mise en place establishes the foundation for consistent results, gather and measure all ingredients before mixing. You’ll need 2¾ cups all-purpose flour, 1½ teaspoons baking powder, ¼ teaspoon salt, ¾ cup sugar, ⅓ cup butter, 2 large eggs, 1 teaspoon vanilla extract, and 1½ cups sliced almonds.
Use measurement calibration tools—digital scales provide superior accuracy over volume measurements. Sift flour with baking powder and salt together, eliminating lumps. For allergen substitutions, you might replace eggs with appleseed or use almond flour alongside all-purpose flour.
Bring butter and eggs to room temperature, ensuring proper emulsification during creaming. Toast almonds lightly beforehand to intensify flavor.
Organize ingredients in mise en place containers within arm’s reach of your work station. This systematic approach eliminates guesswork and guarantees reproducible batches every time you bake.
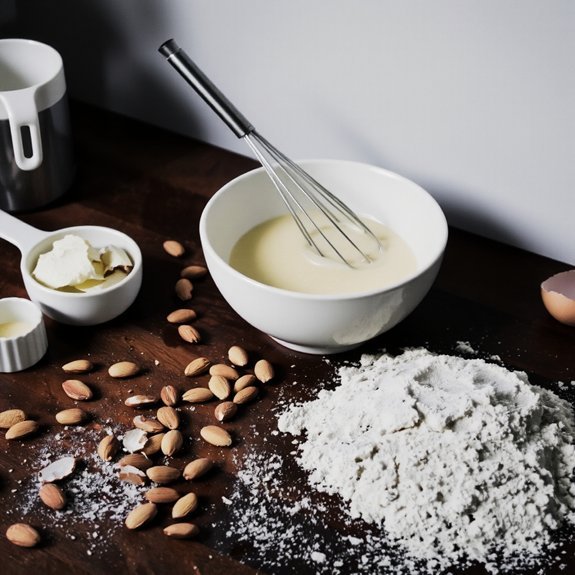
Mixing and Kneading Techniques
With your mise en place organized, cream the room-temperature butter and sugar together for approximately 2–3 minutes until the mixture achieves a pale, fluffy consistency that indicates proper aeration and emulsification.
This process is essential for incorporating air into your dough, establishing the foundation for your biscotti’s texture.
Next, incorporate your eggs individually, allowing each to fully integrate before adding the next.
Watch for tactile cues—the mixture should remain homogeneous and smooth.
Then fold in your dry ingredients using controlled tempo, mixing just until combined to avoid overdeveloping gluten.
Key steps for success:
- Maintain steady tempo during creaming to guarantee even air distribution
- Monitor tactile feedback when adding eggs for proper emulsification
- Use restraint when incorporating flour—stop mixing immediately once no streaks remain
Your dough is now ready for shaping and baking.
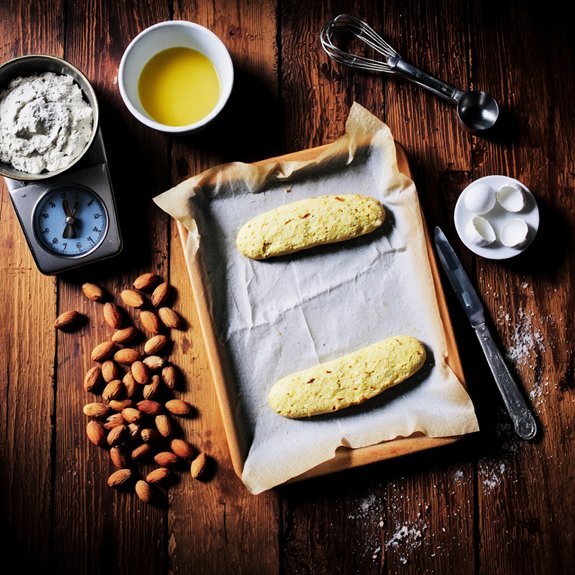
Shaping and First Bake
You’ll shape your dough into two logs approximately 12 inches long and 2 inches wide, pressing firmly to eliminate air pockets.
Bake these logs at 350°F for 25-30 minutes until they’re golden and firm enough to slice without crumbling.
Let them cool for 10-15 minutes on the baking sheet before proceeding to the second bake.
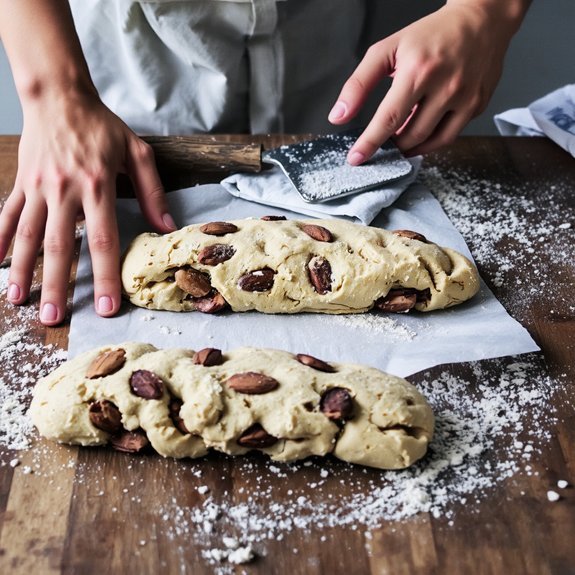
Shaping the Dough Properly
Dividing your dough into two equal portions sets the foundation for uniform baking and consistent biscotti dimensions.
You’ll want to shape each section into a log approximately 12 inches long and 2 inches wide, allowing room for expansion during baking.
- Roll the dough firmly between your palms, applying consistent pressure to create density and eliminate air pockets
- Taper the ends gradually, using end tapering technique to prevent thick, dense extremities that resist even baking
- Smooth the surface meticulously with dampened fingers, ensuring no cracks compromise structural integrity
Place your shaped logs on parchment-lined baking sheets, spacing them 3 inches apart.
This method gives you complete control over your biscotti’s final form, enabling professional-quality results without unnecessary complications.
First Bake Temperature Guide
Once your logs are positioned and ready, proper oven temperature becomes the next critical step in achieving biscotti’s signature texture.
You’ll want to preheat your oven to 325°F (163°C) for the initial bake.
This moderate temperature allows the interior to set gradually without excessive browning.
Oven calibration is essential—use an independent thermometer to verify accuracy, as many home ovens run hot or cold.
If you’re baking at higher elevations, altitude adjustments become necessary.
Increase your temperature by 15-25°F and reduce baking time slightly, typically by 5-10 minutes, to compensate for moisture loss.
Position your baking sheet on the middle rack for even heat distribution.
Bake your logs for approximately 25-30 minutes until they’re firm but not colored.
You’re aiming for a pale, dry exterior that’ll harden further during the second bake.
Cooling Before Second Bake
After the initial bake completes, remove your biscotti logs from the oven and let them cool on the baking sheet for 10-15 minutes—this resting period allows the crumb structure to set adequately before slicing.
During this critical cooling phase, several essential processes occur:
- Crust stabilization develops as the exterior hardens, preventing crumbling during the slicing operation
- Moisture redistribution equalizes throughout the log, ensuring uniform texture in your final product
- Internal temperature reduction facilitates cleaner cuts without structural compromise
You’ll notice the logs firm considerably as they cool.
Once they’ve reached room temperature, slice them at a 45-degree angle to roughly ½-inch thickness.
This preparation step directly impacts your second bake’s success, determining whether you’ll achieve that signature crispy-crunchy texture that defines authentic biscotti.
Slicing Your Biscotti
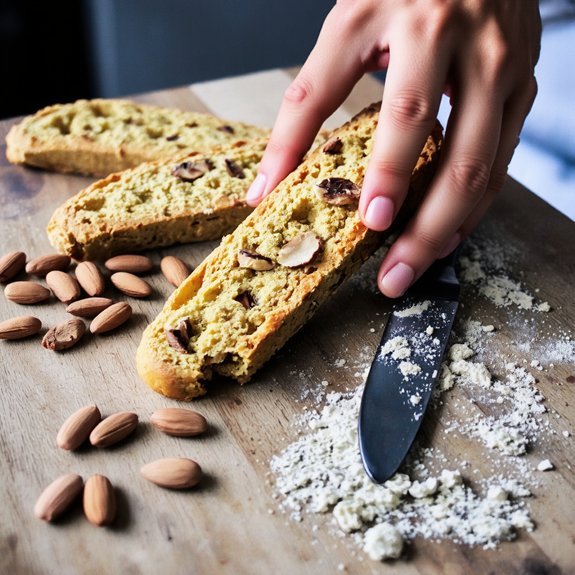
To achieve uniform pieces that’ll bake evenly, you’ll want to slice your cooled biscotti log at a 45-degree angle using a serrated bread knife with a gentle sawing motion. This diagonal cutting technique maximizes surface area for ideal crispness.
Slice your cooled biscotti at a 45-degree angle with a serrated knife to maximize surface area and achieve ideal crispness.
Position the log firmly on your cutting board. Use light pressure rather than aggressive force—you’re sawing, not chopping.
Space each slice approximately ½-inch thick for consistent baking results. Watch for visual cues indicating proper thickness: light should pass through the edges without transparency.
Maintain finger safety by securing the log with a non-knife hand, keeping digits clear of the blade’s path. Your slices determine your final biscotti’s texture, so precision matters here. Don’t rush this step.
The Second Bake
Your precisely sliced biscotti now requires a second bake to achieve that signature crisp, brittle texture.
This critical step eliminates residual moisture and develops the desired crunch you’re after.
Arrange your sliced pieces upright on parchment-lined baking sheets, making sure proper spacing for ideal convection effects.
Toast at 325°F (163°C) for 15-20 minutes until golden brown.
- Monitor crust formation closely—you’ll notice the exterior hardening while the interior dries thoroughly
- Rotate your baking sheet halfway through to guarantee uniform browning and consistent texture development
- Cool completely on wire racks before storing in airtight containers
This methodical approach guarantees biscotti that’ll stand up to dunking without crumbling.
You’ve earned the perfect dunking cookie through precision and technique.
Storage and Serving Tips
How long can you keep your biscotti fresh? Properly stored biscotti maintains peak quality for up to two weeks in an airtight container at room temperature.
Properly stored biscotti maintains peak quality for up to two weeks in an airtight container at room temperature.
For extended preservation, employ freezer storage by wrapping individual biscotti in parchment paper, then placing them in freezer-safe containers for up to three months. Thaw at room temperature for thirty minutes before serving.
Serve your biscotti at ideal texture by pairing it with complementary beverage pairings. Espresso or strong coffee intensifies the almond notes, while sweet wines like Vin Santo cut through richness.
Tea enthusiasts should select robust varieties—black tea or chai work exceptionally well. For non-caffeinated options, pair with hot chocolate or warm milk.
Store biscotti away from moisture and direct sunlight to preserve crispness and prevent flavor degradation.
Flavor Variations to Try
While the classic almond biscotti recipe delivers timeless appeal, you can elevate your baking repertoire by experimenting with complementary flavor profiles.
Consider these variations:
- Lemon Rosemary – Incorporate 2 tablespoons fresh lemon zest and 1 teaspoon finely minced rosemary into your dough. This combination creates a sophisticated, herbaceous note that cuts through the almond’s richness.
- Chocolate Espresso – Add 3 tablespoons Dutch-process cocoa powder and 2 teaspoons instant espresso powder to your dry ingredients. This intensifies depth while maintaining structural integrity.
- Anise-Infused – Fold 1½ teaspoons anise seeds into your batter for a subtle licorice undertone that pairs exceptionally with almonds.
Each variation requires no structural modifications to your baking method, only ingredient substitutions.
You’ll achieve distinctive flavor profiles while preserving the biscotti’s characteristic crispness and dunking capability.
Frequently Asked Questions
Can I Make Almond Biscotti Without Eggs or Dairy for Vegan Baking?
You can absolutely craft vegan almond biscotti by substituting aquafaba swap—three tablespoons per egg—which provides essential binding and structure.
Replace dairy butter with coconut oil at a 1:1 ratio for moisture and richness.
These substitutions maintain your dough’s integrity and crumb structure.
Your technique remains unchanged: mix dry ingredients precisely, incorporate wet components thoroughly, knead to proper consistency, slice uniformly, and bake at specified temperatures.
You’ll achieve that signature crisp texture without compromise.
How Do I Know if My Biscotti Is Perfectly Crispy Versus Too Hard?
You’ll perform the snap test by bending a cooled biscotti piece—it should break cleanly with an audible crack, not crumble into powder.
Perfect crispness demands precise moisture balance; you’re aiming for that sweet spot where internal moisture sits around 8-10%.
If it’s too hard, you’ve overdried it.
Listen carefully during your snap test—that decisive fracture sound tells you you’ve nailed the ideal texture for your biscotti.
What’s the Best Way to Gift Homemade Almond Biscotti to Friends?
You’ll achieve ideal presentation by arranging biscotti in single layers within kraft boxes lined with parchment paper.
Apply professional gift wrapping using kraft paper and twine to maintain structural integrity during delivery.
Follow delivery etiquette by hand-delivering within 24 hours of baking to preserve crispness, or ship in rigid containers with cushioning material.
Include storage instructions on a label.
This approach respects your recipient’s autonomy to enjoy quality homemade confections without compromise.
Can Frozen or Blanched Almonds Be Substituted for Fresh Whole Almonds?
You can substitute frozen or blanched almonds, though you’ll notice differences. Freezing impact minimally affects texture when thawed properly before grinding.
However, blanching effects are more significant—you’ll lose the nutritional skin layer and alter the biscotti’s appearance and subtle flavor profile.
For best results, use fresh whole almonds. If substituting, account for moisture content variations and adjust your hydration ratios accordingly to maintain proper dough consistency and achieve that signature crisp texture you’re after.
How Long Does Almond Biscotti Stay Fresh in an Airtight Container?
You’ll find your almond biscotti maintains ideal quality for two to three weeks when you store it in an airtight container at room temperature, typically 65-75°F. This shelf life depends on your storage temperature—cooler conditions extend freshness.
You’re free to extend longevity further by refrigerating or freezing your biscotti in sealed containers; frozen biscotti remains viable for up to three months. Monitor for moisture absorption, which you’ll control through proper container sealing and environmental conditions.


Leave a Comment