Key Takeaways
- Cream butter and sugar for three minutes until pale and airy for a tender cookie base.
- Fold dry ingredients gently to avoid overmixing and preserve airiness that keeps cookies soft.
- Chill dough 8–12 hours overnight for supremely tender cookies with intensified cinnamon-sugar flavor.
- Bake at 375°F for 9–11 minutes until golden with barely-set centers for soft texture.
- Store in airtight containers at room temperature for up to two weeks of softness.
Ingredients You’ll Need
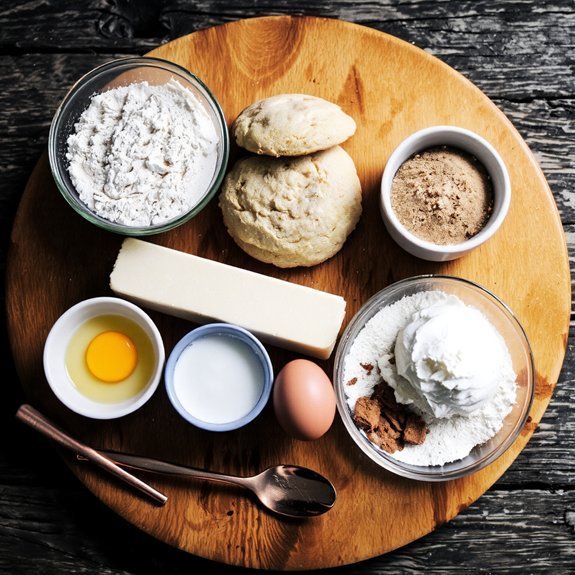
You’ll need just a handful of simple ingredients to create these beloved cinnamon-sugar treats. Gather two and a quarter cups of all-purpose flour, one teaspoon of baking soda, and half a teaspoon of cream of tartar.
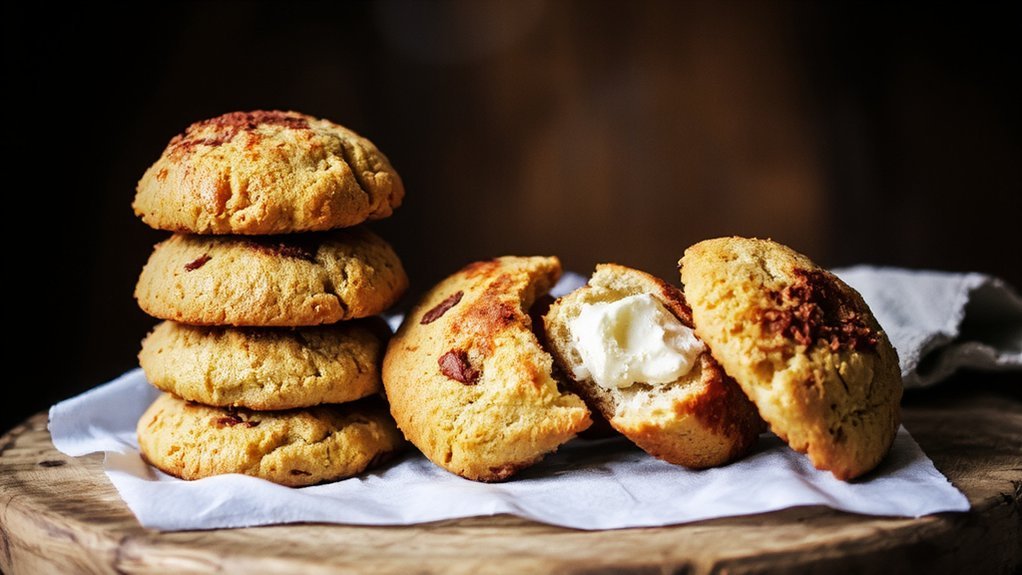
Just a handful of simple ingredients transform into beloved cinnamon-sugar treats with warmth and charm.
You’ll want unsalted butter—about three-quarters of a cup—along with three-quarters cup of granulated sugar and one egg.
For ingredient sourcing, choose quality options from your local suppliers or trusted brands that align with your values. Stock your pantry strategically; flour and baking soda maintain excellent shelf life when stored in cool, dry conditions. Cinnamon and vanilla extract last longer in airtight containers away from heat and light.
The beauty of this recipe lies in its simplicity. Each ingredient serves a purpose, delivering that distinctive soft texture and warm, cinnamon-forward flavor you’re craving. No complicated sourcing required—just honest, quality basics.
Equipment and Tools
You’ll want to gather essential mixing bowls—grab at least two so you can keep your dry and wet ingredients separate.
Pull out your measuring spoons and cups to make sure you’re adding the right amounts of flour, sugar, and cream of tartar, since precision matters for these cookies’ signature texture.
Finally, prep your baking sheet by lining it with parchment paper or a silicone mat so your snickerdoodles bake evenly without sticking.
Essential Mixing Bowls
A sturdy mixing bowl‘s the backbone of snickerdoodle success—it’s where your dough comes together, where butter and sugar transform into a creamy base, and where cinnamon-sugar coatings get properly distributed.
You’ll want to take into account material comparison carefully: stainless steel bowls conduct heat evenly and resist staining, while glass lets you see your mixture’s consistency clearly. Ceramic bowls feel substantial in your hands but chip easily.
Grab nesting bowls—they stack compactly, saving precious cabinet space while giving you multiple sizes for different tasks. A non-slip bottom keeps your bowl steady during vigorous mixing, preventing frustration and spills.
Choose bowls with rolled edges; they’re comfortable to grip and won’t cut your wrists during extended beating sessions. Your snickerdoodles deserve equipment that works as hard as you do.
Measuring Spoons and Cups
Precision’s where snickerdoodles live or die, and that’s where measuring spoons and cups become non-negotiable.
You’ll want dry measuring cups for flour and sugar—they let you level off ingredients without guessing.
Liquid measuring cups with spouts handle your vanilla extract perfectly.
Metal measuring spoons offer durability and accuracy you can trust.
These tools aren’t mere conveniences; they’re rooted in baking’s historical origins, where consistent measurements revolutionized home cooking and freed bakers from trial-and-error guesswork.
Their cultural significance spans generations—grandmothers and modern bakers alike depend on them.
You’ll appreciate how precise measurements guarantee that your cookies rise uniformly, develop that signature crispy-chewy texture, and achieve the perfect cinnamon-sugar balance.
Don’t settle for eyeballing.
Your snickerdoodles deserve the precision only proper measuring tools deliver.
Baking Sheet Preparation
Once you’ve got your measurements dialed in, your baking sheet becomes the stage where all that precision transforms into golden reality.
You’ll want to line yours with parchment paper—it’s the freedom to bake without worrying about stuck cookies or uneven browning. That protective barrier creates essential surface textures that promote even heat distribution across your snickerdoodles.
Don’t skimp on quality here. A sturdy, heavy-duty baking sheet resists warping and provides reliable edge insulation, protecting your cookies’ delicate borders from over-browning while their centers stay perfectly chewy.
Light-colored sheets reflect heat more effectively than dark ones, giving you better control over your bake.
Space your cookies strategically—at least two inches apart—so heat circulates freely. This setup guarantees consistent results every time you slide that sheet into the oven.
Preparing Your Dry Ingredients
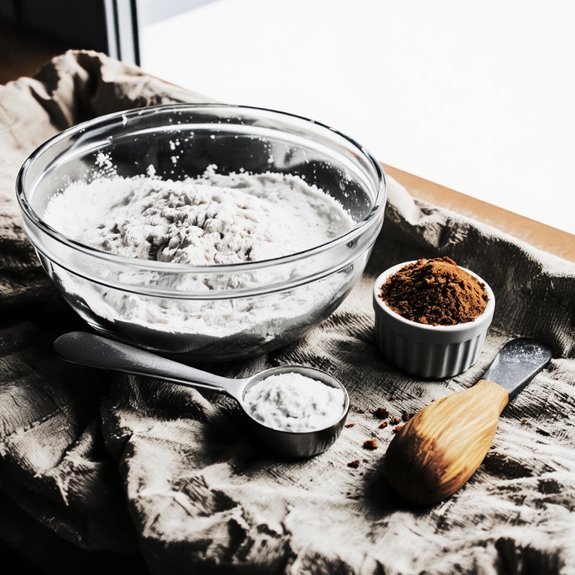
Gather your flour, baking soda, cream of tartar, and salt—you’ll want everything within arm’s reach before you begin mixing. This strategic setup gives you complete control over your baking process.
Measure your flour carefully. Then sift it into a medium bowl.
This flour aeration step is essential; it breaks up any densely packed particles and incorporates air, resulting in lighter, fluffier cookies. Don’t skip this—it makes a real difference.
Sifting flour breaks up densely packed particles and incorporates air, resulting in lighter, fluffier cookies that make a real difference.
Add your baking soda and cream of tartar to the flour, then whisk everything together thoroughly. This whisking guarantees even clump prevention and uniform distribution of leavening agents throughout your dry mixture.
You’re building the foundation for perfectly textured snickerdoodles, so take your time here. The smell of quality ingredients mixing together signals you’re on the right track.
Mixing the Dough

Creaming your butter and sugar together is where the magic truly begins—this step transforms simple ingredients into a rich, fluffy base that’ll make your snickerdoodles tender and golden.
Beat on medium mixing speed for about three minutes until the mixture becomes pale and airy, releasing that irresistible vanilla aroma.
Next, add your eggs one at a time, allowing each to fully incorporate before introducing the next.
This patience pays off.
Once combined, gently add your dry ingredients using a folding technique rather than aggressive stirring.
This preserves the airiness you’ve worked to create and prevents overdevelopment of gluten.
Stop mixing the moment you see no flour streaks—overworking the dough yields tough, dense cookies.
You’re now ready to roll your dough in that signature cinnamon-sugar coating.
The Cinnamon-Sugar Coating

Rolling your dough balls in that fragrant cinnamon-sugar mixture is what sets snickerdoodles apart from their plain-Jane sugar cookie cousins. You’ll love how the spiced coating creates a crispy exterior that yields to a soft center. This distinctive finish traces back to Dutch and German baking traditions, blending Old World charm with American comfort.
| Ingredient | Amount | Texture | Purpose |
|---|---|---|---|
| Cinnamon | 2 tbsp | Fine powder | Warm spice |
| Granulated sugar | 3 tbsp | Crystalline | Sweetness & crunch |
| Butter | 1 tbsp | Melted | Adhesive |
| Dough ball | One | Room temp | Base |
Dip each ball lightly in melted butter, then roll generously in your cinnamon-sugar blend. The coating adheres beautifully, creating irresistible spiced edges. Pair these treats with bold coffee or hot cider for liberation from ordinary afternoon snacking.
Chilling the Dough
You’ll want to refrigerate your dough because the cold firms up the butter, preventing your cookies from spreading too thin and losing that signature thick, chewy texture.
An ideal chilling time of 30 minutes to 2 hours strikes the perfect balance—long enough to chill the dough thoroughly without making it so hard that you’ll struggle to scoop it. If you’re short on time, even 15-20 minutes in the freezer will help your snickerdoodles hold their shape and develop those beautiful crackled edges you’re after.
Why Chilling Matters
After you’ve mixed your dough, resist the urge to roll it out immediately—chilling transforms your snickerdoodles from ordinary to extraordinary.
When you chill your dough, you’re not simply waiting around. Butter crystallization happens during this essential rest period, creating pockets of fat that yield those irresistibly tender cookies.
Simultaneously, gluten relaxation occurs, preventing your snickerdoodles from spreading into thin, crispy wafers you didn’t ask for.
The cold also intensifies flavors. Vanilla deepens. Cinnamon becomes more pronounced.
Your dough firms up, making it easier to shape without sticking to your hands.
Give yourself at least two hours in the refrigerator—overnight’s even better.
You’re not losing freedom by waiting; you’re gaining complete control over your final product. That’s the liberation that comes with proper technique.
Optimal Chilling Time
While two hours represents the bare minimum, the magic truly happens when you let your dough rest overnight in the refrigerator.
You’ll notice your dough becomes firmer, easier to handle, and far less likely to spread uncontrollably during baking.
Overnight chilling allows gluten relaxation to work in your favor.
Your dough develops deeper flavor complexity as ingredients meld together.
The cold environment transforms sticky dough into workable perfection.
Don’t worry about fridge humidity affecting your batch—it actually helps.
Your dough won’t dry out; instead, it’ll absorb subtle moisture that enhances texture.
You’re gaining control here, not losing it.
Push past the two-hour mark whenever possible.
Eight to twelve hours of chilling gives you supremely tender cookies with pronounced cinnamon-sugar flavor.
That’s the freedom to bake on your terms, with superior results.
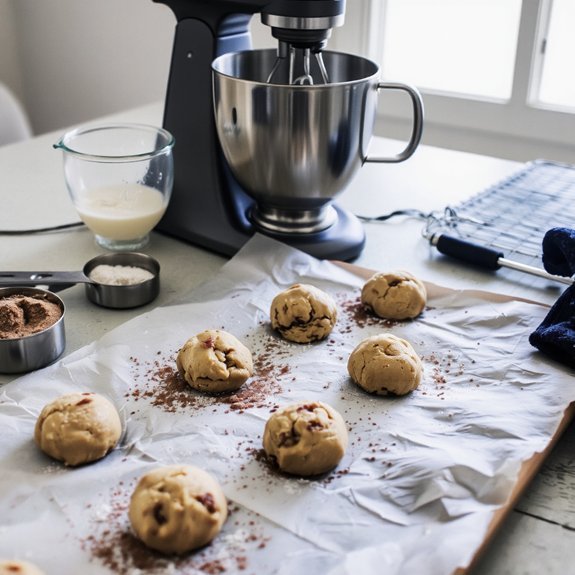
Shaping and Rolling
Scoop the dough into balls about the size of walnuts, then roll each one between your palms until it’s smooth and uniform.
You’ll feel the dough warm slightly from the friction, becoming satisfyingly pliable.
Uniform sizing matters—it guarantees even baking and professional aesthetic finishes that’ll impress any critic.
Uniform sizing guarantees even baking and professional finishes that’ll impress any critic.
Pour your cinnamon-sugar mixture onto a shallow plate.
You’re free to customize the ratio here; trust your taste buds.
Roll each ball generously in the mixture, coating all sides until they’re beautifully speckled.
The coating clings better when you work quickly, so don’t dawdle.
Space them two inches apart on your baking sheet.
They’ll spread slightly during baking, and you want room for that natural expansion.
Your precision now guarantees picture-perfect cookies later.
Baking for Perfect Softness
Once you’ve arranged your cinnamon-sugar-coated balls on the baking sheet, preheat your oven to 375°F and let it reach full temperature—this guarantees they’ll bake evenly from the moment they hit the rack.
Oven calibration matters tremendously; an inaccurate temperature ruins your results.
Bake for 9-11 minutes.
You’re watching for that golden-brown exterior while the centers stay tender.
The magic happens during fat crystallization, when butter solidifies slightly around the edges while the middle remains soft and chewy.
Your snickerdoodles should feel barely set when you remove them.
They’ll firm up as they cool on the sheet for two minutes before transferring to a wire rack.
Trust your instincts—slightly underbaked beats dry every time.
This restraint gives you that coveted soft, pillowy texture you’re after.
Cooling and Storage Tips
After you’ve transferred your snickerdoodles to the wire rack, resist the urge to dig in—patience now determines whether they’ll stay soft for days or harden by tomorrow.
Once they’re completely cooled, you’ll want to store them strategically. Airtight containers are your best defense against staling. Pop your cookies inside, and they’ll maintain that tender center you worked so hard to achieve.
Airtight containers are your best defense against staling, keeping that tender center you worked so hard to achieve.
Here’s where humidity control matters: you’re not locked into one method.
Some bakers toss in a slice of bread to absorb excess moisture. Others prefer a few apple slices for gentle hydration without sogginess. Stack cookies carefully—they’re delicate after all.
Store your containers at room temperature, away from direct sunlight. You’ve earned cookies that stay irresistibly soft and chewy, giving you the freedom to enjoy them fresh for up to two weeks.
Variations and Flavor Ideas
You’ll discover that soft snickerdoodles offer the perfect canvas for creative flavor experimentation—try adding cinnamon-vanilla swirls, a hint of cardamom, or even a touch of espresso powder to deepen the warm spice notes.
Swapping half the cinnamon sugar coating for crushed freeze-dried strawberries or finely chopped pistachios transforms your cookies into something entirely new while maintaining that signature chewy center.
These simple tweaks let you customize your batch to match your mood, from cozy and traditional to bold and unexpected.
Soft Snickerdoodle Recipe
Taking your snickerdoodles beyond the classic cinnamon-sugar coating opens up a world of delicious possibilities.
You’ll discover that soft snickerdoodles offer the perfect canvas for creative experimentation, especially when you understand their origin history rooted in Dutch and German baking traditions.
Consider these exciting variations:
- Chai-spiced versions with cardamom and cloves that pair beautifully with black tea
- Brown butter snickerdoodles delivering nutty, rich depth
- Cream cheese-infused dough for tanginess and moisture
- Maple cinnamon coating for autumn warmth
- Vanilla bean-speckled batches with enhanced aromatic complexity
You’re free to customize these soft cookies to match your taste preferences and tea pairings. Each variation maintains that coveted chewy center while delivering bold, distinct flavors. The softness allows toppings and mix-ins to shine, giving you complete control over your baking adventure.
Variations and Flavor Ideas
Why settle for the traditional cinnamon-sugar when you can transform your snickerdoodles into something entirely unexpected?
You’re free to experiment with bold flavor combinations that break the mold.
Consider seasonal pairings like pumpkin spice for autumn or peppermint for winter holidays.
Swap cinnamon for cardamom, nutmeg, or even cayenne pepper for a subtle heat that tingles your tongue.
Vanilla bean, almond extract, or coconut create entirely different taste profiles.
Beverage pairings elevate your experience—pair chai-spiced versions with hot tea, or pair chocolate-dusted cookies with rich espresso.
You might drizzle melted white chocolate or dip edges in crushed pistachios for textural contrast.
Don’t fear unconventional combinations.
Your kitchen’s your playground where you craft cookies that reflect your unique palate and adventurous spirit.
Frequently Asked Questions
Can I Make Snickerdoodles Without Cream of Tartar as a Substitute?
You’ve got options that’ll free you from cream of tartar’s grip. Swap it with a vinegar mixture—combine white vinegar with baking soda for that tangy kick.
Or try lemon juice mixed with baking soda; you’ll get a bright, zesty flavor that transforms your snickerdoodles into something uniquely yours. Both substitutes deliver the same chemical reaction, creating those irresistibly chewy, cinnamon-sugar-coated cookies you’re craving without compromise.
How Do I Prevent My Snickerdoodles From Spreading Too Thin During Baking?
You’ll want to chill your dough thoroughly before baking—this prevents that frustrating spread. Pop your shaped cookies into the freezer for at least thirty minutes; you’ll notice they hold their form beautifully.
Don’t skip oven calibration either; an accurate temperature keeps cookies from flattening into thin wafers. You’re in complete control here—trust your instincts, and you’ll nail perfectly thick, chewy snickerdoodles that won’t betray your baking independence.
What’s the Ideal Texture Difference Between Soft and Crispy Snickerdoodles?
You’ll want your soft snickerdoodles maintaining that coveted interior moisture while developing just enough surface crispness to give you textural contrast.
Crispy versions? They’re thoroughly dried throughout, shattering satisfyingly between your teeth.
Soft ones retain that pillowy center—almost underbaked—with only their cinnamon-sugar exterior providing gentle resistance.
That delicate balance between yielding interiors and slightly crisp edges is where the real magic happens, giving you freedom to choose your perfect bite.
Can I Freeze Snickerdoodle Dough for Baking Later?
You can absolutely freeze your snickerdoodle dough for later baking freedom.
Wrap individual dough balls tightly in plastic wrap, then store them in freezer bags for up to three months.
When you’re ready to bake, thawing tips matter—let dough sit at room temperature for thirty minutes until it’s soft and workable.
You’ll enjoy that warm, cinnamon-sugar aroma whenever cravings strike, without advance planning constraints.
Why Do Snickerdoodles Crack on Top While Baking?
Your snickerdoodles crack because you’re witnessing the beautiful dance between leavening interaction and surface tension.
As baking soda reacts with your dough’s acidity, it creates expanding gas bubbles that push upward with force.
That crispy cinnamon-sugar coating you’ve applied hardens faster than the dough rises beneath it, creating inevitable cracks across the golden surface—a sign you’ve nailed the perfect, undeniably delicious texture.


Leave a Comment