Key Takeaways
- Cream softened butter and sugar for 3–5 minutes until pale and fluffy for tender, structured cookies.
- Chill dough 4 hours for ideal structure, or overnight for maximum control and enhanced flavor.
- Bake at 350°F for 8–10 minutes with edges set and centers slightly underbaked for optimal texture.
- Apply sprinkles immediately while icing remains tacky to ensure permanent adhesion and visual appeal.
- Store in airtight containers with parchment layers and silica gel packets for freshness up to two weeks.
Ingredients You’ll Need
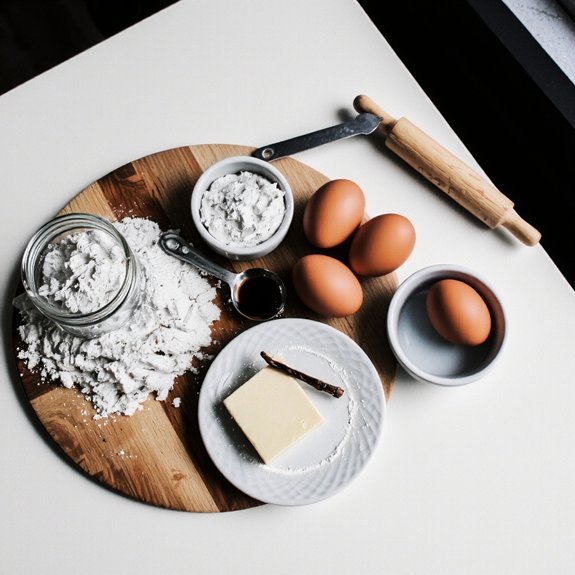
To make these classic sugar cookies, you’ll need 2¾ cups all-purpose flour, 1 teaspoon baking soda, ½ teaspoon salt, 1 cup unsalted butter (softened), 1½ cups granulated sugar, 1 large egg, and 1 teaspoon vanilla extract.
Understanding ingredient origins helps you make informed choices. Select unbleached flour from reputable mills for superior quality. Source your butter from grass-fed cattle when possible—it’ll enhance flavor complexity. Choose pure vanilla extract over imitation; it delivers authentic taste.
For sourcing tips, visit local farmers’ markets for fresh eggs and premium butter. Buy your sugar from suppliers who guarantee purity without additives. Store flour in airtight containers to maintain freshness. This methodical approach to ingredient selection guarantees you’re creating cookies that reflect your commitment to quality and personal control over what you bake.
Why This Recipe Works
This recipe’s success hinges on the precise ratio of butter to sugar, which creates the ideal fat-to-sweetness balance that yields tender, buttery cookies with just enough structure to hold their shape. You’re not bound by convention—you’re empowered by science. The vanilla extract amplifies sensory perception, delivering depth that transforms ordinary dough into something memorable.
Room-temperature ingredients guarantee complete incorporation, preventing dense pockets that compromise texture. Your flour quantity matters; too much creates cardboard, too little produces spread. This historical context matters: classic sugar cookies evolved from precise measurements that bakers refined over centuries.
You’ll recognize the formula’s reliability through consistent results. The baking soda provides just enough lift without creating cake-like crumb. Every component serves purpose, eliminating guesswork and delivering the freedom to bake confidently.
Step-by-Step Instructions
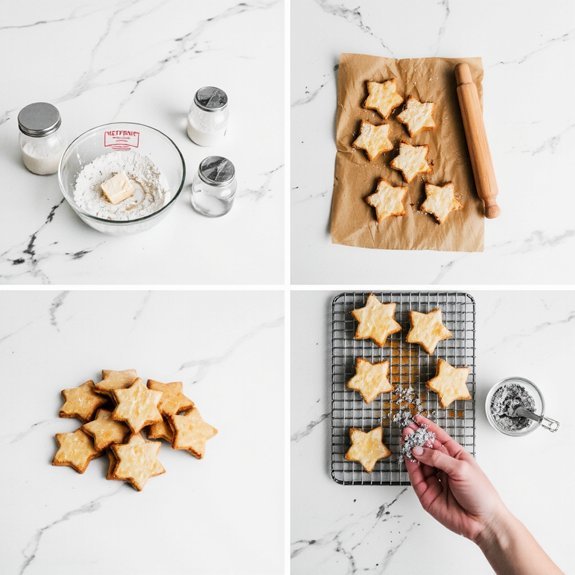
You’ll start by whisking together your flour, baking soda, and salt to guarantee even distribution of leavening agents throughout your dry mixture.
Next, you’ll cream your softened butter with granulated sugar until the mixture reaches a pale, fluffy consistency that incorporates air for proper texture.
Finally, you’ll roll your dough to uniform thickness, cut your shapes, and bake at the specified temperature until the edges set while the centers remain slightly underbaked for ideal chewiness.
Mixing Dry Ingredients
Combining flour, baking soda, and salt in a medium bowl creates the foundation for your cookie structure. You’ll want to prioritize measuring accuracy by spooning flour into your measuring cup and leveling it with a knife—don’t pack it down. This prevents excess flour that’d compromise texture.
Next, you’ll employ proper sifting techniques by whisking these dry ingredients together vigorously for about one minute. This aerates your mixture and distributes the leavening agent evenly, ensuring consistent rise throughout your batch.
You’re not just mixing; you’re engineering precision into every cookie. Take control of your baking outcome by refusing to rush this step.
The small effort here eliminates lumps and guarantees uniformity. Your dry ingredients are now ready for the wet components, setting the stage for perfectly balanced cookies that deliver exactly what you expect.
Creaming Butter and Sugar
Beating softened butter with granulated sugar at medium-high speed for 3-5 minutes creates the aerated foundation that traps air bubbles throughout your dough.
This creaming process is critical—you’re not merely combining ingredients; you’re incorporating oxygen that’ll make your cookies rise and achieve that signature tender crumb.
You’ll notice the mixture transform from dense and yellow to pale and fluffy, roughly doubling in volume.
The historical origins of this technique trace back to 18th-century European baking, when home bakers discovered that creamed butter produced superior texture compared to melted alternatives.
Cultural variations exist worldwide—some traditions substitute brown sugar for depth, while others use high-fat butters for richness.
Regardless of regional preferences, don’t skip this step.
It’s non-negotiable for exceptional cookies.
Stop beating once you’ve achieved that light, fluffy consistency.
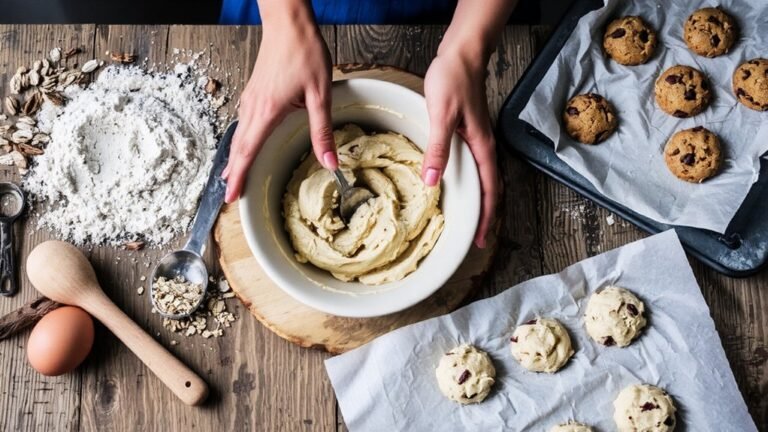
Rolling and Baking
Once your butter-sugar mixture reaches that pale, fluffy state, it’s time to incorporate the remaining ingredients and prepare your dough for shaping.
Roll out your dough between parchment sheets to your desired thickness, then cut shapes using cookie cutters.
You’ll want to chill the cut dough for thirty minutes before baking—this prevents spreading.
For baking, oven calibration is critical; verify your oven temperature with a thermometer to guarantee accuracy at 350°F.
Choose your pan selection carefully: aluminum sheets conduct heat evenly and prevent excessive browning.
Space cookies two inches apart, allowing proper air circulation.
Bake for eight to ten minutes until edges are set but centers remain soft.
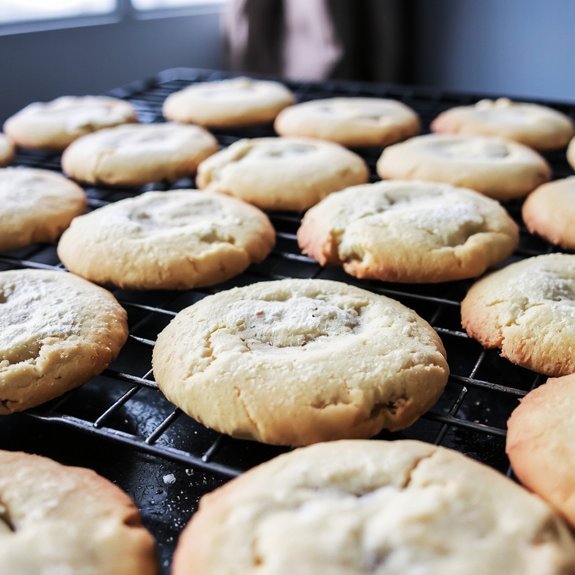
Your cookies shouldn’t brown deeply—they’ll continue cooking slightly after removal.
Cool on the pan for five minutes before transferring to a wire rack.
Tips for Perfect Texture
You’ll achieve the ideal texture by bringing your butter and eggs to room temperature before mixing, as cold ingredients won’t incorporate properly and create dense cookies.
Chilling your dough for at least two hours—or preferably overnight—allows the flour to fully hydrate and the flavors to develop, which prevents excessive spreading during baking.
This methodical approach gives you control over your final product’s crumb structure and guarantees consistent results batch after batch.
Ingredient Temperature Matters
Because butter’s plasticity directly affects dough structure, bringing it to room temperature—around 65-70°F—ensures even distribution throughout the mixture and prevents the formation of large air pockets that compromise texture.
You’ll want to measure your eggs at the same temperature for proper emulsification.
Cold ingredients create inconsistent mixing, leaving you with dense, unevenly baked cookies.
Room-temperature eggs incorporate smoothly, creating a uniform batter.
For safety temperatures, keep your kitchen workspace at 68-72°F during preparation.
You can use temperature conversions to verify your ingredient readiness: 65-70°F equals approximately 18-21°C.
Cold flour and sugar don’t require adjustment, but timing matters with dairy components.
Allow eggs and butter thirty minutes outside refrigeration before combining them.
This methodical approach gives you control over your final product’s structure, crumb, and consistency.
Chill Dough Properly
Resting your dough in the refrigerator for at least two hours—ideally overnight—allows gluten strands to relax while fats solidify, which directly controls spread during baking. You’ll prevent surface condensation by covering your dough with plastic wrap, protecting it from moisture absorption.
| Chilling Duration | Texture Result |
|---|---|
| 2 hours | Minimal spread, defined edges |
| 4 hours | Ideal structure, crisp texture |
| 8 hours | Enhanced flavor development |
| 12+ hours | Maximum control, professional results |
| Overnight | Superior taste, ideal consistency |
Position your dough on the middle shelf where chill airflow circulates evenly. This guarantees uniform cooling throughout. You’ll achieve superior texture—crisp exteriors with tender centers—when you respect these chilling parameters. Don’t rush this critical step; your cookies demand proper cold treatment for excellence.
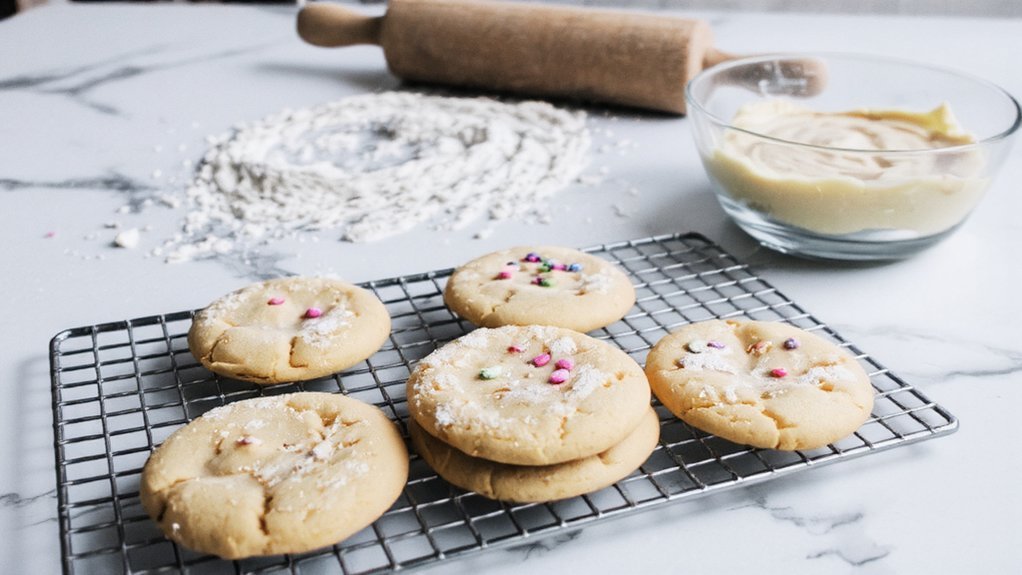
Decorating Your Cookies
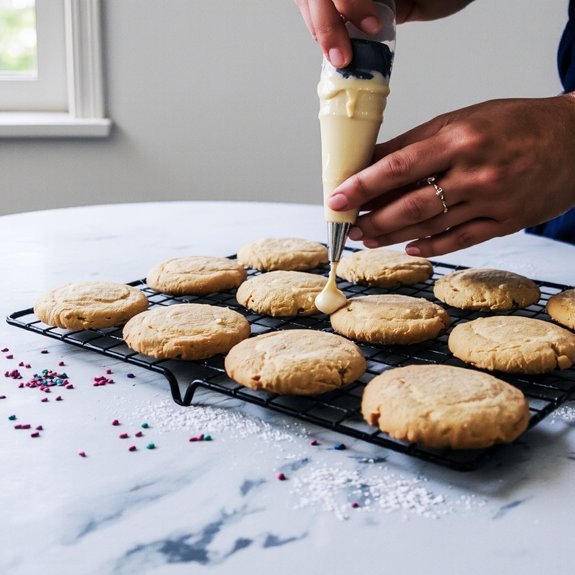
Once your sugar cookies have cooled completely, they’re ready for embellishment.
You’ll master decorating by choosing your preferred medium: royal icing, buttercream, or glaze.
For stencil designs, position your template firmly against the cookie’s surface and apply icing with a spreader or piping bag.
This technique yields crisp, professional patterns without freehand uncertainty.
Sprinkle placement demands precision timing.
Apply sprinkles immediately after icing while the surface remains tacky, ensuring they’ll adhere permanently.
Distribute them evenly across designated zones for visual balance.
You control your decorative complexity—from minimalist single-color designs to elaborate multi-layer compositions.
Mix food colorings to achieve your desired palette.
Layer complementary icings for dimensional effects.
Store decorated cookies in airtight containers, separating layers with parchment paper.
This preserves your meticulous work while maintaining freshness.
Your creative freedom transforms basic cookies into distinctive treats.
Storage and Shelf Life
To maximize your cookies’ longevity, you’ll want to store them in airtight containers within two hours of decorating, as this window allows royal icing to set completely while preventing moisture loss.
Your storage strategy demands attention to humidity control and temperature stability.
Implement these practices:
- Layer parchment between cookies to prevent icing transfer and breakage
- Maintain 40-50% relative humidity using silica gel packets for moisture regulation
- Keep containers in cool, dark spaces away from direct sunlight
Apply shelf labeling with decoration dates and storage conditions for accountability.
Properly stored cookies remain fresh for up to two weeks, though you’ll find the icing and texture at their best within the first five days. This methodical approach preserves your investment in quality ingredients and decorative work.
Variations and Flavor Ideas
Why settle for vanilla when you can elevate your sugar cookies with complementary flavor profiles?
You’ll discover endless possibilities by experimenting with global inspirations.
Incorporate cardamom and rose water for Middle Eastern flair, or add matcha powder for Japanese influence.
Unexpected pairings transform your cookies entirely. Combine black pepper with dark chocolate for sophisticated depth. Try Earl Grey tea steeped in your dough for floral complexity.
Citrus zest—lemon, orange, or bergamot—brightens the base recipe without overwhelming it.
You’re free to customize extract ratios: almond, coconut, or maple create distinct flavor signatures.
Layer spices strategically; cinnamon and nutmeg require precise measurement to avoid dominance.
Consider your decorative glazes as flavor extensions too. Lavender-infused icing or espresso glaze complement your cookie base perfectly, creating cohesive taste experiences.
Troubleshooting Common Issues
Even with precise measurements and careful technique, sugar cookies present predictable challenges that stem from ingredient ratios, temperature control, and mixing methods.
You’ll encounter three recurring problems:
- Spreading excessively – Your butter’s too warm or you’ve overmixed, developing gluten. Chill dough thoroughly and handle minimally.
- Uneven browning – Oven hotspots create dark edges while centers stay pale. Rotate pans halfway through baking and invest in an oven thermometer.
- Dense, tough texture – Overmixing or excessive flour incorporation compacts your dough. Measure flour by weight, not volume, and mix only until combined.
For altitude adjustments, reduce baking soda by 25% and increase liquid slightly—altitude accelerates moisture evaporation and leavening reactions.
You’ll refine your technique through systematic troubleshooting, achieving consistently excellent results that respect your baking standards.
Make-Ahead and Freezing Guide
Preparing sugar cookie dough in advance streamlines your baking workflow and actually improves your final product—cold dough spreads less and bakes more evenly.
You can refrigerate dough up to five days or freeze it for three months.
For party prep, portion dough into discs, wrap individually in plastic, then store in airtight containers.
Implement a labeling system noting the dough type, fat content, and freeze date—this prevents guesswork when you’re ready to bake.
Frozen dough requires no thawing; simply add two to three minutes to your baking time.
You’ll achieve superior texture and structure because cold dough resists spreading during oven heat application.
This method grants you complete flexibility, letting you bake fresh cookies whenever you want without starting from scratch.
Frequently Asked Questions
Can I Use Margarine Instead of Butter for This Sugar Cookie Recipe?
You can substitute margarine for butter, though you’ll notice flavor differences—margarine lacks butter’s rich, creamy taste that defines classic sugar cookies.
Health comparison-wise, margarine often contains trans fats and additives, while butter’s simpler composition offers better nutritional transparency.
If you’re choosing margarine for cost savings or dietary reasons, use a 1:1 ratio. Your cookies’ll spread slightly differently and won’t develop that golden, buttery complexity. Stick with real butter for superior results.
What’s the Best Way to Prevent Cookies From Spreading Too Much While Baking?
You’ll prevent excessive spreading by chilling your dough at least two hours before baking.
Maintain your oven temperature at precisely 350°F—no variance.
Monitor room humidity; high moisture causes dough to spread aggressively.
Use parchment paper for even heat distribution.
Space cookies two inches apart.
Consider adding an extra egg white to your butter mixture for structure.
These methodical adjustments give you complete control over your cookie’s final texture and appearance.
How Do I Achieve Crispy Edges While Keeping the Centers Soft and Chewy?
You’ll achieve crispy edges and chewy centers by controlling your oven temperature precisely at 350°F and using a blend of granulated and brown sugar types.
Brown sugar retains moisture, keeping centers soft, while granulated sugar promotes spreading and crispness.
You’re not bound by convention—bake for 11-13 minutes until edges set but centers remain underbaked.
This methodical approach gives you the textural contrast you’re after without compromise.
Can I Make This Dough Ahead and Bake Cookies Later This Week?
You can absolutely prepare your dough ahead.
Wrap it tightly and refrigerate for up to three days, or freeze it for three months.
Freezing actually enhances your cookies—the dough resting develops deeper vanilla notes and more complex sweetness.
When you’re ready to bake, thaw refrigerated dough slightly, then portion and bake directly.
This methodical approach gives you maximum flexibility while preserving your dough’s structural integrity and flavor profile.
Why Did My Cookies Turn Out Cake-Like Instead of Soft and Chewy?
You’ve likely overdone the leavening agents or overmixing your dough.
Excess baking soda and powder create too much lift, producing a cake-like crumb structure.
When you overmix, you’re developing gluten unnecessarily, which toughens the texture.
You’re after a tender cookie, so handle your dough minimally—mix just until ingredients combine.
Use precise measurements for leavening and trust your instincts to keep things light and chewy.


Leave a Comment