Key Takeaways
- Maintain a 2:1 flour-to-butter ratio and use a digital scale for precise ingredient measurements ensuring consistent texture and structure.
- Cream butter and sugars 2–3 minutes until fluffy, then add eggs individually; chill dough minimum 30 minutes before baking.
- Brown butter to develop nutty caramelized notes, cool to room temperature, then incorporate for enhanced depth and decreased moisture.
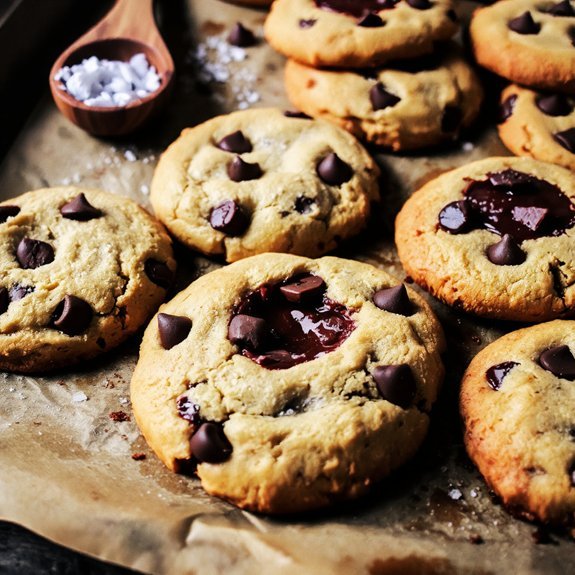
- Bake at 375°F for 11–13 minutes with cookies spaced 2 inches apart; remove when edges turn golden and centers remain slightly underdone.
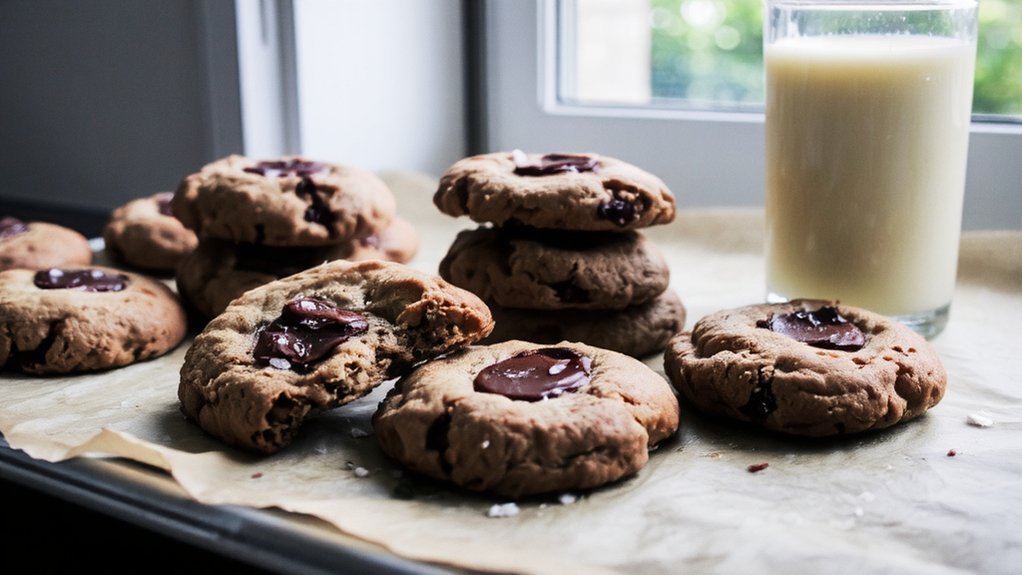
- Store in airtight glass or polypropylene containers with parchment paper between layers; serve at 68–72°F for optimal chocolate activation and chewiness.
The Secret to Perfect Chocolate Chip Cookies
Mastering the ratio of dry to wet ingredients—specifically maintaining a 2:1 flour-to-butter proportion—creates the ideal cookie texture.
Mastering dry-to-wet ratios, particularly a 2:1 flour-to-butter proportion, establishes the foundation for ideal cookie texture and superior results.
You’ll achieve superior results by controlling gluten development through precise measurement adherence.
Understanding Historical Origins reveals that Ruth Graves Graves’ 1938 innovation established the chocolate chip cookie template.
You’re building upon a foundation of culinary experimentation when you follow established ratios.
Cultural Variations demonstrate how bakers worldwide adapt recipes to regional preferences.
You can explore alternatives like brown butter clarification or varying cocoa percentages to customize your batch.
Temperature control matters substantially.
You’ll want to chill dough for 30 minutes minimum, enabling proper spreading and flavor maturation.
This technical approach grants you freedom to experiment within structural parameters, ensuring consistent results while honoring traditional methodology.
Essential Ingredients and Why They Matter
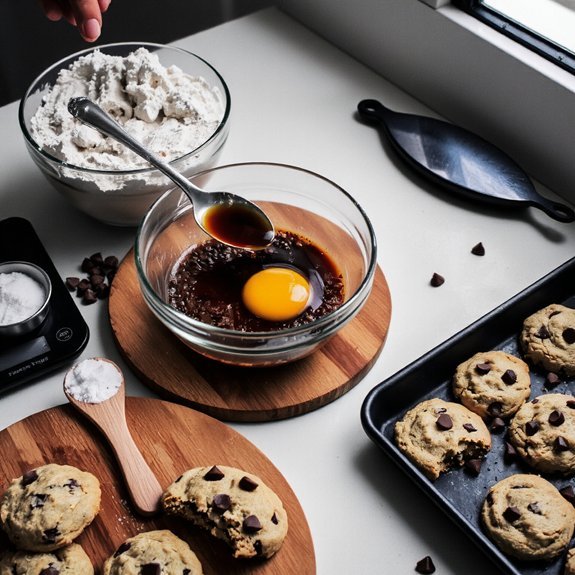
Because each ingredient performs a specific chemical function, you’ll need to understand their individual roles before combining them. Your flour varieties—whether all-purpose or bread flour—determine gluten development and structural integrity. Sugar chemistry matters equally; granulated sugar provides sweetness and browning, while brown sugar contributes moisture and deeper flavor through molasses content.
Butter functions as both a tenderizer and flavor carrier, requiring proper temperature control. Eggs act as binders and emulsifiers, creating cohesion. Baking soda triggers the Maillard reaction, producing golden edges and complex flavors.
Salt enhances taste perception and controls fermentation rates. Vanilla extract adds aromatic complexity. Chocolate chips contribute fat and cocoa solids, affecting texture and richness. Each component demands precise measurement and proper sequencing. Understanding these mechanics gives you control over your results—you’re not following blind instructions but mastering chemistry itself.
Step-by-Step Baking Instructions
Now that you understand how each ingredient functions, you’re ready to execute the precise sequence that transforms your components into perfectly textured cookies.
Begin by preheating your oven to 375°F, allowing adequate time for oven calibration to stabilize internal temperatures.
Cream your butter and sugars together for precisely 2-3 minutes until achieving a light, fluffy consistency.
Incorporate eggs individually, beating thoroughly between additions.
Your timing checkpoints include:
- Mixing dry ingredients separately for 30 seconds to guarantee uniform distribution
- Combining wet and dry components until just incorporated—avoid overmixing
- Resting dough for 15 minutes before portioning onto prepared baking sheets
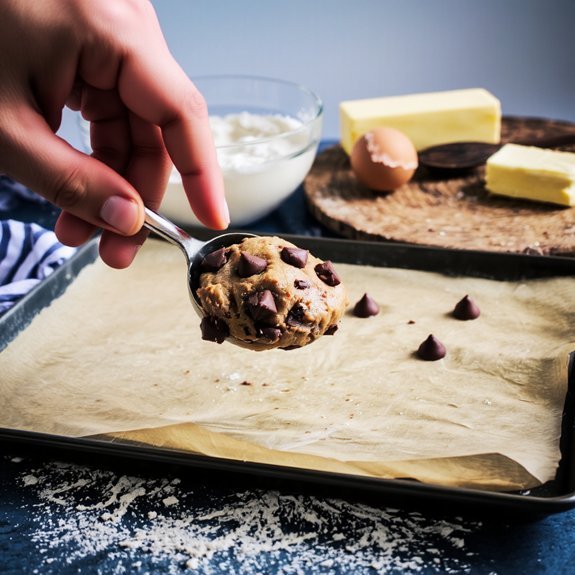
Drop uniform 1.5-tablespoon portions onto parchment paper.
Bake for 11-13 minutes until golden edges form while centers remain slightly underbaked.
This technique guarantees ideal texture and prevents overdrying, delivering cookies that maintain their structural integrity and flavor complexity while respecting your preference for unapologetic indulgence.
Pro Tips for Crispy Edges and Chewy Centers
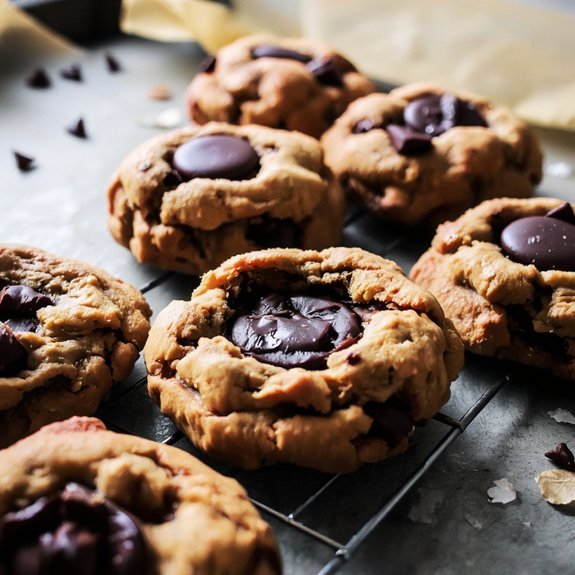
You’ll achieve crispy edges and chewy centers by browning your butter first, which develops nutty compounds that enhance texture contrast.
Chill your dough for at least 30 minutes before baking to prevent excessive spreading and allow the edges to crisp while the centers remain tender.
These two techniques work synergistically to create the ideal balance between structural integrity at the perimeter and moisture retention in the interior.
Brown Your Butter First
While traditional recipes call for softened butter, browning it first—a technique known as beurre noisette—fundamentally transforms your cookie’s texture and flavor profile.
This culinary history technique, with regional variations across European baking traditions, elevates your cookies beyond conventional results.
When you brown butter, you’re caramelizing milk solids, creating complex nutty notes that enhance chocolate depth. Here’s what happens:
- Milk solids separate and toast, developing rich, toasted flavor compounds
- Moisture content decreases, promoting crispier edges while maintaining chewy centers
- Emulsification improves, creating superior texture and mouthfeel throughout
Cool your browned butter to room temperature before mixing. This precision guarantees proper incorporation without compromising dough structure. You’ll notice immediate differences: deeper color, enhanced aroma, and markedly superior taste. The technique demands attention but rewards you with cookies that taste deliberately crafted, not mass-produced.
Chill Dough Before Baking
After your browned butter’s cooled and you’ve incorporated it into your dough, refrigeration becomes your next critical control point. Chilling allows gluten relaxation and flavor development to occur simultaneously, transforming your dough’s structural integrity and taste profile.
| Chilling Duration | Temperature | Primary Benefit | Result |
|---|---|---|---|
| 30 minutes | 40°F | Partial gluten relaxation | Moderately crispy edges |
| 2 hours | 40°F | Complete gluten relaxation | Enhanced structural stability |
| 4+ hours | 40°F | Maximum flavor development | Superior taste complexity |
| Overnight | 40°F | Full fermentation cycle | Ideal cookie performance |
You’ll notice that extended refrigeration (4-24 hours) yields superior results. This resting period allows butter to resolidify, preventing excessive spreading during baking. Your dough develops deeper, more complex flavors through enzymatic activity. When you finally bake, you’ll achieve precisely calibrated browning—crispy, caramelized edges balanced with chewy, underbaked centers. Don’t skip this step; it’s non-negotiable for excellence.
Common Mistakes to Avoid
Several critical errors can compromise your cookie’s texture, flavor, and appearance. You’ve got the freedom to bake with confidence by sidestepping these pitfalls.
1. Overbaking cookies – Remove them when edges’re golden but centers slightly underdone.
They’ll continue cooking on the hot baking sheet, achieving ideal texture without becoming brittle.
2. Overcrowding trays – Space dough balls 2 inches apart minimum. Insufficient spacing causes uneven heat distribution and merged cookies that won’t develop proper structure.
3. Inaccurate ingredient ratios – Use a digital scale for precision. Volume measurements introduce variability; exact weights guarantee consistent results batch after batch.
These technical considerations directly impact your final product’s structural integrity and sensory qualities.
Mastering these fundamentals transforms your baking from amateur to professional-grade outcomes.
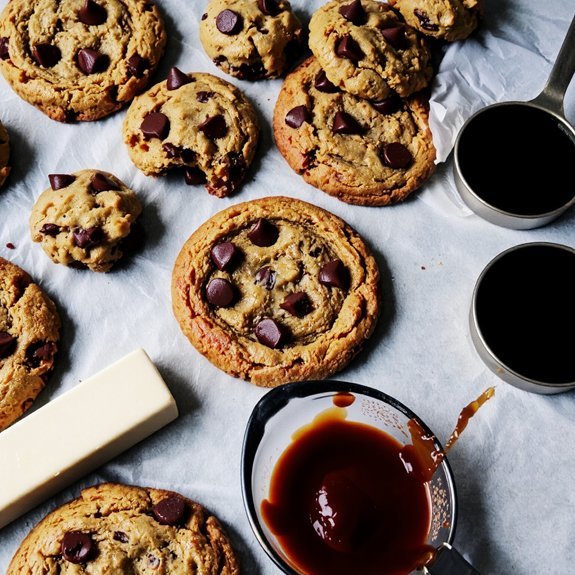
Storage and Serving Suggestions
You’ll preserve your cookies’ texture and freshness by storing them in an airtight container at room temperature for up to seven days.
For ideal flavor development, serve your cookies at room temperature, which allows the chocolate to soften slightly and enhances the vanilla and butter notes.
If you’ve refrigerated your cookies, let them acclimate to room temperature for 15-20 minutes before serving to restore their intended taste profile.
Airtight Container Storage
Storing your chocolate chip cookies in an airtight container’ll keep them fresh for up to 10 days at room temperature (68–72°F).
- Select container materials with food-grade polypropylene or glass construction to prevent moisture infiltration and maintain ideal texture integrity
- Inspect seal maintenance regularly, ensuring gasket compression remains consistent and no air gaps compromise the storage environment
- Layer parchment paper between cookie stacks to prevent adhesion and facilitate even moisture distribution
Position your sealed container away from direct sunlight and heat sources.
Monitor humidity levels; if condensation accumulates, transfer cookies to a fresh container immediately.
This prevents bacterial growth and preserves crispness.
Your freedom to enjoy quality cookies extends considerably through proper airtight storage methodology.
Room Temperature Serving Tips
Once your airtight container preserves the cookies’ structural integrity, you’ll want to think about how serving temperature affects their sensory qualities.
Room temperature serving—approximately 68-72°F—optimizes flavor blooming and crumb softening without compromising structural integrity. At this temperature range, cocoa solids fully activate, enhancing chocolate complexity.
| Temperature (°F) | Effect on Flavor | Texture Result |
|---|---|---|
| 68-72 | Peak cocoa activation | Ideal chewiness |
| Below 60 | Muted chocolate notes | Dense crumb |
| Above 75 | Flavor degradation | Excessive softening |
| Refrigerated | Suppressed aromatics | Hard texture |
You’ll achieve maximum sensory satisfaction by removing cookies 15-20 minutes before serving. This allows crumb softening to develop naturally while maintaining your desired bite. The freedom to customize your experience means you’re in control—serve them precisely as you prefer.
Frequently Asked Questions
Can I Substitute Butter With Coconut Oil or Other Alternatives in Chocolate Chip Cookies?
You can substitute butter with coconut oil at a 1:1 ratio, though you’ll experience notable flavor differences and texture changes.
Coconut oil produces crispier cookies with subtle coconut notes, while ghee yields similar results to traditional butter.
Avocado oil creates denser, more cake-like cookies. You’ll find these alternatives grant you greater culinary freedom to customize your recipe according to your dietary preferences and desired outcomes.
How Do I Adjust the Recipe for High Altitude Baking?
You’ll need to reduce leavening agents by 25% since baking soda and powder react more aggressively at altitude.
Increase your oven temperature by 15-25°F to promote faster moisture evaporation.
Decrease liquid ingredients by 2-4 tablespoons per cup, and extend baking time slightly. These modifications compensate for lower atmospheric pressure, preventing your cookies from spreading excessively or developing a cakey texture while maintaining ideal rise and structural integrity.
What’s the Best Way to Melt Chocolate Chips Without Burning Them?
You’ll achieve ideal results using either method.
The double boiler technique involves heating water to 120°F while chocolate sits in the upper vessel, preventing scorching through indirect heat transfer.
Alternatively, you can employ the microwave method—heat chips in 30-second intervals at 50% power, stirring between cycles. Both approaches maintain chocolate integrity and prevent the 115°F threshold where cocoa butter degrades, ensuring you retain complete control over your baking outcome.
Can I Make the Dough Ahead and Freeze It for Later Baking?
You can absolutely freeze your cookie dough for extended storage.
Utilize portioning tips by scooping uniform portions onto parchment paper before freezing solid—this prevents clumping and streamlines baking.
For thawing methods, you’ve got flexibility: bake directly from frozen, adding 2-3 minutes to your standard time, or thaw at room temperature for 30 minutes beforehand.
Both techniques yield professional-grade results.
Your dough maintains ideal structural integrity when frozen at 0°F, preserving ingredient ratios and achieving consistent cookie architecture every time.
Are There Egg-Free or Vegan Options for This Chocolate Chip Cookie Recipe?
You can definitely create egg-free versions using a Flax Egg—combine one tablespoon ground flaxseed with three tablespoons water per egg, letting it set five minutes.
Alternatively, you’ll find Aquafaba Substitute works excellently; three tablespoons aquafaba replaces one egg effectively.
Both options maintain binding properties and moisture content.
For vegan adaptations, substitute butter with coconut oil at a 1:1 ratio and use dairy-free chocolate chips.
These modifications preserve structural integrity and deliver comparable results to traditional recipes.


Leave a Comment