Key Takeaways
- Sift cocoa, flour, and sugar together; whisk eggs with butter for proper emulsification before folding dry ingredients gently.
- Macerate pitted cherries in genuine kirsch (40–45% ABV) for at least 30 minutes to intensify flavor and extract juices.
- Stabilize whipped cream with cornstarch or cream cheese; chill bowl and beaters to 40°F before whipping to stiff peaks.
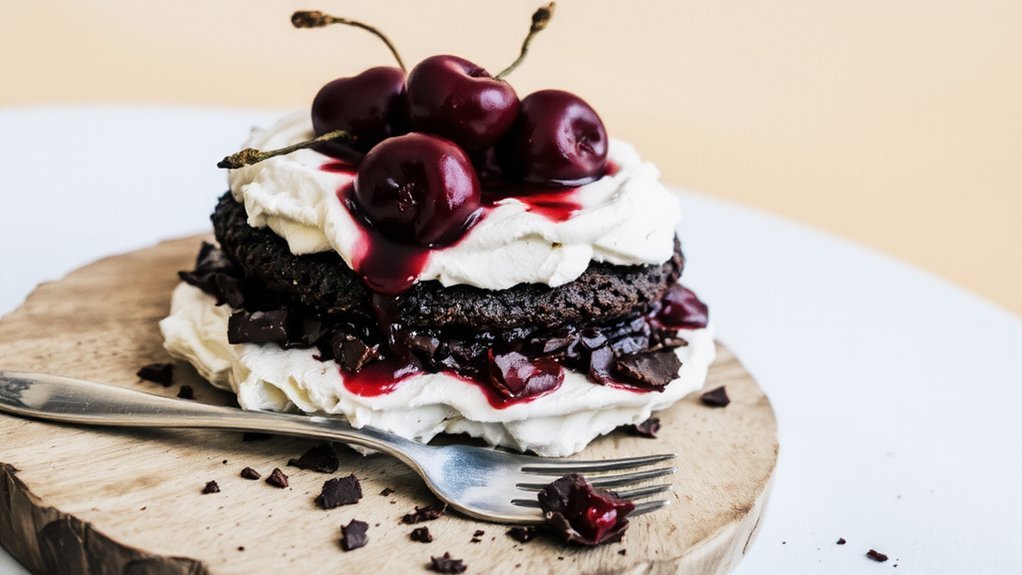
- Assemble cake on serving plate with alternating layers of cake, stabilized whipped cream, cherries, and kirsch-soaked syrup for moisture.
- Garnish finished cake with chocolate shavings, whipped cream rosettes, and fresh cherries; refrigerate until serving for optimal structure.
Ingredients You’ll Need
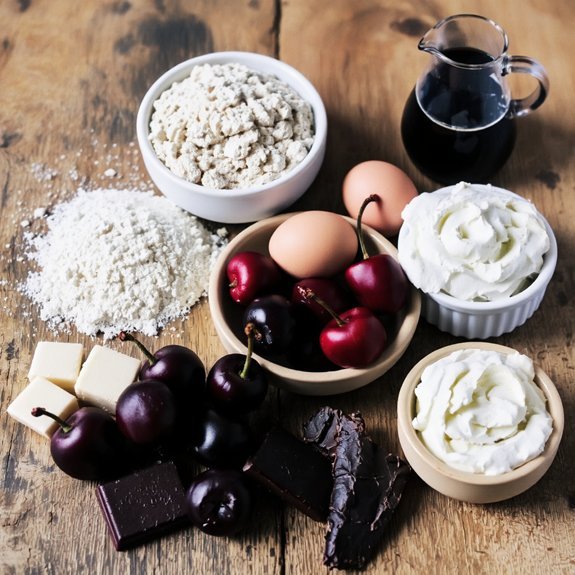
To craft an authentic Black Forest cake, you’ll need two cups of all-purpose flour, two teaspoons of baking powder, half a teaspoon of salt, one cup of unsweetened cocoa powder, two cups of granulated sugar, four large eggs, one cup of whole milk, two teaspoons of vanilla extract, and half a cup of vegetable oil.
You’ll also require one can of pitted cherries, one cup of heavy whipping cream, two tablespoons of powdered sugar, and chocolate shavings for garnish.
For allergy substitutions, replace all-purpose flour with a gluten-free blend or almond flour. Substitute dairy milk with almond or oat milk.
Consider this cost breakdown: flour and cocoa ($3), eggs and dairy ($4), sugar ($2), cherries and chocolate ($5). Your total investment runs approximately $14, yielding a professional-quality dessert without compromising your budget or dietary requirements.
Essential Equipment and Tools
You’ll need the right arsenal to execute this multilayered dessert properly.
Invest in ergonomic tools that won’t fatigue your hands during extended mixing sessions.
A heavy-duty stand mixer handles thick batters effortlessly, while offset spatulas and bench scrapers maneuver frosting with precision.
You’ll want springform pans for structural integrity and a rotating cake turntable for even frosting application.
A piping bag with various tips creates those signature chocolate shards and whipped cream rosettes.
Digital scales guarantee accurate ingredient measurements—critical for this technical recipe’s success.
Don’t overlook tool maintenance.
Clean equipment immediately after use to prevent chocolate buildup and frosting residue.
Dry everything thoroughly before storage.
Sharp knives and well-maintained mixers perform at their best, directly impacting your final product’s quality and your freedom to create without equipment frustration.
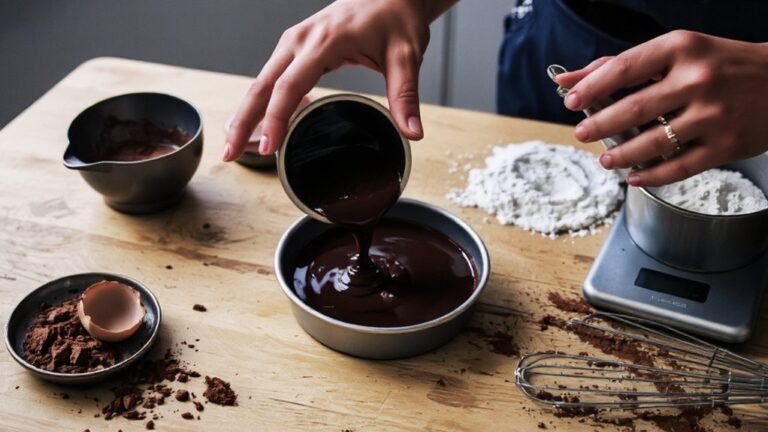
Preparing Your Chocolate Cake Layers
With your equipment cleaned and ready, crafting the cake layers begins with precise ingredient measurement and methodical mixing.
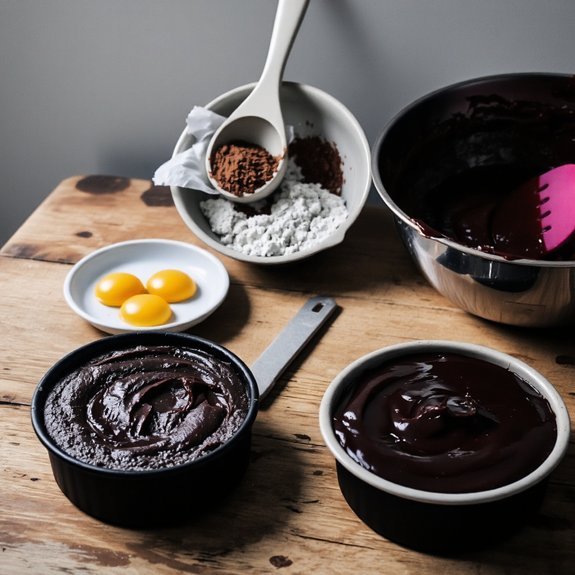
You’ll combine sifted cocoa powder, flour, and sugar to achieve ideal crumb texture—light yet structurally sound.
Whisk eggs with butter until you’ve reached proper emulsification, then fold in your dry ingredients deliberately to avoid overdevelopment.
Divide your batter equally between prepared pans for layer uniformity; uneven distribution creates structural problems during assembly. Bake at the specified temperature, checking doneness with a toothpick—you want minimal crumbs attached, indicating proper moisture retention without dryness.
Cool your layers completely on wire racks before handling. This prevents warping and guarantees your cake maintains structural integrity throughout the stacking and frosting process.
Making the Cherry Filling
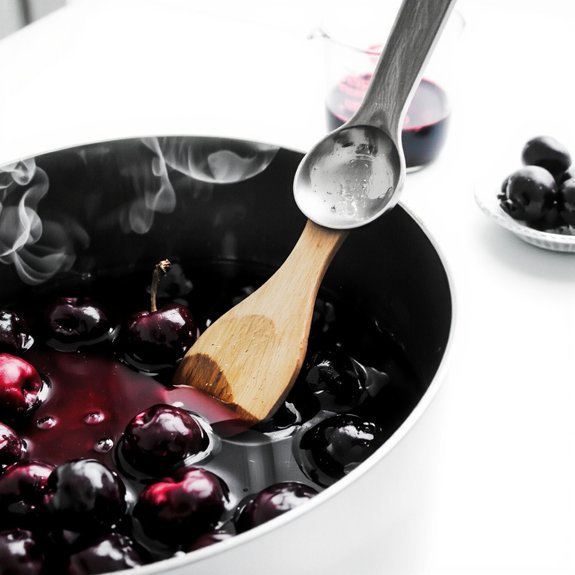
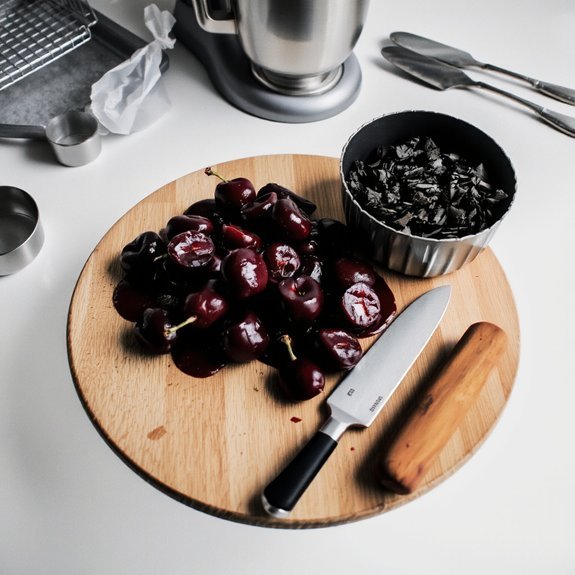
Once your cake layers have cooled completely, you’ll prepare the filling that defines Black Forest Cake’s character. Start with fresh cherries sourced seasonally from local producers—their peak ripeness guarantees superior flavor and texture. Master efficient pitting techniques by using a cherry pitter or improvising with a paperclip, removing pits without destroying the fruit’s integrity.
Combine your pitted cherries with kirsch or cherry liqueur, allowing them to macerate for at least thirty minutes. This process extracts juices and intensifies flavor.
Add a measured amount of sugar based on your cherries’ natural sweetness—seasonal sourcing means variability. The filling should achieve a balanced consistency: juicy enough to soak your cake layers, yet thick enough to support the structure without collapsing under the whipped cream topping.
Whipping the Cream Topping
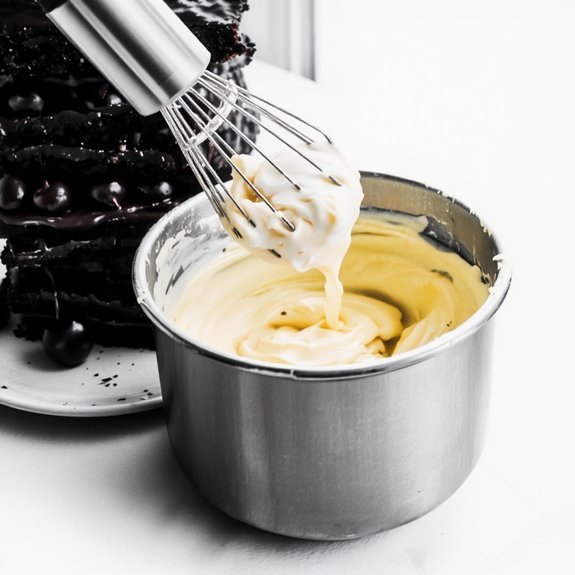
You’ll achieve perfect peaks by whipping cold heavy cream with powdered sugar until stiff peaks form—a process that typically takes 2-3 minutes with an electric mixer.
Timing matters greatly because over-whipping will turn your cream grainy and separate, so you’ll want to stop as soon as the peaks hold their shape without drooping.
To stabilize your whipped cream for a cake that won’t weep, you can fold in a tablespoon of cornstarch or cream cheese per cup of cream, which extends its hold without compromising texture.
Achieving Perfect Peaks
Whipping cold heavy cream transforms it into an airy topping that’ll crown your Black Forest cake with elegance and texture.
You’ll need heavy cream at 35-40% fat content, chilled bowls, and a stand mixer or whisk.
Start on medium speed, gradually increasing to medium-high as peaks form.
Stop when you’ve reached stiff peaks—the moment your cream holds its shape without drooping.
This visual psychology of perfectly peaked cream catches judges’ eyes in competitive judging scenarios.
Over-whipping yields grainy, separated butter, so monitor constantly.
Your technique determines success: forty seconds too long ruins everything.
Chill your mixing bowl beforehand; warmth accelerates breakdown.
The transformation from liquid to billowy peaks requires precision timing and unwavering attention.
Master this stage, and you’ve conquered your cake’s crowning glory.
Temperature and Timing
Now that you understand the mechanics of peak formation, temperature control becomes your competitive edge in achieving consistent results.
You’ll want to chill your mixing bowl and beaters to 40°F or below before whipping cream—cold equipment maintains structural integrity throughout the process.
Time your whipping carefully; you’re looking at 2-3 minutes maximum to reach stiff peaks without overshooting into butter territory.
Don’t rely on guesswork—use oven calibration to verify your refrigerator’s actual temperature, ensuring accuracy that directly impacts your cream’s performance.
Coordinate your bake scheduling so your cake layers cool completely before frosting application.
Warm cake melts whipped cream instantly, undermining all your technical work.
You control the timeline by planning backward from serving time, giving you the freedom to execute each stage with precision and confidence.
Stabilizing Whipped Cream
Because standard whipped cream breaks down within hours, stabilizers like gelatin or cornstarch extend its structure and holding power.
You’ll find that gelatin requires careful heating to activate without clumping, while cornstarch offers a simpler alternative requiring only whisking.
Choose stabilizers based on your supply chain preferences—sourcing locally reduces environmental impact while supporting regional producers.
Whip your cream to soft peaks before adding your stabilizer, then continue beating until stiff peaks form.
This technique prevents overworking the cream, which’d cause separation.
You’re free to experiment with stabilizer ratios: typically one tablespoon per cup of cream works effectively.
Allow stabilized whipped cream to chill for thirty minutes before decorating your Black Forest cake, ensuring it maintains its structure throughout serving.
Assembling the Cake
Once you’ve prepared your cake layers, cherries, and whipped cream, you’re ready to construct your Black Forest cake.
Follow this assembly sequence: place your first chocolate cake layer on a serving plate or cake board. Spread a thin stabilized whipped cream layer across it, then add a generous portion of cherries with their syrup.
Begin assembly by positioning your first chocolate cake layer on a serving plate, then spread stabilized whipped cream and add cherries with syrup.
Stack your second layer and repeat the process. Crown the top with the final layer.
Frost the entire cake with remaining whipped cream, applying even pressure for uniform coverage. Arrange fresh and maraschino cherries on top, then garnish with chocolate shavings.
For transport planning, consider assembling your cake on the actual serving plate to minimize movement and prevent structural compromise during transit.
Adding the Kirsch Liqueur
You’ll want to select a true Kirsch—a clear, colorless brandy distilled from black cherries—rather than imitation versions, as authentic Kirsch delivers the distinctive flavor your Black Forest Cake requires.
Measure your Kirsch precisely using a jigger or graduated measuring spoon, typically between 2-3 tablespoons for the cake layers and additional amounts for the cherry filling, ensuring you don’t oversaturate the sponge.
Pour the Kirsch evenly across each cake layer right after assembly, allowing it to absorb gradually into the crumb structure before you add the whipped cream frosting.
Kirsch Selection and Quality
What separates an authentic Black Forest cake from a mediocre imitation? Your kirsch selection.
You’ll want genuine kirsch from established production regions like the Black Forest itself, Switzerland, or Alsace.
These areas produce superior spirit through traditional distillation of morello cherries.
You’re looking for kirsch with clean, bright tasting notes—fruity yet neutral enough to complement rather than overpower your cake layers.
Authentic kirsch runs 40-45% ABV and carries a subtle almond undertone from cherry pits.
Avoid mass-produced substitutes or artificial cherry liqueurs; they’ll compromise your cake’s integrity.
You’re choosing between quality and mediocrity here.
Invest in a 200ml bottle of genuine kirsch—you’ll use roughly three tablespoons—because your cake deserves nothing less than authenticity.
This choice directly impacts your final product’s complexity and professional caliber.
Proper Measuring Techniques
Now that you’ve selected your kirsch, precision in measuring becomes non-negotiable.
You’ll want to use a jigger or calibrated measuring spoon rather than free-pouring, which introduces inconsistency into your cake’s flavor profile.
Conduct tolerance analysis on your measuring tools before starting.
Verify your equipment against known volumes—a digital scale works excellently for liquid measurements, offering accuracy within 1-2 grams.
Perform calibration checks regularly, especially if you’re reusing vintage measures.
Room temperature affects liquid volume slightly, so measure your kirsch at consistent conditions.
For this Black Forest Cake, you’re typically adding 2-3 tablespoons to the chocolate layers and 1-2 tablespoons to the whipped cream filling.
Don’t eyeball these amounts.
Your precision directly determines whether the kirsch’s flavor integrates subtly or dominates the cake.
Decorating Your Masterpiece
Transforming your assembled cake into an elegant Black Forest creation requires careful application of whipped cream, fresh cherries, and chocolate shards. You’ll pipe rosettes and scrolls using piping patterns that showcase your technical skill. Position maraschino cherries strategically atop each cream dollop for visual impact.
| Decorating Element | Application Method | Quantity |
|---|---|---|
| Whipped Cream | Piping bag with star tip | 2 cups |
| Dark Chocolate Shards | Hand-placed between layers | 1 cup |
| Fresh Cherries | Positioned on rosettes | 20-24 pieces |
| Edible Accents | Gold leaf or cocoa dust | As desired |
You’ll create depth by layering chocolate shards between cream swirls. Apply cocoa powder or gold leaf as edible accents, enhancing both flavor and presentation. Your piping patterns establish visual rhythm while maintaining structural integrity. This approach demands precision—you’re not constrained by convention, but by your own exacting standards.
Chilling and Storage Tips
After you’ve perfected your piping and positioned the final cherry garnish, proper refrigeration becomes your ally in preserving the cake’s structure and flavor.
Proper refrigeration becomes your ally in preserving the cake’s structure and delicate flavor after final decoration.
Store your Black Forest cake at 35-40°F for ideal results.
You’ll want to use airtight packaging methods—either a cake box with tight-fitting lid or plastic wrap layered directly against the frosting to prevent oxidation and moisture loss.
Humidity control matters notably; excess moisture degrades your delicate chocolate shavings and cherry compote consistency.
Keep your cake away from your refrigerator’s ice maker and back walls where temperature fluctuations occur.
Your cake stays fresh for three to four days when properly stored.
For extended preservation, you can freeze it for up to two months. You should thaw it gradually in your refrigerator before serving to maintain structural integrity and flavor complexity.
Serving and Enjoying Your Black Forest Cake
When should you remove your Black Forest cake from refrigeration?
Take it out 15-20 minutes before serving to let the chocolate ganache and cherry filling reach peak flavor intensity.
This temperature adjustment enhances the cake’s textural complexity and allows the kirsch liqueur notes to emerge fully.
For occasion suggestions, this cake commands attention at anniversaries, formal dinners, and celebrations demanding sophistication.
Its technical construction justifies showcase moments.
Coffee pairings amplify your experience considerably.
Serve alongside espresso or strong brewed coffee—the bitter notes cut through the cake’s richness, balancing sweetness with acidity.
The caffeine complements cherry and chocolate layers without overwhelming your palate.
Slice with a hot, damp knife between cuts to achieve clean portions.
The whipped cream topping and candied cherries remain pristine, delivering that liberation of indulgence you’ve earned through precise execution.
Frequently Asked Questions
Can I Make Black Forest Cake Without Kirsch Liqueur or Alcohol?
You can absolutely make Black Forest cake without kirsch liqueur. Replace it with cherry flavor extracts—almond extract works beautifully too.
Your soaking techniques matter here: brush your cake layers with cherry juice or simple syrup instead of alcohol. You’ll get that moisture and flavor you’re after.
Mix cherry extract into your whipped cream frosting for depth. These substitutions give you complete control over your dessert’s taste profile without compromising authenticity or texture.
How Far in Advance Can I Prepare Black Forest Cake Before Serving?
You can prepare your Black Forest Cake up to two days ahead.
You’ve got flexibility with layer chilling—assemble and refrigerate components separately for ideal texture control.
Time your decoration timing strategically: apply frosting and cherries no more than 24 hours before serving to prevent ingredient breakdown.
This approach lets you manage your schedule independently while maintaining the cake’s structural integrity and flavor profile throughout the serving period.
What’s the Best Substitute if I Don’t Have Fresh Cherries Available?
You’ve got solid options when fresh cherries aren’t accessible.
Maraschino cherries work well for garnish, though they’re sweeter and lack tartness.
Cherry preserves offer superior flavor depth—you’ll get concentrated cherry notes that actually enhance your cake’s complexity. Strain the preserves slightly if you’re concerned about excess moisture.
Mix them into your filling or use them as a glaze.
Either substitute maintains your cake’s integrity while giving you freedom from ingredient constraints.
Can Black Forest Cake Be Frozen, and How Long Does It Last?
You can freeze your Black Forest Cake up to three months. Wrap it tightly in plastic wrap and foil to prevent freezer burn affecting texture.
Thaw it in your refrigerator for 12-24 hours—this gradual thawing tips process preserves the cake’s moisture and chocolate integrity.
Avoid room-temperature thawing, which risks bacterial growth and compromises your ganache layer. Properly stored, you’ve got complete control over your dessert timing without sacrificing quality.
Why Does My Cake Layers Sink or Become Dense After Baking?
Your cake layers sink or become dense when you’re overmixing batter, which deflates air bubbles you’ve worked to incorporate.
You’ve also likely got insufficient leavening—check your baking powder or soda hasn’t expired.
Use a light hand folding ingredients together, don’t overbeat your eggs, and make sure you’re measuring flour correctly.
Your oven temperature matters too; verify it’s accurate with a thermometer for proper rise.


Leave a Comment