Key Takeaways
- Bake a light sponge cake using separated eggs beaten to stiff peaks for natural leavening and aeration.
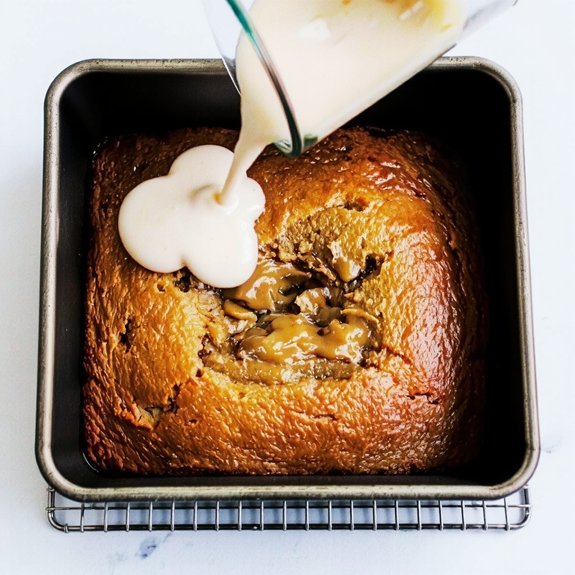
- Pierce the cooled cake with a fork at ¼-inch intervals and slowly pour the three-milk mixture evenly across.
- Refrigerate the assembled cake minimum four hours or overnight to allow proper milk absorption and flavor melding.
- Whip heavy cream with sugar and vanilla to stiff peaks, optionally stabilized with cornstarch to prevent weeping.
- The three-milk mixture combines equal parts sweetened condensed milk, evaporated milk, and heavy cream for optimal consistency.
Ingredients You’ll Need
You’ll need the following for the sponge cake base: 1 cup all-purpose flour, 1½ teaspoons baking powder, ¼ teaspoon salt, 5 large eggs (separated).
You’ll also need ¾ cup granulated sugar, ⅓ cup whole milk, and 1 teaspoon vanilla extract.
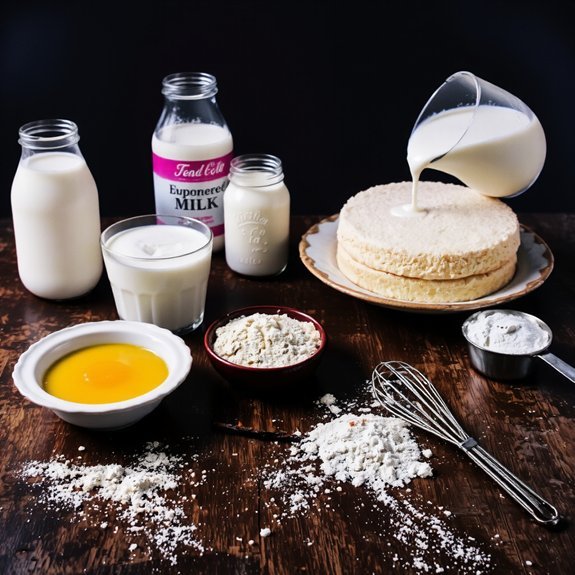
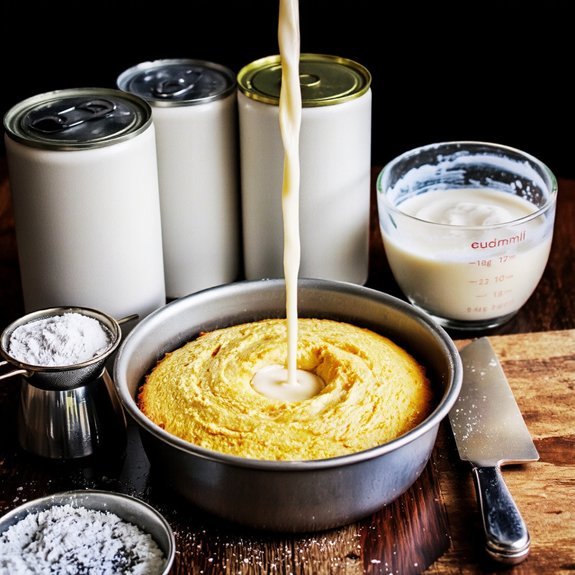
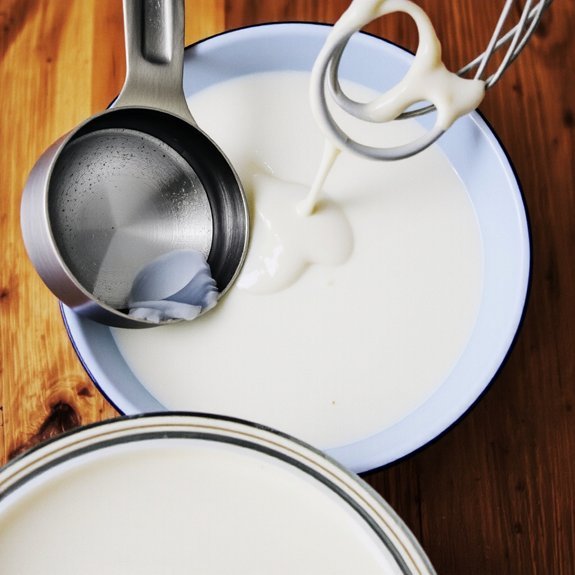
For the three-milk mixture, you’ll combine 1 can (14 ounces) sweetened condensed milk, 1 can (12 ounces) evaporated milk, and ½ cup heavy cream.
Finally, you’ll need 2 cups heavy whipping cream, ¼ cup granulated sugar, and 1 tablespoon vanilla extract for the topping.
For the topping, gather 2 cups heavy whipping cream, ¼ cup granulated sugar, and 1 tablespoon vanilla extract.
When sourcing ingredients, consider seasonal availability—fresh eggs and dairy products typically cost less during peak seasons.
Conduct a cost comparison between brands to optimize your budget without compromising quality.
All-purpose flour remains consistently affordable year-round, making it economical for this dessert.
Equipment and Preparation
Before you begin mixing the sponge cake base, gather your equipment and prep your workspace: you’ll need two 9-inch round cake pans, parchment paper, a stand mixer or hand mixer, separate bowls for wet and dry ingredients, a whisk, a spatula, and a fork for piercing the cooled cake.
Arrange your kitchen layout strategically to optimize workflow—position your mixer near an electrical outlet with dry ingredients staged on one side and wet components on the other.
Line your pans with parchment paper for easy removal.
Make sure tool maintenance by verifying that your mixer operates smoothly and your bowls are completely dry. This setup prevents cross-contamination and streamlines the baking process, allowing you to work efficiently through each technical step without interruption.
How to Make the Sponge Cake
You’ll whip your eggs and sugar to stiff peaks using a stand mixer on medium-high speed for approximately 8-10 minutes, creating the essential air structure for your cake’s rise.
Next, you’ll fold your sifted flour into the egg mixture using a spatula with gentle, deliberate strokes to preserve the incorporated air and maintain the batter’s volume.
Finally, you’ll bake your sponge at 350°F for 25-30 minutes until a toothpick inserted in the center emerges clean and the cake’s internal temperature reaches 205°F.
Whipping Eggs Perfectly
Separating your eggs into yolks and whites is essential for achieving the proper sponge cake structure.
You’ll whip your egg whites at medium-high speed for 3-4 minutes until stiff peaks form. This process forces air incorporation into the proteins, creating countless tiny bubbles that’ll leaven your cake naturally.
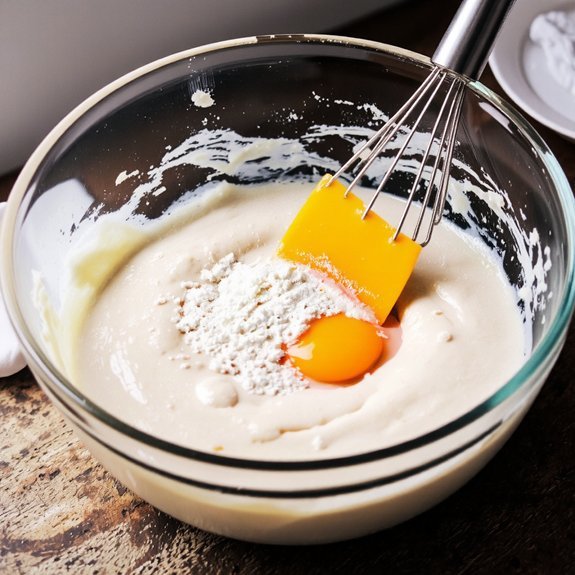
Next, beat your yolks with sugar until pale and ribbon-like, about 2-3 minutes.
This step initiates protein denaturation, which stabilizes your mixture and traps additional air. The emulsification process here guarantees a unified batter.
Fold your whipped whites gently into the yolk mixture using a spatula, making 12-15 deliberate strokes.
Don’t deflate those air bubbles you’ve worked to create. This careful combining preserves the structure you’ve built, giving you freedom to bake a perfectly light, airy sponge cake that’ll hold your tres leches mixture beautifully.
Folding Flour Gently
Gently incorporating your flour into the egg mixture requires a delicate hand to maintain the aeration you’ve carefully developed. Use a rubber spatula to execute your folding technique with precision.
Cut down through the center of your bowl, sweep across the bottom, and fold the mixture upward in one fluid motion. Rotate your bowl slightly and repeat this sequence until you’ve fully incorporated the dry ingredients.
This folding technique prevents excessive gluten development, which would toughen your sponge cake. Work deliberately but don’t overthink it—you’re aiming for a homogeneous batter without deflating those air bubbles.
Stop folding the moment you see no white flour streaks. Your batter’s light, airy texture directly determines your cake’s final structure.
Baking Time Temperature
Once your batter reaches that light, airy consistency, it’s time to transfer it to a prepared 9-inch round cake pan and set your oven to 350°F (175°C).
Bake for 25-30 minutes until a toothpick inserted in the center emerges clean. Don’t open the oven door during baking—you’ll collapse the delicate crumb structure you’ve worked to create.
Oven calibration matters considerably; your thermometer might read differently than actual temperature. Use an independent oven thermometer to verify accuracy.
Altitude adjustments are necessary if you’re above 3,000 feet; increase oven temperature by 15-25°F and reduce baking time by 5-10 minutes to prevent overdrying.
Remove the cake when golden brown and springy to touch. Cool completely before adding the three-milk mixture.
Preparing the Three-Milk Mixture
To create the signature moistening liquid for tres leches cake, you’ll combine three distinct dairy components in precise proportions.
Blend one 14-ounce can of sweetened condensed milk, one 12-ounce can of evaporated milk, and one cup of heavy cream in a mixing bowl.
Whisk thoroughly until completely incorporated, ensuring no separation occurs.
Temperature effects markedly impact absorption rates—use chilled mixture for slower penetration, allowing controlled hydration.
For ideal results, maintain 40°F storage conditions before application.
Pierce your cooled cake layer with a fork across the entire surface, creating channels for liquid distribution.
Pour the mixture slowly and evenly, allowing each section to absorb before adding more.
This deliberate technique prevents oversaturation while ensuring uniform moisture distribution throughout your cake’s crumb structure.
Soaking and Chilling the Cake
After you’ve applied the three-milk mixture, you’ll need to allow adequate absorption time before proceeding with frosting. The chill duration directly impacts your cake’s structural integrity and flavor distribution. Refrigerate at 40°F for a minimum of four hours—preferably overnight—making sure the lactose-based liquid fully penetrates the sponge layers.
During this resting period, texture development occurs as the milk mixture hydrates the crumb structure, creating that signature tender, moist consistency. The extended chilling time allows flavors to meld while stabilizing the cake’s framework.
Before frosting, remove your cake from refrigeration and let it reach 55-60°F for approximately thirty minutes. This temperature adjustment prevents condensation on the surface and promote ideal frosting adhesion.
Proper chill duration guarantees superior texture development and a professional-quality Tres Leches cake that maintains structural integrity throughout serving.
Making the Whipped Cream Topping
Whipping heavy cream into a stable topping requires precise technique and cold ingredients to achieve ideal volume and texture.
Achieving stable whipped cream requires precise technique and chilled ingredients for optimal volume and texture results.
You’ll want to chill your mixing bowl and beaters beforehand to maintain appropriate temperatures throughout the process.
Pour 2 cups of heavy cream into your bowl and begin beating at medium speed.
Once soft peaks form, gradually add 3 tablespoons of powdered sugar and 1 teaspoon of vanilla extract.
Continue whipping until stiff peaks develop—typically 3-4 minutes total.
For stability techniques, don’t overbeat, as this causes separation.
You can add 1 tablespoon of cornstarch per cup of cream to enhance structural integrity if needed.
Transfer your whipped cream to a piping bag fitted with a decorative piping tip.
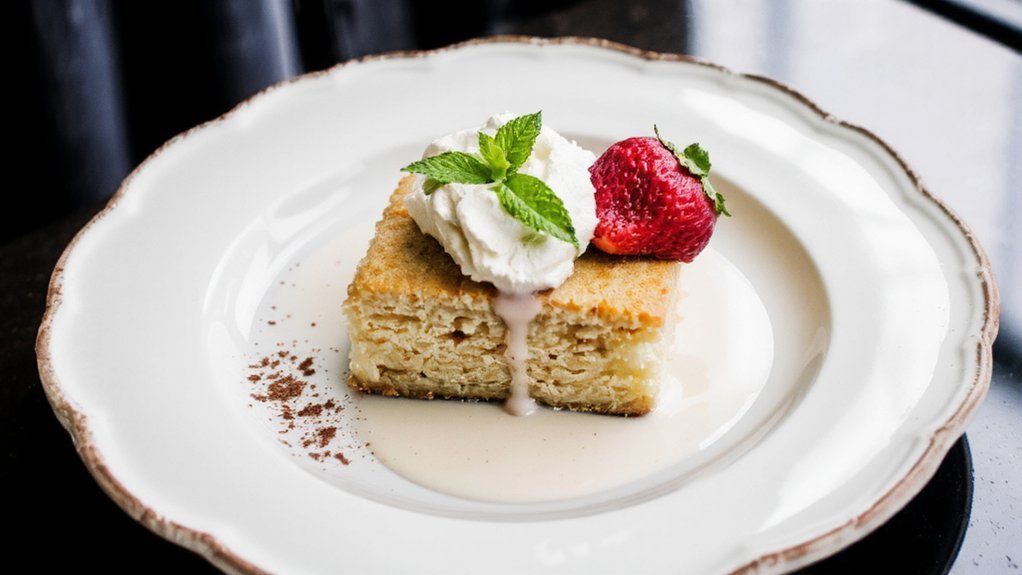
Apply generous dollops across your chilled cake’s surface, creating textured peaks that complement the dessert’s elegant presentation.
Tips for Perfect Results Every Time
Since consistency matters most when you’re assembling a tres leches cake, you’ll want to measure your three-milk mixture with precision—use equal parts evaporated milk, sweetened condensed milk, and heavy cream (typically ½ cup each).
Distribute it evenly across the sponge layer using a fork to pierce the surface at ¼-inch intervals before pouring.
- Account for altitude adjustments by reducing sugar by 1-2 tablespoons per cup in high-elevation areas
- Chill the assembled cake minimum 4 hours for ideal milk absorption
- Stabilize whipped cream with 1 tablespoon cornstarch per cup to prevent weeping
- Apply garnish ideas including fresh strawberries, maraschino cherries, or toasted coconut flakes immediately before serving
These technical adjustments guarantee consistent results, ensuring your tres leches cake achieves the perfect moisture-to-structure balance every time you bake it.
Frequently Asked Questions
Can I Make Tres Leches Cake a Day Ahead, and How Should I Store It?
You can absolutely prepare tres leches cake one day ahead. After soaking the sponge cake with the three-milk mixture, you’ll want to refrigerate it in airtight storage for overnight chilling.
This extended hydration period actually enhances flavor integration and texture development. Cover your cake tightly with plastic wrap or transfer it to an airtight container, ensuring no moisture loss.
The controlled refrigeration environment prevents bacterial growth while allowing proper osmotic absorption of the milk mixture throughout your cake’s crumb structure.
What Can I Substitute if I Don’t Have Sweetened Condensed Milk?
You can make homemade condensed milk by combining one cup of whole milk with one cup of granulated sugar in a saucepan.
Heat to 190°F, stirring constantly for 1-2 hours until it reaches the desired consistency.
For dairy-free options, you’ll substitute coconut milk or oat milk with added sugar, heating identically.
Both alternatives yield comparable viscosity and sweetness, allowing you complete control over your tres leches cake’s ingredient composition without commercial additives.
How Do I Know When the Cake Is Properly Soaked Through?
You’ll know you’ve achieved proper saturation when you’ve punctured the cake’s entire surface with a toothpick, allowing the three-milk mixture complete penetration.
Perform the finger press test on the cake’s top—it’ll feel moist yet structurally sound, not waterlogged or collapsing.
You’re targeting that sweet spot where the crumb’s absorbed maximum liquid without becoming mushy.
The cake should spring back slightly when pressed, indicating you’ve nailed the soaking duration perfectly.
Can I Freeze Tres Leches Cake, and for How Long?
You can freeze tres leches cake for up to three months when properly stored.
Wrap it tightly in plastic wrap, then aluminum foil to prevent freezer burn.
Thaw it in your refrigerator for 4-6 hours before serving—never at room temperature, which’ll compromise structural integrity.
This method preserves moisture content and maintains the cake’s signature texture.
You’ve got complete control over your dessert timeline without sacrificing quality.
Why Did My Cake Turn Out Dry or Not Absorb the Milk Mixture?
Your cake likely didn’t absorb the milk mixture because you’ve overbaked your sponge, creating a dense crumb structure that resists liquid penetration.
You’ll want to pull your cake at exactly 25-30 minutes when a toothpick shows minimal crumbs.
An overbaked sponge’s tight crumb matrix prevents adequate milk absorption.
Additionally, make sure you’re poking numerous holes throughout the entire cake layer before applying your milk mixture generously.
This technique guarantees ideal saturation.


Leave a Comment