
Key Takeaways
- Combine dry ingredients (flour, baking powder, baking soda, spices, salt) and wet ingredients (pumpkin, eggs, oil, vanilla) separately, then fold together gently.
- Fill muffin cups two-thirds full and bake at 350°F for 18–22 minutes until a toothpick inserted comes out clean.
- Avoid opening the oven during the first 15 minutes of baking to prevent the muffins from collapsing or baking unevenly.
- Cool muffins in the pan for 10–15 minutes, then transfer to a wire rack for 30–45 minutes to prevent soggy bottoms.
- Store cooled muffins in an airtight container at room temperature up to 3 days or freeze individually for up to 3 months.
Gathering Your Ingredients

Before you’ll mix anything together, you’ll need to assemble 1¾ cups all-purpose flour, 1 teaspoon baking powder, ½ teaspoon baking soda, 1 teaspoon ground cinnamon, ½ teaspoon ground ginger, ¼ teaspoon ground cloves, ¼ teaspoon ground nutmeg, ¼ teaspoon salt, 1 cup pumpkin puree, ¾ cup granulated sugar, ¼ cup brown sugar, ⅓ cup vegetable oil, 2 large eggs, and 1 teaspoon vanilla extract.
For seasonal shopping, source your pumpkin puree from local vendors during autumn months or reliable year-round suppliers.
Verify ingredient sourcing by checking product labels for quality certifications.
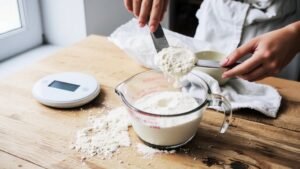
Measure dry ingredients using the spoon-and-level technique for accuracy.
Combine all spices in a separate vessel before incorporating them into your dry mixture.
This preliminary organization facilitates proper emulsification and uniform spice distribution throughout your batter, guaranteeing consistent results across all twelve muffins.
Essential Baking Equipment

You’ll need a standard 12-cup muffin tin, preferably with a nonstick coating to prevent sticking and facilitate easy removal.
A standard 12-cup nonstick muffin tin prevents sticking and ensures easy removal of perfectly baked muffins.
A large mixing bowl accommodates your wet and dry ingredients efficiently.
You’ll also require measuring cups and spoons for precise quantities—accuracy directly impacts texture and rise.
A whisk aerates your batter properly, while a spatula scrapes bowl sides thoroughly.
An electric mixer saves time and promotes consistent blending, though manual mixing works if you prefer hands-on control.
For appliance upkeep, clean your mixer immediately after use to prevent batter buildup.
Establish a tool organization system in your kitchen—designate specific drawers or shelves for baking implements.
You’ll need an oven thermometer to confirm accurate temperature calibration.
A cooling rack prevents soggy bottoms as muffins set.
Preparing Your Batter
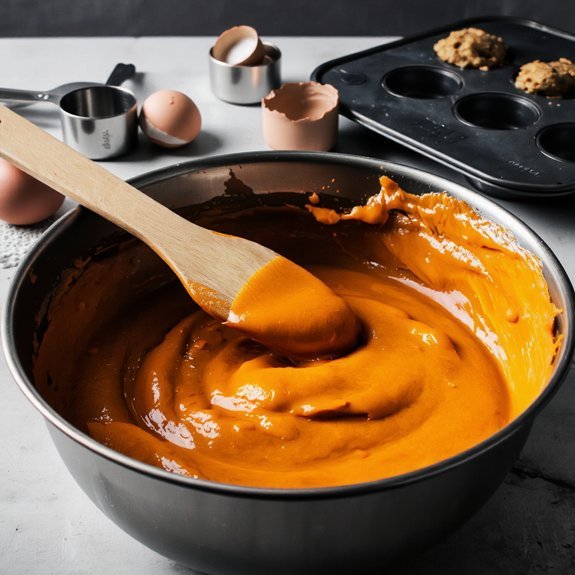
Combining your dry ingredients first—flour, baking powder, baking soda, cinnamon, nutmeg, ginger, and salt—ensures even distribution of leavening agents throughout the batter.
Whisk these together in a medium bowl for about thirty seconds, breaking up any clumps.
In a separate bowl, you’ll blend your wet ingredients: pumpkin puree, eggs, oil, and vanilla extract.
Whisk until fully incorporated. Pour your wet mixture into the dry ingredients and fold together using a spatula with twelve to fifteen strokes—don’t overmix, as this develops gluten and toughens your muffins.
Allow your batter a five-minute resting time before portioning. This essential mixing order and resting period lets the flour fully hydrate while keeping your crumb structure tender.
Your batter should appear thick but pourable.
Filling Your Muffin Cups

With your batter rested and ready, it’s time to portion it into your prepared muffin tin.
Fill each cup approximately two-thirds full using a standard ice cream scoop or measuring spoon.
This guarantees portion consistency across all twelve muffins and promotes even baking.
For overflow prevention, avoid filling beyond the three-quarter mark. Excess batter will rise during the 350°F bake and spill onto your oven floor, creating cleanup headaches. If you’ve prepared more batter than your tin accommodates, refrigerate the remainder for later use.
Insert the tin into your preheated oven and bake for eighteen to twenty-two minutes until a toothpick inserted into the center emerges clean. Your muffins are now set for successful baking without mess or wasted product.
Baking and Monitoring

Once you’ve positioned the muffin tin on the center oven rack, set a timer for eighteen minutes and resist the urge to open the oven door during the first fifteen minutes—doing so causes temperature fluctuations that’ll compromise rise and texture.
After fifteen minutes, you can safely peek to assess browning.
Your muffins’ll achieve ideal lift and golden-brown exteriors when you maintain consistent oven calibration.
For temperature tracking, use an independent oven thermometer to verify your appliance’s accuracy—many home ovens deviate noticeably from their displayed settings.
If your oven runs hot, reduce the temperature by ten to fifteen degrees.
Insert a toothpick into the center of a muffin; it should emerge clean or with minimal crumbs.
Remove the tin when the tops feel firm and spring back when lightly pressed.
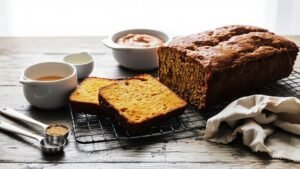
Cooling and Storage
Removing your muffins from the oven marks the beginning of a critical phase that directly impacts their final texture and shelf life.
Allow muffins to cool in their pan for 10-15 minutes, enabling the crumb structure to set properly.
Transfer them to a wire rack for complete cooling, typically 30-45 minutes, ensuring air circulation prevents moisture accumulation on the bottom.
For storage, implement moisture control by placing cooled muffins in an airtight container with parchment paper between layers.
Room-temperature storage extends shelf life to three days.
For extended preservation, freeze muffins individually in freezer bags up to three months.
Don’t store warm muffins—trapped steam creates condensation, compromising texture.
Thaw frozen muffins at room temperature before consuming.
This approach guarantees ideal moisture retention and maintains your desired crumb consistency throughout storage.
Creative Variations and Add-Ins
Why settle for plain pumpkin muffins when you can elevate them with complementary flavors and textures?
Experiment with spice pairings like cardamom, ginger, and nutmeg—add ¼ teaspoon of each to your dry ingredients for enhanced warmth.
You’re not limited to traditional options; consider chai spices or clove for bolder profiles.
For topping ideas, you’ve got unlimited freedom.
Combine equal parts brown sugar, cinnamon, and chopped pecans—sprinkle ½ teaspoon per muffin before baking.
Alternatively, mix cream cheese frosting with maple syrup for a glazed finish.
Streusel toppings work exceptionally well; layer butter, oats, and almonds directly atop your batter.
Don’t overlook mix-ins.
Fold in chocolate chips, dried cranberries, or chopped walnuts—use 1 cup total per dozen muffins.
These additions enhance moisture retention while providing textural contrast.
Your variations transform standard pumpkin muffins into sophisticated, personalized treats.
Frequently Asked Questions
Can I Use Canned Pumpkin Puree Instead of Fresh Pumpkin in This Recipe?
You can absolutely substitute canned pumpkin puree for fresh pumpkin. Canned varieties offer superior flavor concentration and consistent texture differences—they’re denser and more refined than fresh.
Use a 1:1 ratio by volume. You’ll achieve ideal results with precise measurements: one 15-ounce can replaces approximately one cup fresh puree.
Canned puree eliminates moisture variability, yielding predictably moist muffins with intensified pumpkin profile. This substitution streamlines your process while maintaining professional-grade quality.
How Do I Know When Pumpkin Muffins Are Fully Baked Without Overbaking Them?
You’ll nail the perfect bake by employing the toothpick test—insert it into your muffin’s center, and you’re done when it emerges clean or with minimal crumbs. Simultaneously, verify your internal temperature reaches 200-205°F using a meat thermometer. This dual-method approach prevents underbaking while eliminating overbaking risks.
Your muffins should display a golden-brown exterior without drying out. You’ve got complete control—trust these precise indicators to deliver consistently excellent results every single time.
What’s the Best Way to Freeze Pumpkin Muffins for Long-Term Storage?
You’ll freeze your pumpkin muffins by first cooling them completely, then wrapping each muffin individually in plastic wrap.
Place wrapped muffins in airtight containers or vacuum sealing bags—vacuum sealing maximizes storage duration up to three months.
For thawing methods, you can defrost at room temperature for two hours or refrigerate overnight.
You’ve got complete control over your muffin inventory without any commercial preservatives compromising your product.
Why Did My Muffins Turn Out Dry, and How Can I Prevent This?
Your muffins likely dried out due to overmixing effects, which develops excess gluten and creates a dense crumb structure that loses moisture.
You’re also probably underestimating your ingredient ratios—ensure you’re using precise measurements for wet components like pumpkin puree and oil.
Don’t overbeat; mix until ingredients barely combine.
Verify your oven temperature’s accuracy with a thermometer.
Reduce baking time by two to three minutes, checking doneness with a toothpick insertion test.
Can I Make Pumpkin Muffins Without Eggs for Dietary or Allergy Reasons?
You can absolutely make egg-free pumpkin muffins by substituting with flax eggs or aquafaba options.
Mix one tablespoon ground flaxseed with three tablespoons water per egg, letting it sit five minutes until gelatinous.
Alternatively, use three tablespoons aquafaba per egg for superior binding properties.
Both methods yield moisture-rich, structurally sound muffins.
Maintain precise measurements—125g pumpkin puree, 180g flour, 10ml baking powder—ensuring ideal rise and crumb development.
You’ve got complete control over your baking outcome.


Leave a Comment