You’ll master a seared tuna with sesame crust that’s simple yet refined. Start with sushi-grade ahi, a quick soy-sesame-honey marinade, and a press of black and white sesame seeds. You’ll sear steaks in a screaming-hot skillet for a crisp exterior and rare center. I’ll show exact timings, plating, and safety tips so your result is restaurant-quality—here’s where it gets interesting.
Ingredients and Measurements
Ingredients and measurements matter: use sushi‑grade ahi tuna, about 6‑ounce steaks per person, and coat them with 2–4 tablespoons combined black and white sesame seeds.
You’ll also need salt, pepper, garlic powder and a neutral high‑heat oil; soy sauce, rice vinegar, sesame oil, honey and ginger serve as sauce bases.
For herbs or heat, add thyme, cilantro, sriracha or wasabi sparingly.
If you need ingredient substitutions, swap olive oil for peanut or canola, and adjust soy with low‑sodium versions.
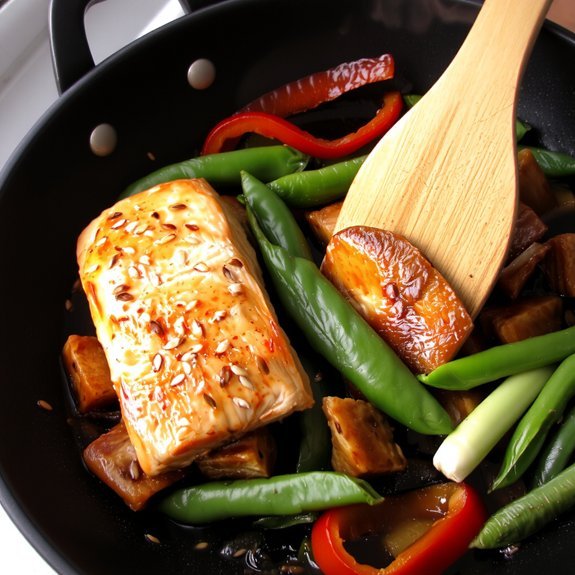
Note portion adjustments: increase 6‑ounce portions for larger appetites or serve with rice and salad to extend servings.
Keep seasonings measured precisely to maintain balance; aim for a light crust and a rare center for ideal texture and flavor.
Reserve bold garnishes for final presentation.
Ahi tuna is also known as yellowfin tuna.
Equipment and Prep
Now that you’ve measured and seasoned your tuna, get your workstation and tools in order: a heavy cast‑iron or stainless skillet, a high‑heat oil (canola or grapeseed), metal spatula and tongs, and a splatter guard. If possible, use sushi-grade tuna or Saku tuna for best results.
Select equipment types that tolerate very high heat and transfer it evenly; cast iron or stainless are nonnegotiable.
Lay out prep essentials: paper towels for thorough drying, a thermometer if you use one, a plate for rested fish, and the extractor fan on.
Heat the skillet until very hot before adding oil, then use tongs and the metal spatula to handle and turn the steaks.
Follow safe handling to avoid cross‑contamination and refrigerate any unused raw or cooked tuna promptly. Clean all surfaces and utensils immediately after each use.
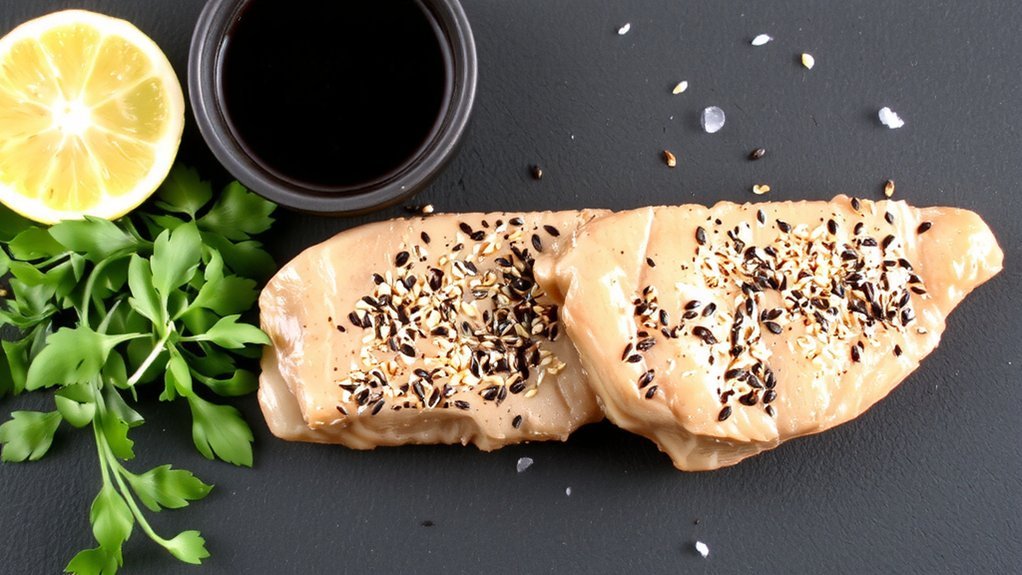
Marinade and Sesame Crust
You’ll balance soy, toasted sesame oil, a touch of sweetener and an acid to lift the tuna without overpowering it.
Then you’ll press a mix of black and white sesame seeds and dry spices onto patted-dry steaks to form an even, crunchy crust.
To guarantee adhesion, lightly oil or briefly marinate the fish, press seeds firmly including the edges, and wipe away excess marinade to prevent sogginess.
For best results, use steaks that are 1.5-inch thick.
Marinade Flavor Balance
Balance the sweet, savory, and aromatic elements of your marinade so the sesame crust complements, not overpowers, the tuna. For best results start with two 6 oz sushi-grade tuna steaks. Choose marinade ingredients that prioritize umami (soy sauce or liquid aminos), toasted sesame oil, a touch of honey for sweetness, and fresh ginger for warmth; add lemon or vinegar sparingly to brighten.
Aim for short marination—5–10 minutes—or up to 30 minutes refrigerated for deeper penetration. Keep consistency slightly viscous so the coating adheres. Taste for salt and sweetness balance; adjust honey or low‑sodium soy to control sodium.
Consider subtle spice (Korean chili, wasabi) or dried herbs for complexity without masking tuna. Proper balance preserves the fish’s texture and highlights sesame’s crunch as a complementary contrast. This approach yields nuanced flavor enhancement without overwhelming delicate tuna texture.
Sesame-Crust Technique
Anyone preparing sesame-crusted tuna should start by keeping the fish dry and the marination short—5–10 minutes (up to 30 refrigerated)—so the seeds adhere without steaming the flesh.
You toast seeds in a dry pan until light golden to boost sesame flavor, and choose fresh seeds for taste. Separate black and white seeds for contrast, then blend or arrange as desired.
Pat tuna dry, season lightly, and apply a thin oil or egg-white coat only if needed to aid adhesion. Preheat a flat pan hot, then sear each side 10–30 seconds to develop a crisp crust texture while preserving a rare center.
Use mixed oils to raise smoke point and watch closely to prevent burning. Finish with citrus zest or quick soy-lime dipping sauce.
Ensure you use sushi-grade fish when preparing lightly seared tuna.
Seed Adhesion Tips
Someone prepping sesame-crusted tuna should aim for a slightly tacky surface—never soaking wet or bone-dry—so seeds will embed rather than slide off.
You control moisture balance by using a damp towel, brief water dip, or an egg wash; avoid excess water and overly long marinades that leach stickiness. Prefer viscous marinades (soy, honey, miso) or light oil/mustard sprays to create a glue-like layer.
Lightly score or pat the fish to optimize surface texture and press or roll the tuna into seeds—don’t sprinkle. Apply seeds immediately before searing; pre-toast seeds sparingly to activate oils but not dry them.
For stubborn loss, sandwich seeds between two thin binder layers to lock the crust without altering flavor. Maintain moderate heat during sear to preserve adhesion and flavor.
For seeding techniques, many cooks prefer a damp towel to control surface moisture.
Searing Technique and Timing

You need a very hot cast-iron or heavy skillet—test with a flick of water—and add a high-smoke-point oil just before you add the tuna.
Sear each flat side about 45–60 seconds for a golden crust, hold edges upright 15–30 seconds, or extend to 1–2 minutes per side for medium-rare.
Keep heat high (ventilation on) and raise it if the crust isn’t forming quickly to avoid overcooking the interior.
For best results, use sushi-grade ahi tuna and ensure it is fully defrosted if previously frozen.
Pan Heat and Oil
While a very hot pan is essential, heat it over medium-high to high until a flicked drop of water sizzles loudly. For best results, marinate the tuna for about 10 minutes before searing marinate 10 minutes.
For effective heat management, choose a heavy skillet (cast iron ideal) and add a thin film of neutral, high‑smoke‑point oil—this is oil selection.
Add oil only after the pan reaches temperature; it should shimmer or just begin to smoke.
Swirl to coat the surface, use minimal oil to avoid splatter and sogginess, and turn on strong ventilation.
Press the tuna gently to guarantee full contact without moving it during the initial contact.
If a crust fails to form, raise the heat.
Avoid overheating oil before fish goes in to prevent degradation and burnt flavors; remove excess residue between batches for consistent, repeatable results.
Sear Time Per Side
Although searing’s aim is a deep, golden crust, timing dictates how cooked the center will be. For rare tuna, sear about 45–60 seconds on the first side until golden, then flip and sear 60–90 seconds on the side; total sear duration ~1.5–2.5 minutes gives a raw center.
For medium-rare, aim 1.5 minutes per side and extend toward 3 minutes per side for more doneness, adjusting heat from high to medium-high after first sear. You preheat a cast-iron skillet, don’t move the steak while browning, and check for a deep golden color before flipping. Use a preheated cast-iron skillet with canola oil over medium-high heat to achieve an immediate sear.
Briefly sear edges to secure the sesame crust. You rest tuna about three minutes to allow carryover cooking and juices to settle before slicing.
Adjust times for thickness and serving preference.
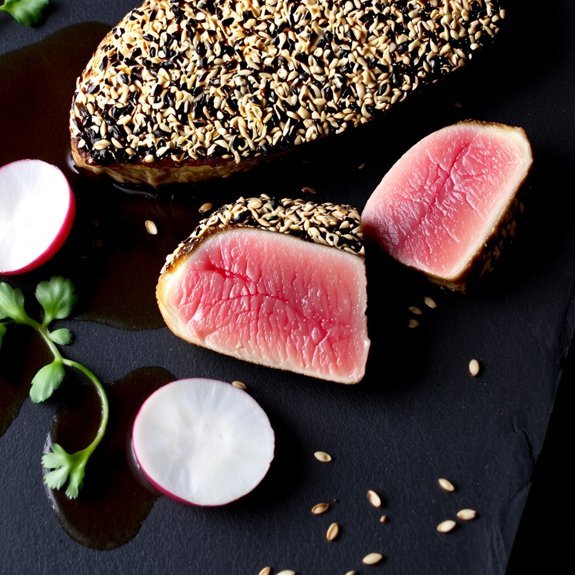
Slicing, Plating, and Garnishes
When slicing and plating seared tuna, use a very sharp knife and cut across the grain into roughly 1/4-inch (6 mm) slices after the steak has rested briefly to guarantee clean, tender pieces.
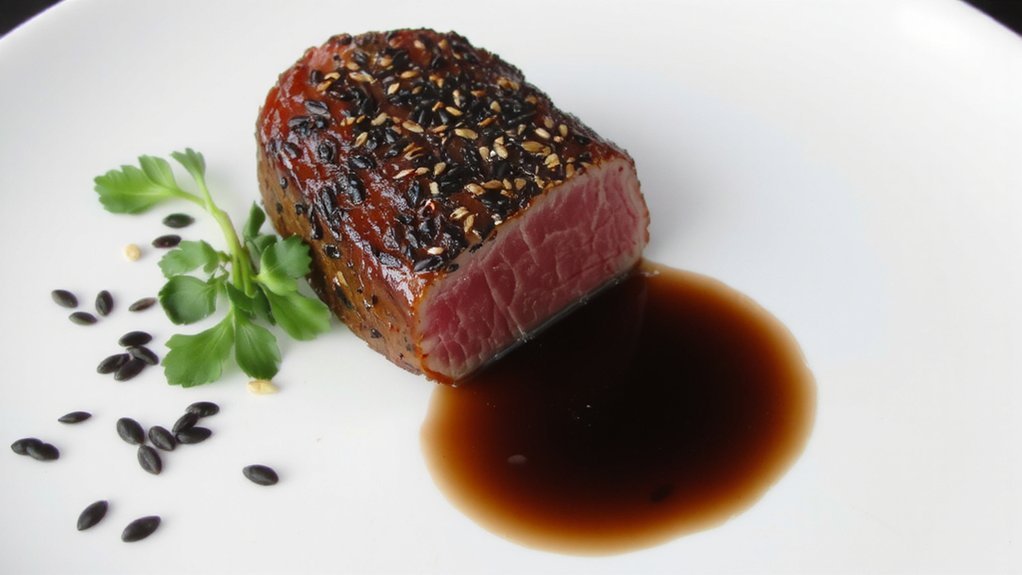
You maintain slicing precision by adjusting angle when grain shifts and keeping slices consistent. For plating aesthetics, fan slices on a dark plate, use chilled or warm plates, and keep edges spotless.
Apply garnishing techniques sparingly: toasted sesame, scallions, microgreens, citrus zest. Control sauce presentation—drizzle lightly or offer a ramekin to avoid oversaucing.
Follow these practical steps to present balanced portions and professional-looking plates:
- 4–6 slices appetizer, 8–10 main.
- Fan slices on a rectangular plate.
- Sprinkle toasted sesame, scallions, microgreens.
- Serve sauce in ramekin or drizzle lightly.
Remember that quick searing—about 30 seconds per side—helps preserve a rare, tender center.
Nutrition, Storage, and Safety
Because seared tuna is nutrient-dense, it delivers substantial protein (about 41.2 g per cup), roughly 412 calories, beneficial omega‑3s, and an exceptionally high reported vitamin D content (listed as 1176% DV), so you should treat it as both a healthful and potentially potent source of nutrients. This recipe makes Servings: 4.
| Nutrient | Amount | Note |
|---|---|---|
| Protein | 41.2 g | benefit |
| Calories | 412 kcal | energy |
You’ll get 23.5 g fat (3.5 g saturated), calcium and iron, and clear nutrition benefits for heart and muscle support. For safe storage, refrigerate cooked tuna below 40°F (4°C), freeze raw if needed, and use airtight containers. Prevent cross-contamination, avoid serving raw tuna to high-risk individuals, and label packages with dates. Inspect appearance and smell; discard if spoiled. Choose MSC-certified tuna when possible to guarantee safety, sustainability, and reliable quality consistently.

Leave a Comment