Key Takeaways
- Combine 1 cup cornmeal, 1 cup flour, 1/4 cup sugar, 3 tsp baking powder, and 1/2 tsp salt; whisk thoroughly to distribute leavening evenly.
- Whisk together 1 egg, 1 cup milk, and 3 tbsp melted butter until uniform; fold into dry ingredients until just combined with slight lumps.
- Fill muffin cups two-thirds full using an ice cream scoop; preheat oven to 400°F and bake for 15–20 minutes until golden-brown.
- Check doneness by inserting a clean toothpick into the center; muffins are done when toothpick emerges clean with no wet batter.
- Cool muffins in pan for 5 minutes, then transfer to wire rack for 10–15 minutes; store in airtight container at room temperature up to two days.
Gather Your Ingredients
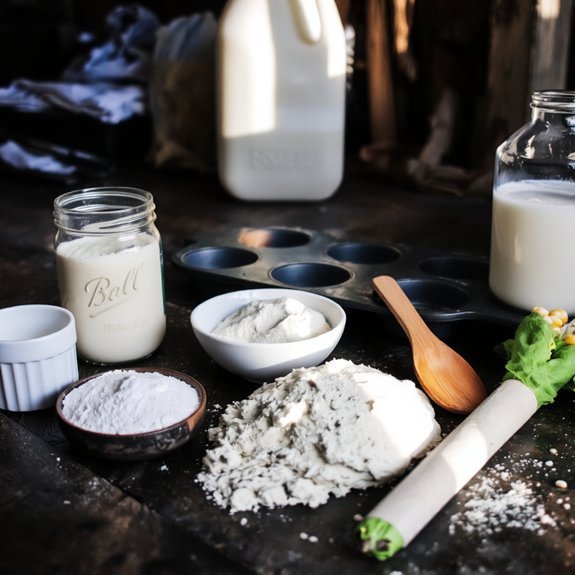
Assembling your ingredients before you begin makes sure you won’t interrupt your mixing and baking process.
You’ll need one cup of cornmeal, one cup of all-purpose flour, one-quarter cup of sugar, three teaspoons of baking powder, and one-half teaspoon of salt.
Gather one cup of milk, one egg, and three tablespoons of melted butter.
For budget shopping, consider buying store brands—they’re chemically identical to premium options at half the cost.
If you’re out of buttermilk, you can make ingredient substitutions by adding one tablespoon of lemon juice to regular milk and letting it sit five minutes.
Having everything measured and arranged before mixing prevents errors and streamlines your workflow, ensuring consistent results every time you bake.
Prepare Your Muffin Tin
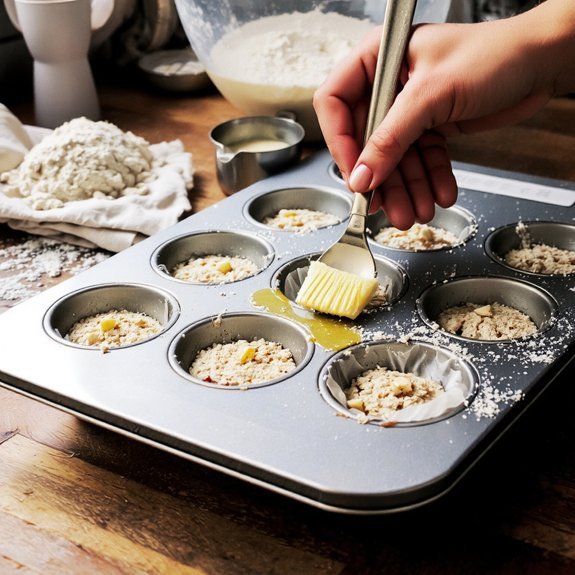
With your ingredients measured and ready, you’ll want to prepare your muffin tin so you can pour the batter immediately after mixing. Start by choosing your liner options: paper cups or silicone liners both work effectively, though silicone ones prove reusable and economical.
If you prefer baking directly in the tin, apply a light coating of cooking spray or butter to each cup, ensuring complete coverage to prevent sticking.
For pan maintenance, inspect your tin for any residue from previous uses. Hand-wash it thoroughly with warm soapy water, then dry completely before use. Never skip this step—old batter remnants affect heat distribution and baking consistency.
Position your prepared tin on the center oven rack before mixing your batter. This eliminates delays and prevents the mixture from sitting, which compromises texture and rise.
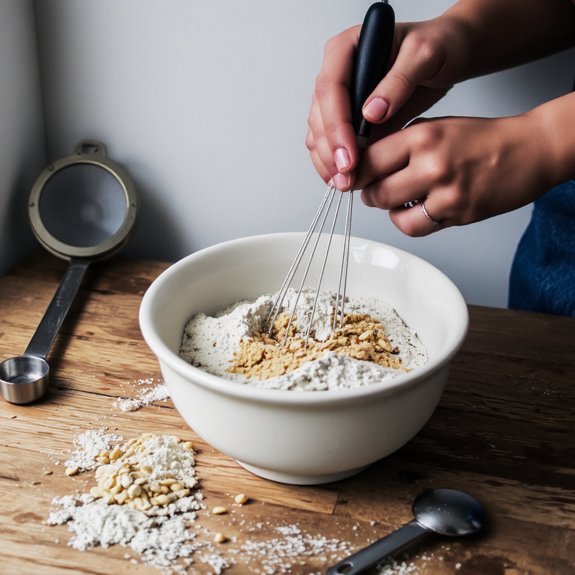
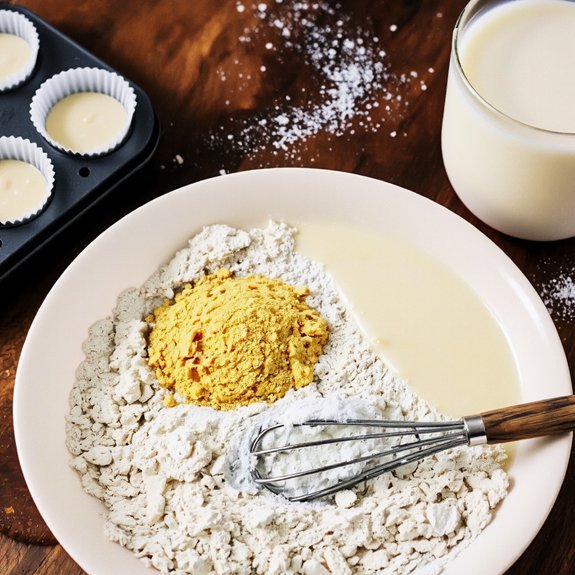
Mix Your Dry Ingredients
You’ll want to measure your flour correctly by spooning it into your measuring cup and leveling it off with a knife rather than scooping directly from the bag.
Once you’ve gathered your flour, cornmeal, baking powder, salt, and sugar, combine them in a large bowl using a whisk or fork to distribute the leavening agent evenly throughout the dry mixture. This step guarantees your muffins’ll rise uniformly and have a consistent texture throughout.
Measuring Flour Correctly
Before combining your wet and dry ingredients, you’ll need to measure and mix the dry components accurately.
Use a digital scale for precision—proper scale calibration guarantees consistent results every time.
Weigh your cornmeal, flour, baking powder, and salt rather than relying on volume measurements, which vary based on how densely you pack ingredients.
Humidity impact greatly affects dry ingredient measurements.
On humid days, flour absorbs moisture, requiring slight adjustments to your recipe ratios.
If you don’t have a scale, spoon flour into your measuring cup and level it with a knife—never scoop directly from the bag.
Combine all dry ingredients in a bowl, whisking thoroughly to distribute leavening agents evenly.
This step prevents lumps and ensures uniform rise throughout your muffins.
Proper technique here determines your baking success.
Combining Dry Ingredients
Gather your measured cornmeal, flour, baking powder, and salt in a medium mixing bowl. Whisk these dry ingredients together for about one minute, to promote even distribution throughout.
This prevents contamination prevention by breaking up any clumps and distributing leavening agents uniformly.
Use a fork or whisk with deliberate, controlled motions rather than vigorous stirring. Work methodically across the bowl’s bottom and sides, lifting ingredients upward to incorporate air.
For batch scaling, multiply each ingredient proportionally and increase whisking time by thirty seconds per doubled batch. Maintain consistent technique regardless of quantity to guarantee reliable results.
Transfer your combined mixture to a separate container if you’re not immediately ready to add wet ingredients. This protects against moisture infiltration and maintains ingredient integrity.
Combine Your Wet Ingredients
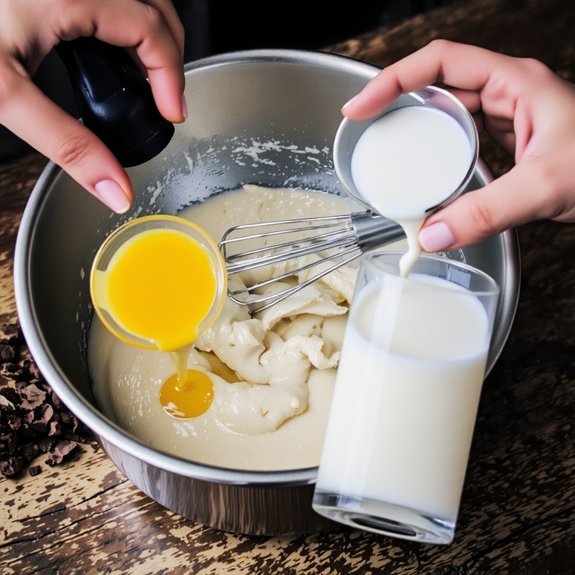
Whisk together the eggs, milk, and melted butter in a medium bowl until well combined. This emulsification technique creates a stable, homogeneous mixture that’ll distribute evenly throughout your batter. You’re breaking down fat molecules into smaller droplets, which promotes consistent texture and moisture in every muffin.
| Ingredient | Purpose |
|---|---|
| Eggs | Binding agent and leavening |
| Milk | Hydration and tenderness |
| Melted butter | Fat for richness and flavor infusions |
| Honey (optional) | Natural sweetness enhancement |
| Vanilla extract | Aromatic depth |
Maintain medium speed while whisking for approximately 2-3 minutes. You’ll notice the mixture becoming lighter and slightly frothy. This aeration prevents dense muffins. Don’t over-whisk—you’ll incorporate excess air, causing peaked tops and tunneling. Stop once you’ve achieved a uniform, pourable consistency without visible streaks of butter or egg white.
Blend Wet and Dry Mixtures
Combining your wet and dry mixtures requires a gentle hand to preserve the aeration you’ve developed.
Create a well in your dry ingredients and pour in your wet mixture.
Using a spatula, fold rather than stir—this technique maintains the air bubbles critical for light, fluffy muffins.
Fold rather than stir with a spatula to maintain air bubbles essential for achieving light, fluffy muffins.
Consider your mixing ergonomics by holding the bowl at a comfortable angle and using controlled wrist motions.
Fold from the bottom upward, rotating the bowl slightly with each stroke.
Stop folding immediately when you no longer see streaks of dry flour; overmixing develops gluten, resulting in tough, dense muffins.
Your emulsifier options—whether eggs or commercial emulsifiers—work best when incorporated gently.
Don’t chase perfection; slight lumps are acceptable and actually preferable.
This approach delivers superior texture and structure to your finished corn muffins.
Fill Your Muffin Cups
With your batter properly prepared, you’ll want to fill your muffin cups to the appropriate level for even baking and ideal rise.
Pour your mixture into each cup until it’s approximately two-thirds full—this gives your muffins room to expand without overflow.
Use a standard ice cream scoop or measuring cup for consistent filling patterns across all cups.
This uniformity guarantees even cooking times and uniform browning.
Work methodically from cup to cup, maintaining your rhythm for spillage prevention.
If you’re using a standard 12-cup muffin tin, you’ll typically fill all cups.
For extra-large muffins, fill fewer cups and adjust baking time accordingly.
Wipe any drips on the pan’s exterior immediately—this prevents burnt spots and maintains a professional appearance on your finished product.
Bake Until Golden Brown
Once you’ve filled your muffin tin, place it in your preheated 400°F oven and bake for 15-20 minutes until the tops develop a golden-brown color.
This browning results from Maillard chemistry, where amino acids and reducing sugars react under heat, creating complex flavors and appealing color.
Monitor your muffins’ progress by:
- Checking oven calibration using a reliable thermometer to verify accurate temperature
- Observing the golden-brown crust formation around 12-15 minutes
- Testing doneness by inserting a toothpick into the center—it should emerge clean or with minimal crumbs
Don’t open your oven door repeatedly, as temperature fluctuations compromise baking consistency.
Your muffins are ready when they’ve achieved that perfect golden hue and spring back when lightly touched.
Remove them immediately to prevent over-baking.
Check for Doneness
You’ll know your corn muffins are done when they’ve turned a light golden brown on top and a toothpick inserted into the center comes out clean or with just a few moist crumbs.
If the toothpick pulls out wet batter, they need more time in the oven. Let them cool in the pan for a few minutes before turning them out onto a wire rack.
Check for Doneness
How can you tell when your corn muffins have baked through?
You’ve got three reliable methods to verify doneness without guessing:
- Toothpick test – Insert a toothpick into the center of a muffin. It should come out clean or with just a few moist crumbs. A wet batter means more time’s needed.
- Springback test – Gently press the top of a muffin with your finger. It’ll spring back immediately when fully baked. If it leaves an indent, keep them in the oven.
- Crumb structure – The interior should display a uniform, fine crumb structure with no dense, gummy pockets.
The edges’ll pull slightly from the pan’s sides.
Remove your muffins when all three indicators align.
You’re in control of your baking success.
Toothpick Test Method
The toothpick test stands as the most straightforward and reliable method for determining corn muffin doneness.
Insert a clean toothpick into the center of your muffin.
If it emerges with moist crumbs clinging to it, your muffins need additional baking time.
A completely clean toothpick signals doneness.
Maintain proper toothpick hygiene by using a fresh pick for each test, preventing cross-contamination and guaranteeing accuracy.
If you’re out of toothpicks, skewer alternatives work equally well—try a thin knife, cake tester, or wooden skewer.
Simply make sure whatever tool you choose is clean and thin enough to create minimal disruption to your muffin’s structure.
This method gives you complete control over your baking results, guaranteeing perfectly baked corn muffins every time.
Golden Brown Color
While the toothpick test provides internal confirmation,
a visual inspection of your muffin tops offers an equally important external indicator of doneness.
You’ll want to observe the Maillard reaction and caramelization process occurring on your muffins’ surfaces. Here’s what to monitor:
- Color development – Look for a rich, golden-brown hue across all muffin tops, indicating proper browning without burning
- Even distribution – Confirm the color’s consistent throughout; dark spots suggest uneven heat exposure requiring rack adjustment
- Slight crackling – Notice tiny surface cracks forming, signaling moisture evaporation and structural set
The golden-brown exterior confirms your muffins have reached ideal baking conditions.
You’re free to remove them from the oven once this coloration appears uniform and no pale spots remain visible. This external cue, combined with your toothpick test results, guarantees perfectly baked corn muffins every time.
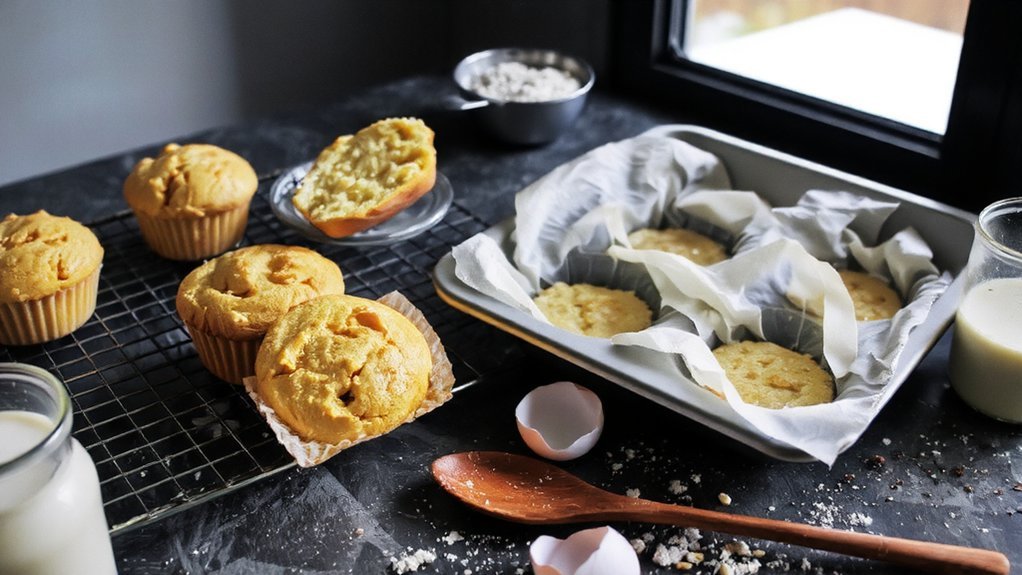
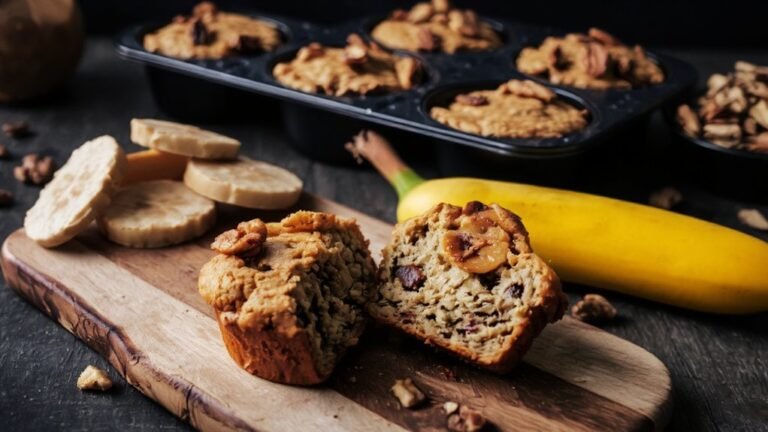
Cool Your Muffins
Once you’ve pulled your muffins from the oven, let them cool in the pan for about 5 minutes before transferring them to a wire rack.
This brief resting period allows steam release from the bottom, preventing a soggy base.
Don’t skip this step—it’s critical for proper crust formation and texture.
After moving your muffins to the rack, give them another 10-15 minutes to cool completely.
This cooling time lets the interior set properly without trapping excess moisture.
You’ll notice the muffins firm up considerably during this phase.
Avoid the temptation to wrap them while warm; doing so traps steam and softens your carefully developed crust.
Once fully cooled, you’re free to store them in an airtight container.
This method preserves your muffins’ quality and keeps that desirable golden exterior intact.
Storage and Serving Tips
You can store your cooled corn muffins at room temperature in an airtight container for up to two days, though they’ll stay fresher longer if you refrigerate them.
For extended storage, you’ll want to freeze your muffins in a freezer-safe bag or container for up to three months, then thaw them at room temperature before serving.
You can serve your muffins straight from the freezer by warming them in a 350°F oven for about ten minutes, or enjoy them cold with butter and jam.
Room Temperature Storage
Because corn muffins cool quickly after baking, they’ll reach room temperature within an hour and can be stored safely on the counter.
You’ll maintain peak freshness by following these storage guidelines:
- Place muffins in an airtight container to prevent microbial growth and protect them from environmental contaminants that compromise quality.
- Store away from direct sunlight and heat sources to slow flavor changes and preserve the muffins’ tender crumb structure for up to two days.
- Check muffins daily for signs of mold or staleness, discarding any that show deterioration to guarantee safe consumption.
You control your storage approach—keep them accessible on your kitchen counter for convenient snacking, or refrigerate for extended shelf life.
Either method preserves your baked goods effectively when you maintain proper container sealing.
Freezer Preservation Methods
Freezing corn muffins extends their shelf life to three months while maintaining quality when you follow proper preservation techniques.
Start by cooling your muffins completely on a wire rack. Arrange them in a single layer on a baking sheet and employ flash freezing for two hours—this prevents them from clumping together. Transfer the frozen muffins into freezer-safe containers or use vacuum sealing for maximum protection against freezer burn and oxidation. Label your containers with the date and contents.
When you’re ready to enjoy them, thaw muffins at room temperature for thirty minutes or reheat them directly in a 350°F oven for fifteen minutes.
This method gives you complete control over your breakfast options without sacrificing taste or texture, ensuring you always have fresh corn muffins available on demand.
Best Serving Practices
While freezer storage extends your muffin supply across months, proper room-temperature storage and thoughtful serving techniques will maximize flavor and texture for immediate consumption.
Store cooled muffins in airtight containers at room temperature for up to three days.
You’ll maintain ideal moisture and prevent staleness.
For plating presentation, arrange muffins on rustic wooden boards or ceramic plates to enhance visual appeal.
Consider these beverage pairings:
- Strong coffee with jalapeño-cheddar varieties
- Fresh-squeezed orange juice with blueberry muffins
- Herbal tea with honey-cornmeal blends
Serve muffins slightly warm—reheat for 10-15 seconds in the microwave if needed.
You’ll want to break them apart rather than bite whole, revealing the tender crumb structure.
This approach gives you better control over portion sizes and demonstrates respect for your baking craftsmanship.
Frequently Asked Questions
Can I Substitute Cornmeal With Cornflour in This Recipe?
You can substitute cornmeal with cornflour, but you’ll notice significant texture differences. Cornflour’s finer consistency produces denser, more cake-like muffins versus cornmeal’s grittier crumb.
For measurement conversions, use equal parts cornflour to replace cornmeal—it won’t absorb liquids identically, so you might need slight flour adjustments.
Your muffins will taste similar but feel noticeably smoother. Experiment with small batches to dial in your preferred texture and moisture level before committing to full recipes.
Why Did My Corn Muffins Turn Out Dry and Dense?
Your muffins likely turned dry and dense because you’ve overmixed the batter.
Overdeveloping the gluten creates a tight crumb structure that traps moisture poorly.
Additionally, verify your oven temperature—baking at too high a heat dries out the exterior before the interior fully sets.
Use a reliable thermometer to confirm accuracy.
Mix ingredients just until combined, and bake at the precise temperature specified.
These adjustments’ll deliver moist, tender results.
How Do I Make Corn Muffins Without Eggs or Dairy?
You’ll replace eggs with vegan binders like flax eggs or appleseed replacers to maintain structure. Swap dairy milk for almond or oat milk, and use coconut or vegetable oil instead of butter.
These oil alternatives won’t compromise moisture or texture. Mix your flax egg with cornmeal and flour first, then incorporate your chosen oil alternative.
This approach gives you complete control over your recipe’s ingredients without sacrificing that classic muffin crumb.
Can Frozen Corn Be Used Instead of Fresh Corn?
You can absolutely use frozen corn instead of fresh.
Thawing techniques matter—thaw your corn at room temperature or in the refrigerator overnight for best results.
Drain excess moisture thoroughly to prevent soggy muffins.
Frozen corn actually retains flavor retention comparable to fresh varieties since it’s frozen at peak ripeness.
This substitution works seamlessly in your egg-free, dairy-free recipes without compromising quality or taste.
What’s the Difference Between Cornbread and Corn Muffins?
You’ll find cornbread’s crumbly, dense structure contrasts sharply with muffins’ lighter, cake-like texture.
Cornbread’s traditionally baked in cast iron and cut into wedges—a communal serving tradition. Muffins you’ll portion individually, creating distinct servings.
Both deliver corn flavor, but cornbread suits casual family meals and side dishes, while muffins work perfectly for breakfast or portable snacking.
Choose based on your preferred texture and how you want to serve them.


Leave a Comment