Key Takeaways
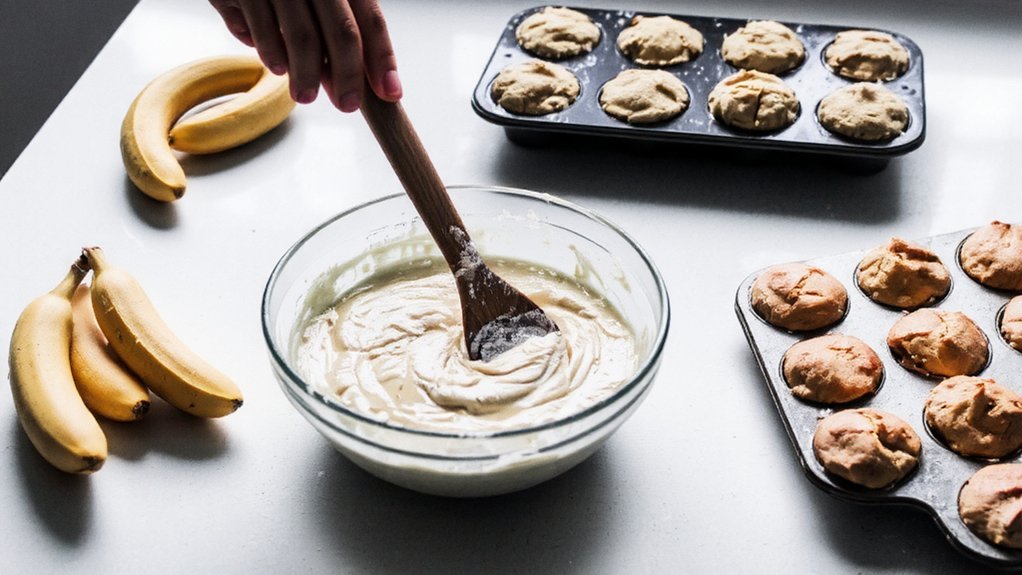
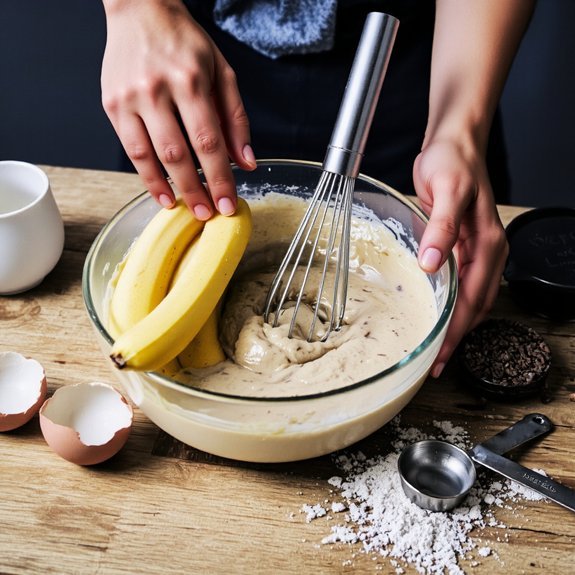
- Mix mashed bananas, eggs, oil, and vanilla until homogeneous, then fold in flour, sugars, baking soda, and salt gently.
- Fill muffin cups three-quarters full and bake at 375°F for 18–22 minutes until golden-brown with a toothpick showing minimal crumbs.
- Cool muffins in the pan for five minutes, then transfer to a wire rack for at least 30 minutes.
- Store room-temperature muffins in an airtight container for two days or refrigerate for up to five days.
- Use room-temperature eggs, measure ingredients by weight for consistency, and position the muffin tin on the center oven rack.
Gathering Your Ingredients
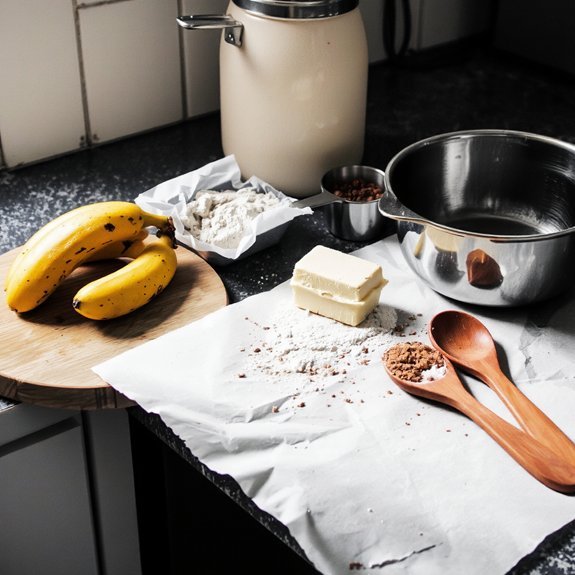
You’ll need three overripe bananas (about 1 cup mashed), 2 cups all-purpose flour, 3/4 cup granulated sugar, 1/4 cup brown sugar, 1/2 cup vegetable oil, 2 large eggs, 1 teaspoon vanilla extract, 1 1/2 teaspoons baking soda, 1/2 teaspoon salt, and 1/2 teaspoon ground cinnamon.
Three overripe bananas, two cups flour, sugars, oil, eggs, vanilla, baking soda, salt, and cinnamon unite.
Gather ripe bananas with brown spots—they’ll deliver maximum sweetness and moisture.
For nutritional flexibility, consider organic alternatives like unbleached flour or coconut oil.
Measure dry ingredients separately for accuracy, ensuring your baking soda and salt distribute evenly throughout.
Room-temperature eggs incorporate more smoothly into your batter, creating superior texture.
Position your ingredients strategically on your workspace before mixing.
This prep method streamlines your process and prevents measurement errors.
You’re establishing control over your baking outcome through deliberate organization and precise component selection.
Essential Equipment and Tools
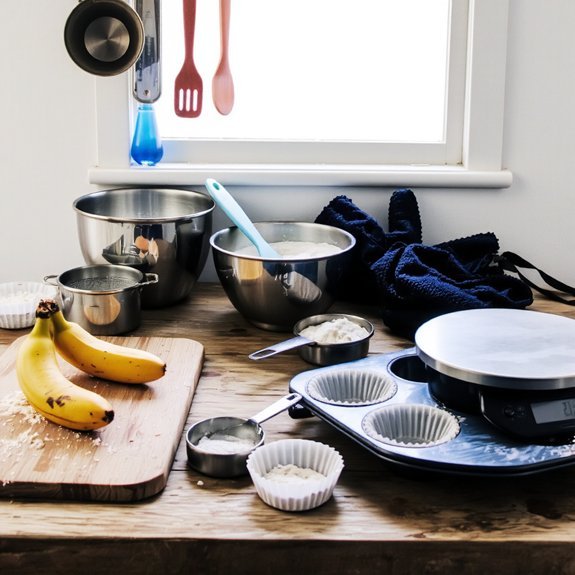
You’ll need mixing bowls and sturdy utensils to combine your ingredients efficiently without incorporating excess air.
Prepare your baking pans with liners or light greasing to guarantee even heat distribution and prevent sticking, which affects muffin texture and nutritional integrity.
Gather precise measuring devices—both dry and wet measures—since accurate portions directly impact your muffins’ structure, moisture content, and macronutrient balance.
Mixing Bowls and Utensils
The right equipment guarantees consistent results and efficient preparation for banana muffins.
You’ll want a sturdy mixing bowl made from sustainable materials—stainless steel or glass work best for precise temperature control during ingredient combining.
Current design trends favor nesting bowls that save space while offering multiple sizes for dry and wet components.
Select a whisk for aerating dry ingredients, ensuring even leavening distribution that impacts nutritional density and texture.
You’ll need a rubber spatula for folding without deflating your batter, preserving those essential air pockets.
A wooden spoon handles thicker mixtures effectively.
Invest in measuring spoons and cups that align with your commitment to accurate portions.
You’re free to choose between traditional and digital scales—both deliver the precision your banana muffins demand for consistent, professional-quality results every bake.
Baking Pans and Liners
Once you’ve assembled your mixing bowls and utensils, selecting appropriate baking pans and liners becomes your next priority.
You’ll want to choose standard muffin tins—either steel or aluminum—since they offer superior heat conduction for even baking.
Steel pans deliver consistent results and withstand repeated use better than aluminum alternatives.
Paper liners aren’t just convenient; they’re essential for preventing sticking and simplifying your cleanup process.
You’ve got freedom to skip liners if you prefer greasing your pan thoroughly, though liners save considerable time during cleaning tips implementation.
For peak performance, position your muffin tin on the center oven rack.
This placement guarantees uniform heat distribution around each muffin.
Invest in quality pans—they’ll serve you reliably for years, making them a worthwhile commitment to your baking success.
Measuring Devices and Tools
Accurate measurements form the foundation of consistent, reliable banana muffins, so investing in proper measuring equipment shouldn’t be overlooked.
You’ll want to establish a toolkit that prioritizes precision:
- Digital kitchen scale – Provides weight-based measurements for unmatched accuracy; make sure regular scale calibration for best results
- Measuring cups and spoons – Choose dry measuring cups for flour and sugar; verify spoon accuracy by leveling ingredients with a knife
- Mixing bowls – Select various sizes for organizing ingredients and combining mixtures efficiently
You’ll gain complete control over your baking outcomes by mastering these tools. Weight measurements eliminate guesswork inherent in volume-based approaches, delivering superior nutritional consistency.
Proper technique—leveling dry ingredients and using appropriate utensils—directly impacts your muffins’ texture and rise. You’re not just following a recipe; you’re commanding your baking results through disciplined, methodical preparation.
Preparing Your Muffin Tin

You’ll want to select paper or silicone liners that fit snugly in your tin to prevent batter from seeping underneath during baking.
Alternatively, grease your tin thoroughly with cooking spray or butter, ensuring you coat the bottom and sides evenly to promote uniform browning and easy removal.
Space your cups at consistent intervals—whether you’re filling all twelve or leaving some empty—to allow heat to circulate properly and bake your muffins evenly throughout.
Choosing the Right Liners
Before you pour your batter, selecting appropriate muffin liners promotes even baking and easy removal while protecting your tin from residue. You’ll find several options worth considering:
- Paper liners – Traditional choice offering convenience and minimal cleanup; however, they contribute to environmental impact through single-use waste
- Silicone liners – Reusable alternatives reducing waste; maintain consistent heat distribution for uniform browning
- Unbleached liners – Eco-conscious design trends favoring natural materials without chemical processing
Choose liners matching your muffin tin’s dimensions precisely—standard or jumbo sizes determine proper fit.
Unbleached paper liners align with environmental awareness while delivering reliable performance. Silicone options support sustainability goals if you’re committed to reducing disposable products.
Both materials withstand temperatures up to 400°F, ensuring professional-quality results. Your selection directly influences muffin texture, appearance, and environmental responsibility.
Greasing Your Tin Properly
Whether you’ve selected liners or prefer direct tin contact, proper greasing helps your muffins release cleanly and bake evenly. Use melted butter or coconut oil, applying it thoroughly to every cup’s bottom and sides with a pastry brush.
Don’t skip the edges—they’re essential for preventing sticking.
For eco alternatives, consider parchment paper squares or silicone cups, which eliminate greasing entirely while reducing waste.
If you’re using traditional methods, make sure residue removal between batches by wiping tins with a dry cloth.
You’ll achieve consistent results by maintaining this discipline.
A well-greased tin guarantees your banana muffins won’t stick or tear during removal, preserving their structure and appearance.
This foundational step directly impacts your baking success, making it worth your attention and effort.
Spacing Cups Correctly
Proper spacing between muffin cups prevents heat from concentrating in one area and guarantees even baking throughout your tin.
You’ll achieve best results by maintaining consistent center spacing across your pattern layout.
Here’s how to space your cups correctly:
- Position cups at least half an inch apart to allow air circulation
- Use a standard 12-cup tin with pre-measured spacing for foolproof consistency
- Verify alignment by checking that cups sit equidistant from tin edges
Don’t overcrowd your tin.
Muffins need breathing room to rise uniformly and develop golden tops.
When you’re meticulous about spacing, you’re controlling your baking environment—no compromises on texture or crumb structure.
This professional technique makes certain every muffin bakes at the same rate, giving you complete control over your final product’s quality and nutritional consistency.
Mixing the Dry Ingredients
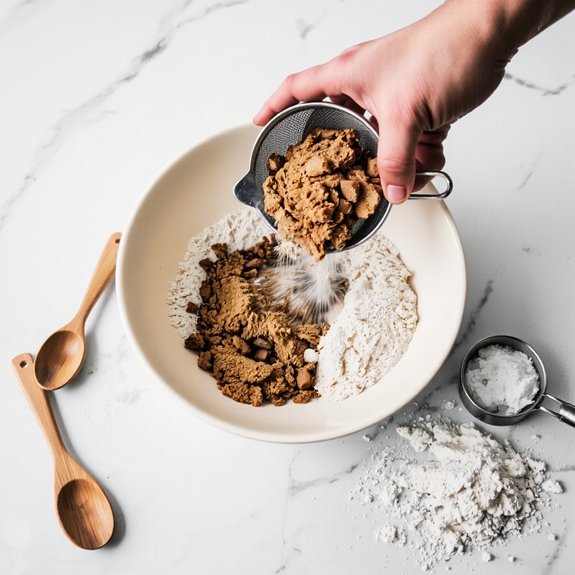
Combine 2 cups all-purpose flour, 1 teaspoon baking soda, ½ teaspoon baking powder, and ¼ teaspoon salt in a medium bowl. You’ll want to use proper sifting techniques to break up any lumps and aerate your mixture, ensuring consistent texture throughout your muffins.
Next, you’re free to customize your dry ingredients by adding ½ teaspoon cinnamon and ¼ teaspoon nutmeg. Whisk these spices thoroughly for even spice distribution—this step prevents concentrated pockets of flavor and guarantees balanced taste in every bite.
Don’t skip this critical preparation phase. Properly mixed dry ingredients create a stable foundation for your batter, promoting even rising and proper moisture absorption. You’ll achieve professional-quality results by taking these few minutes to combine everything thoroughly before incorporating wet components.
Combining the Wet Ingredients
While you’ve prepared your dry ingredients, it’s time to focus on the wet components that’ll bind everything together. Start by emulsifying butter with brown sugar until you’ve achieved a light, fluffy texture—roughly two minutes of vigorous mixing. This process incorporates air, creating a superior crumb structure.
Next, incorporate these elements in order:
- Three ripe bananas mashed to proper mash consistency without lumps
- Two large eggs beaten individually to guarantee even distribution
- One teaspoon vanilla extract for depth
Combine each addition thoroughly before proceeding to the next. The emulsifying butter serves as your batter’s foundation, so don’t rush this stage. Your mixture should appear homogeneous and slightly glossy.
This wet base provides essential moisture and richness while maintaining nutritional integrity through whole fruit and minimal processing.
Bringing It All Together
Folding your dry mixture into the wet base requires a gentle hand to preserve the aeration you’ve built into your emulsified butter.
Use a spatula to combine ingredients with minimal strokes—overworking develops gluten, yielding dense muffins instead of tender crumbs.
Divide batter evenly among lined cups, filling each three-quarters full. This ratio guarantees proper rise without overflow. Bake at 375°F for 18-22 minutes until a toothpick emerges with minimal crumbs.
For Serving Suggestions, cool muffins briefly before removing from tins. They’re best enjoyed warm, offering ideal moisture content and flavor intensity.
Consider Flavor Pairings: cream cheese frosting complements banana’s natural sweetness.
Cinnamon-sugar crusts add textural contrast. Pair with black coffee for a balanced, satisfying breakfast that respects your dietary preferences and taste priorities.
Baking to Perfection
Once you’ve transferred your batter to the prepared muffin cups, you’ll want to monitor the oven temperature closely—375°F is critical for even crumb development and proper dome formation.
Precise oven calibration yields consistent results every time you bake.
Your timing precision directly impacts texture and nutritional value.
Bake for 18-22 minutes, checking doneness with a toothpick at the 18-minute mark.
The pick should emerge with minimal crumbs.
Key indicators of perfectly baked muffins:
- Golden-brown tops with slight dome formation
- Dry toothpick test results
- Internal temperature reaching 200°F
Remove muffins immediately upon completion to prevent overcooking and moisture loss.
Cool in the pan for five minutes before transferring to a wire rack.
This approach guarantees you’ll achieve muffins with ideal crumb structure and nutritional integrity, giving you complete control over your baking results.
Cooling and Storing Your Muffins
Allowing your muffins to cool properly guarantees they’ll develop the right texture and maintain their nutritional value.
Place them on a wire rack for at least 30 minutes, enabling air circulation beneath each muffin.
This prevents moisture from pooling underneath, which compromises texture and shelf life.
For storage, you’ve got flexibility.
Room temperature works for two days in an airtight container—use parchment paper between layers for condensation control.
Refrigeration extends shelf life to five days; the cool environment slows mold growth without drying them out excessively.
Freezing offers maximum freedom, preserving muffins up to three months when wrapped individually in plastic wrap, then placed in freezer bags.
Before consuming frozen muffins, thaw them at room temperature for one hour, restoring their original texture and nutritional integrity.
Frequently Asked Questions
Can I Substitute Regular Flour With Whole Wheat or Almond Flour?
You can substitute regular flour with whole wheat or almond flour, though you’ll notice texture differences. Whole wheat flour creates denser, nuttier muffins while absorbing more moisture—reduce liquid by 1-2 tablespoons.
Almond flour yields grainier texture with superior nutritional profile, higher protein and healthy fats, but you’ll need binding agents.
For best results, use 1:1 ratios with whole wheat or combine almond flour with regular flour for ideal structure.
How Do I Know if My Bananas Are Ripe Enough for Muffins?
You’ll know your bananas are ripe enough when you spot yellow skin with brown speckling—this indicates ideal sugar development for muffins.
Perform an aroma check: ripe bananas emit a sweet, fragrant smell signaling peak flavor.
You’re free to use them at this stage for maximum taste.
Avoid green bananas; they’re starchy and bland.
Overripe specimens with mostly brown skin work too, yielding denser, sweeter muffins.
Trust your senses for the perfect baking consistency.
What Can I Use Instead of Eggs for Vegan Banana Muffins?
You can replace eggs with a flax egg—combine one tablespoon ground flaxseed with three tablespoons water per egg, letting it sit five minutes.
Alternatively, use silken tofu: blend a quarter cup per egg for moisture and binding.
Both options deliver comparable protein and nutritional density.
You’ve got complete autonomy to experiment with ratios, discovering which substitute aligns best with your dietary preferences and desired muffin texture.
Why Are My Muffins Dense and How Do I Prevent This?
Your muffins are dense because you’re likely overmixing the batter, which develops gluten and compacts the crumb structure. You’ll want to fold ingredients together gently until just combined.
Additionally, check your leavening balance—ensure you’re using the correct ratio of baking soda to baking powder for ideal rise. Use precise measurements with a kitchen scale, not cups, for consistency.
Proper technique gives you control over your final product’s texture.
Can I Freeze Banana Muffin Batter for Baking Later?
Yes, you can freeze banana muffin batter.
Use airtight freezer packaging or muffin liners to prevent freezer burn and maintain quality for up to three months.
When you’re ready to bake, thaw your batter in the refrigerator overnight—this preserves leavening agents and texture.
Pour thawed batter into prepared muffin cups and bake at 350°F for 20-25 minutes.
This method gives you complete control over your baking schedule without sacrificing nutritional value or professional results.


Leave a Comment