Key Takeaways
- Measure 2 cups flour (spoon-and-level or 125 g per cup) and combine with leavening agents, salt, then whisk vigorously 30 seconds.
- Whisk 2 eggs with sugars (1/3 cup granulated, 1/2 cup brown) for 1–2 minutes until pale and frothy for proper aeration.
- Gently fold wet mixture into dry ingredients using figure-eight motions with a spatula in two additions to avoid overmixing.
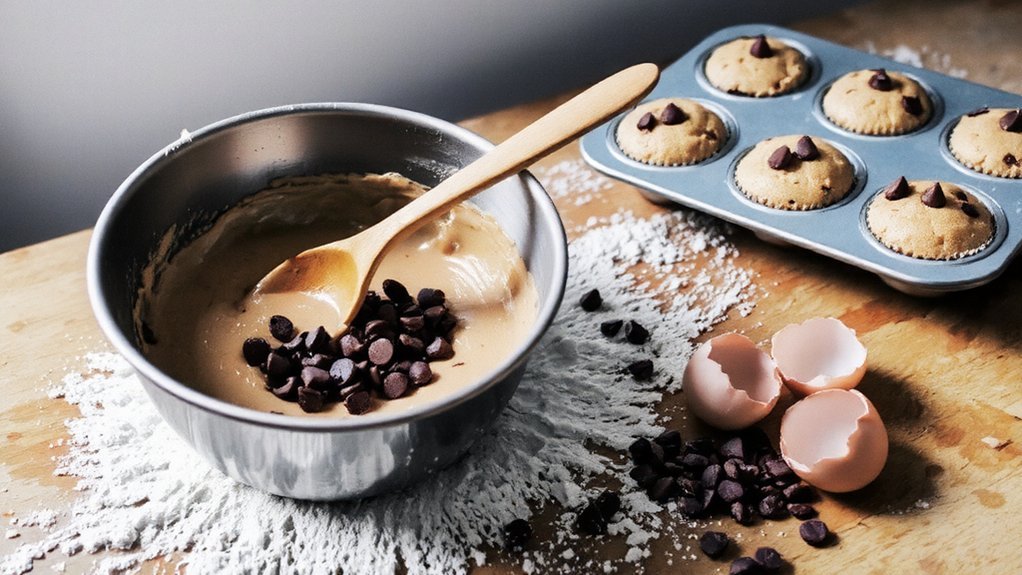
- Fill muffin cups two-thirds full, fold in 1½ cups chocolate chips during final stage, and bake at 350°F until golden.
- Cool muffins in tin 5–10 minutes before transferring to wire rack; store in airtight container at room temperature up to 3 days.
Gathering Your Ingredients
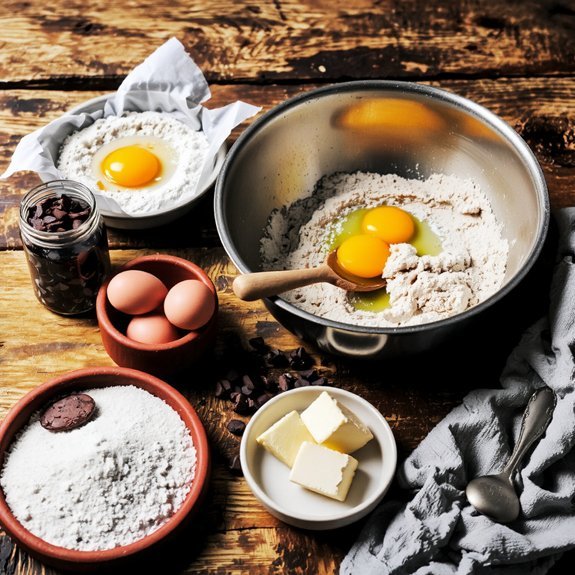
Before you’ll need to assemble your dry and wet ingredients.
Start with your pantry staples: two cups all-purpose flour, one teaspoon baking powder, half a teaspoon baking soda, and half a teaspoon salt.
Start with your pantry staples: all-purpose flour, baking powder, baking soda, and salt.
You’ll also need one-third cup granulated sugar and half a cup brown sugar.
For wet ingredients, gather two large eggs, one cup whole milk, one-third cup melted butter, and one teaspoon vanilla extract.
If you’re managing dietary restrictions, consider allergy alternatives: substitute all-purpose flour with gluten-free flour blend, use dairy-free milk and vegan butter, or replace eggs with appleseed or flax eggs at a one-to-one ratio.
Finally, measure one and one-half cups chocolate chips.
Organizing ingredients before mixing prevents measurement errors and streamlines your baking process.
Essential Baking Equipment
You’ll need mixing bowls and utensils—including a whisk and rubber spatula—to properly combine your dry and wet ingredients without overmixing.
Accurate measuring tools and scales are critical for achieving consistent results, as baking requires precise ratios of flour, sugar, and leavening agents.
Finally, you must invest in quality muffin tins and paper liners to guarantee even heat distribution and easy removal of your finished muffins.
Mixing Bowls and Utensils
Stainless steel mixing bowls in varying sizes—typically 1.5, 3, and 5-quart capacities—form the foundation of your baking setup, as they’ll accommodate different ingredient volumes without reaction or staining.
You’ll want to invest in quality silicone spatulas and wooden spoons that won’t scratch surfaces or leach chemicals into your batter.
A whisk proves essential for incorporating air into your dry ingredients and guaranteeing uniform distribution of leavening agents.
For storage solutions, stack your bowls neatly in a dedicated cabinet section, keeping utensils in a separate drawer with dividers.
Maintenance tips include hand-washing your bowls immediately after use to prevent residue buildup, and periodically sanitizing your utensils with hot water.
These practices preserve your equipment’s integrity and deliver peak performance for consistent results.
Measuring Tools and Scales
Precision in baking hinges on accurate measurement, making your scale and measuring cups indispensable investments that directly impact your muffins’ texture and rise. You’ll want a digital scale that features a tare function—this capability zeroes the weight, allowing you to measure ingredients sequentially without manual calculations.
| Tool | Capacity | Accuracy | Function |
|---|---|---|---|
| Digital Scale | 5 kg | ±1g | Primary measurement |
| Dry Measuring Cups | 2 cups | Volume-based | Flour, sugar |
| Liquid Measuring Cup | 2 cups | Spout design | Oils, milk |
| Measuring Spoons | ¼ tsp–1 tbsp | Precise portions | Baking soda, vanilla |
| Nesting Bowls | Varies | Support tools | Ingredient prep |
Prioritize battery maintenance on your scale, replacing batteries every six months to maintain consistent accuracy throughout your baking sessions.
Muffin Tins and Liners
Muffin tins and liners form the structural foundation of your baking process, directly influencing heat distribution, browning consistency, and the final product’s shape retention.
You’ll find standard 12-cup tins accommodate most recipes efficiently, though mini and jumbo variations exist for specialized applications.
Choose between paper liners, silicone cups, or unlined tins based on your preferences.
Paper liners offer convenient cleanup and liner sustainability options through compostable materials.
Silicone reusable liners provide eco-conscious alternatives without sacrificing performance.
Vintage tins, often crafted from heavier gauge steel, frequently deliver superior heat conduction compared to modern counterparts.
Their construction promotes even browning and prevents over-browning on edges.
You’ll achieve ideal results by selecting quality equipment matching your baking frequency and environmental values.
Proper tin selection eliminates variables, ensuring consistent muffin texture and appearance across batches.
Preparing Your Muffin Tin
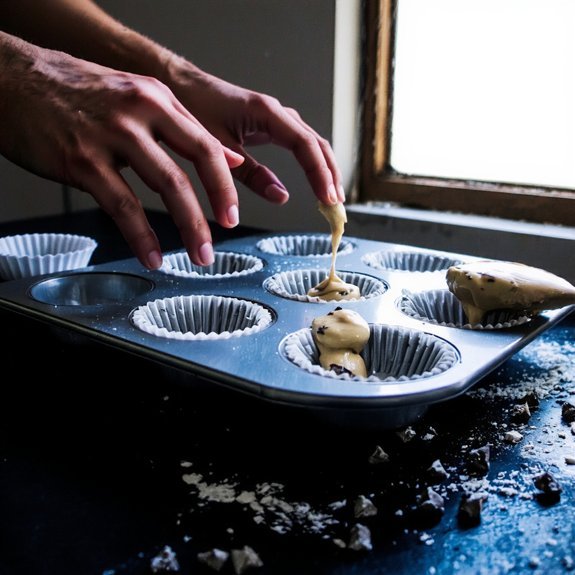
Grease each cup of your standard 12-cavity tin with butter or non-stick cooking spray, ensuring complete coverage of the bottom and sides to prevent adhesion.
Your greasing methods directly impact muffin removal and presentation quality.
Consider these preparation techniques:
- Apply butter or spray uniformly, avoiding pooling that compromises batter distribution
- Maintain consistent cup spacing by
Mixing the Dry Ingredients
You’ll need to measure your flour accurately using the spoon-and-level method to guarantee consistent results and proper muffin structure.
Combine your leavening agents—baking powder and baking soda—with the flour, adjusting quantities based on your recipe’s specific ratios.
Whisk the dry mixture thoroughly for 30 seconds to distribute the leavening agents evenly and incorporate air throughout the flour blend.
Measuring Flour Accurately
Accurately measuring flour is essential for achieving the proper texture and structure in your muffins.
You’ll want to use the spoon-and-level method rather than scooping directly from the bag, which compacts flour unnecessarily.
Consider these critical factors:
- Ingredient aging: Allow flour to rest 24-48 hours after purchase, as freshly milled flour absorbs more liquid
- Room humidity: High moisture environments require slight reduction in flour quantity; aim for 50-55% humidity for consistency
- Scale measurement: Weigh flour at 125 grams per cup for precision that cup measurements can’t match
- Aeration: Fluff flour with a fork before measuring to guarantee accurate density
You’ve got the freedom to choose your preferred method, but weighing delivers superior results.
Don’t skimp on this foundational step—accurate flour measurement directly impacts your muffins’ rise, crumb structure, and overall success.
Combining Leavening Agents
Once you’ve accurately measured your flour, it’s time to combine your leavening agents—baking powder and baking soda—with the dry ingredients to guarantee even distribution throughout the batter.
| Ingredient | Measurement | Function |
|---|---|---|
| All-purpose flour | 2 cups | Structure |
| Baking powder | 1.5 tsp | Primary lift |
| Baking soda | 0.5 tsp | pH balance |
| Salt | 0.5 tsp | Flavor enhancement |
Whisk these components together thoroughly for 30 seconds. This mechanical action prevents clumping and promotes uniform chemical interactions when wet ingredients activate the leavening agents. Proper reaction timing depends on this distribution—uneven mixing creates dense pockets and irregular rise. You’ll achieve consistent texture and lift by mastering this critical step. Don’t skip this process; your muffins’ structure depends on it.
Whisking Dry Mixture
Now that your leavening agents are combined with the flour, it’s time to whisk the entire dry mixture vigorously for 30 seconds to guarantee complete homogenization.
This rhythmic motion guarantees uniform distribution of leavening agents and salt throughout the flour, preventing dense spots in your finished muffins.
Employ a quiet technique using controlled, deliberate strokes:
- Use a stainless steel balloon whisk for ideal incorporation
- Maintain consistent wrist speed and pressure throughout whisking
- Direct the whisk through all mixture corners systematically
- Listen for the subtle sound shift indicating full integration
This approach prevents over-agitation while achieving precise homogenization. You’re aerating the flour slightly, which’ll enhance your muffins’ crumb structure. Complete this step immediately before adding wet ingredients to maintain leavening agent efficacy and prevent premature activation.
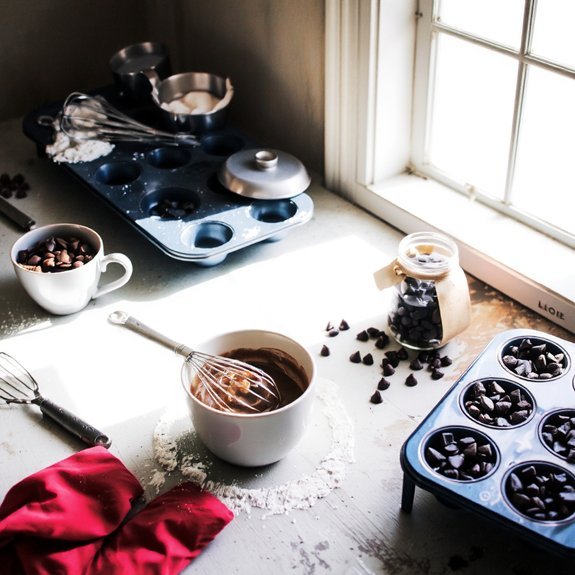
Combining the Wet Ingredients
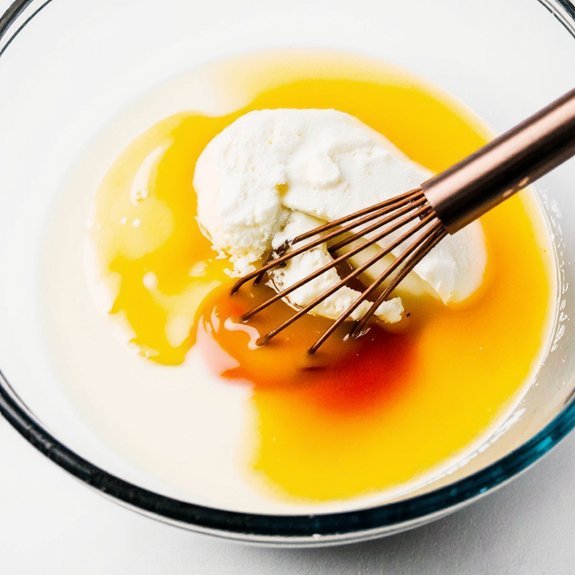
Whisking together your wet ingredients creates the foundation for proper muffin texture and crumb structure. You’ll combine eggs, buttermilk, and melted butter at room temperature to achieve ideal emulsification techniques. Proper temperature control prevents premature coagulation and guarantees uniform fat distribution throughout your batter.
| Ingredient | Measurement | Temperature |
|---|---|---|
| Eggs | 2 large | Room temperature |
| Buttermilk | 1 cup | Room temperature |
| Melted butter | ½ cup | 110°F |
| Vanilla extract | 2 tsp | Room temperature |
Whisk vigorously for 1–2 minutes until the mixture becomes pale and slightly frothy. This incorporation of air promotes leavening during baking. Your emulsification creates a stable suspension that binds with your dry mixture, delivering consistent results. Don’t skip this critical step—it’s your gateway to superior muffins.
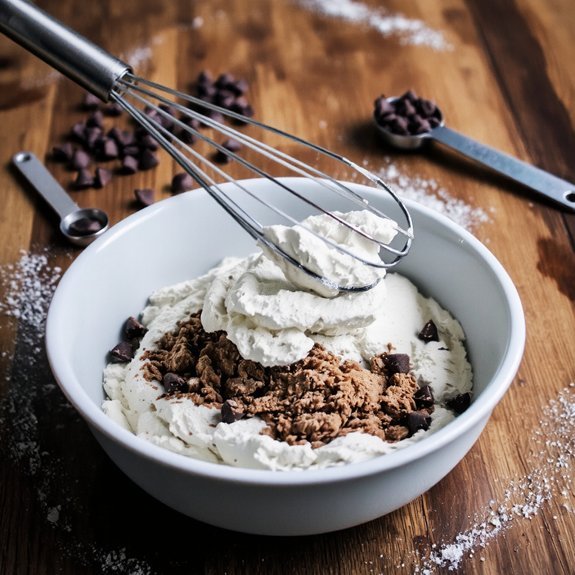
Bringing It All Together
After you’ve achieved your pale, frothy wet mixture, you’ll combine it with your dry ingredients using a folding technique that preserves the air you’ve incorporated.
Combine your pale, frothy wet mixture with dry ingredients using gentle folding techniques to preserve incorporated air.
This critical step demands precision in your kitchen workflow to assure ideal texture.
Use these integration methods:
- Fold gently with a spatula using figure-eight motions
- Avoid overmixing, which develops gluten and toughens your muffins
- Incorporate dry ingredients in two additions for better control
- Reserve chocolate chips for the final fold to distribute evenly
Your batter should remain slightly lumpy.
When scaling your recipe, maintain consistent folding ratios regardless of yield.
This approach guarantees you won’t sacrifice quality for quantity.
Distribute batter immediately into prepared muffin cups, filling each cavity two-thirds full for proper rise and structure.
Baking to Perfection
Preheating your oven to 350°F establishes the thermal foundation for consistent muffin development. You’ll want to verify your oven calibration using an independent thermometer, as factory settings often drift. Insert your filled muffin cups into the center rack position, ensuring even heat circulation around each cup.
| Baking Stage | Time | Temperature | Result |
|---|---|---|---|
| Initial rise | 8-10 min | 350°F | Golden dome formation |
| Crumb structure | 10-12 min | 350°F | Moist interior development |
| Color deepening | 2-3 min | 350°F | Caramelized edges |
| Cooling stage | Immediate | Room temp | Set crumb texture |
You’ll achieve that perfect crumb texture—tender yet sturdy—by avoiding the temptation to open your oven door. Your muffins are done when a toothpick inserted into the center emerges with minimal crumbs. You’re now free to enjoy your precisely baked creation.
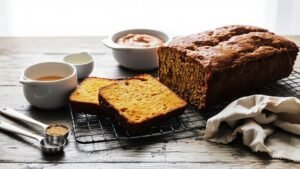
Cooling and Serving Tips
Once your toothpick test confirms doneness, you’ll want to let your muffins cool for 5-10 minutes in the pan before transferring them to a wire rack.
This initial cooling period allows the crumb structure to set properly without collapsing.
Transfer your muffins to the cooling rack for complete thermal equilibration, approximately 20-30 minutes.
Proper cooling prevents condensation that compromises texture.
Serving presentation strategies:
- Arrange muffins on elevated platters for visual appeal
- Dust tops with powdered sugar or cocoa powder
- Serve at room temperature for ideal flavor development
- Pair with complementary beverages like coffee or tea
Store cooled muffins in airtight containers at room temperature for up to three days.
You’ll maintain peak freshness and texture when you follow these guidelines precisely.
Frequently Asked Questions
Can I Substitute Butter With Oil in Chocolate Chip Muffin Recipes?
You can absolutely substitute butter with oil in your chocolate chip muffin recipes. Use a 3:4 oil-to-butter ratio—for every cup of butter, substitute ¾ cup oil.
This adjustment accounts for water content differences. Oil ratios notably impact texture and moisture retention, yielding denser, more tender crumbs.
The flavor impact shifts subtly; oil produces neutral results while butter delivers richness. You’ll gain liberation from rigid formulations, allowing experimentation with various oils to customize your muffins’ final characteristics.
How Do I Prevent My Muffins From Becoming Dry or Dense?
You’ll prevent dry, dense muffins by avoiding overmixing, which overdevelops gluten and creates a tough crumb structure.
Use accurate measuring techniques—preferably a kitchen scale—for precise flour ratios.
Don’t compact flour when scooping.
Mix your wet and dry ingredients just until combined; lumps are acceptable.
Monitor baking time closely; overbaking desiccates your muffins.
These technical adjustments maintain ideal moisture and crumb structure, giving you complete control over your baking outcomes.
What’s the Best Way to Store Leftover Chocolate Chip Muffins?
You’ll maximize your muffins’ shelf life by placing them in airtight containers lined with paper towels, which absorb excess moisture.
Store them at room temperature for up to two days, or refrigerate for five days. For extended preservation, freeze them in freezer-safe containers up to three months.
You can thaw frozen muffins at room temperature within two hours. This method prevents staleness while maintaining ideal texture and flavor integrity throughout storage.
Can I Freeze Chocolate Chip Muffin Batter Before Baking?
You can freeze chocolate chip muffin batter effectively by following proper freezing safety protocols. Pour batter into greased muffin cups, freeze until solid, then transfer to freezer bags for extended storage up to three months.
When you’re ready to bake, skip thawing tips—bake directly from frozen, adding 3-5 minutes to standard baking time. This method preserves leavening agents and maintains ideal texture, giving you complete control over your baking schedule.
How Do I Make Muffin Tops Larger and More Pronounced?
You’ll achieve pronounced muffin tops by adjusting your batter viscosity and oven temperature strategically.
Increase your batter’s thickness—it won’t spread as readily during baking.
Simultaneously, elevate your oven temperature to 425°F initially, then reduce it to 375°F midway through baking. This technique creates rapid rise and browning on top surfaces. You’re free to experiment with these parameters independently, controlling your muffins’ final appearance without restrictive guidelines.


Leave a Comment