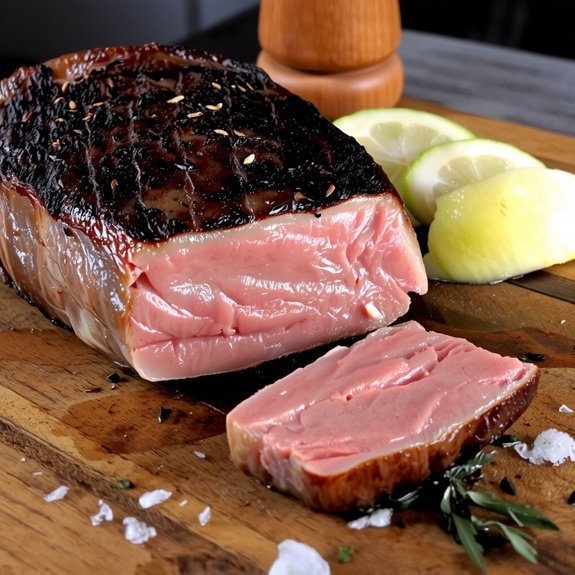
When you blacken tuna, you want a crisp, spice-charred crust and a cool, rare center. You’ll pat the steaks dry, press on a balanced spice rub, and sear in a smoking-hot cast-iron pan for mere seconds per side. Follow precise heat and timing controls — and you’ll want the exact steps.
Ingredients and Measurements
When choosing ingredients for blackened tuna, pick fresh, firm sushi-grade ahi or yellowfin and portion steaks at about 6–8 ounces and roughly 1 inch thick for even searing.
You’ll dry the fish, then measure seasoning and fats precisely. Also, make sure to use a hot skillet by preheating a cast iron pan so the tuna sears quickly and develops a flavorful crust. For two servings use 12–16 ounces tuna and a seasoning blend: 2 tbsp paprika, 1 tbsp oregano, 1 tsp cayenne, ½ tsp each salt, garlic salt, black pepper, onion powder, garlic powder.
That quantitative example shows clear ingredient ratios for balance. Use 1–2 tbsp butter or 1 tbsp avocado oil, or combine for flavor and smoke control.
Choose spice combinations that match your heat tolerance; reduce cayenne if needed. Finish with 1 tbsp citrus juice and optional herbs for contrast.
Serve immediately for best texture, always.
Equipment and Pan Selection
Choose your pan based on heat capacity and surface: cast iron holds intense, even heat for a crisp blackened crust, stainless steel responds faster and gives precise sear control, and nonstick or other alternatives offer easier cleanup but lower tolerance for extreme heat.
You’ll favor cast iron for maximum char, stainless for rapid temperature adjustments, and nonstick when you need to prevent sticking or cook at gentler temperatures.
Whatever you pick, preheat thoroughly, use clarified butter or oil until it shimmers, and don’t overcrowd the pan to guarantee an even blacken.
When buying tuna, choose sushi-grade ahi for the best results.
Cast Iron Vs Stainless
Although both materials are durable, you’ll pick cast iron when you need unmatched heat retention for searing and slow cooking, and stainless steel when you need rapid, even temperature control and non‑reactive, cooking performance surface. Additionally, it offers high heat resistance, tolerating temperatures up to 1500F which is useful for finishing steaks.
For blackened tuna, choose cast iron if you want intense, sustained cooking performance: it holds high heat, tolerates oven finishing and stabilizes temperature when you sear multiple steaks.
Choose stainless steel when you need faster heat response, uniform surface temperature and easy cleanup between batches.
Remember cast iron heats unevenly on undersized burners and needs seasoning and careful drying to prevent rust; it can impart slight iron flavor.
Stainless steel with bonded cores boils and responds faster, resists corrosion and suits acidic marinades.
Match pan choice to desired sear, control, maintenance.
Nonstick and Alternatives
After weighing cast iron’s heat retention and stainless steel’s responsiveness, turn your attention to nonstick and other pan options when you prioritize easy release, less oil and faster cleanup.
You’ll find nonstick coatings give reliable release and cleaner work, but they limit authentic blackening because high heat degrades coatings and reduces crust development. Use high-smoke-point oils and moderate heat, and expect slower searing than with cast iron due to lower heat retention.
- Nonstick: minimal oil, delicate fish, limited sear
- Carbon steel: fast heat, good seasoning, lighter than cast iron
- Stainless steel: even browning with more oil, precise control
- Grill/ceramic options: grill marks or ceramic nonstick for easy cleanup
Choose the pan that matches steak thickness and your crust priority and timing. This approach highlights the smoky, spicy flavors of blackened tuna.
Preparing the Tuna Steaks
Choose high-quality, sushi-grade ahi steaks about 6–8 oz and at least 1″ thick so you’re starting with a cut that sears evenly.
Pat each steak completely dry with paper towels to remove surface moisture and guarantee a proper crust.
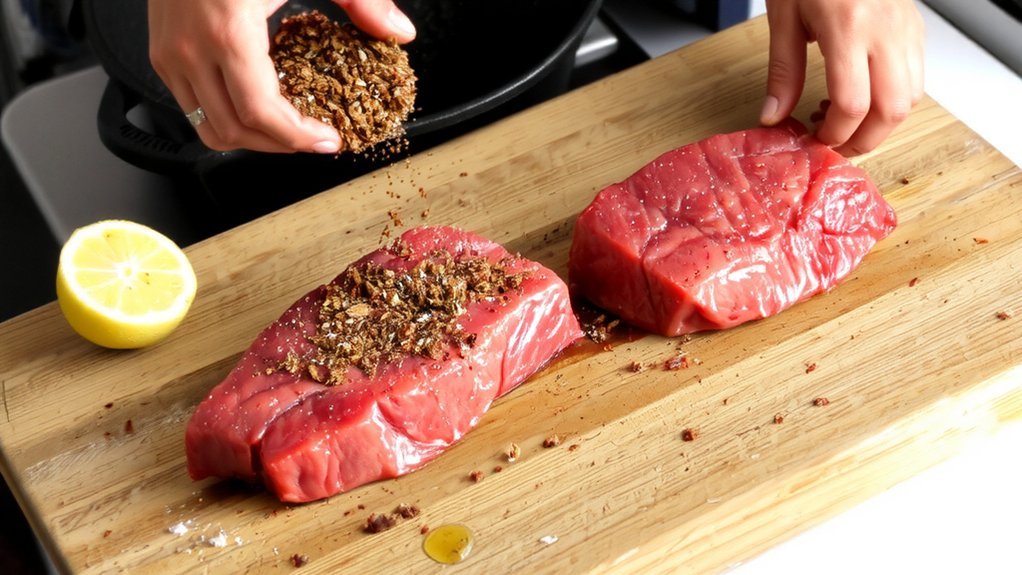
Rub the blackened spice mix evenly onto all sides, pressing firmly so the seasoning adheres before it hits the hot pan.
This preparation is quick — blackened tuna steaks take less than 10 minutes to prepare.
Selecting Fresh Ahi
Inspection begins with appearance and texture: the flesh should look moist and shiny and feel firm, bouncing back when you press it—avoid any soft, slimy areas or brown spots. Ahi tuna refers to Yellowfin and Bigeye.
You’ll evaluate color variations and bloodline, note handling and storage, and apply tuna grading and freshness indicators to choose steaks suitable for searing or raw use.
Check smell and, for whole fish, clear eyes. Prefer pieces kept under ice and sold at consistent low temperatures.
When evaluating grades, favor #1 or #2+ for raw applications; #2 is acceptable for cooking, and higher fat in larger cuts increases flavor and tenderness and texture detail.
- Moist, shiny flesh; firm texture
- Bright red or appropriate bloodline color
- No sour odor or brown discoloration
- Proper handling and refrigerated storage
Patting Dry Thoroughly
Because moisture sabotages a proper sear, pat each tuna steak thoroughly before seasoning. You’ll use clean paper towels and a gentle touch, blotting rather than rubbing to avoid compressing the flesh.
Work evenly across both sides and the edges, replacing towels as they saturate so you achieve complete moisture removal. Pat immediately before cooking; prolonged air exposure risks drying the center. If you dry-cure briefly with salt beforehand, it helps retain moisture during cooking.
A properly dried surface promotes even heat transfer, reliable caramelization, reduced sticking, and measurable texture enhancement—crispy exterior with a tender interior.
Don’t press aggressively or soak the fish beforehand; over-handling damages cell structure and invites uneven cooking.
Follow this methodical routine and you’ll set the tuna up for consistent searing performance across pan, grill, or oven. Repeat the step for each steak carefully.
Seasoning and Pressing
With the surface dry, mix your blackened rub in a bowl—paprika and oregano as the base, smaller amounts of cayenne, chili powder, and garlic/onion powders to taste—and keep salt controlled. This blend is typically used prior to high-heat cooking to create black marks and a flavorful crust.
You’ll sprinkle half the blend onto one side, flip the steak, and use the rest to guarantee even coverage.
Press seasoning firmly into all surfaces and edges with your fingers or a flat utensil; this increases contact and builds a crisp crust.
Apply just before searing to prevent moisture uptake. Consider spice substitutions to tailor heat and avoid additives.
- Blend ratios: paprika and oregano dominant
- Application: half, flip, press firmly
- Edges: press thoroughly for even crust
- Finish: shake off excess to prevent burning
Use precise seasoning techniques to balance flavor profiles and timing now.
Searing and Blackening Technique
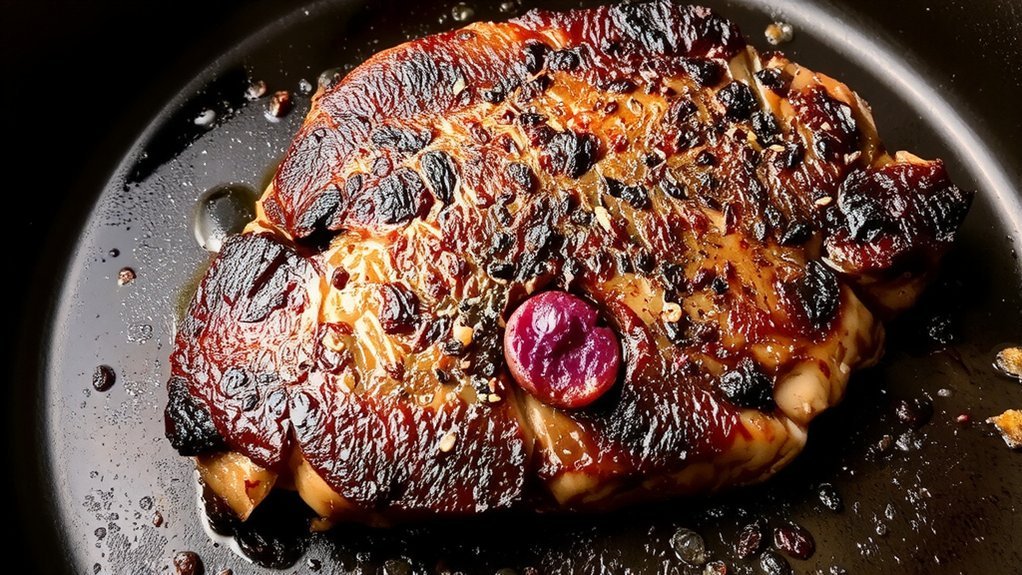
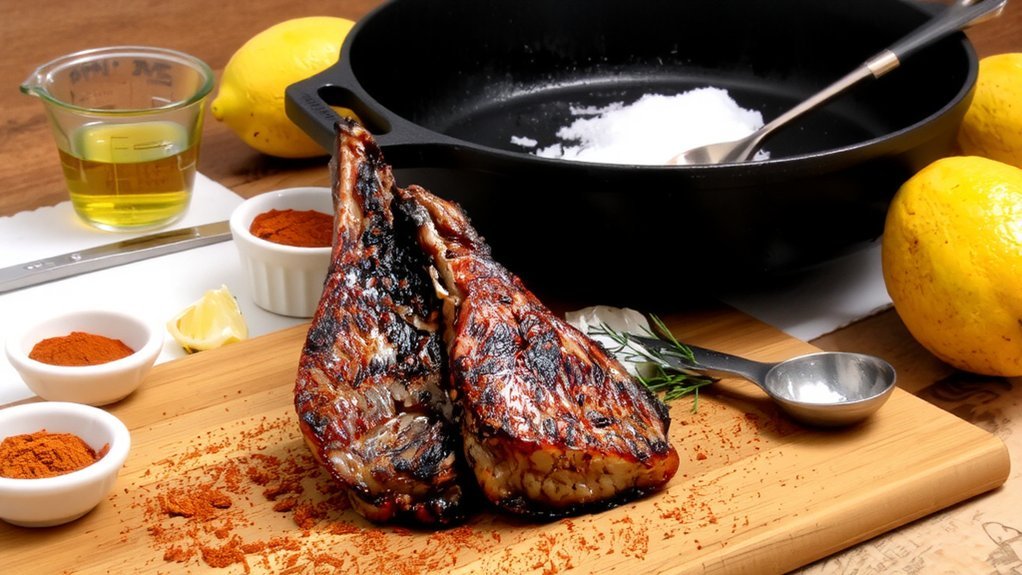
Heat a cast-iron or carbon-steel pan over medium-high to high until it’s smoking or the oil shimmers, then add a high‑smoke‑point fat (clarified butter, avocado oil) so the surface’s intense heat will create a true blackened crust. For best control at high heat, many chefs prefer a carbon steel pan.
Preheat cast‑iron until smoking, add a high‑smoke‑point fat to forge an authentic blackened crust.
You’ll use disciplined searing techniques: preheat pan several minutes, pat steaks dry, press seasoned tuna into the surface, and add oil only after the pan’s ready to prevent sticking and burning.
Sear each side briefly — 10 seconds for rare up to 3–4 minutes for firmer doneness — without overcrowding; press gently to guarantee even contact and crust formation.
Watch oil temperature to avoid bitter burn of blackening spices. Rest briefly before slicing to redistribute juices and preserve texture.
Use ventilation and long-handled tools to protect yourself safely.
Seasoning Variations and Flavor Twists
Three broad approaches to seasoning blackened tuna let you control heat, aroma, and regional character.
You’ll choose a core blackening mix (cayenne, paprika, garlic, onion, oregano, salt, pepper) and then decide if you want Cajun vs Creole emphasis, Global variations, or subtle Alternative spices.
For results, adjust cayenne or swap chipotle, ancho, or smoked paprika as different Heat sources.
Use clarified butter or neutral oil to bind rubs; marinades (soy, citrus) can precede blackening. Aim for balanced salt and aromatic depth; commercial blends give consistency, homemade blends give control. Also, use firm red ahi tuna to ensure the best texture and flavor.
Vary flavor without masking tuna:
- Emphasize Cajun vs Creole: more cayenne vs fennel/ celery salt
- Global variations: za’atar, ponzu, or garam masala
- Alternative spices as Heat sources: chipotle, ancho
- Flavor boosts: mustard powder, toasted fennel
Serving Ideas and Storage Tips
After you’ve settled on a seasoning profile, plan how you’ll serve and store the fish to preserve texture and flavor.
This dish is quick to make, typically ready in about 15 minutes.
For serving suggestions, place blackened tuna over wild rice or cauliflower rice pilaf, or alongside steamed broccoli, asparagus, or roasted lemon potatoes. For sandwiches or tacos, add lettuce, avocado or mango avocado salsa and a citrus vinaigrette; offer sriracha mayo or creamy cilantro dressing. Garnish with parsley or cilantro and sprinkle nuts over greens for contrast.
Store leftovers in an airtight container in the refrigerator for up to two days; keep sauces separate. Reheat wrapped in foil at 350°F for ten minutes, avoiding the microwave.
For leftover transformations, repurpose slices into salads, rice bowls, tacos or sandwiches, combining fresh vegetables and light dressings immediately.
Leave a Comment