Key Takeaways
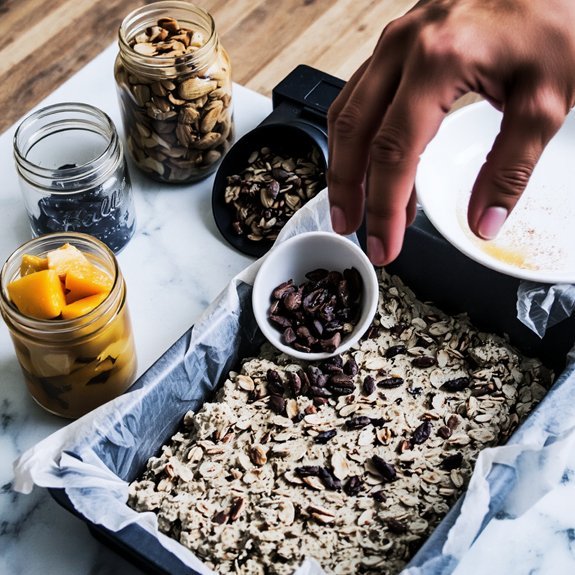
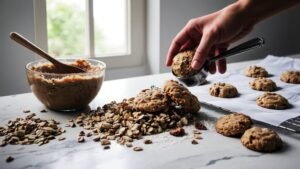
- Mix oats, honey, oil, nut butter, and lecithin thoroughly until cohesive, then fold in nuts and seeds evenly.
- Press mixture firmly into a parchment-lined 9×13-inch pan to approximately ½-inch thickness, eliminating air pockets completely.
- Bake at 350°F for 20–25 minutes until golden-brown edges form and center firms slightly without overbaking.
- Cool in pan for 10 minutes, transfer to wire rack for 30–45 minutes, then cut into uniform rectangles.
- Store in airtight containers at room temperature for two weeks or freeze for up to three months.
Gathering Your Ingredients
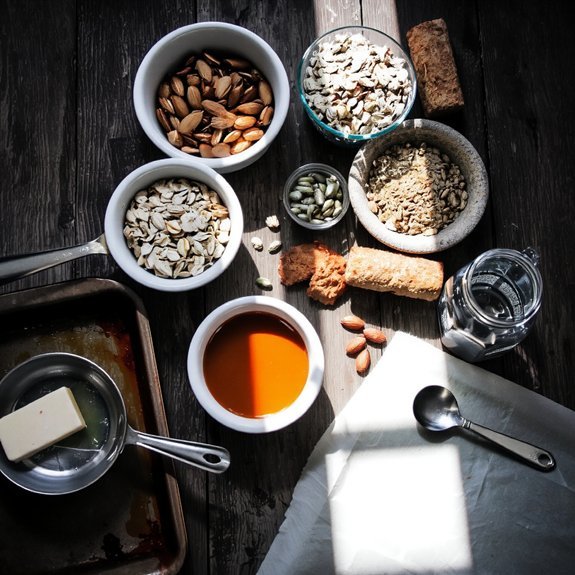
Before you’ve mixed a single ingredient, you’ll need to assemble the precise components that’ll determine your granola bars’ nutritional profile and texture.
Start with your base: rolled oats (roughly 2 cups), which provide complex carbohydrates and fiber.
Add binding agents like honey or almond butter (½ cup each) for structural integrity.
Include nuts and seeds—almonds, walnuts, or sunflower seeds—contributing protein and healthy fats.
Your ingredient sourcing matters; choose organic options when possible to avoid pesticides and additives.
Practice allergen awareness by identifying potential cross-contaminants, especially with tree nuts and sesame.
Incorporate dried fruit (cranberries or dates) for natural sugars and micronutrients.
Finally, gather your optional mix-ins: dark chocolate chips or coconut flakes.
This calculated approach guarantees nutritional density and textural balance.
Choosing Your Mix-Ins
You’ll want to select nuts and seeds that complement your granola bars’ texture and nutritional profile. Almonds, walnuts, and sunflower seeds provide healthy fats and protein, while adding roughly 160 calories per ounce to your final product.
Consider combining varieties to achieve both structural integrity and varied micronutrient content.
Choosing Your Mix-Ins
What’ll transform your granola bars from mediocre to memorable? Strategic mix-in selection that balances flavor profiles and texture contrasts.
You’re not limited to standard choices.
Consider dried cranberries, which provide tartness and anthocyanins—powerful antioxidants.
Dark chocolate chips contribute polyphenols and satisfy cravings without excess sugar.
Nuts like almonds deliver protein and healthy fats; roughly 23 grams per ounce.
Texture contrasts matter scientifically.
Chewy dried fruit opposes crunchy seeds.
This variation stimulates sensory receptors differently, enhancing satisfaction and perceived quality.
You decide your nutritional destiny.
Pumpkin seeds offer magnesium; coconut flakes provide medium-chain triglycerides.
Dried berries pack vitamin C.
Measure precisely: one cup mix-ins per two cups oats maintains ideal binding ratios.
Your combination determines the final bar’s macronutrient profile, so choose intentionally, not arbitrarily.
Nuts and Seeds
Almonds, walnuts, and pecans form the protein backbone of superior granola bars, delivering 6-9 grams per ounce while contributing essential amino acids your body can’t synthesize independently. You’ll maximize nut nutrition by selecting raw varieties, which retain heat-sensitive micronutrients like vitamin E and selenium.
| Ingredient | Protein (g/oz) | Fat Profile |
|---|---|---|
| Almonds | 6.0 | High monounsaturated |
| Walnuts | 8.5 | Omega-3 rich |
| Pumpkin seeds | 9.0 | Zinc abundant |
| Sunflower seeds | 5.5 | Vitamin E dense |
You’ll appreciate seed sustainability since these crops regenerate efficiently with minimal environmental impact. Seeds like pumpkin and sunflower provide bioavailable micronutrients while requiring fewer resources than tree nuts. Combine your selections at a 60/40 nut-to-seed ratio for ideal texture, nutrition, and binding capacity in your bars.
Preparing Your Baking Pan
You’ll need an 8×8-inch or 9×13-inch baking pan, depending on your desired bar thickness and nutrient density per serving.
Line your pan with parchment paper, which creates a moisture barrier that reduces oil absorption by up to 15% compared to unlined pans. Grease the parchment lightly with cooking spray or coconut oil to prevent the granola mixture from adhering to the surface during baking and cooling.
Choosing the Right Pan
Why does pan selection matter when baking granola bars? Your choice directly impacts heat distribution and baking consistency.
Metal pans conduct heat more efficiently than glass, reducing baking time by approximately 5-10 minutes and preventing over-browning.
Glass retains heat longer, requiring temperature adjustments.
For shape selection, rectangular 9×13-inch pans are ideal, providing uniform bar thickness and even cooking. This dimension yields approximately 12-16 bars with consistent nutritional portions.
Consider material comparison carefully: aluminum offers superior heat conductivity, while steel provides durability.
Dark-coated pans absorb more heat, potentially requiring temperature reduction by 25°F.
You’ll achieve ideal texture and structural integrity by selecting appropriate pans.
Proper pan choice guarantees your granola bars bake evenly, maintaining nutritional density while delivering the freedom to enjoy perfectly consistent results every time.
Lining With Parchment Paper
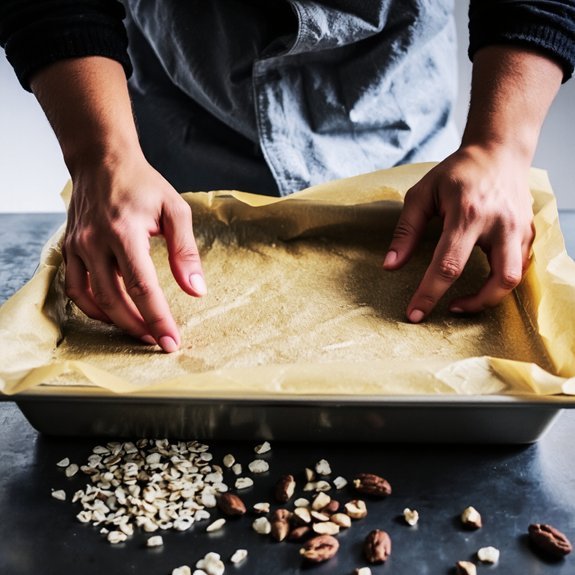
Preparing your pan with parchment paper creates a non-stick barrier that prevents moisture absorption and guarantees clean bar extraction.
You’ll want to cut a sheet large enough to cover your baking surface with an edge overhang of approximately two inches on all sides.
This overhang provides leverage for lifting your finished granola bars without crumbling.
Position the parchment with the seam placement facing downward against the pan’s bottom.
This orientation prevents seams from catching on your bars during removal.
Smooth out any wrinkles or air pockets by pressing firmly across the surface.
The parchment’s silicone coating reduces sticking without added fats, keeping your bars’ nutritional profile intact.
You’re not locked into expensive cooking sprays or oils when parchment paper delivers superior results.
This simple preparation step eliminates frustration and assures professional-quality extraction every time.
Greasing and Preventing Sticking
While parchment paper provides excellent non-stick properties, adding a thin layer of fat further guarantees your bars release cleanly without structural damage.
You’ve got multiple application methods available. Brush melted coconut oil or unsalted butter directly onto your pan’s bottom and sides—about one-eighth teaspoon per square inch optimizes coverage without excess. Oil alternatives like avocado or grapeseed oil work equally well, offering higher smoke points for durability during baking.
These fats create a molecular barrier preventing adhesion between your mixture and the pan’s surface. The science is straightforward: lipids repel hydrophilic compounds in your granola base.
Apply your chosen fat before positioning parchment paper for maximum protection. This dual-layer approach makes certain your finished bars maintain structural integrity, allowing you complete freedom in portioning without crumbling or breaking.
Mixing the Base Mixture
Combining your dry and wet ingredients creates the foundation of your granola bars’ texture and structural integrity.
You’ll want to employ proper mixing techniques to distribute binders evenly throughout your oats, nuts, and seeds.
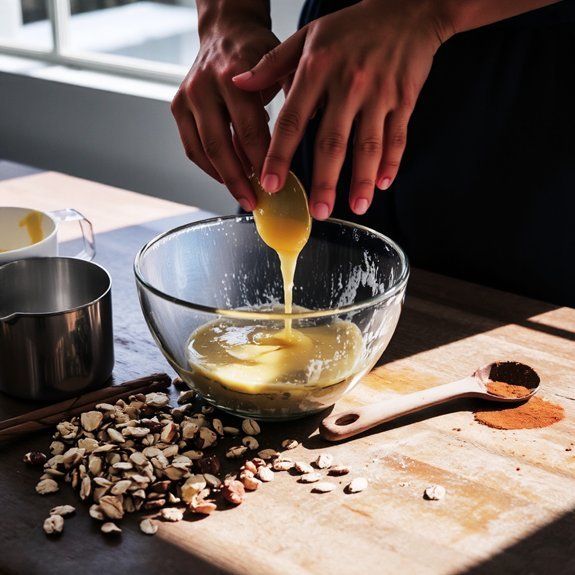
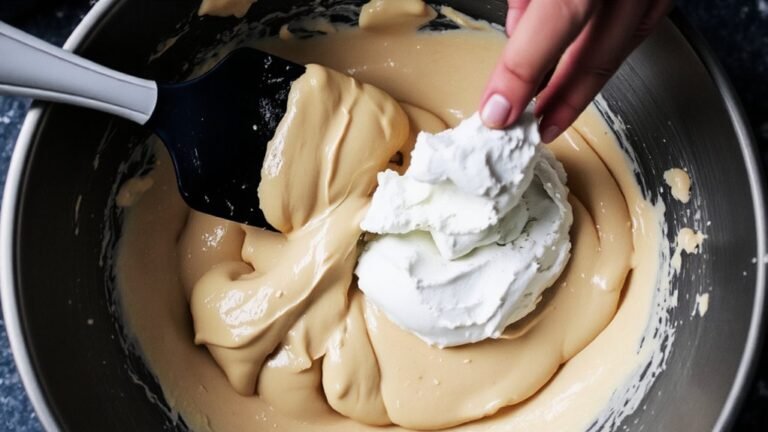
Start by whisking your wet components—honey, oil, and nut butter—in a separate bowl until fully incorporated. Temperature control matters here; make sure your wet mixture reaches approximately 110°F for ideal viscosity and binding capacity.
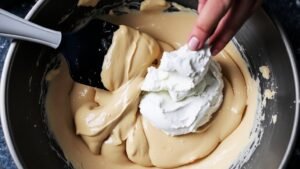
Pour your wet ingredients into your dry mixture, then fold thoroughly using a spatula. This method prevents overmixing, which’d compromise your bars’ nutritional density and create undesirable texture.
Aim for complete saturation without crushing your grains. Work quickly while your mixture maintains workability. You’re fundamentally creating a cohesive mass that’ll hold its shape during baking and deliver sustained energy release.
Combining Wet and Dry Ingredients
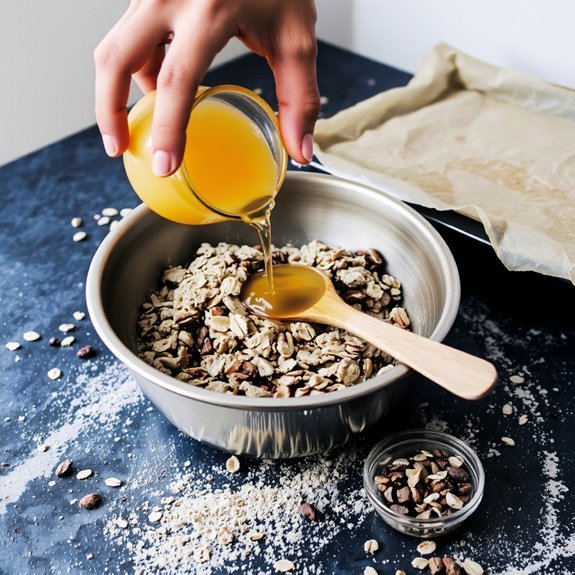
Now that you’ve prepared your wet and dry components separately, you’ll merge them into a unified mixture that determines your bars’ final texture and nutritional bioavailability.
Pour your wet ingredients into the dry mixture gradually, stirring consistently to guarantee even distribution. This methodical approach prevents clump formation and guarantees uniform nutrient absorption. Use an emulsifier like lecithin to stabilize your mixture, enhancing binding without compromising nutritional integrity.
| Ingredient | Function | Measurement | Mixing Time | Result |
|---|---|---|---|---|
| Oats | Base structure | 2 cups | 30 seconds | Uniform coating |
| Honey | Binder | ¾ cup | 45 seconds | Ideal adhesion |
| Oil | Emulsifier | ⅓ cup | 20 seconds | Smooth texture |
| Nuts | Texture | 1 cup | 15 seconds | Even distribution |
| Lecithin | Stabilizer | 1 tbsp | 10 seconds | Enhanced binding |
Combine thoroughly until you’ve achieved a cohesive mass that holds together without excess moisture.
Pressing Into the Pan
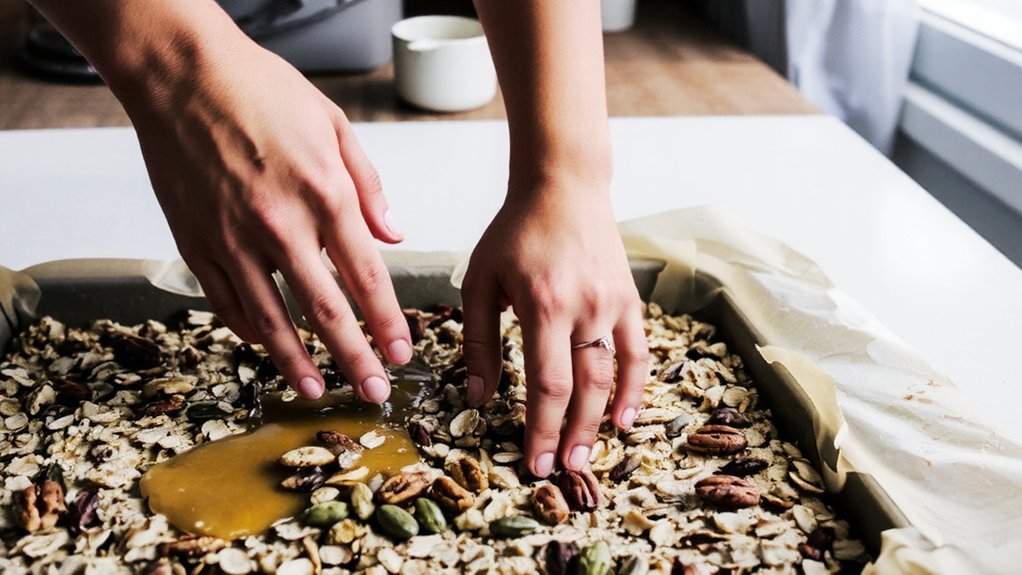
Transfer your cohesive mixture to a parchment-lined 9×13-inch baking pan, then use an offset spatula or your palms to distribute it evenly across the surface.
Apply even compression throughout the mixture, pressing firmly to eliminate air pockets that’d compromise structural integrity during baking. This densification guarantees consistent moisture distribution and prevents crumbling after cooling.
Use the tapping technique—gently striking the pan’s bottom against your countertop—to settle ingredients and maximize contact between components.
This process activates binding agents and promotes uniform browning. The resulting density increases caloric density per serving while stabilizing nutritional content retention through the baking cycle.
Aim for approximately half-inch thickness.
You’ll achieve ideal texture: crispy exterior with a chewy interior that maintains nutritional density without excessive air spaces that’d cause rapid staling.
Baking Your Granola Bars
Baking your pressed mixture requires precise temperature control to develop the Maillard reaction—the chemical process that creates browning and enhances flavor complexity.
Set your oven temperature to 350°F (175°C) for ideal results. This temperature balances caramelization without burning delicate nuts and seeds.
Your baking time should run approximately 20-25 minutes. You’ll know they’re done when the edges turn golden-brown and the center firms up slightly. Don’t overbake—excessive heat degrades nutritional value and creates bitter flavors.
Remove your bars from the oven and let them cool completely in the pan for 10 minutes. This cooling period allows the mixture to set properly, preventing crumbling when you cut them. You’ve now got nutrient-dense, shelf-stable snacks ready for your active lifestyle.
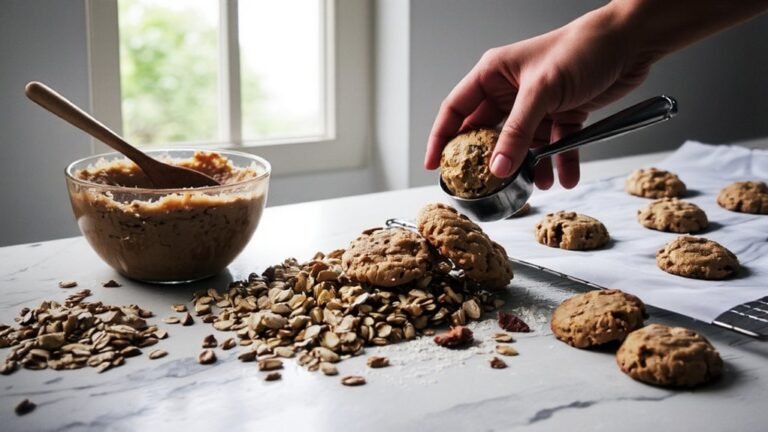
Cooling and Cutting
Once your granola bars’ve cooled in the pan for 10 minutes, transfer them to a wire rack for complete cooling—typically 30-45 minutes.
Depending on thickness.
Cooling racks allow air circulation underneath, preventing moisture accumulation that compromises texture.
Cooling racks enable air circulation underneath, preventing moisture accumulation that compromises texture.
This process stabilizes the binding agents, guaranteeing structural integrity for clean cuts.
When ready to cut:
- Use a sharp, long-bladed knife dipped in hot water and wiped between each slice for precision
- Cut bars into uniform rectangles (approximately 2″×3″) to guarantee consistent nutritional portions and cooking quality
- Work decisively—hesitant sawing motions create ragged edges and crumbling
Clean cuts maximize your freedom to portion bars according to your dietary goals.
Properly cooled granola bars maintain their nutrient density and shelf stability for up to two weeks when stored in airtight containers.
Storing Your Homemade Granola Bars
Preserving your granola bars’ nutritional integrity requires proper storage techniques that minimize oxidation and moisture loss. You’ll extend your shelf life by keeping bars in an airtight container at room temperature for up to two weeks.
For extended preservation, you’ve got freezer storage as your best option—bars maintain quality for up to three months when frozen.
The science is straightforward: cold temperatures dramatically slow lipid oxidation and microbial growth. You’ll want to use parchment paper between layers to prevent sticking. Make sure your container’s seal is tight; exposure to ambient humidity degrades texture and accelerates rancidity in nuts and seeds.
Don’t rely on commercial preservatives. Your homemade bars’ ingredient purity means you control what enters your body—a freedom worth protecting through intelligent storage choices that respect both nutrition and taste.
Frequently Asked Questions
Can I Make Granola Bars Without Honey or Other Sweeteners?
You can absolutely create granola bars without honey or sweeteners by embracing savory bars instead. Combine rolled oats with nuts, seeds, and olive oil for binding.
Add protein additions like hemp seeds or nuts to boost nutritional density. The natural fats from ingredients provide cohesion without added sugars.
You’ll gain control over your ingredients, crafting bars aligned with your dietary freedom and nutritional goals.
How Do I Prevent Granola Bars From Becoming Too Hard or Stale?
You’ll prevent staleness through strategic storage techniques and moisture control.
Keep your bars in an airtight container with a silica gel packet—this absorbs excess humidity that hardens them. Store them at room temperature, away from direct sunlight. You can also refrigerate them for extended shelf life.
Adding slightly more fat (coconut oil or nut butter) during baking creates a tender crumb that resists hardening, maintaining ideal texture and nutritional integrity for weeks.
What’s the Best Way to Cut Granola Bars Into Even Pieces?
You’ll achieve uniform portions by chilling bars for two hours at 32°F, which solidifies binding agents and reduces crumbling.
Use a sharp knife dipped in hot water, wiping between cuts—this prevents adhesion and guarantees clean edges.
Cut lengthwise first, then crosswise, creating equal rectangles of approximately 45-50 grams each.
This precise technique maximizes nutrient distribution consistency, giving you complete control over portion sizes and macronutrient intake per serving.
Can I Substitute Butter With Coconut Oil or Other Alternatives?
You can definitely substitute butter with coconut oil or alternatives.
Coconut oil’s higher smoke point (350°F versus butter’s 350°F) works well for baking.
Consider your flavor profile—coconut oil adds subtle sweetness, while ghee offers richness.
Use equal measurements: one cup butter equals one cup oil.
Nutritionally, coconut oil contains more saturated fat, so choose based on your dietary preferences.
Avocado oil provides neutral taste and superior nutritional benefits if you’re health-conscious.
How Long Do Homemade Granola Bars Stay Fresh Before Going Bad?
You’ll maximize your granola bars’ lifespan by understanding proper storage methods.
At room temperature, they’ll stay fresh for 3-5 days before oxidation degrades nutritional integrity.
Refrigeration lifespan extends to 2 weeks, as cooler temperatures slow lipid degradation and microbial growth.
For extended preservation, freezer duration reaches 3 months without compromising nutritional value or texture.
You’re free to choose storage based on your consumption schedule and independence preferences.

Leave a Comment