Key Takeaways
- Combine flour, sugar, salt, and yeast; add lukewarm milk and melted butter, then knead until smooth and elastic.
- Fold cold butter into dough through 4–6 turns with 90° rotation, refrigerating 30–45 minutes between each fold.
- Cold proof laminated dough overnight at 38–40°F for flavor development and controlled enzymatic activity before shaping.
- Shape chilled dough into 1/8-inch thickness using envelope folds or braids; fill with preserves, pastry cream, or savory ingredients.
- Bake at 400°F for 12–20 minutes until deep golden-brown; cool 5–10 minutes before glazing and serving within 2–4 hours.
Gathering Your Ingredients
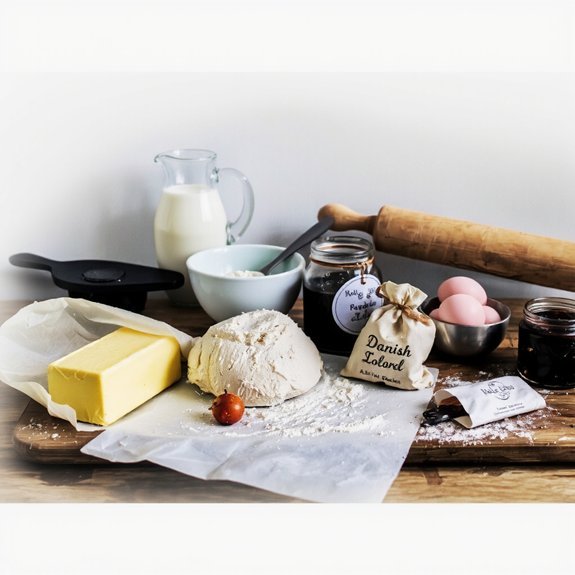
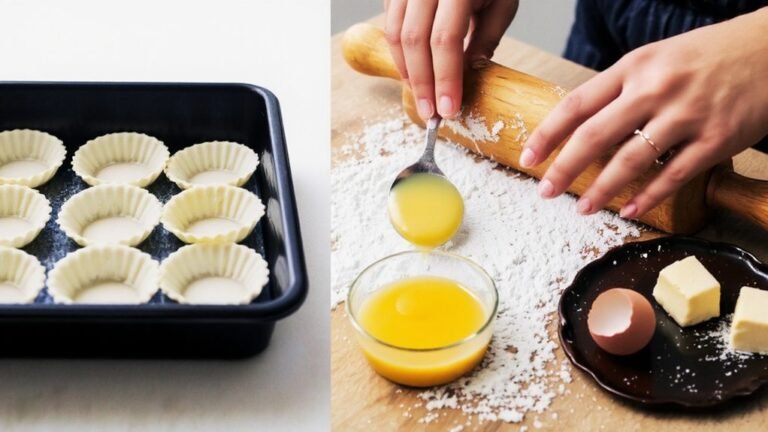
Before you’ll succeed at laminating dough and achieving those signature flaky layers, you’ll need to assemble precise measurements of all-purpose flour (500g), cold unsalted butter (400g), whole milk (240ml), instant yeast (7g), salt (10g), sugar (50g), and one large egg for the egg wash.
These pantry staples form your foundation.
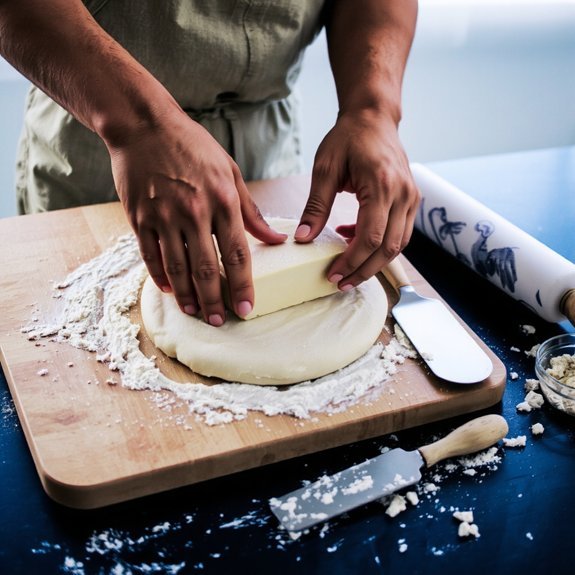
Make sure your butter’s genuinely cold—this’s critical for creating distinct lamination layers.
Cold butter is absolutely critical for creating those distinct, beautiful lamination layers in your dough.
You’ll want to measure ingredients by weight rather than volume for accuracy that won’t compromise your results.
For allergy alternatives, you can substitute all-purpose flour with bread flour for enhanced gluten development.
If you’re dairy-free, use plant-based butter and unsweetened almond milk.
You’ll maintain structural integrity while accommodating dietary restrictions.
Gathering everything beforehand prevents mid-process scrambling and keeps your workflow efficient, giving you complete control over your baking success.
Preparing the Base Dough
Now that you’ve assembled your ingredients, you’ll combine them into a cohesive dough that serves as the foundation for lamination.
Mix your flour, sugar, salt, and yeast in a large bowl. Create a well in the center and pour in your lukewarm milk and melted butter.
Incorporate the wet ingredients into the dry mixture until a shaggy dough forms. Begin kneading on a lightly floured surface, working the dough for 8-10 minutes until it reaches the proper dough consistency—smooth, elastic, and slightly tacky but not sticky.
You’re building gluten structure that’ll support the lamination process. Once you’ve achieved the correct texture, transfer your dough to a lightly oiled bowl.
Cover it and let it rest before you proceed with the butter layering stage.
Mastering the Lamination Technique
Once your dough’s rested and chilled, you’ll fold cold butter into it through a series of precise turns that create the characteristic flaky layers of Danish pastries.
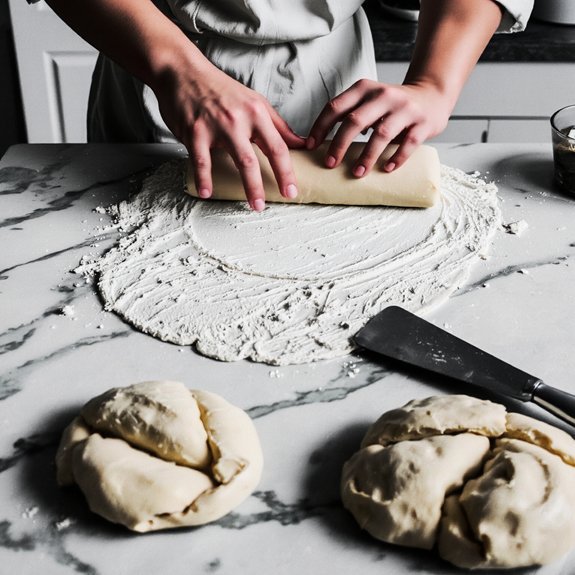
Execute rolling precision by working on a floured surface, maintaining even thickness throughout each fold.
Perform four to six turns, rotating your dough ninety degrees between each one.
Keep butter cold and incorporated—never let it break through the dough’s surface.
Each turn compounds flake development exponentially.
Rest the dough between turns, minimum thirty minutes, preventing gluten overdevelopment and butter softening.
Your lamination success depends on temperature control and consistent pressure.
Don’t rush this process.
Proper technique yields those distinct, delicate layers that define exceptional Danish pastries.
Master these fundamentals, and you’ll command complete control over your final product’s texture and quality.
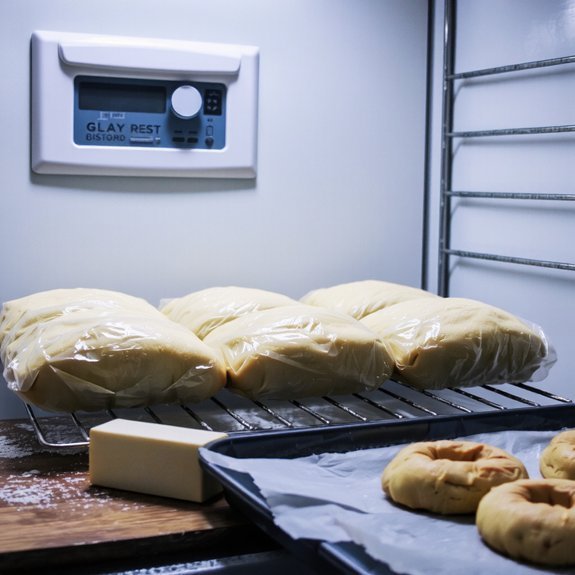
Chilling and Resting the Dough
Strategic temperature management between lamination turns determines your dough’s workability and final structure.
You’ll refrigerate your dough for 30-45 minutes between each fold cycle, preventing butter from melting into the flour and compromising those critical layers you’ve worked to establish.
Refrigerate 30-45 minutes between folds to prevent butter melting and preserve your carefully established laminated layers.
Cold proofing extends this principle further.
After completing all lamination folds, you’ll rest your dough overnight in a 38-40°F environment.
This extended chill isn’t merely about temperature control—it’s about flavor maturation.
During cold proofing, wild yeast activity slows dramatically while enzymatic development continues, building complex notes and improving fermentation consistency.
You maintain control by monitoring dough temperature constantly.
Warm conditions degrade your laminated structure; cold conditions guarantee the precision you demand.
This strategic resting transforms your technically sound dough into a superior final product.
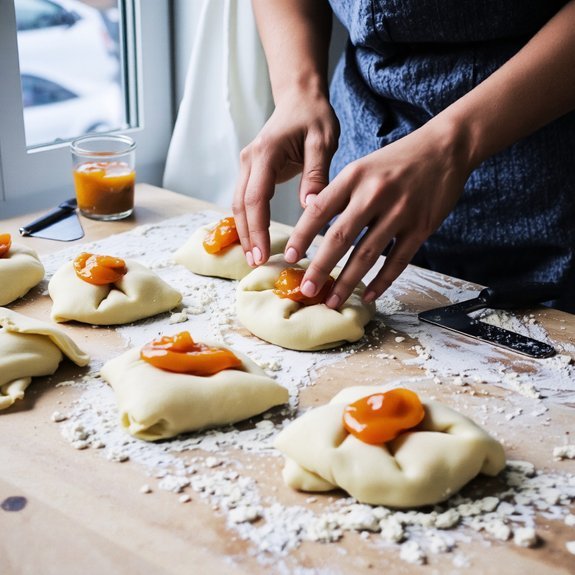
Shaping Your Pastries
After your dough’s cold proof is complete, you’ll remove it from refrigeration and let it sit at room temperature for 10-15 minutes until it’s pliable but still cold—this brief warm-up prevents cracking during cutting and shaping.
Roll your laminated dough to 1/8-inch thickness on a lightly floured surface.
You’ll cut rectangles or squares depending on your desired pastry style.
For the envelope fold, place filling in the center, then fold corners toward the middle, sealing edges with egg wash.
The braid technique demands precision: cut parallel strips along both sides of a center rectangle, then alternately cross strips over filling for visual appeal and structural integrity.
Work quickly to maintain dough temperature.
Position shaped pastries on parchment-lined baking sheets, allowing space for expansion.
You’re now ready for final proofing before baking.
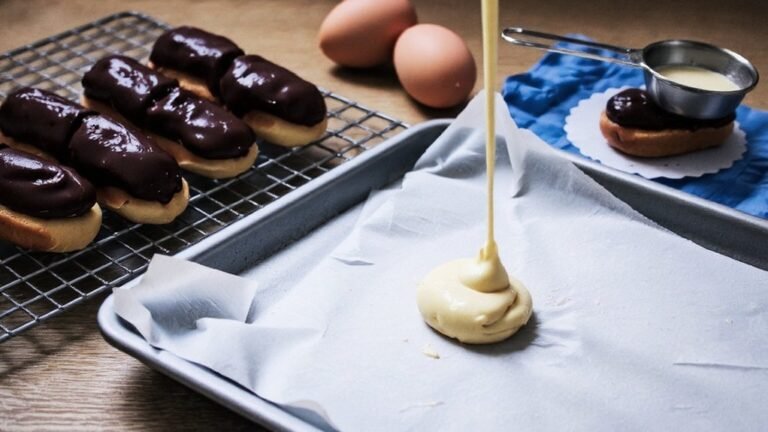
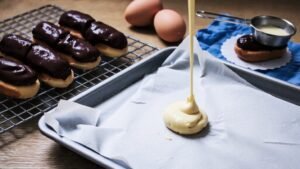
Filling and Topping Options
Danish pastry fillings fall into several categories: fruit preserves, pastry cream, almond paste, and cheese mixtures.
Each category requires specific application techniques to prevent sogginess and achieve even distribution.
You’ll maximize flavor and texture by selecting fillings strategically:
- Fruit preserves: Apply seasonal fruits sparingly—roughly 1 tablespoon per pastry—to avoid moisture penetration
- Pastry cream: Pipe thickly to create structural support against steam absorption
- Almond paste: Mix with egg whites for stability and enhanced moisture resistance
- Savory cheeses: Combine aged varieties with herbs for bold, distinct profiles
- Hybrid combinations: Layer complementary fillings for complexity without compromising structural integrity
You’ll apply toppings after shaping but before proofing.
Egg wash creates golden browning; pearl sugar adds textural contrast.
Dust with powdered sugar or icing post-baking for visual appeal.
Temperature control during filling application prevents premature melting and guarantees clean, professional results.
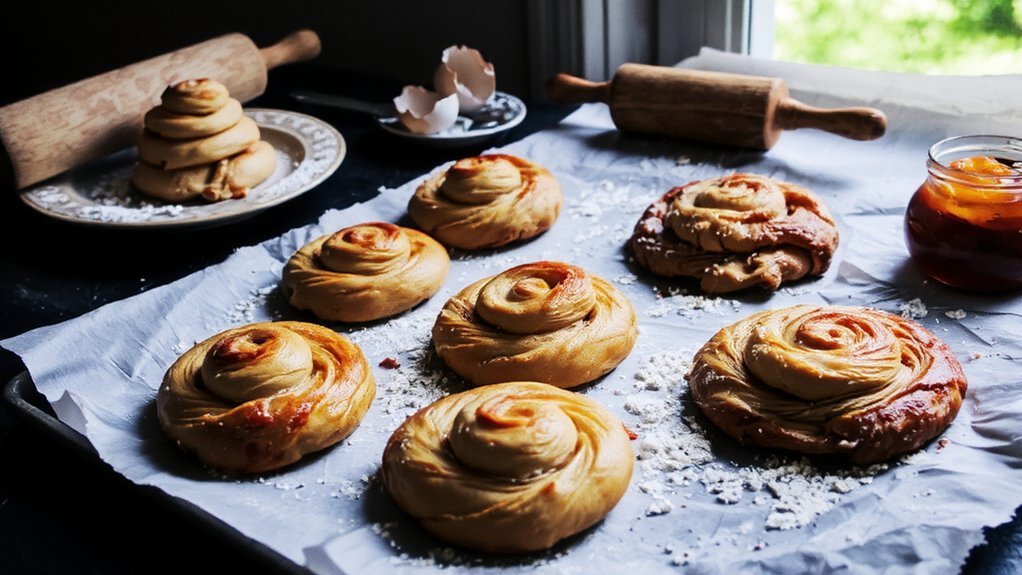
Baking and Serving Your Danish Pastries
You’ll bake your Danish pastries at 400°F (200°C) for 12-15 minutes until the laminated dough achieves a deep golden-brown exterior and the filling reaches proper temperature.
Once cooled for 5-10 minutes, you can apply your chosen glaze or icing while the pastries retain residual warmth for ideal adhesion.
Store baked pastries in an airtight container at room temperature for up to two days, or freeze unbaked shaped pastries for up to three months before baking.
Baking Temperature and Time
Once your pastries have proofed to the proper size, it’s important to bake them at 400°F (200°C) for 15-20 minutes until they’ve achieved a deep golden-brown exterior.
You’ll want to master these critical baking elements:
- Thermometer placement: Position an oven thermometer at the center rack for accurate temperature readings
- Altitude adjustments: Increase baking temperature by 15-25°F if you’re above 3,000 feet elevation
- Convection settings: Use convection mode to promote even browning and reduce baking time by 5 minutes
- Crust development: Watch for caramelization without burning; rotate pastries halfway through if needed
- Cooling protocol: Transfer immediately to wire racks to prevent steam from softening the base
Monitor your pastries closely during the final 5 minutes.
You’ve earned the freedom to bake without guesswork—precision temperature control guarantees consistent, professional results every time.
Serving and Storage Tips
To preserve the crispy exterior and tender layers you’ve worked to develop, be sure to serve your pastries within 2-4 hours of baking while they’re still warm and structurally sound.
Store cooled Danish pastries in an airtight container at room temperature for up to 2 days—this shelf life depends on humidity and filling composition.
Refrigeration extends shelf life to 5 days; however, it compromises crispness.
Freeze unbaked laminated dough for 3 months or baked pastries for 2 months in freezer bags.
For presentation ideas, arrange pastries on a clean surface, showcase the visible lamination, and dust with powdered sugar if desired.
Reheat frozen pastries at 325°F for 8-10 minutes to restore textural integrity without degrading the delicate butter layers.
Frequently Asked Questions
Can I Make Danish Pastries Without Butter or Use a Substitute?
You can absolutely liberate yourself from traditional butter. Vegan margarine works excellently—it’s formulated to replicate butter’s lamination properties, giving you those signature flaky layers you’re after.
Coconut oil offers another option, though it’ll yield slightly different texture. For ideal results with coconut oil, you’ll need to chill it thoroughly and work quickly.
Vegan margarine typically delivers superior results because it’s engineered specifically for pastry lamination. Both substitutes demand precision in temperature control and technique to achieve proper dough stratification.
How Far in Advance Can I Prepare Danish Pastries Before Baking?
You can prepare your Danish pastries up to 24 hours before baking.
Shape them, then place them on parchment paper.
Cover loosely and refrigerate for overnight proofing.
This cold retardation develops flavor complexity while allowing you to bake fresh pastries whenever you want.
Before baking, let them reach room temperature for 30-45 minutes.
You’re in complete control—prep on your schedule, bake when ready.
What’s the Best Way to Store Leftover Danish Pastries?
You’ll preserve your Danish pastries best by storing them in an airtight container at room temperature storage for up to two days. They’ll maintain ideal texture and flavor this way.
For longer storage, freeze them up to three months. When you’re ready to enjoy them again, use reheating techniques like a 350°F oven for five minutes to restore their crispy exterior and soft, laminated interior. This method prevents sogginess while reviving their fresh-baked quality.
Why Did My Pastries Turn Out Dense Instead of Flaky?
You’ve likely encountered incorrect lamination or overproofing problems.
If you didn’t fold your butter layers precisely, you’ve compromised the separation needed for flakiness.
Overproofing causes your dough to collapse during baking, eliminating air pockets.
You’ll want to control fermentation timing strictly—don’t let bulk or final proof exceed recommended intervals.
Make sure your butter stays cool and consistent throughout folding.
These technical adjustments’ll give you the crispy, layered texture you’re after.
Can I Freeze Danish Pastry Dough for Later Use?
You can absolutely freeze Danish pastry dough. Wrap it tightly in freezer packaging to prevent freezer burn and oxidation. Store it for up to three months at 0°F or below.
When you’re ready, thaw it in your refrigerator overnight—this controlled thawing method preserves the dough’s structural integrity and lamination layers. Avoid rapid thawing, which compromises your pastry’s flaky texture and rise potential.

Leave a Comment