Key Takeaways
- Prepare pie crust by cutting cold butter into flour, add ice water until dough holds together, then refrigerate at least 30 minutes before rolling and chilling again.
- Sort blueberries, remove stems, mix with cornstarch and sugar, add lemon juice and spices, then let rest 15 minutes before filling the crust.
- Bake at 425°F for 20 minutes, reduce to 375°F, then bake 25–30 minutes more until filling bubbles and crust turns golden brown.
- Cool pie on a wire rack for at least two hours, preferably overnight, before slicing to allow filling to set completely.
- Store cooled pie covered in the refrigerator for up to four days, or freeze whole for two months or individual slices for three months.
Gathering Your Ingredients
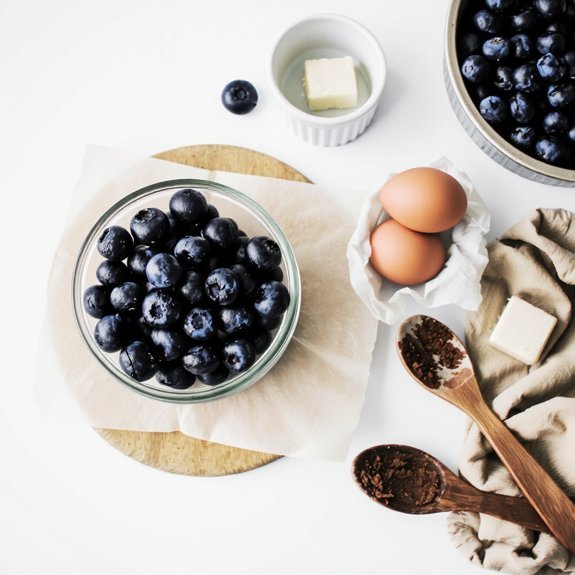
Before you begin mixing, gather your ingredients: two cups of all-purpose flour, one cup of granulated sugar, half a teaspoon of salt, three-quarters cup of cold unsalted butter (cut into cubes), one large egg yolk, three to four tablespoons of ice water, five cups of fresh blueberries, two tablespoons of cornstarch, one tablespoon of lemon zest, two tablespoons of fresh lemon juice, and one-quarter teaspoon of nutmeg.
For seasonal sourcing, you’ll want to purchase blueberries during peak harvest months for maximum freshness and flavor. If you’re managing allergies, you’ve got flexibility: substitute all-purpose flour with gluten-free alternatives, or replace butter with coconut oil. Source your ingredients from local farmers’ markets when possible—you’ll gain quality control and support regional producers. Make sure your butter stays cold; you’ll achieve superior crust texture. Double-check ingredient measurements before proceeding, as precision directly impacts your pie’s success.
Making the Perfect Pie Crust
With your ingredients assembled and your butter properly chilled, you’ll now combine them into a cohesive dough.
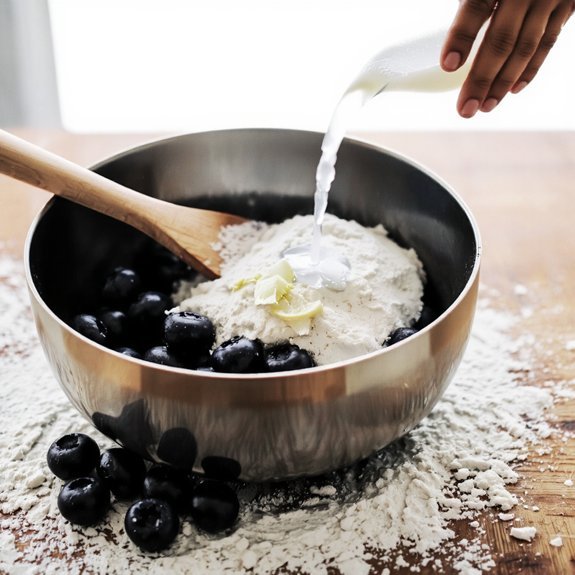
Using historic techniques refined over centuries, you’ll cut cold butter into flour until the mixture resembles coarse breadcrumbs—this textural science creates pockets of fat that steam during baking, producing flakiness.
Cut cold butter into flour using historic techniques to create pockets of fat that steam during baking, producing exceptional flakiness.
Add ice water gradually, mixing just until the dough holds together.
Overworking develops gluten, resulting in toughness rather than tenderness.
You’re aiming for a shaggy mass, not a smooth ball.
Wrap your dough in plastic and refrigerate for at least thirty minutes.
This resting period allows gluten to relax and flour to fully hydrate, ensuring easier rolling and superior structure.
When ready, roll between parchment sheets to your desired thickness, then transfer to your pie pan.
You’ve now mastered the foundation of an exceptional blueberry pie.
Preparing Your Blueberries
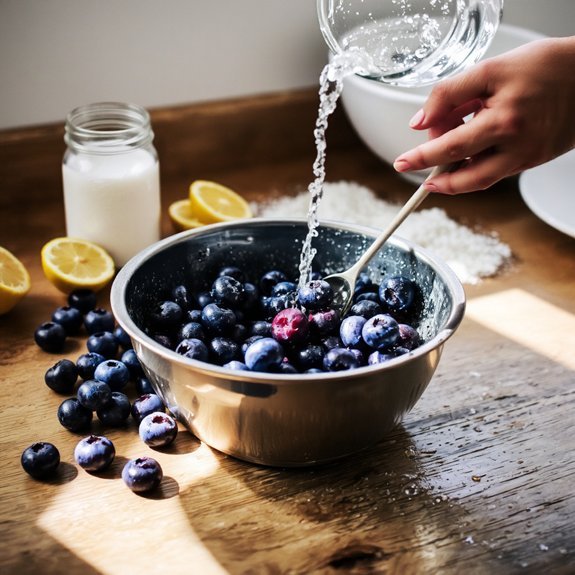
Selecting and sorting your blueberries establishes the quality foundation for your filling.
You’ll want to discard any moldy or damaged berries that compromise texture and taste.
Rinse your blueberries gently under cool water, then pat them dry with paper towels—excess moisture weakens your crust and extends baking time.
Next, focus on stem removal.
You can pick off stems individually or use your fingernail to flick them away efficiently.
Some bakers prefer removing stems after cooking, but pre-cleaning gives you better control.
Once cleaned, you’ve got options.
Use fresh berries directly in your filling, or macerate them with sugar thirty minutes beforehand to release their juices.
This step intensifies flavor and creates a thicker filling that won’t make your crust soggy.
Your preparation determines your pie’s success.
Creating the Filling Mixture
Combining your prepared blueberries with thickening agents and seasonings creates the foundation of your pie’s flavor and texture.
You’ll want to mix your berries with cornstarch or tapioca starch—about two tablespoons per four cups of berries—to achieve the right consistency without a gummy result.
Mix berries with cornstarch or tapioca starch—two tablespoons per four cups—for ideal consistency without gumminess.
Next, you’ll address acid balance by adding lemon juice, which brightens the filling and prevents excessive sweetness. Start with two tablespoons and adjust to taste.
Consider your spice pairings carefully; cinnamon, nutmeg, or cardamom complement blueberries without overpowering them. Add a pinch of salt to enhance overall flavor complexity.
Combine sugar—typically three-quarters cup—with your thickening agent first, then fold in the blueberries gently. This prevents crushing the fruit.
Let the mixture rest for fifteen minutes, allowing the starch to activate before pouring into your crust.
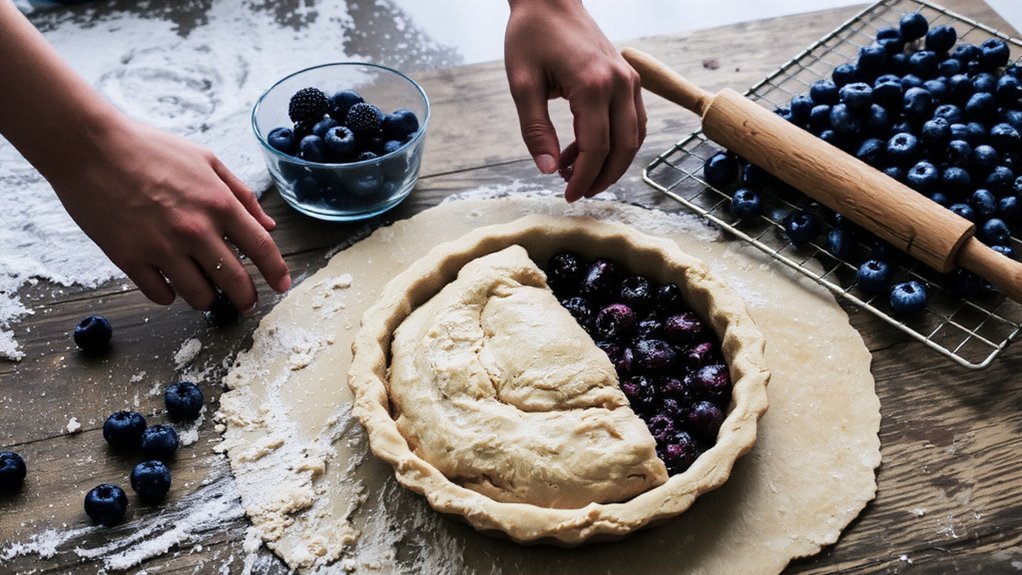
Assembling Your Pie
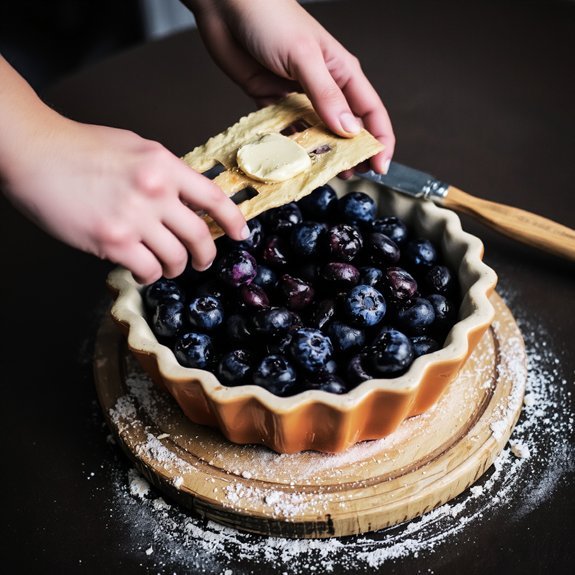
Pour your rested blueberry filling into your prepared pie crust, ensuring you’ve distributed it evenly across the bottom.
Set up your assembly station with all necessary components within arm’s reach: your crust, filling, and top crust or lattice strips.
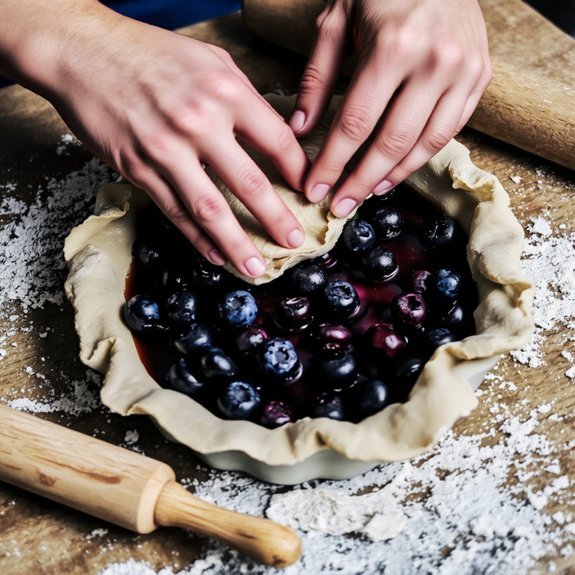
Follow this layer sequence: position the filled bottom crust, then carefully place your top crust over the filling.
Press the edges firmly together, crimping with a fork or your fingers to seal.
Trim any excess dough hanging beyond the pie’s rim.
Cut four to six steam vents into the top crust using a sharp knife. This prevents pressure buildup during baking.
If you’re using a lattice pattern, weave strips over the filling before sealing the edges.
Your assembled pie’s now ready for the oven.
Crimping and Decorating the Edges
Once you’ve sealed your pie’s perimeter, you’ll want to focus on creating an attractive, functional edge that both looks polished and helps contain the filling during baking.
You’ve got two excellent options to choose from.
For a classic sugared rim, brush your crust edge with egg wash, then generously coat it with coarse sugar.
This creates a crystalline, decorative finish that caramelizes beautifully during baking.
Alternatively, try a braided rim for sophisticated flair.
Twist two thin dough strips together and press them along your sealed edge, sealing with egg wash.
This technique demands precision but rewards you with an undeniably professional appearance.
Both methods require you to work efficiently before your dough warms excessively.
Choose whichever approach aligns with your skill level and desired aesthetic.
Baking Your Blueberry Pie
You’ll want to preheat your oven to 425°F and place your crimped pie on a baking sheet to catch any filling drips.
Bake for 20 minutes at the higher temperature, then reduce the heat to 375°F and bake for an additional 25–30 minutes until the crust turns golden brown and the filling bubbles slightly at the edges.
If your crust browns too quickly, tent it loosely with aluminum foil during the final baking stages.
Preparing Your Pie Crust
Before assembling your blueberry pie, you’ll need to ready your crust—whether you’re using a pre-made version or one you’ve made from scratch.
If you’ve opted for a homemade crust, roll it out on a floured surface to approximately one-eighth inch thickness.
Carefully transfer it to your pie dish, making sure it fits snugly without stretching.
Trim excess dough, leaving a half-inch overhang for crimping the edges.
For gluten-free substitutions, use specialized blends designed for pastry work—they’ll yield comparable texture and structure. Chill your prepared crust for at least thirty minutes before filling; this prevents shrinkage during baking.
Maintain your rolling pin and pie dish regularly. Wash tools immediately after use, dry thoroughly, and store properly to promote longevity and prevent rust or warping that could compromise your baking results.
Filling and Baking Tips
With your crust properly chilled and fitted, you’re ready to fill and bake your pie.
Pour your blueberry filling into the crust, distributing berries evenly.
Cover the edges with foil to prevent over-browning, then bake at 375°F for 50-60 minutes until the filling bubbles at the edges.
Make humidity control adjustments by cracking your oven door slightly during the final 10 minutes if moisture accumulates on the crust.
For altitude adjustments above 3,000 feet, increase oven temperature by 25°F and reduce baking time by 5-10 minutes to guarantee proper setting.
Test doneness by inserting a knife near the center; it should encounter resistance from thickened filling.
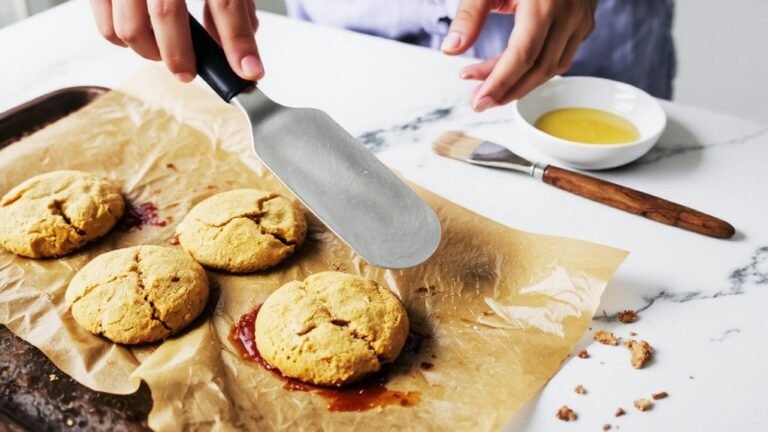
Allow your pie to cool completely on a wire rack before slicing, enabling the filling to set properly.
Cooling and Serving Tips
You’ll cool your blueberry pie at room temperature for at least two hours before slicing, which allows the filling to set properly and prevents a runny texture. Once cooled, you can store the pie covered in the refrigerator for up to three days, or wrap it tightly and freeze it for up to two months.
When you’re ready to serve, slice with a sharp knife dipped in hot water between cuts, and pair your pie with vanilla ice cream or whipped cream if desired.
Proper Cooling Techniques
Once your blueberry pie emerges from the oven, resist the urge to slice it immediately—the filling hasn’t fully set and’ll run across the plate if cut too soon.
Place your pie on a wire rack, which promotes efficient heat transfer and prevents the crust from becoming soggy due to trapped steam.
The rack’s material conductivity allows air circulation underneath, cooling the bottom evenly.
Let it rest at room temperature for at least three hours, though overnight cooling guarantees ideal results.
Avoid refrigeration during this phase—sudden temperature changes can crack the filling.
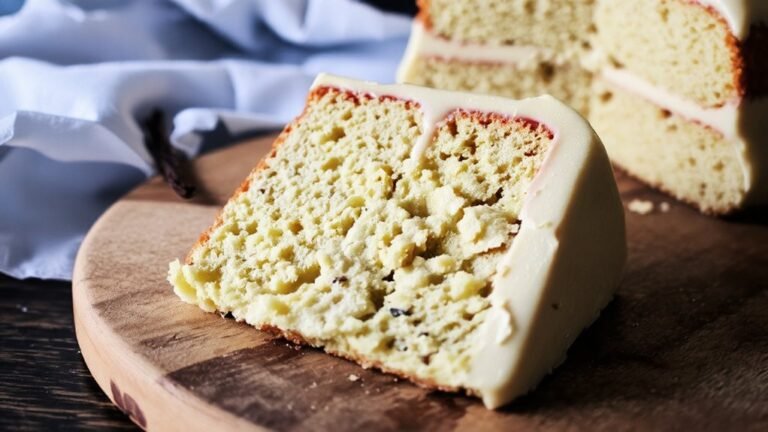
Once fully cooled, you’ll control when and how you serve your pie. This patience yields perfectly sliced portions with a stable, flavorful filling that showcases your baking mastery.
Serving and Storage
How should you approach serving your cooled blueberry pie to maximize flavor and presentation?
Slice your pie with a sharp knife dipped in hot water between cuts for clean edges.
Serve at room temperature or chilled, depending on your preference—both bring out distinct flavor profiles.
Standard portion sizing yields eight slices per pie, though you can adjust based on appetite.
For storage, refrigerate your pie in an airtight container for up to four days.
The filling sets properly when chilled, improving texture and taste.
For extended preservation, wrap individual slices tightly and place them in freezer storage for up to three months.
Thaw frozen slices overnight in your refrigerator before serving.
This approach maintains quality while giving you control over your consumption schedule.
Frequently Asked Questions
Can I Make Blueberry Pie Filling Ahead of Time and Refrigerate It Overnight?
You can absolutely prepare your blueberry pie filling ahead and refrigerate it overnight.
This method actually enhances flavor development as the blueberries meld with sugar and lemon juice.
For texture preservation, you’ll want to store the filling in an airtight container.
When you’re ready to bake, pour the chilled filling directly into your crust.
The cold filling bakes evenly, preventing a soggy bottom while maintaining the berries’ integrity throughout the baking process.
What’s the Best Way to Prevent a Soggy Bottom Crust in Blueberry Pie?
You’ll prevent a soggy bottom crust by blind baking your pie shell at 375°F for 10-12 minutes until it’s set but not fully cooked. This creates a protective barrier.
Next, you’re free to sprinkle a cornmeal barrier across the bottom—it’ll absorb excess moisture from your blueberry filling. Once you’ve added your filling, bake as directed. This two-step approach gives you complete control over crust texture and prevents sogginess every time.
Can I Freeze an Unbaked Blueberry Pie Before Baking It?
Yes, you can freeze your unbaked blueberry pie.
Wrap it tightly with plastic wrap and aluminum foil using proper wrapping techniques to prevent freezer burn and oxidation.
You’ll maintain quality for up to three months.
When ready to bake, follow these thawing guidelines: don’t thaw beforehand.
Bake directly from frozen, adding five to ten minutes to your standard baking time.
This approach preserves your crust’s integrity and filling consistency.
How Do I Know When My Blueberry Pie Is Fully Baked and Done?
You’ll know your blueberry pie’s done when the crust color turns golden brown throughout. Watch for juice bubbling vigorously at the pie’s edges and through any vents you’ve cut.
The filling shouldn’t bubble weakly—it needs that active, rolling motion. Insert a knife into the center; the filling should resist slightly rather than flow freely. These signs guarantee you’ve baked it perfectly without overcooking or leaving it underdone.
Can I Substitute Frozen Blueberries for Fresh Blueberries in This Recipe?
Yes, you can substitute frozen blueberries for fresh ones.
Thaw them completely and drain excess liquid to maintain moisture control.
You’ll notice reduced flavor intensity since freezing diminishes some volatile compounds.
Don’t thaw blueberries before adding them to your filling—you’ve got freedom to toss them in frozen, which prevents excess moisture from compromising your pie’s structural integrity and crust quality during baking.


Leave a Comment