Key Takeaways
- Mix 3 cups flour, 1½ teaspoons salt, ½ teaspoon yeast, and 1 tablespoon sugar; add 1 cup warm water and 2 tablespoons oil.
- Knead dough 8–10 minutes until smooth and elastic, using push-fold-rotate technique with firm wrist pressure until it springs back.
- Bulk ferment at room temperature 4–6 hours in an airtight container, performing gentle stretch-and-folds every 90 minutes for gluten development.
- Divide into 8 portions, flatten each to ¼-inch thickness as 6-inch rounds, and stamp with fork or fingertips before cooking.
- Cook on preheated 500°F cast iron 2–3 minutes per side until golden-brown spots appear, or bake at 475°F for 8–12 minutes with steam injection.
Ingredients You’ll Need
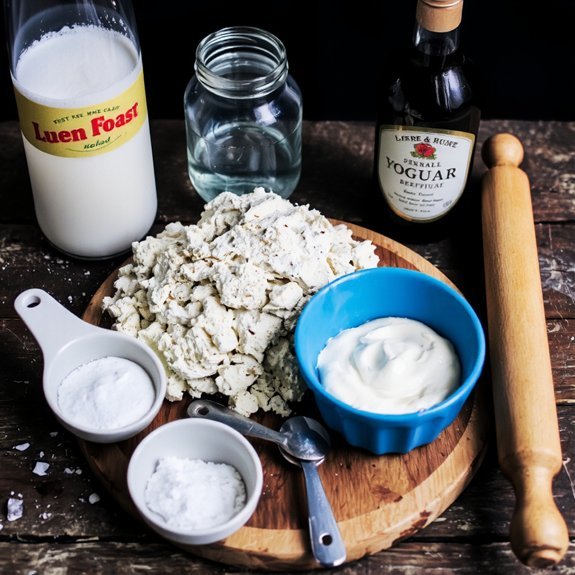
You’ll need 3 cups all-purpose flour, 1½ teaspoons salt, ½ teaspoon instant yeast, 1 tablespoon sugar, 2 tablespoons vegetable oil, and 1 cup warm water to form your dough base.
Master naan with 3 cups flour, salt, yeast, sugar, oil, and warm water as your essential dough foundation.
For enhanced flavor and nutrition, you’re free to experiment with flour varieties like whole wheat, spelt, or chickpea flour.
Substitute up to one cup of all-purpose flour with your preferred alternative.
You’ll also want dairy alternatives for brushing your finished naan.
Ghee remains traditional, but you can use melted butter, coconut oil, or olive oil based on your dietary preferences.
Optional toppings include nigella seeds, garlic, or fresh herbs.
These ingredients are flexible—adjust ratios according to your taste and texture preferences without compromising the dough’s structural integrity.
2. Preparing Your Dough
You’ll start by whisking together your dry ingredients—2 cups all-purpose flour, 1/2 teaspoon salt, and 1/2 teaspoon baking powder—in a large bowl.
Next, you’ll create a well in the center and add 3/4 cup yogurt and 2 tablespoons oil.
Then knead the mixture for 8-10 minutes until you’ve achieved a smooth, elastic dough.
This kneading process develops the gluten structure necessary for naan’s characteristic texture and chew.
Mixing Dry Ingredients
Before combining wet and dry components, it’s essential to properly measure and blend your dry ingredients to guarantee even distribution of leavening agents and salt throughout the dough.
You’ll achieve ideal results by following these steps:
- Sift 3 cups all-purpose flour with 1.5 teaspoons baking powder to eliminate lumps and incorporate air
- Add 1 teaspoon salt to your sifted mixture for flavor control and gluten development
- Whisk thoroughly for 30 seconds, ensuring uniform distribution of leavening agents
- Reserve your blended dry mixture in a separate bowl until ready to combine with wet ingredients
Sifting benefits include breaking up compacted flour and distributing baking powder evenly.
This technical precision prevents dense, unevenly risen naan.
You’re taking command of your baking outcomes by mastering these fundamental dry ingredient techniques.
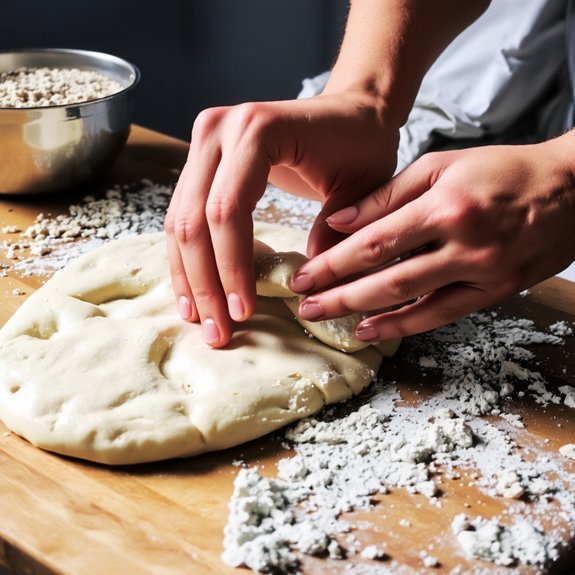
Hydrating and Kneading
Combining your dry ingredients with wet components requires precise liquid ratios and controlled kneading technique to develop the gluten structure essential for naan’s characteristic texture.
Add your yogurt and water gradually—typically 1:1 ratio—observing how hydration chemistry transforms your flour into workable dough.
You’ll want approximately 65-70% hydration for ideal elasticity.
Knead for 8-10 minutes using proper wrist ergonomics: position your hands to minimize strain while applying consistent pressure.
Push the dough away, fold it back, rotate 90 degrees, and repeat.
Your dough should shift from shaggy to smooth and slightly tacky—never sticky.
This kneading phase develops gluten networks that trap steam during baking, creating naan’s signature puffed interior.
You’ve now got properly conditioned dough ready for fermentation.
3. Understanding the Rising Process
You’ll begin your first rise by letting the dough develop at room temperature (68-72°F) for 4-6 hours, during which the yeast ferments and roughly doubles in volume.
This bulk fermentation timeline activates the gluten network and builds flavor complexity through enzymatic activity, with your dough’s readiness indicated by gentle bubbling and a slightly domed surface.
You can adjust fermentation duration based on ambient temperature—warmer conditions accelerate the process, while cooler environments extend it and enhance flavor development.
First Rise Fundamentals
The dough’s first rise—typically lasting 1–2 hours at room temperature (68–72°F)—activates the yeast and develops gluten structure, which traps CO₂ and creates the bread’s characteristic texture.
You’ll want to optimize your proofing location and container selection for consistent results.
- Choose an airtight container that’s 2–3 times larger than your dough’s volume
- Maintain a proofing location free from drafts and temperature fluctuations
- Monitor dough expansion—it should roughly double in size
- Test readiness by pressing gently; the dough should spring back slowly
Your container selection directly impacts fermentation consistency.
A sealed bowl prevents surface drying while allowing proper gas exchange.
Position your proofing location away from direct sunlight and heat sources.
You’ll achieve ideal rise when the dough’s internal temperature reaches 75–78°F, ensuring proper yeast activation and gluten development throughout.
Bulk Fermentation Timeline
As your dough progresses beyond its initial rise, bulk fermentation becomes the critical phase where flavor development and gluten maturation accelerate simultaneously.
You’ll manage this stage by monitoring temperature mapping—ideally maintaining 75–78°F for best results.
This window typically spans 4–8 hours, depending on ambient conditions and your desired flavor profile.
You’re building complex taste through extended fermentation, allowing wild yeasts and bacteria to produce organic acids.
Check your dough every 90 minutes, performing gentle stretch-and-folds to develop structure without degassing it entirely.
You’ll notice increased extensibility and slight bubbling throughout the mass.
Temperature control directly impacts fermentation speed: warmer environments accelerate the process, while cooler conditions extend it, deepening flavor complexity.
You’ve got flexibility here—adjust timing based on your schedule and environmental conditions.
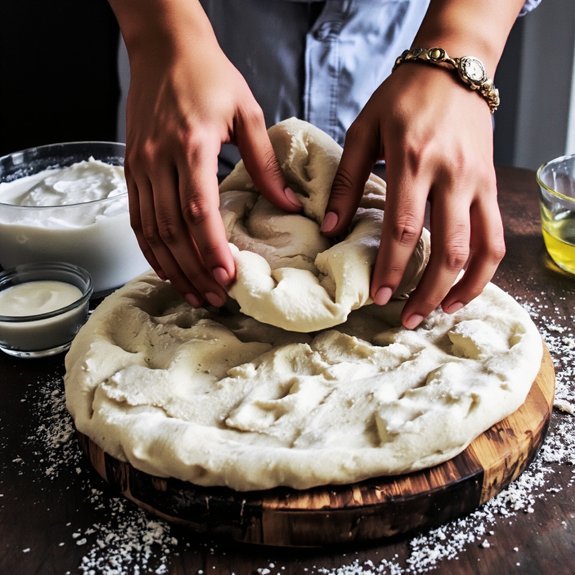
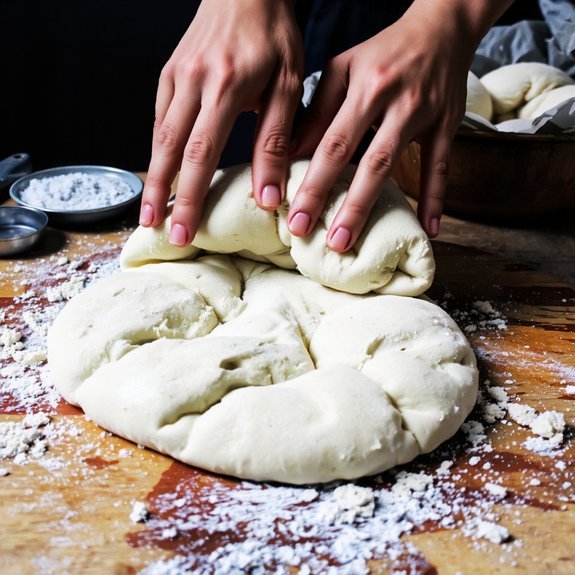
4. Kneading Techniques for Perfect Texture
Developing gluten structure through proper kneading creates the characteristic chewy yet tender crumb that defines authentic naan.
You’ll master this technique by employing strategic wrist motion and controlled finger pressure.
Here’s your kneading protocol:
- Use a 3:2 flour-to-water ratio as your foundation
- Apply firm wrist motion in circular patterns for 8-10 minutes
- Maintain consistent finger pressure without overworking the dough
- Test readiness when the dough becomes smooth and elastic
Your hands control the outcome.
Push the dough away using your palm’s heel, fold it back, rotate a quarter-turn, and repeat.
This rhythmic motion develops elasticity without creating toughness.
You’re not fighting the dough—you’re coaxing it into submission.
Stop kneading when it springs back immediately after pressing.
This precision determines whether you’ll achieve restaurant-quality naan or dense, lifeless flatbread.
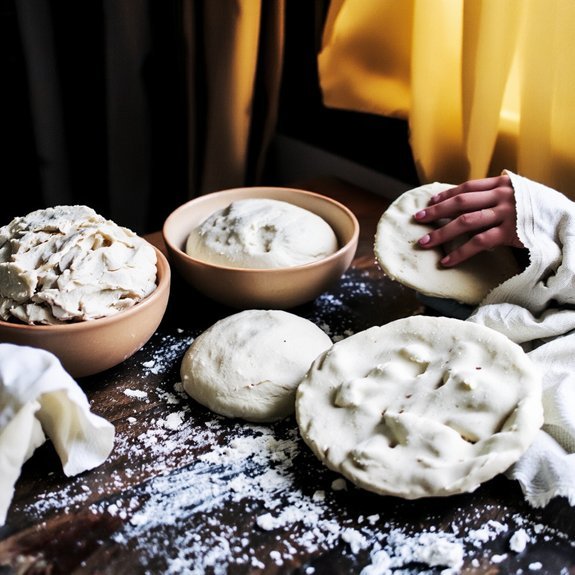
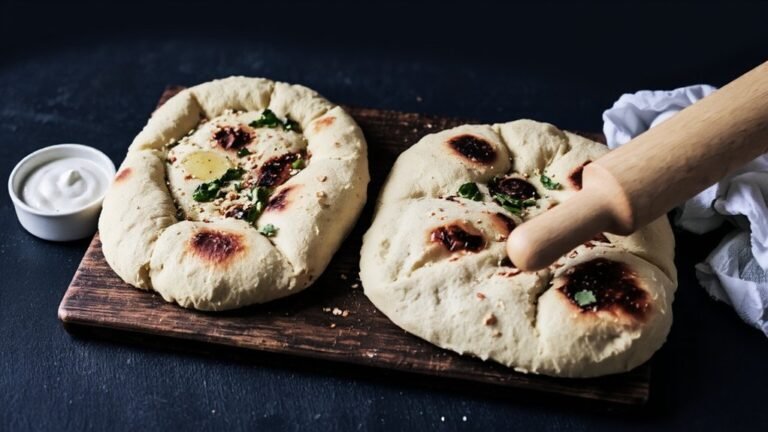
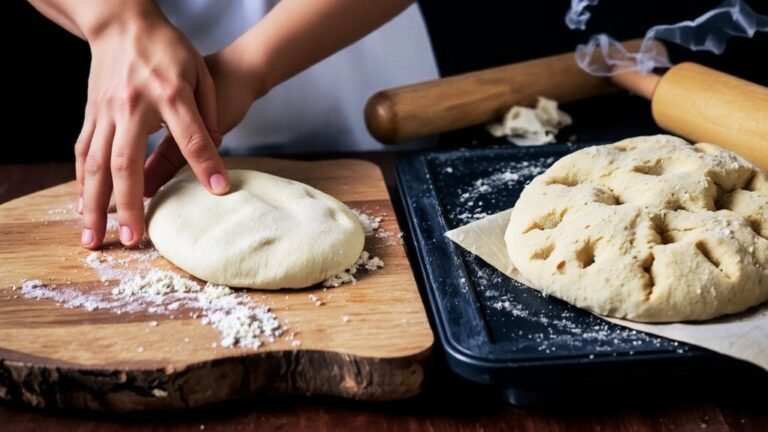
5. Shaping Your Naan Bread
Once your dough reaches that springy, elastic state, you’re ready to shape it into individual naan rounds.
Divide your dough into 8 equal portions, each weighing approximately 75-80 grams. Roll each piece into a ball, then flatten it into a 6-inch oval or round. You’ll control the thickness—aim for ¼ inch for ideal texture.
| Technique | Result | Best For |
|---|---|---|
| Hand-stretching | Rustic, uneven thickness | Traditional appeal |
| Rolling pin | Uniform ¼-inch consistency | Predictable cooking |
| Cast iron pressing | Charred edges, puffed center | High-heat performance |
Experiment with shape variations: traditional ovals, elongated rectangles, or irregular rustic forms. Apply pattern stamping using a fork or fingertips before cooking—this controls puffing and creates authentic texture. Your dough’s elasticity won’t resist proper shaping when you’ve kneaded correctly.
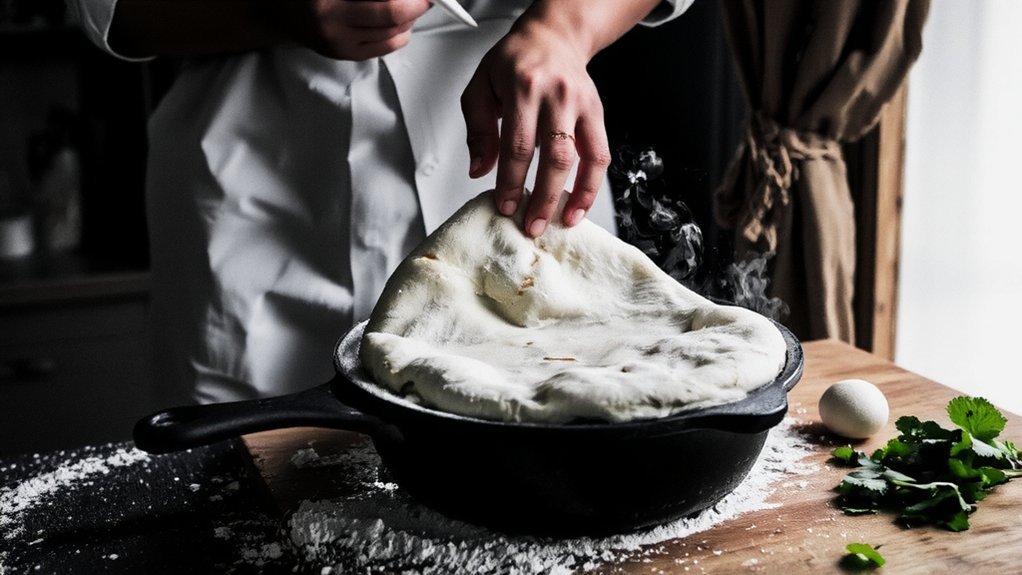
6. Cooking on the Stovetop
Your cast iron skillet or heavy-bottomed pan should reach 500°F before you place your first naan on it—this temperature’s critical for achieving the characteristic blistering and puffing that define properly cooked naan.
Your cast iron skillet must reach 500°F—this temperature’s critical for achieving the characteristic blistering and puffing that define properly cooked naan.
Pan selection determines your success.
Cast iron retains heat uniformly, giving you consistent results every time.
Here’s your stovetop protocol:
- Preheat your pan for 5-7 minutes at medium-high heat
- Place shaped dough directly on the surface without oil
- Cook 2-3 minutes until golden spots appear on the bottom
- Flip and cook the reverse side for 1-2 minutes
Heat control’s essential—maintain steady temperature throughout.
Don’t overcrowd your pan; work in batches.
You’ll achieve that restaurant-quality char and authentic texture that justifies your effort.
7. Baking in the Oven
While stovetop cooking delivers exceptional results, oven-baking offers an alternative method that produces equally impressive naan with less hands-on attention.
Preheat your oven to 475°F and position your rack in the upper third for ideal heat exposure.
Place your prepared dough on a preheated baking stone or steel surface.
Implement steam injection by placing a shallow water pan on the lower rack, creating the moisture necessary for proper crust development and characteristic blistering.
Bake naan for 8-12 minutes, depending on thickness and your specific oven’s heat distribution.
The bread should achieve golden-brown spots and slight charring.
This method frees you from constant monitoring while maintaining the authentic texture and flavor profile of traditional naan, giving you the independence to attend other tasks during the baking process.
8. Achieving the Perfect Golden Char
How does one achieve that coveted deep golden-brown exterior with charred spots that define exceptional naan? Master these techniques:
- Maximize heat intensity – Crank your oven to 500°F (260°C) for ideal Maillard reaction development
- Control smoke strategically – Position racks to prevent excessive smoke while allowing surface browning
- Monitor timing precisely – Bake 3-4 minutes per side; don’t exceed this window
- Apply finishing touches – Brush with ghee or oil at 1:1 ratio immediately after removal
The Maillard reaction creates those characteristic charred spots you’re after.
You’ll notice browning accelerates rapidly at high temperatures.
This chemical process develops complex flavors that define authentic naan.
Smoke control remains critical—excessive smoke indicates temperature loss or poor ventilation.
Your freedom to experiment lies in adjusting rack position and timing based on your oven’s unique characteristics.
9. Serving and Storage Tips
Since naan’s quality deteriorates rapidly once it cools, you’ll want to serve it within 15 minutes of baking for ideal texture and flavor. Wrap warm naan in cloth to retain moisture and heat during serving.
| Storage Method | Duration | Temperature |
|---|---|---|
| Room Temperature | 2-3 hours | 68-72°F |
| Refrigerator | 5 days | 40°F |
| Freezer Storage | 3 months | 0°F or below |
Your serving suggestions should pair naan with curries, dips, or kebabs to maximize its versatility. For freezer storage, wrap individual pieces in parchment, then seal in airtight containers to prevent freezer burn. Reheat frozen naan directly on your stovetop or oven at 350°F for 2-3 minutes, restoring its characteristic chew and slight char without compromising structure or taste.
Frequently Asked Questions
Can I Make Naan Bread Without Yeast or Yogurt?
You can absolutely make naan bread without yeast or yogurt by substituting baking powder as your leavening agent.
Use a 2:1 flour-to-baking powder ratio for reliable rise.
Replace yogurt with dairy alternatives like coconut milk or plant-based options at a 1:1 ratio.
This approach gives you complete control over your ingredients while maintaining authentic texture.
You’ll achieve similar results with precise measurements and proper technique, liberating yourself from traditional constraints.
What’s the Difference Between Naan and Other Indian Breads?
Naan differs fundamentally in its leavened textures—you’ll achieve that characteristic pillowy interior through yeast fermentation, creating air pockets that other Indian breads don’t possess.
Regional varieties like kulcha incorporate fillings, while chapati remains unleavened.
You’ll notice naan’s superior rise and chew compared to dosa or roti.
The ideal ingredient ratio of 3:1 flour-to-yogurt guarantees proper hydration.
You’re not bound by traditional methods; experiment with your preferred leavening agents for personalized results.
How Do I Fix Dough That’s Too Sticky or Dry?
You’ll master hydration adjustment by adding flour incrementally to sticky dough—roughly 1 tablespoon per cup of flour.
For dry dough, introduce water gradually, 1 teaspoon at a time. You’re aiming for a 60-65% hydration ratio.
If you’re experimenting, flour substitutes like whole wheat or chickpea flour require different ratios; reduce liquid by 10-15% accordingly. This precision gives you control over your naan’s texture and your baking freedom.
Can I Prepare Naan Dough the Night Before Baking?
You can absolutely prepare naan dough the night before baking. An overnight rest develops superior flavor and texture through slow fermentation.
You’ll want a dough ratio of 3:1 flour to water with 1% salt and 0.5% instant yeast. Advance shaping isn’t necessary—simply refrigerate your bulk dough covered. The overnight rest allows you complete freedom to bake fresh naan whenever you choose the next day.
What Equipment Do I Need if I Lack a Traditional Tandoor?
You’ll achieve excellent results with either a cast iron skillet or pizza stone.
Heat your cast iron to high temperatures—it’ll mimic tandoor conditions effectively.
Alternatively, a preheated pizza stone on your oven’s highest rack produces authentic charring and puffing.
Both methods give you complete control over your baking without traditional equipment constraints.
Either option delivers restaurant-quality naan that’s crispy outside, soft inside.


Leave a Comment