Key Takeaways
- Mix flour, yeast, salt, warm water, and olive oil until shaggy dough forms, then hand-knead 8–10 minutes until smooth and elastic.
- Let dough rise at room temperature 1–2 hours until doubled, or refrigerate 8–48 hours for enhanced flavor complexity.
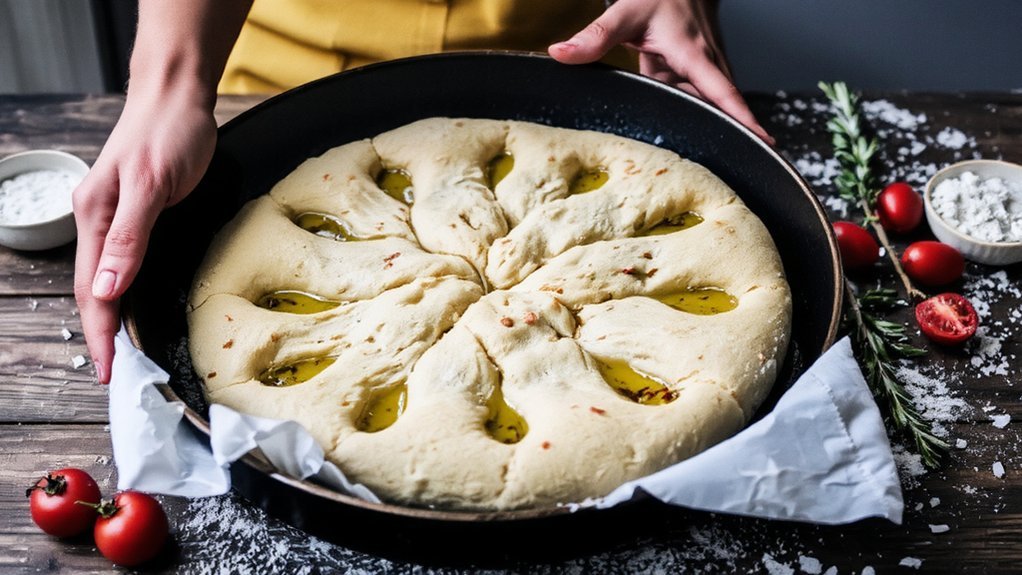
- Stretch dough into 9×13-inch pan, create uniform dimples 1–1.5 inches apart, drizzle with olive oil, and add toppings.
- Press sea salt, herbs, and cheese gently into dimples to secure toppings and prevent burning during baking.
- Bake at 425°F for 18–22 minutes on lower-middle rack with water pan below until golden-brown and hollow-sounding when tapped.
Gathering Your Ingredients and Tools
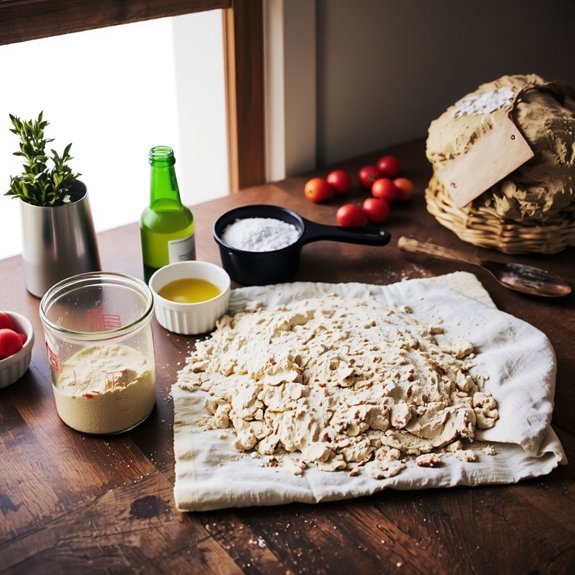
Before you start mixing your dough, you’ll need to assemble 3½ cups of all-purpose flour, 1½ teaspoons of instant yeast, 1¼ teaspoons of salt, 1 cup of warm water (110°F), 3 tablespoons of olive oil, plus 2 tablespoons of olive oil for the pan, and 1 teaspoon of coarse sea salt for topping.
For ingredient sourcing, select high-quality, unbleached flour and extra-virgin olive oil.
Source your yeast from reputable suppliers to guarantee viability.
Your essential tools include a digital scale for precise measurements, a large mixing bowl, a stand mixer with dough hook attachment, and a 9×13-inch baking pan.
Prior to use, verify tool maintenance by cleaning your mixer thoroughly and ensuring your scale calibrates correctly.
Keep your bowl dry and free from residue.
Prepare your workspace with adequate counter space and verify your oven rack positions correctly for even baking.
Mixing and Kneading the Dough
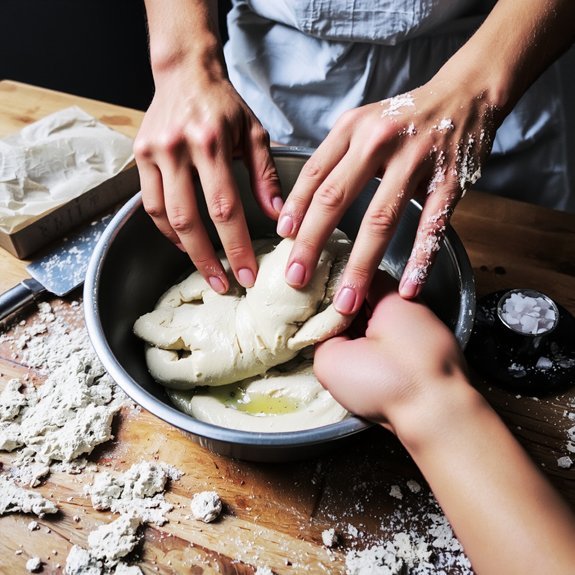
You’ll combine your dry ingredients—flour, salt, and instant yeast—in a large bowl, then create a well in the center and pour in your warm water and olive oil.
Knead the mixture for 8-10 minutes using the heel of your hand with a push-fold-turn motion until you’ve developed a smooth, elastic dough that’s slightly sticky but doesn’t cling to your fingers. Your finished dough should pass the windowpane test: stretch a small piece between your fingers, and it should form a thin, translucent membrane without tearing.
Combining Dry and Wet Ingredients
Once you’ve assembled your dry ingredients in a large mixing bowl, create a well in the center and pour in your combined wet ingredients—water, olive oil, and yeast mixture.
Use measurement precision to achieve accurate ratios: typically 500g flour, 325ml water, 50ml olive oil, and 7g instant yeast.
Gently fold the wet ingredients into the dry using a wooden spoon until no dry flour remains. If you’re using gluten alternatives, reduce water slightly since they absorb differently. Mix for approximately two minutes until the dough comes together. Don’t overmix at this stage.
The dough should feel shaggy and slightly sticky. You’re now ready for the kneading phase, where development continues. Proper ingredient combination creates the foundation for focaccia’s characteristic airy crumb structure.
Kneading Techniques and Timing
Now that your dough’s come together in its shaggy state, kneading transforms it into a smooth, elastic mass ready for rising.
You’ll work the dough for 8-10 minutes by hand, developing gluten strands that give focaccia its characteristic texture.
Push the dough away with your palm heel, fold it back, rotate, and repeat.
Don’t buy into kneading folklore suggesting you need 15+ minutes—modern mixing methods are efficient.
You’ve achieved proper development when the dough springs back slowly after poking.
Timing myths claim only machines produce adequate results. You’re perfectly capable doing this manually. Stop when your dough becomes smooth, slightly tacky, and holds its shape.
This stage indicates sufficient gluten development for an ideal rise and structure during fermentation.
Achieving Proper Dough Consistency
How do you know when your dough’s reached the right consistency?
You’ll rely on both tactile feedback and visual cues.
Your dough should feel slightly tacky but not sticky—it shouldn’t cling excessively to your fingers.
Visually, it’ll transform from shaggy to smooth and elastic.
Start with 500g flour and 350ml water at 20°C.
Mix until a rough mass forms.
Knead for 10 minutes until the dough becomes supple.
It should pass the windowpane test: stretch a small piece until light shines through without tearing.
The dough’s temperature should reach 26–27°C after kneading.
Check consistency by poking your finger in—it’ll spring back slowly but not instantly.
This indicates proper gluten development and hydration balance, giving you the freedom to shape focaccia confidently.
The First Rise: Developing Flavor and Texture
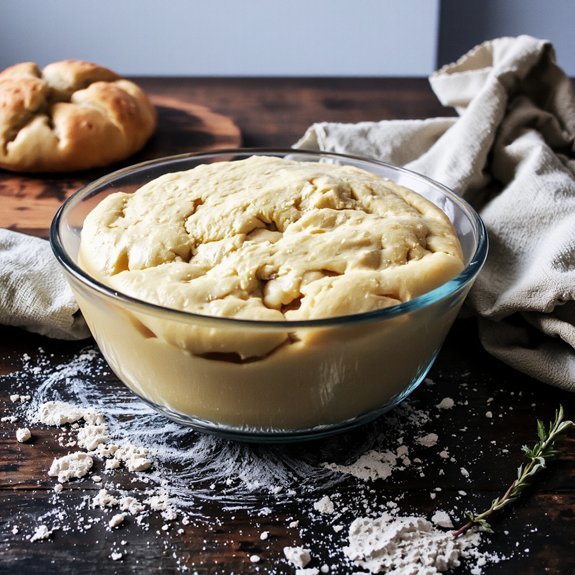
After you’ve mixed your dough, you’ll transfer it to a lightly oiled bowl and cover it with plastic wrap or a damp kitchen towel.
Let it rest at room temperature for 1-2 hours until it doubles in volume. This initial fermentation develops gluten structure and creates the foundation for focaccia’s characteristic texture.
For superior flavor complexity, you’ll employ cold fermentation by refrigerating your dough for 8-48 hours at 38-40°F.
This extended timeframe greatly enhances aroma development through slow yeast activity and bacterial fermentation, producing subtle, sophisticated flavors impossible to achieve with rapid proofing alone.
When ready to proceed, remove your dough and let it come to room temperature for 30-45 minutes before shaping.
You’ve now unleashed focaccia’s full flavor potential.
Stretching and Shaping Your Focaccia

With your dough at room temperature, you’re ready to transfer it to your work surface and begin shaping.
With your dough at room temperature, transfer it to your work surface and begin your shaping process.
- Dust your work surface lightly with flour to prevent sticking
- Gently stretch the dough into a rectangular form, approximately 12 by 9 inches
- Use edge folding techniques by folding edges toward the center, then flattening to build strength
- Transfer the shaped dough to your oiled pan for final positioning
Pan positioning matters especially.
Place your focaccia in a 9 by 13-inch baking pan, ensuring even distribution. Press the dough firmly into corners, creating contact with the pan’s surface.
This positioning guarantees uniform heat distribution and ideal crust development. Don’t overwork the dough—you’ll preserve the airy crumb structure you’ve developed.
Your shaped focaccia’s ready for dimpling and topping.
Creating the Signature Dimples
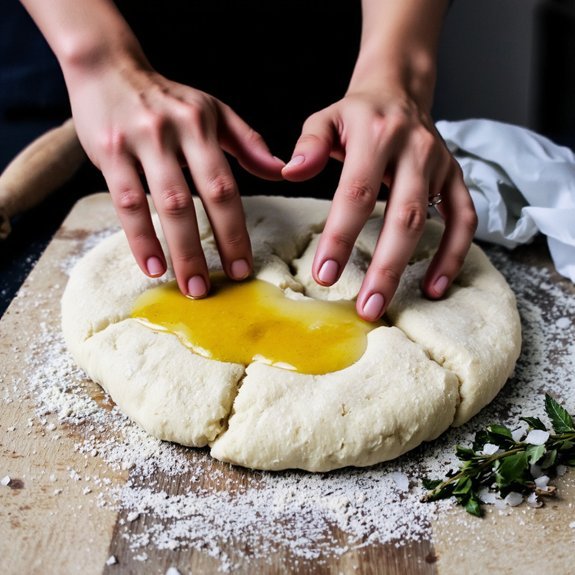
Once your dough’s positioned in the pan, you’ll create focaccia’s distinctive dimpled texture by pressing your fingertips into the surface.
Work methodically across the entire dough, maintaining uniform spacing between each indentation—approximately 1 to 1.5 inches apart.
Press firmly enough to create quarter-inch-deep dimples without puncturing through to the bottom.
This technique serves both functional and aesthetic purposes.
The dimples trap olive oil and seasonings, enhancing flavor distribution.
They’re also decorative motifs that define authentic focaccia.
Use consistent finger pressure and depth throughout.
If you’re incorporating herbs or sea salt, press them gently into each dimple for secure placement.
Work quickly to prevent the dough from over-proofing during this step.
Your uniform spacing creates the characteristic appearance that distinguishes quality focaccia.
Adding Toppings and Final Seasoning
You’ll drizzle extra virgin olive oil evenly across the dimpled surface, using approximately 2-3 tablespoons per focaccia.
Apply the oil in a thin, consistent layer to achieve the characteristic glossy finish and enhance browning during baking.
Finish with coarse sea salt, distributing it uniformly across the top before the final rise or immediately before placing the bread in the oven.
Adding Toppings and Final Seasoning
Before your focaccia enters the oven, you’ll dimple the surface with your fingertips, pressing down at roughly 1-inch intervals to create shallow indentations across the entire dough.
Now customize your focaccia with your preferred toppings:
- Drizzle 2-3 tablespoons of extra virgin olive oil evenly across the dimpled surface
- Sprinkle finishing salts like Maldon or sea salt at 1/4 teaspoon per square inch
- Add cheese selections—crumbled feta, shredded mozzarella, or grated Parmigiano-Reggiano—at 2 ounces per loaf
- Layer fresh rosemary sprigs, cracked black pepper, or sliced garlic cloves for aromatic depth
Press toppings gently into the dimples to secure them during baking.
This strategic placement guarantees even distribution and prevents burning.
The olive oil penetrates the dough while the finishing salts crystallize on the crust’s exterior, creating textural contrast and enhancing flavor complexity throughout your final product.
Classic Olive Oil Drizzle
While the dimpling technique creates the foundation for topping adhesion, the olive oil drizzle serves as both a flavor base and a binding agent.
You’ll want to use extra virgin olive oil for maximum flavor impact and health benefits—it’s rich in antioxidants and heart-healthy monounsaturated fats.
Drizzle approximately 3-4 tablespoons across your focaccia’s surface, ensuring even distribution.
You’re not simply coating; you’re creating moisture that’ll crisp the crust during baking.
Regional traditions vary—Ligurian focaccia demands generous oil application, while Venetian versions use restraint.
Apply your drizzle just before baking. This timing prevents oil oxidation and preserves its nutritional properties.
You’ll notice the oil settling into those dimples you’ve created, anchoring additional toppings if desired.
The result? A golden, flavorful crust that respects both technique and tradition.
Baking to Golden Perfection
Once your focaccia’s second rise is complete, preheat your oven to 425°F (220°C) and position a rack in the lower-middle section.
You’ll want to create ideal conditions for that coveted golden crust.
- Place a shallow pan of water on the lowest rack to maintain oven humidity—this prevents premature crust formation and promotes even browning through the Maillard reaction.
- Transfer your focaccia to a preheated baking sheet, ensuring proper spacing for air circulation.
- Bake for 18–22 minutes, monitoring color development without opening the oven door frequently.
- Your focaccia’s done when it reaches deep golden-brown on top and sounds hollow when tapped underneath.
Remove it immediately and cool on a wire rack.
You’ve earned this freedom from store-bought alternatives.
Frequently Asked Questions
Can I Make Focaccia Dough Ahead of Time and Freeze It for Later?
Yes, you can freeze your focaccia dough for maximum flexibility.
Wrap your prepared dough tightly in plastic wrap, then place it in an airtight freezer bag.
Use this freezing method for up to three months.
For your thawing schedule, transfer the dough to your refrigerator 12-24 hours before baking.
Once thawed, let it reach room temperature for 30-45 minutes, then proceed with shaping and proofing.
You’re liberated from rigid baking timelines.
What’s the Difference Between Focaccia and Pizza Dough?
You’ll notice focaccia dough contains higher hydration levels—typically 65-70%—compared to pizza dough’s 60-65%, creating a distinctly open crumb structure.
This difference means you’re working with a slacker, more delicate dough.
Focaccia demands gentle handling and extended fermentation to develop its characteristic airy interior.
Pizza dough, conversely, maintains tighter crumb structure, allowing you greater freedom in shaping and handling without tearing or deflating your final product.
How Do I Know if My Focaccia Has Over-Proofed or Under-Proofed?
You’ll perform the poke test by pressing your finger into the dough. If it springs back immediately, you’ve under-proofed it—continue rising.
Properly proofed dough shows slow spring-back with slight indentation remaining.
Over-proofed dough won’t bounce back and displays excessive bubble formation throughout. You’re seeking that sweet spot where gentle pressure leaves a mark without collapsing the structure completely.
Can I Use Whole Wheat Flour Instead of All-Purpose Flour?
You can substitute whole wheat flour, but you’ll need to adjust your hydration upward by 5-10% since whole wheat absorbs more water. This modification shifts your flavor profile toward nuttier, earthier notes.
Use a 1:1 ratio initially, then incrementally increase water until you achieve proper dough consistency. Whole wheat demands slightly longer fermentation—monitor closely. You’re free to experiment with partial substitutions for balanced results without sacrificing structure.
Why Is My Focaccia Dense and Heavy Instead of Fluffy?
You’re likely under-hydrating your dough or using improper kneading technique. Increase your hydration level to 65-70% water ratio—this creates an open crumb structure.
Knead adequately for 10-12 minutes until you achieve proper gluten development. Under-kneaded dough won’t trap sufficient gas bubbles.
Additionally, make sure your bulk fermentation reaches 4-6 hours at room temperature. Don’t rush this stage.
Proper hydration combined with correct kneading technique guarantees the airy, pillowy focaccia you’re after.
Leave a Comment