Key Takeaways
- Use room-temperature butter (65–70°F) and cream it thoroughly for 2–3 minutes to incorporate air and reduce spreading.
- Measure flour accurately by weight (120g per cup) or spoon-and-level method to increase dough stability.
- Refrigerate dough at least two hours or overnight to solidify fats and relax gluten before baking.
- Verify oven temperature with a thermometer and bake at 350–375°F on the middle rack using light aluminum pans.
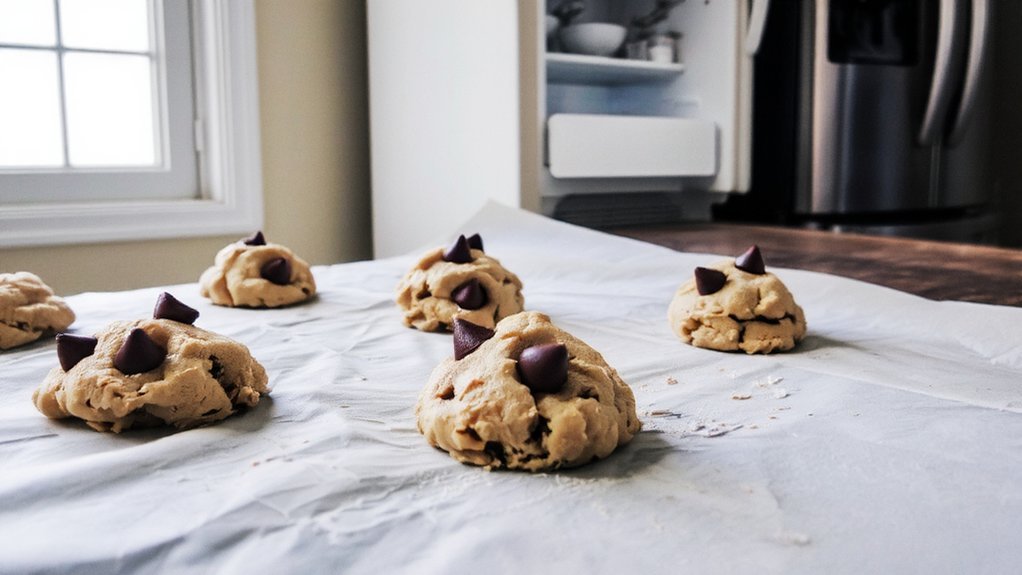
- Pull cookies when edges set but centers remain slightly underbaked; residual heat continues cooking during cooling.
Use the Right Butter Temperature
When you’re creaming butter and sugar together, the temperature of your butter fundamentally affects how cookies spread during baking.
Room-temperature butter—around 65-70°F—creates an ideal creaming method that incorporates air into your dough.
This aeration slows spreading by establishing structure.
Cold butter resists mixing, trapping less air and producing denser cookies with minimal spread.
Conversely, warm butter approaches its melting point, causing excessive spreading because the fat distributes unevenly throughout your dough.
You’ll notice that properly tempered butter creams within two to three minutes, becoming pale and fluffy.
This texture indicates adequate air incorporation.
If you’re struggling with spreading, check your kitchen temperature.
Cold environments demand slightly warmer butter; hot kitchens require chilling yours beforehand.
This simple adjustment gives you complete control over your final product’s texture and appearance.
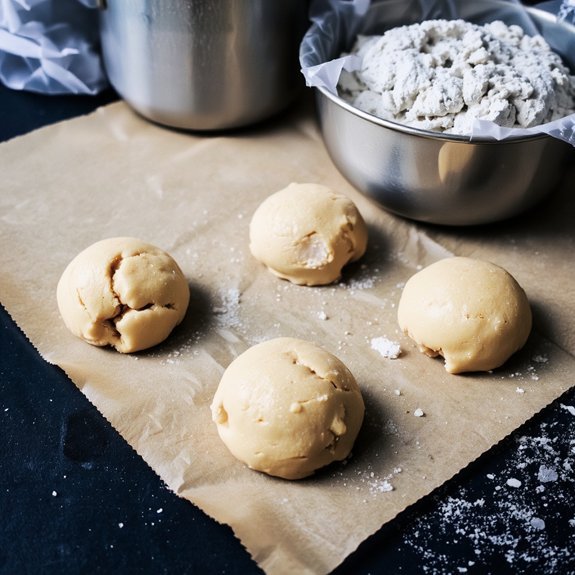
Measure Your Flour Accurately
You’ll prevent cookie spread by measuring flour accurately, since excess flour increases dough stability and reduces flow during baking.
You can employ three proven techniques: the spoon and level method, which you perform by spooning flour into your measuring cup and leveling it flush with the rim; a kitchen scale, which you use to weigh flour by grams for maximum precision; or sifting flour first to aerate it and guarantee consistent density before measuring.
Each method compensates for flour’s tendency to compact, which would otherwise result in flour-light dough that spreads excessively.
Spoon and Level Method
Measuring flour by weight eliminates the inconsistencies inherent in volume-based measurements, but if you don’t have a kitchen scale, the spoon and level method provides the next best alternative.
This technique guarantees scoop uniformity and promotes cookie symmetry by standardizing how much flour you’re actually using. Here’s how you’ll do it:
- Fluff your flour with a fork to aerate it and break up compacted particles
- Spoon flour into your measuring cup without pressing down, allowing it to settle naturally
- Level the top with a straight edge, removing excess flour cleanly
This method minimizes air pockets and compaction variations that typically plague volume measurements.
You’ll achieve more consistent dough hydration and gluten development, resulting in predictable baking outcomes.
Proper flour measurement directly controls spread rate and final cookie structure.
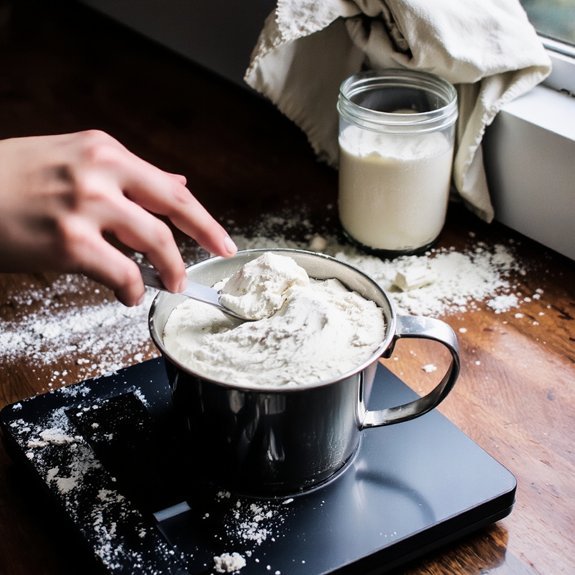
Kitchen Scale Precision
Ditch the guesswork entirely by investing in a digital kitchen scale, which delivers the accuracy that volume measurements simply can’t match.
You’ll eliminate variables that cause uneven spreading, like flour density fluctuations from scooping versus spooning.
Here’s your protocol: perform calibration checks before each baking session to confirm precise readings.
Place your mixing bowl on the scale, then use the tare function to reset it to zero.
This feature lets you add ingredients sequentially without transferring between containers, reducing measurement errors substantially.
Weigh flour at 120 grams per cup—the industry standard.
You’re not restricted by inconsistent techniques or environmental humidity affecting your measurements anymore.
This scientific approach gives you reproducible results, tighter dough consistency, and cookies that bake uniformly without unwanted spreading.
Sifting Flour First
While a kitchen scale guarantees accurate ingredient quantities, the flour’s physical state before weighing matters equally.
Sifting flour before measurement prevents clump removal issues and makes sure you’re not compacting the ingredient unnecessarily.
Here’s why you should sift:
- Aeration benefits – Sifting incorporates air into flour, reducing density and preventing over-measurement
- Clump removal – Breaking up moisture-formed lumps guarantees consistent texture throughout your dough
- Even distribution – Sifting combines flour with leavening agents uniformly, promoting reliable rise
You’ll find that sifted flour occupies more volume than unsifted flour.
This means you’ll use less total flour when you sift first, then weigh—directly addressing cookie spread problems.
The scientific principle’s straightforward: less flour equals less gluten development and reduced spreading during baking.
Don’t skip this step if you’re serious about controlling your cookie’s final dimensions and texture.
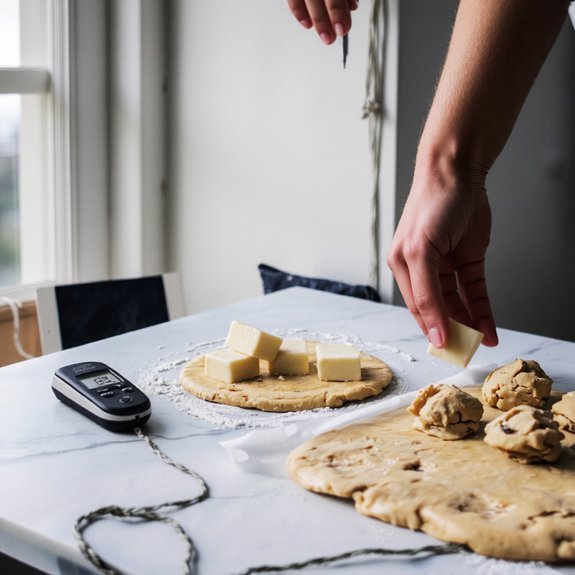
Chill Your Dough Before Baking
Refrigerating your dough substantially reduces spread during baking by allowing fats to solidify and gluten to relax.
You’ll gain control over your cookies’ final dimensions through cold fermentation, which stabilizes the dough structure before heat exposure.
For ideal results, your chill duration should span at least two hours, though overnight refrigeration provides superior outcomes.
This extended timeframe permits butter to firm completely while flour fully hydrates, creating dough that resists excessive spreading.
You’re not constrained to one chilling session—you can portion and freeze dough for weeks, baking fresh cookies whenever you choose.
Simply add two to three minutes to your baking time for frozen dough.
Cold dough bakes more evenly, developing better texture and flavor complexity.
You’ll notice cookies maintain defined edges and achieve your desired thickness consistently.
Choose the Correct Oven Temperature
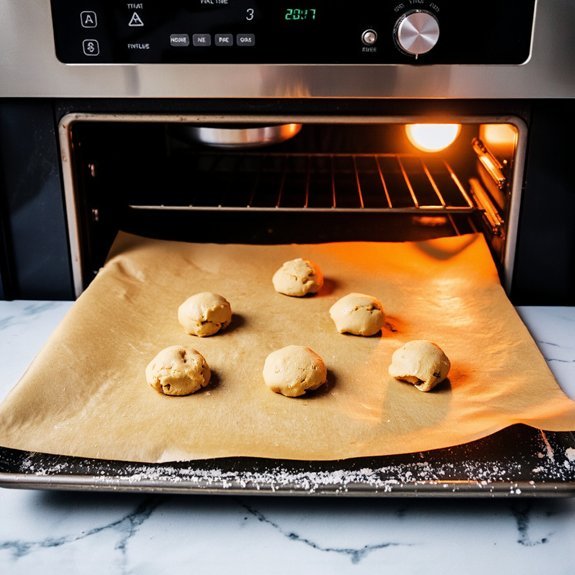
Once you’ve chilled your dough, controlling oven temperature becomes your next lever for preventing spread.
Temperature directly affects how quickly butter melts and sugar caramelizes, influencing cookie structure before the dough sets.
Temperature controls how quickly butter melts and sugar caramelizes, directly shaping cookie structure before your dough sets.
- Calibration Check: Verify your oven’s actual temperature using an oven thermometer. Most home ovens drift 25°F or more from their dial setting, causing unpredictable spreading.
- Preheat Duration: Allow 15-20 minutes for full preheating. This provides thermal stability throughout your baking chamber, preventing temperature fluctuations that destabilize dough.
- Temperature Selection: Bake at 350-375°F for ideal results. Higher temperatures caramelize sugars faster, setting cookies before they spread excessively.
You’re taking control of your baking outcomes by mastering these thermal variables.
Select High-Quality Ingredients
You’ll find that butter quality directly impacts cookie structure because higher fat content creates a more stable emulsion that resists excessive spreading during baking.
Your flour selection matters equally—using cake flour instead of all-purpose flour reduces gluten development, which weakens the dough’s elasticity and minimizes unwanted expansion.
Together, these ingredient choices establish the foundation for controlling spread and achieving the dense, chewy texture you’re targeting.
Butter Quality Matters
Since butter’s composition directly influences dough structure and spread rate, selecting high-quality butter is essential for controlling cookie behavior.
You’ll want to prioritize butter with higher fat percentage—typically 82-86%—which stabilizes your dough and minimizes excess spreading during baking.
Consider these three options:
- Cultured butter contains beneficial lactic acid bacteria, creating a more stable emulsion that resists spreading while enhancing flavor complexity.
- European-style butter boasts elevated fat content compared to standard American varieties, giving you superior structural control.
- Unsalted butter lets you command sodium levels precisely, preventing unwanted reactions that trigger excessive spread.
You’re taking charge of your baking outcomes by understanding butter’s technical role.
This knowledge empowers you to achieve consistent, controlled results every single time.
Flour Type Selection
Protein content fundamentally determines how your dough will behave during baking. You’ll want to select flour strategically to control spread and achieve your desired cookie texture.
| Flour Type | Protein Content | Best Use |
|---|---|---|
| Bread Flour | 12-14% | Chewy, structured cookies |
| All-Purpose Flour | 10-12% | Balanced texture |
| Cake Flour | 7-9% | Tender, delicate cookies |
Higher protein flours develop more gluten networks, which stabilize your dough and minimize spreading. Conversely, lower protein options produce softer results. You’re not limited to traditional wheat—gluten free blends offer viable alternatives when you need dietary accommodations. However, you’ll need to adjust your liquid ratios accordingly. Match your flour choice to your desired outcome: choose bread flour for structure, all-purpose for versatility, or specialized blends for specific dietary requirements. This precision prevents disappointing flat cookies and gives you control over your final product.
Adjust Your Baking Time and Pan Type
Baking time and pan material directly influence cookie spread because they affect heat distribution and the rate at which dough sets.
You’ll achieve superior results by understanding these critical factors.
- Pan material matters considerably—dark steel pans absorb more heat, causing faster spreading and browning, while light aluminum pans provide gentler, more even heat distribution for controlled spreading.
- Rack position determines temperature exposure—place your cookies on the middle rack where heat circulates uniformly, avoiding the top rack’s intense direct heat that accelerates spreading.
- Reduce baking time slightly—monitor your cookies closely and pull them from the oven when edges set but centers remain slightly underbaked.
Residual heat continues cooking as they cool.
These adjustments give you precise control over cookie structure and thickness, ensuring you get the dense, chewy results you’re after.
Frequently Asked Questions
Why Do Cookies Spread More in Humid Weather Than in Dry Conditions?
You’ll find that ambient humidity increases moisture in your kitchen’s air, which directly affects your dough’s hydration level.
Higher moisture content reduces flour absorption capacity, leaving excess liquid in your batter.
This surplus liquid causes your cookies to spread excessively during baking.
In dry conditions, flour absorbs moisture more effectively, creating a stiffer dough that holds its shape.
You’re fundamentally fighting physics—managing environmental moisture determines whether your cookies maintain their structural integrity or flatten unpredictably across your baking sheet.
Can I Use Parchment Paper or Silicone Mats to Prevent Cookie Spreading?
You’ll find both parchment paper and silicone mats effective for controlling spread. Their nonstick comparison reveals parchment’s superior heat conductivity, while silicone mats’ insulating effect moderates bottom browning.
Parchment typically yields slightly less spread due to reduced moisture absorption. You’re free to choose based on your desired crust characteristics—parchment promotes crispier edges, silicone creates softer bottoms.
Either option substantially minimizes spreading compared to unlined baking sheets, giving you reliable results.
Does the Type of Sugar Affect How Much Cookies Spread During Baking?
Yes, you’ll find that sugar type substantially impacts spreading. Hygroscopic sugars like brown sugar absorb moisture, reducing spread by increasing dough viscosity. Conversely, granulated sugar promotes spreading through faster caramelization degree during baking.
You’re controlling moisture retention and heat response by choosing your sugar. Brown sugar yields denser, less-spread cookies, while granulated sugar produces thinner, crispier results.
You’ve got the freedom to manipulate texture by selecting your sweetener strategically.
How Does Mixing Method Influence Cookie Spread and Final Texture?
Your mixing method directly controls cookie spread and texture.
When you cream butter and sugar longer, you’ll incorporate more air, creating lighter, airier cookies that spread moderately. Conversely, minimal creaming produces denser cookies with less spread.
Overmixing flour develops gluten, tightening your dough and reducing spread while creating chewier texture. You’re basically choosing between airy-tender or dense-chewy by controlling creaming time and flour incorporation intensity.
What Role Does Leavening Agent Amount Play in Controlling Cookie Spread?
You’ll find that leavening agent amounts directly control your cookie spread.
Higher soda proportion creates rapid CO2 release, causing excessive rise and spread.
Lower powder ratios produce denser, more compact cookies.
You’re balancing chemical reaction intensity—too much lifts dough rapidly before it sets; too little leaves cookies flat.
Precise measurements let you control the rise rate, ensuring cookies set before spreading excessively.
You’ve got the power to dictate your final product’s structure.


Leave a Comment