Key Takeaways
- Use blended flour formulas combining rice flour, tapioca starch, and xanthan gum for superior texture and structure.
- Whisk dry ingredients for 60+ seconds, then fold wet ingredients with maximum 15–20 gentle strokes to prevent overmixing.
- Rest dough 5–15 minutes before baking to allow proper flour hydration and achieve balanced, consistent results.
- Reduce liquid by 10–15% from traditional recipes and calibrate oven temperature with a thermometer for accuracy.
- Remove cookies when edges set but centers remain slightly underdone; carryover cooking completes baking on the hot sheet.
Understanding Gluten-Free Flour Blends
Since gluten-free baking requires different structural properties than traditional wheat flour provides, you’ll need to understand how various flour blends function.
Different milling processes create distinct particle sizes and protein compositions that affect your dough’s elasticity and rise.
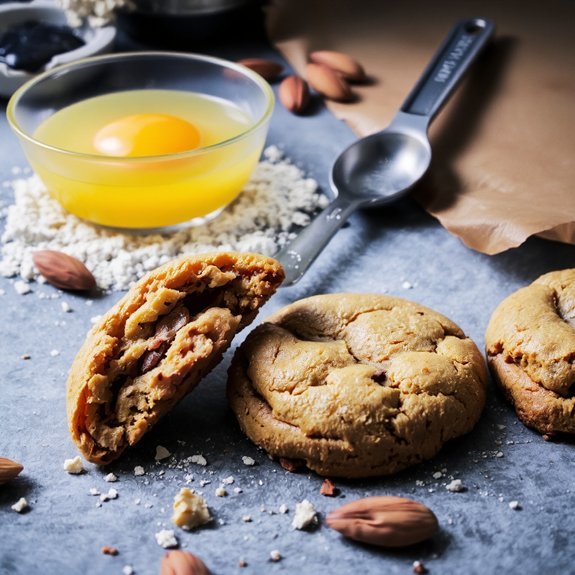
Rice flour offers neutral flavor profiles but lacks binding strength, while almond flour adds richness and moisture.
Tapioca starch provides elasticity that mimics gluten’s structure.
You’ll find that blended formulas—combining starches, proteins, and whole grain flours—outperform single-ingredient options.
Experimenting with ratios helps you discover which flavor profiles suit your preferences.
Many commercial blends already balance these components, simplifying your process.
Understanding these mechanics empowers you to customize recipes confidently and achieve superior texture and taste in your gluten-free cookies.
Essential Binding Agents for Gluten-Free Baking
Replacing gluten’s binding function requires understanding how different agents work within your dough’s structure.
Master gluten-free baking by understanding how different binding agents work within your dough’s unique structure.
You’ll need reliable binders to achieve proper texture and prevent crumbling.
Consider these essential options:
- Xanthan gum – Creates elasticity and moisture retention at 1/4 teaspoon per cup of flour
- Psyllium husk – Offers superior binding with psyllium sourcing from reputable suppliers ensuring purity and additive safety
- Eggs or flax eggs – Provide natural binding while contributing structure and richness
- Cornstarch or tapioca starch – Improves texture and workability without affecting flavor
You’ll gain freedom from gluten’s limitations by strategically combining these agents.
Verify additive safety on all purchased ingredients, reading labels carefully. Experiment with ratios to discover your preferred texture, as each binder behaves differently depending on your specific recipe and cookie type.
Choosing the Right Fat for Your Cookies
Fat’s role in gluten-free baking differs fundamentally from traditional baking because it must compensate for gluten’s structural contributions while delivering moisture and tenderness.
You’ll find that butter, coconut oil, and vegetable oil each offer distinct advantages depending on your desired outcome.
Butter provides rich flavor pairing with vanilla, chocolate, and spice-forward cookies. Its melting behavior creates tender crumbs and subtle browning.
Coconut oil delivers lightness and pairs excellently with tropical or citrus profiles, though it’ll produce denser textures.
You should consider vegetable oil when you want maximum moisture without competing flavors. Its neutral melting behavior guarantees consistent results across batches.
The fat-to-flour ratio becomes more critical in gluten-free formulas. You’ll often need slightly higher fat percentages to achieve proper structure and prevent dryness. Experiment strategically to discover your preferred texture and taste profile.
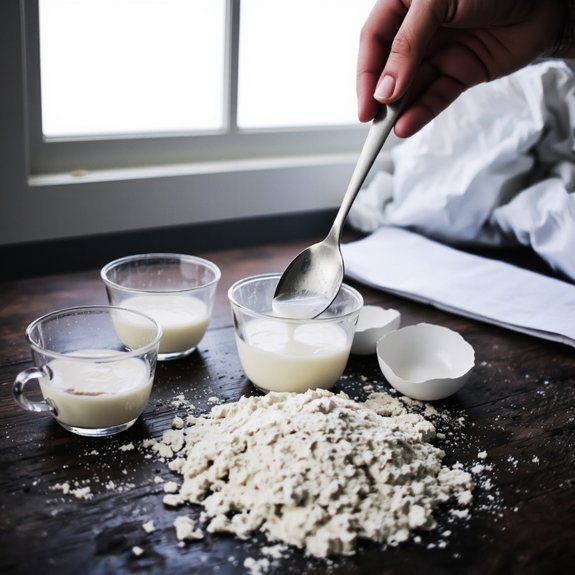
Moisture and Texture: Getting the Balance Right
Because gluten-free batters lack the protein network that traditionally traps and distributes moisture, you’ll need to carefully calibrate your liquid ingredients to prevent cookies that’re either dense and gummy or dry and crumbly.
Master moisture control through these strategies:
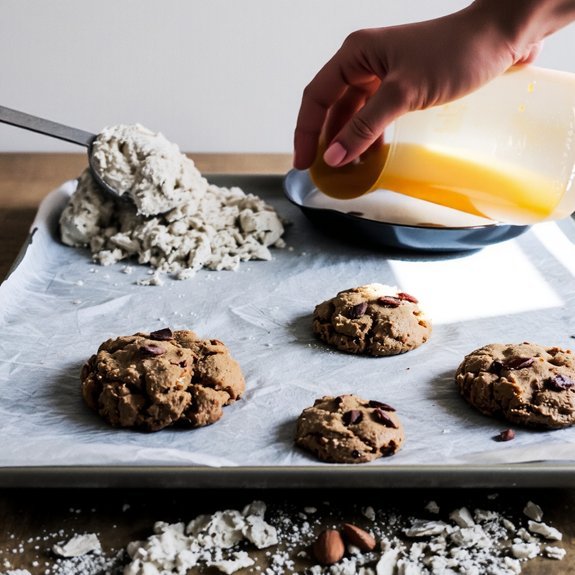
- Reduce liquid by 10-15% compared to traditional recipes, as gluten-free flours absorb differently
- Add binding agents like xanthan gum to strengthen crumb structure and stabilize texture
- Use egg wash or dairy to enhance mouthfeel optimization without excess moisture
- Rest dough 15 minutes before baking to allow flour hydration and achieve balanced consistency
This calibration directly impacts your final product’s structural integrity.
You’ll develop superior crumb structure by respecting these ratios, ensuring cookies that’re neither undersaturated nor waterlogged—granting you complete control over your baking outcome.
Common Mistakes to Avoid
Even with a solid understanding of moisture control, you’ll encounter pitfalls that undermine your gluten-free cookies.
First, neglecting proper label reading invites hidden gluten into your batter. Many ingredients contain trace amounts you’d miss without careful scrutiny.
Second, cross contamination sabotages your efforts. Use dedicated equipment—separate cutting boards, mixing bowls, and utensils—to prevent gluten particles from contaminating your dough.
Third, you’ll fail if you substitute flours without adjusting your liquid ratios. Each gluten-free flour absorbs moisture differently.
Fourth, overmixing develops undesirable texture in gluten-free dough, creating dense, tough cookies rather than tender ones.
Finally, rushing cooling time compromises structural integrity. These mistakes consistently derail otherwise sound baking techniques, so remain vigilant throughout your process.
Adjusting Recipes for Gluten-Free Success
Once you’ve mastered the common pitfalls, you’ll need to systematically adjust traditional recipes to achieve reliable gluten-free results.
You’re not simply substituting flour—you’re restructuring your entire formula.
Consider these critical adjustments:
- Sweetness Adjustment: Reduce sugar by 10-15% since gluten-free flours absorb liquids differently, intensifying sweetness perception.
- Altitude Compensation: Add 1-2 tablespoons flour per cup above 3,000 feet elevation to combat rapid moisture evaporation.
- Binding Enhancement: Incorporate xanthan gum or psyllium husk to replicate gluten’s structural properties.
- Hydration Modification: Increase liquid content by 5-10% to compensate for flour’s reduced water absorption capacity.
You’ll gain complete control over your baking outcomes by understanding these technical adjustments. This systematic approach liberates you from recipe constraints, enabling confident experimentation and consistent success.
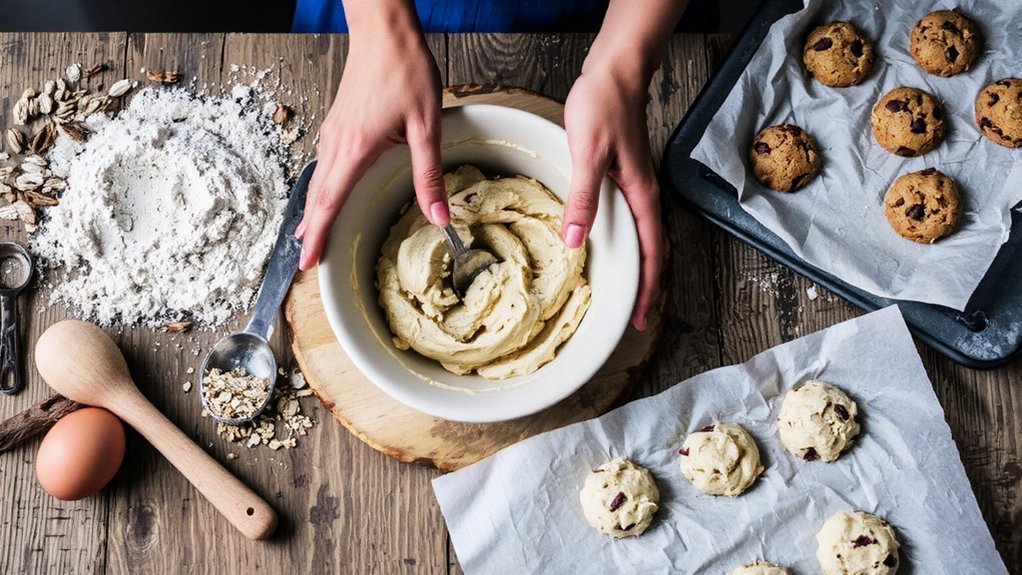
Mixing Techniques That Make a Difference
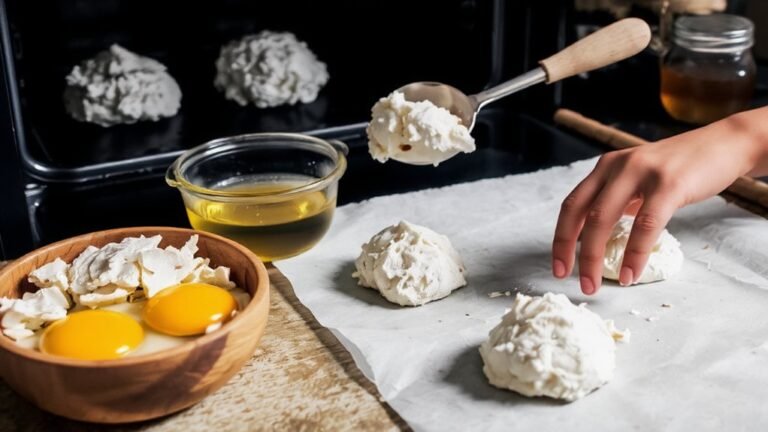
You’ll want to blend your dry ingredients first to guarantee even distribution of leavening agents and starches throughout your flour blend.
When you’re ready to combine wet and dry components, mix until you’ve just incorporated everything—this is where gluten-free batters diverge critically from traditional cookie doughs.
Overmixing develops gluten substitutes’ binding properties excessively, which can result in tough, dense cookies instead of the tender crumb you’re aiming for.
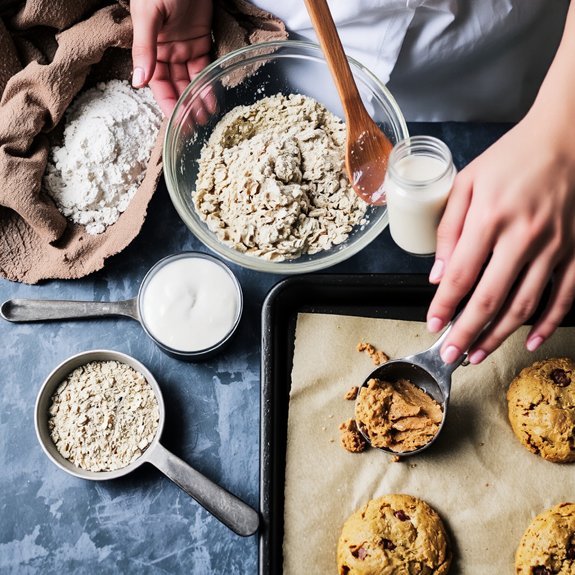
Dry Ingredients Blend First
Before you combine wet and dry ingredients, blending your dry mixture thoroughly guarantees an even distribution of leavening agents and starches throughout the batter.
Here’s your essential approach:
- Whisk your gluten-free flour blend, xanthan gum, baking soda, and salt together for 60 seconds minimum
- Break up any lumps in your dry mixture using a fine-mesh sieve
- Implement pre-blend storage by keeping measured dry ingredients in airtight containers, ready for use
- Use batch labeling to track your specific flour blend ratios and dates
This method prevents uneven rising and texture inconsistencies common in gluten-free baking.
You’ll achieve superior cookie structure by ensuring every particle of leavening agent disperses uniformly.
Your independence in the kitchen strengthens when you master these technical fundamentals—you’re no longer dependent on commercial pre-mixed blends.
Wet and Dry Combining
Combining your prepared dry ingredients with wet components requires deliberate, controlled mixing to prevent overmixing—the primary culprit behind dense, tough gluten-free cookies. Position your bowl placement strategically for accessibility, then add wet ingredients to dry in stages. Fold gently with a spatula using about fifteen to twenty strokes maximum. You’ll notice the mixture coming together without overworking the flour blend. Stop mixing immediately when you no longer see dry streaks—slight lumps are acceptable and preferable.
This restraint preserves the delicate structure gluten-free batters require. Your cleanup routine becomes simpler with fewer mixing implements, and you’ll appreciate the efficiency. Resist the temptation to thoroughly combine; you’re not making bread dough.
This technique directly impacts your final cookies’ texture, ensuring they remain tender rather than crumbly or dense. Master this step and you’ll notice immediate improvements in your results.
Overmixing: Common Gluten-Free Mistake
Because gluten-free flours lack the protein structure that tolerates extended mixing, overmixing represents the most frequent cause of failed batches.
You’ll notice that rushing bakers and overconfidence bias lead to dense, crumbly cookies that crumble apart.
Control your mixing by following these essential guidelines:
- Mix wet ingredients separately for 30 seconds maximum
- Combine wet and dry ingredients with 8-10 gentle folds
- Stop immediately when you see no flour streaks
- Let dough rest 5 minutes before portioning
You’re working with delicate starches that break down easily.
Unlike traditional wheat-based recipes, gluten-free dough demands restraint and precision.
Your freedom to experiment exists within boundaries—respect them.
Undermixing beats overmixing every time.
Trust the process, not your instincts.
Baking Temperature and Time Guidelines
Since gluten-free doughs behave differently than their conventional counterparts, you’ll need to adjust your baking parameters accordingly.
Start by calibrating your oven—temperature variance of just 25°F can markedly impact your results.
Use an oven thermometer to verify accuracy, as many home ovens run hot or cold.
Consider altitude adjustments if you’re baking above 3,000 feet. Higher elevations require temperature increases of 15-25°F and reduced baking times by 5-10 minutes due to faster moisture evaporation.
Gluten-free cookies typically bake 2-3 minutes faster than traditional recipes. Monitor them closely during the final minutes to prevent over-baking, which’ll dry them out. Remove cookies when edges are set but centers remain slightly underdone—they’ll continue cooking on the hot baking sheet.
Storage Tips for Maximum Freshness
Proper storage is essential for maintaining the texture and flavor of your gluten-free cookies, as they’re more prone to moisture loss and staleness than conventional varieties.
You’ll maximize freshness by implementing these strategies:
- Store cookies in airtight containers with silica gel packets for humidity control
- Maintain room temperature between 65-70°F away from direct sunlight
- Use vacuum sealing for extended storage up to three months
- Separate layers with parchment paper to prevent moisture transfer
You can freeze unbaked dough for up to three months, giving you independence in your baking schedule.
For baked cookies, refrigeration extends shelf life to two weeks.
Avoid storing gluten-free cookies with other baked goods, as they’ll absorb surrounding moisture rapidly.
These practices preserve your cookies’ structural integrity and taste profile.
Delicious Gluten-Free Cookie Recipes to Try
Now that you’ve mastered storage techniques to keep your cookies fresh, you’re ready to explore recipes that showcase gluten-free baking‘s full potential.
You’ll discover that seasonal flavors elevate your creations throughout the year.
Spring brings lemon-lavender combinations, while autumn demands pumpkin spice and cranberry variations.
Winter welcomes gingerbread and peppermint options.
Expand your repertoire with international variations that liberate you from conventional cookie-making.
Italian almond flour biscotti offers nutty complexity.
French macarons demonstrate meringue-based possibilities.
Spanish polvorones showcase cornstarch’s binding capabilities.
You’re not limited by dietary restrictions—you’re empowered by ingredient flexibility.
Rice flour, tapioca starch, and xanthan gum create superior textures when properly balanced.
These recipes prove that gluten-free baking delivers exceptional results without compromise, allowing you to enjoy authentic, satisfying cookies that respect your dietary choices.
Frequently Asked Questions
Can I Use Regular All-Purpose Flour in Gluten-Free Cookie Recipes?
No, you can’t simply swap regular all-purpose flour into gluten-free recipes.
All-purpose flour contains gluten, which fundamentally changes your dough’s structure.
You’ll need appropriate substitute ratios—typically 1:1 for dedicated gluten-free blends.
However, you’ll also require binding agents like xanthan gum or psyllium husk to replicate gluten’s elasticity.
These additions compensate for the absent protein network, ensuring your cookies maintain proper texture and consistency without compromising your dietary freedom.
How Do I Know if My Cookies Are Truly Gluten-Free and Safe?
You’ll verify gluten-free safety through rigorous Label Reading of all ingredients and equipment sources.
Check certifications from trusted organizations ensuring products meet gluten-free standards.
Minimize Cross Contact Risks by using dedicated utensils, cutting boards, and mixing bowls—never shared with gluten-containing items.
Test your kitchen’s preparation surfaces.
Purchase certified gluten-free flour blends rather than mixing conventional flours.
Document your ingredient sources meticulously.
This vigilance guarantees you’re taking full control of your dietary needs and maintaining genuine gluten-free integrity.
Why Do My Gluten-Free Cookies Taste Different From Regular Cookies?
Your gluten-free cookies taste different because you’re replacing gluten’s binding properties with starches that lack its structural integrity. This protein absence alters texture and moisture retention.
Additionally, alternative flours often contain higher starch sweetness levels, affecting flavor profiles. You’ll notice denser crumbs and sometimes grainy mouthfeel.
Experimenting with flour blends and binding agents helps you achieve results closer to conventional cookies while maintaining your dietary freedom.
What Equipment Do I Need for Gluten-Free Baking at Home?
You’ll need a digital scale for precise flour measurements—critical since gluten-free flours vary in density.
A silicone mat prevents sticking without added flour.
Standard mixing bowls, measuring spoons, and a sturdy whisk handle your dry ingredients independently.
You’ll want parchment paper, mixing utensils, and a reliable oven thermometer to guarantee accurate baking temperatures.
These essentials give you complete control over your gluten-free baking outcomes.
Are Gluten-Free Cookies More Expensive to Make Than Traditional Cookies?
Yes, you’ll typically spend more on gluten-free cookies due to higher ingredient costs for specialty flours and binders. However, you’ve got control over your expenses.
Bulk purchasing substantially reduces per-unit pricing, allowing you to reclaim financial independence from premium retail markups. By sourcing alternative flours and xanthan gum in larger quantities, you’ll dramatically cut costs and maintain your freedom to bake affordably without compromising quality.


Leave a Comment