
Key Takeaways
- Cream softened butter and sugar for 2–3 minutes until pale and fluffy to incorporate air for natural leavening.
- Combine wet and dry ingredients in thirds, alternating batches while folding gently to prevent overmixing and preserve texture.
- Roll dough into uniform 1-inch diameter balls, then flatten to ¼-inch thickness using consistent, gentle pressure.
- Bake at 350°F for 12–15 minutes on the center rack until edges turn light golden while centers remain slightly underbaked.
- Cool cookies on a wire rack for 15–20 minutes at room temperature before storing in an airtight container.
Gathering Your Ingredients
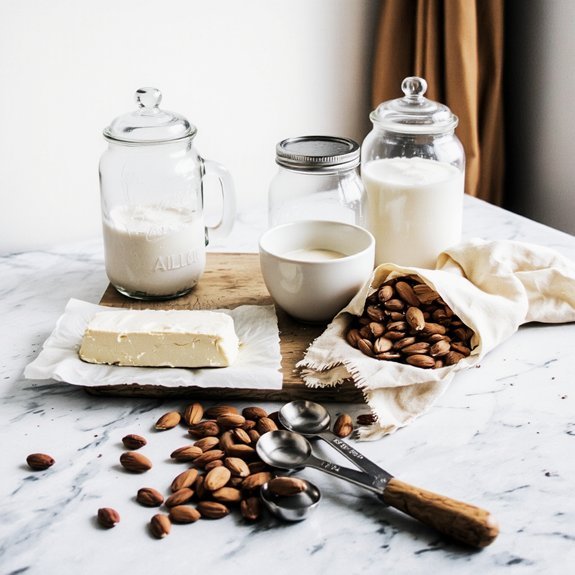
Assembling your mise en place guarantees you’ll have all components ready before you begin mixing.
You’ll need 2 cups blanched almond flour, 3/4 cup granulated sugar, 1/4 teaspoon sea salt, 2 large eggs, 1 teaspoon vanilla extract, and 1/2 teaspoon almond extract.
Consider seasonal availability when sourcing your almonds—spring harvests often yield superior quality.
Your supplier selection matters markedly; procure almond flour from reputable vendors offering recent processing dates to guarantee peak freshness and flavor integrity.
Procure almond flour from reputable vendors offering recent processing dates to guarantee peak freshness and flavor integrity.
Verify your eggs are room temperature before beginning; this facilitates proper emulsification.
Measure your dry ingredients using the spoon-and-level technique for precision.
Having everything prepped eliminates disruptions during your mixing phase, allowing you to work efficiently and maintain complete control over your baking process without compromise or delay.
Essential Equipment and Tools
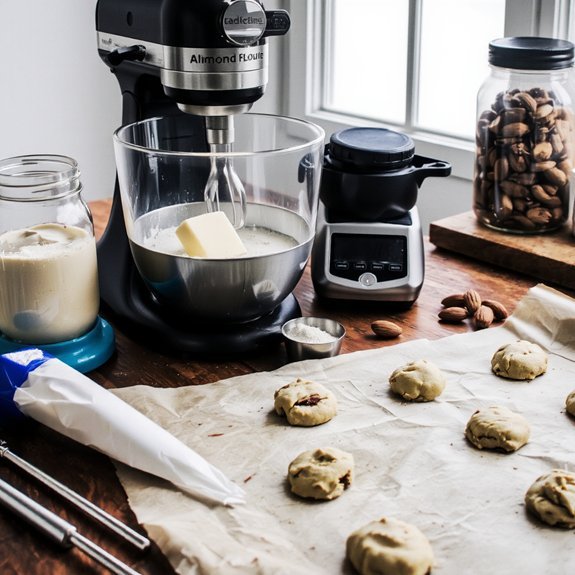
You’ll need several key pieces of equipment to execute this recipe with precision. A stand mixer or hand mixer helps achieve proper incorporation of ingredients. Measure flour, sugar, and almond meal with a digital scale for accuracy.
You’ll require mixing bowls, preferably stainless steel, for durability and easy cleaning. A baking sheet and parchment paper prevent sticking and promote even heat distribution. Use a cookie scoop for uniform portion sizes, which guarantees consistent baking results.
Don’t overlook safety gear—kitchen gloves protect your hands during mixing. Keep cleaning supplies nearby for immediate sanitation between tasks. A cooling rack allows proper air circulation after baking.
A silicone spatula prevents scratching bowl surfaces. Finally, gather an oven thermometer to verify accurate temperature calibration. These tools establish the foundation for reliable, professional-quality almond cookies that respect your freedom to bake independently without compromise.
Preparing Your Dry Ingredients

With your equipment organized and ready, it’s time to prepare the dry components that’ll form your cookie’s foundation. Measure 2 cups all-purpose flour, 1 cup almond flour, ¾ teaspoon baking soda, and ½ teaspoon sea salt into separate bowls. This separation guarantees even distribution and prevents clump prevention issues.
Sift your dry ingredients together through a fine-mesh sieve into a larger mixing bowl. This aeration technique incorporates air and breaks apart any compacted particles. Pay attention to humidity effects—if your environment’s moisture content is elevated, your flour may compact prematurely. Sift immediately before mixing wet ingredients to maintain ideal texture.
Store your combined dry mixture in an airtight container if you’re preparing ahead. Keep it away from moisture sources to preserve its integrity and guarantee consistent cookie results.
Creaming Butter and Sugar
Combining softened butter and sugar creates the foundation for your cookie’s tender crumb structure.
You’ll beat these ingredients together for approximately 2-3 minutes until the mixture becomes pale and fluffy. This process achieves critical air incorporation, which leavens your cookies during baking without relying solely on chemical agents.
Beat butter and sugar 2-3 minutes until pale and fluffy to incorporate critical air that naturally leavens cookies.
Use a stand mixer on medium speed for ideal results.
The mechanical action disperses sugar crystals throughout the butter, creating an emulsion stability that binds your dry and wet ingredients seamlessly. You’re basically whipping tiny air bubbles into the fat, expanding its volume.
Don’t underestimate this step—inadequate creaming produces dense, flat cookies.
Conversely, over-beating can cause your emulsion to break, resulting in greasy, spread-prone cookies. Stop when your mixture reaches a light, uniform consistency resembling wet sand.
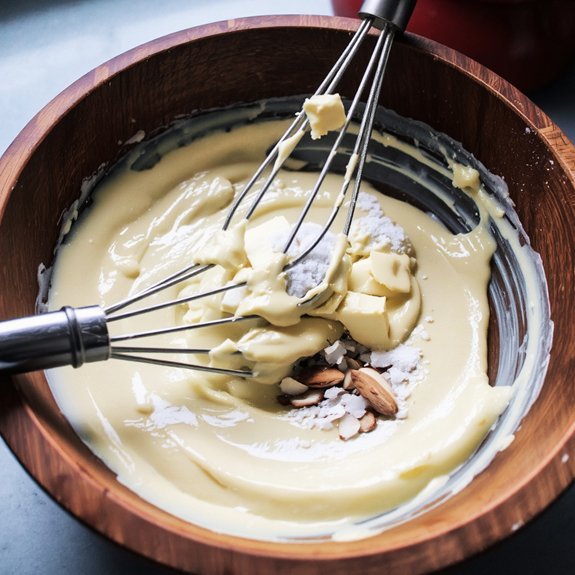
Combining Wet and Dry Mixtures
You’ll create your dry ingredients foundation by whisking together 2 cups almond flour, 1 cup all-purpose flour, 1 teaspoon baking soda, and ½ teaspoon salt in a medium bowl.
Your wet mixture preparation requires you to combine the creamed butter-sugar base with 1 large egg, 1 teaspoon almond extract, and 2 tablespoons whole milk until fully incorporated. Folding techniques matter particularly here—use a spatula to gently combine the wet and dry mixtures with 15-20 strokes, being careful not to overmix and develop excessive gluten that’ll toughen your cookies.
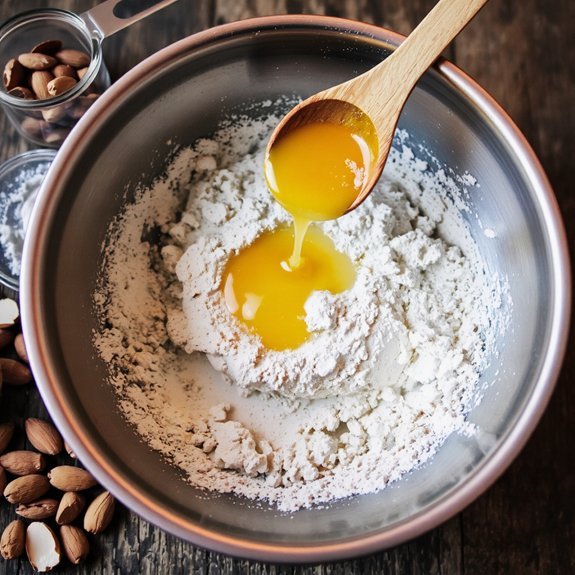
Dry Ingredients Foundation
Layering your dry mixture into the wet ingredients requires a methodical approach to achieve proper incorporation without overdeveloping the batter.
You’ll want to sift your dry ingredients—flour, baking powder, and salt—together to assure particle uniformity and eliminate lumps.
This preparation step prevents dense pockets in your finished cookies.
When combining, you’re free to choose your mixing method: fold gently by hand or use low mixer speed.
Add your dry mixture in thirds, alternating with any remaining wet components.
This technique minimizes gluten development while guaranteeing even distribution.
Quality almond sourcing impacts your foundation considerably.
Finely ground almonds should integrate seamlessly with your flour blend, creating a cohesive dry base.
Don’t overmix once you’ve added the dry ingredients—stop as soon as you can’t see streaks of flour.
This restraint preserves your cookie’s tender crumb structure and delicate texture.
Wet Mixture Preparation
Before you introduce your dry ingredients, the wet mixture—typically comprising butter, eggs, almond extract, and vanilla—must reach proper emulsification. This critical step guarantees uniform texture and ideal rise.
Cream softened butter at 65-70°F with granulated sugar until pale and fluffy, approximately 3-4 minutes. Incorporate eggs individually, allowing 30 seconds between additions. Add almond extract and vanilla during this phase.
| Component | Temperature | Duration |
|---|---|---|
| Butter | 65-70°F | Room temp |
| Eggs | 68-72°F | Cold from fridge |
| Mixture | 75-78°F | Final blend |
Emulsification techniques demand consistent speed and timing. Maintain medium mixer velocity throughout. Your liquid temperature directly impacts molecular bonding and batter stability. Once your wet mixture reaches glossy consistency, you’re ready for dry ingredient integration, which’ll create your cookie foundation.
Folding Techniques Matter
Once your emulsified wet mixture achieves glossy consistency, it’s time to incorporate the dry blend—a process that demands precision to preserve the air you’ve cultivated. You’ll employ the folding technique using a spatula, cutting vertically through the center, sweeping along the bowl’s bottom, and folding upward. This controlled motion maintains aeration effects essential for your cookies’ texture.
You’re creating ideal crumb structure by preventing overmixing, which would develop gluten and compromise tenderness. Work deliberately yet efficiently—approximately 12-15 fold cycles typically suffice. Don’t rush; aggressive stirring destroys the incorporation you’ve achieved.
Your spatula’s gentle pressure against the mixture guarantees even distribution of almond flour and leavening agents without deflating your carefully prepared base. This technique determines whether you’ll achieve delicate, tender cookies or dense, tough results.
Shaping Your Cookies
You’ll shape your cookie dough using hand-rolling techniques to achieve uniform 1-inch diameter balls, which guarantees consistent baking times and even browning.
Once rolled, you’ll flatten and press each ball to approximately ¼-inch thickness using the bottom of a glass or your palm, creating a slight dome that prevents excessive spreading during baking. This dual-step process yields professional-quality almond cookies with ideal texture and appearance.
Hand-Rolling Techniques
After your dough’s rested and cooled to room temperature, you’re ready to begin hand-rolling.
Proper finger positioning is essential for consistent results. Use your thumbs and index fingers to apply gentle, even pressure while rotating the dough ball. Maintain a rolling rhythm of approximately one rotation per second—this prevents overworking the dough while ensuring uniformity.
| Technique | Pressure Level | Ideal Size |
|---|---|---|
| Standard roll | Light-moderate | ¾ inch diameter |
| Firm roll | Moderate-heavy | ⅝ inch diameter |
| Delicate roll | Light | ⅞ inch diameter |
You’ll achieve superior texture control through hand-rolling compared to mechanical methods. The tactile feedback allows you to detect dough consistency variations immediately. Position cookies 1.5 inches apart on parchment paper. This method liberates you from equipment constraints while producing professional-grade results.
Flattening and Pressing
How you flatten your hand-rolled dough balls directly determines your cookies’ final texture and appearance.
You’ll want to apply consistent pressure across each ball using either a flat-bottomed glass or your palm.
Press down firmly, then rotate the dough slightly before pressing again—this technique guarantees uniform thickness throughout.
Aim for an impression depth of approximately one-quarter inch.
Maintaining pressure consistency prevents uneven baking and cracking.
If you’re seeking thinner, crispier cookies, decrease the thickness.
For chewier results, increase it slightly.
Work quickly to prevent dough from warming excessively.
Cold dough resists flattening, so let balls sit at room temperature for two minutes before pressing.
This simple adjustment grants you complete control over your final product’s texture profile and structural integrity.
Baking to Golden Perfection
Achieving that signature golden-brown exterior requires monitoring your oven’s internal temperature and the cookies’ surface development throughout the baking cycle.
Monitor your oven’s internal temperature and cookie surface development to achieve that signature golden-brown exterior.
Start by verifying oven calibration with a reliable thermometer—most home ovens deviate 25°F from their displayed settings, directly impacting browning science.
Position your baking sheet on the center rack for even heat distribution.
You’ll typically bake almond cookies at 350°F for 12–15 minutes.
Watch for the shift from pale to light golden at the edges; this signals Maillard reaction initiation, where proteins and sugars recombine to create flavor complexity and color depth.
Don’t rely solely on visual cues.
You’re looking for defined edges with a slightly underbaked center—residual heat continues cooking after removal.
This technique prevents overdrying while ensuring proper structure development.
Remove cookies when you spot that ideal golden hue; they’ll firm considerably as they cool.
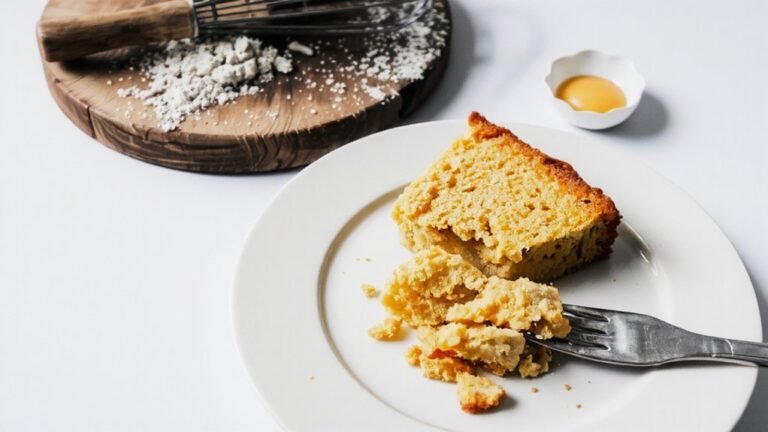
Cooling and Storing Your Almond Cookies
The moment you’ve removed your cookies from the oven, you’ll need to manage the cooling process carefully to preserve their texture and structure.
Transfer your almond cookies to a wire rack cooling surface immediately—this prevents moisture accumulation underneath and maintains their crispness. Allow approximately 15-20 minutes for complete cooling at room temperature.
Once cooled, you’ll want maximum freshness retention through airtight storage.
Place your cookies in airtight containers with parchment paper separating layers, preventing direct contact and breakage. Store in cool, dry conditions away from direct sunlight and heat sources.
Properly stored almond cookies maintain peak quality for up to two weeks.
For extended preservation beyond this timeframe, consider freezer storage in airtight containers, where they’ll remain viable for three months. This approach grants you flexibility in enjoying your homemade treats whenever desired.
Frequently Asked Questions
Can I Substitute Almond Flour With Regular Flour in This Recipe?
You can substitute regular flour for almond flour, but you’ll experience significant texture differences and altered flavor balance.
All-purpose flour produces denser, less tender cookies because almond flour’s fat content and moisture properties differ substantially.
You’ll need to adjust your liquid ratios and increase binding agents.
The nutty, delicate flavor you’d achieve with almond flour will disappear entirely.
For ideal results maintaining the intended profile, you shouldn’t make this substitution without thorough recipe modifications.
How Do I Make These Cookies Gluten-Free?
You’ll substitute regular flour with certified gluten-free flour blends at a 1:1 ratio.
Use 240 grams per cup for accurate measurements.
Incorporate alternative sweeteners like erythritol or monk fruit if desired.
Prevent cross contamination by using dedicated equipment and verified gluten-free ingredients.
Maintain precise temperatures at 325°F and monitor baking time closely—gluten-free batches require 12-14 minutes.
Your cookies retain ideal texture and structure through technical precision and ingredient integrity.
What Causes My Almond Cookies to Spread Too Much While Baking?
Your almond cookies spread excessively due to improper butter temperature and oven calibration. You’re likely using softened butter that’s too warm, causing excessive spreading during baking.
Verify your oven’s actual temperature with an independent thermometer—many run hot. Chill your dough thoroughly, use room-temperature butter precisely, and bake at the exact specified temperature.
These technical adjustments’ll give you the control you deserve over your final product.
How Long Do Almond Cookies Stay Fresh in an Airtight Container?
You’ll maintain your almond cookies’ ideal shelf life for up to two weeks in an airtight container.
Effective moisture control is essential—ensure cookies cool completely before storing to prevent condensation.
Keep them at room temperature away from direct sunlight.
You can extend freshness by adding silica gel packets.
For extended preservation beyond two weeks, you’ve got the freedom to freeze them up to three months, maintaining their structural integrity and flavor profile.
Can I Freeze Almond Cookie Dough Before Baking?
You can absolutely freeze almond cookie dough before baking. Flash freezing your portioned dough balls on a sheet tray for two hours prevents them from clumping together. Once solid, transfer them into freezer-safe containers for extended storage.
When you’re ready to bake, you’ve got flexibility—thaw methods include refrigeration overnight or baking directly from frozen, adding two to three minutes to your bake time. This approach gives you maximum freedom in your baking schedule.


Leave a Comment