Key Takeaways
- Cream softened butter and sugar until fluffy, then gradually mix in flour without overworking the dough.
- Press dough evenly into a baking pan and chill for at least 30 minutes before baking.
- Bake at 325°F for 12–15 minutes until edges are pale golden and centers remain slightly soft.
- Cut warm shortbread with sharp cookie cutters using downward pressure without twisting for clean edges.
- Store cooled shortbread in airtight containers at room temperature for up to two weeks.
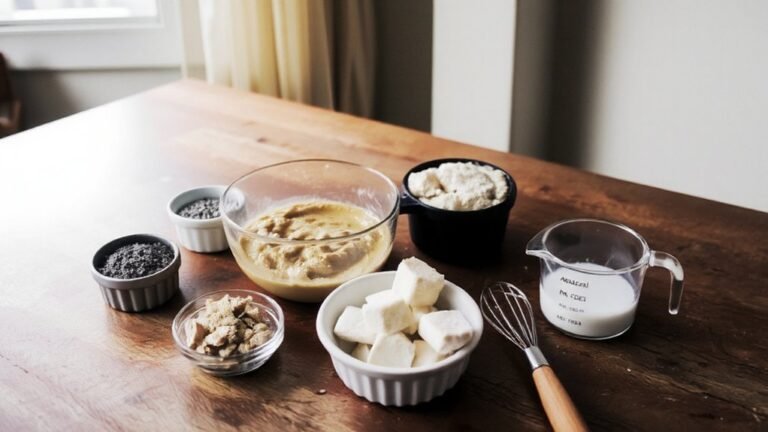
Gathering Your Ingredients
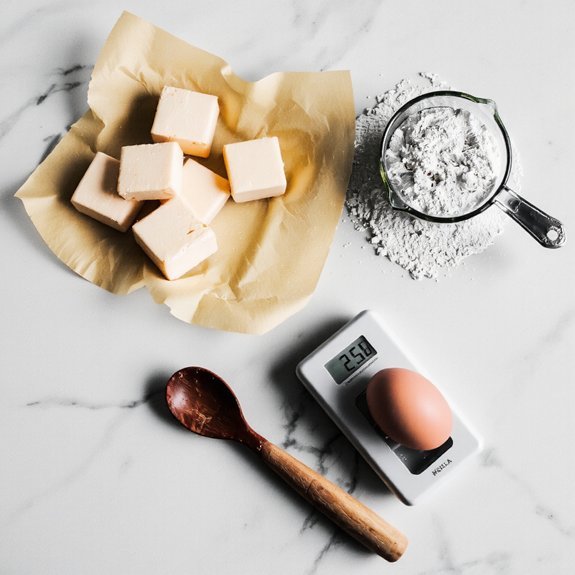
Before you start mixing, gather these essential ingredients: 2 cups all-purpose flour, 1 cup unsalted butter (softened to room temperature), ½ cup granulated sugar, and ¼ teaspoon salt.
You’ll want to source quality ingredients without breaking your budget.
Check bulk bins for flour and sugar—you’ll save substantially compared to pre-packaged options.
For butter, you’re not locked into premium brands; standard unsalted butter performs identically in shortbread.
Shop sales and stock up when prices drop.
Verify your flour’s freshness by checking the packaging date.
Room-temperature butter’s vital—it’ll cream properly with sugar, creating the tender crumb shortbread demands.
Don’t use cold butter or you’ll struggle during mixing.
Have everything measured and ready before you begin.
This prep work prevents mistakes and keeps you in control of your baking process.
2. Preparing Your Dough
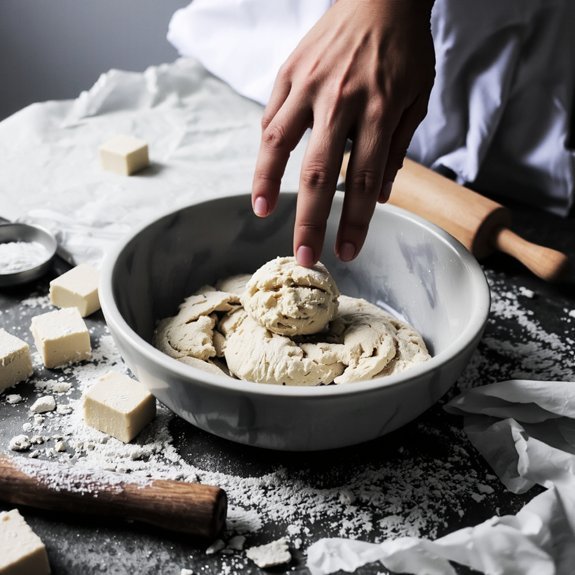
Now that you’ve gathered your ingredients, it’s time to combine them into dough. Start by creaming softened butter with sugar until the mixture becomes light and fluffy—this takes about three minutes.
Gradually add your flour, mixing until the dough just comes together without overworking it.
Maintain proper kitchen workflow by organizing ingredients within arm’s reach before you begin.
Follow hygiene practices by washing your hands before handling ingredients and keeping your work surface clean.
Don’t knead excessively; overworking develops gluten, resulting in tough cookies.
You’ll know you’re done when the dough forms a cohesive mass. Press the mixture firmly into your baking pan, ensuring even thickness throughout. Chill the dough for at least thirty minutes before baking.
3. Achieving the Perfect Texture
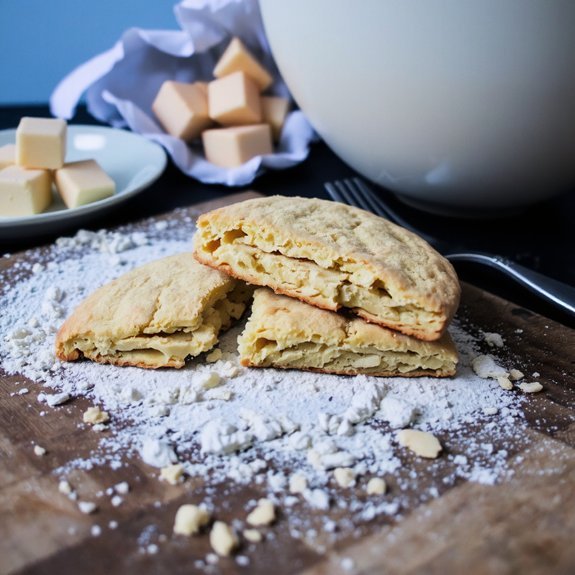
The butter-to-flour ratio you’ve maintained throughout your preparation directly determines whether your shortbread will achieve that signature crumbly, tender texture.
Press your dough gently into the baking pan—you’re not compacting it, you’re setting it. This restraint preserves the air pockets that create that desirable melt-in-your-mouth quality.
During baking, watch for a pale golden color at the edges. This sensory evaluation signals proper moisture evaporation without over-browning. Remove your shortbread when it’s still slightly soft to the touch; residual heat completes the cooking process.
Understanding texture psychology matters here: that satisfying crunch followed by dissolution triggers consumer satisfaction.
Cool your shortbread completely before cutting. The contrast between crisp exterior and tender crumb satisfies both tactile and taste expectations, delivering the freedom of perfect, unadulterated butter flavor without dense, cakey disappointments.
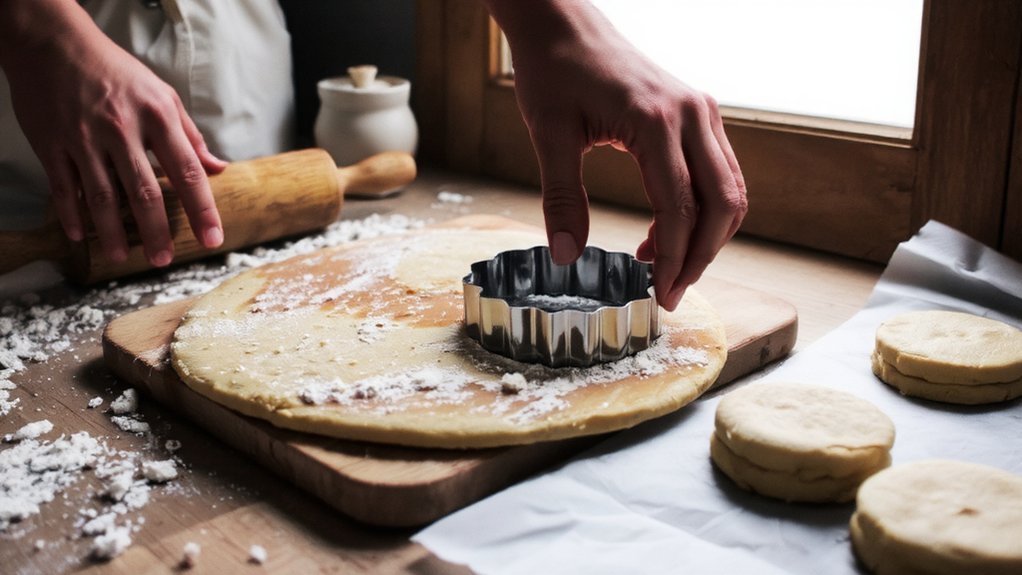
4. Shaping and Cutting Your Cookies
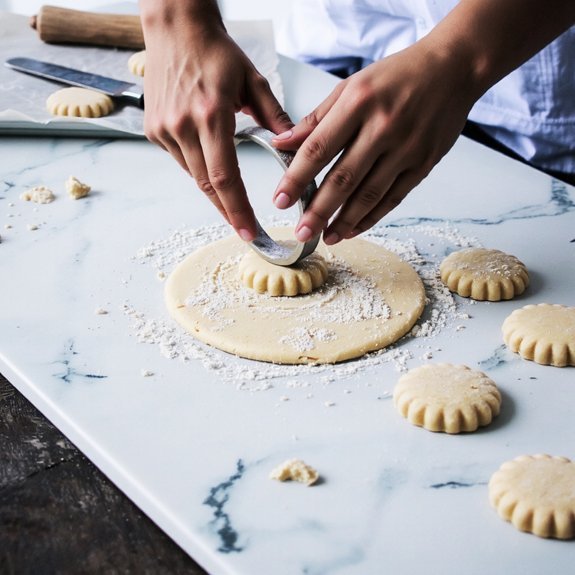
Cutting your shortbread while it’s still warm from the pan gives you clean edges and prevents the crumbly edges that occur once it’s fully cooled.
You’ll want to work quickly during this window.
Use sharp cookie cutters to press shapes directly into the dough without twisting, which can seal edges and inhibit even baking.
For intricate designs, employ decorative stamping tools to impress patterns into the surface before cutting.
Transfer cut pieces to a cooling rack using a thin spatula, supporting the dough fully to prevent breakage.
If your dough hardens before you finish shaping, simply return it to the oven for 2-3 minutes to soften.
This approach guarantees uniform thickness, consistent browning, and the refined appearance that defines quality shortbread.
5. Baking to Golden-Brown Perfection
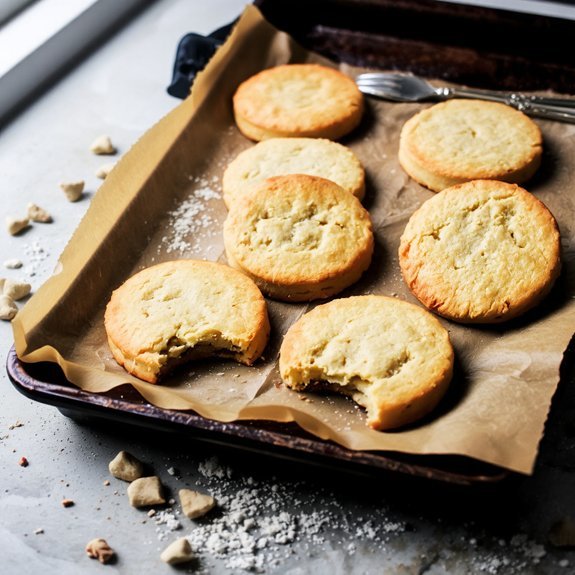
You’ll bake your shortbread at 325°F for 12-15 minutes, monitoring closely since butter-based doughs brown quickly and unevenly in hotter ovens.
Watch for the edges to turn light golden while the centers remain pale cream—they’ll continue cooking slightly after removal from heat.
You’ve achieved perfection when the entire cookie displays a uniform, pale golden hue without any dark spots or underbaked white patches.
Temperature and Timing Control
Once you’ve shaped your dough, precise oven temperature becomes critical—shortbread won’t develop its signature golden-brown exterior or achieve that tender, buttery crumb without consistent heat.
Verify your oven’s accuracy using thermometer calibration; most home ovens drift 25 degrees or more, compromising results. Set your temperature to 325°F for ideal butter caramelization without burning.
Implement timer redundancy by using both your oven’s built-in timer and a separate device. Shortbread typically requires 12-15 minutes, depending on thickness and your specific oven’s characteristics. Remove cookies when edges just turn golden—centers will continue cooking as they cool. Overbaking creates a dry, crumbly texture that destroys shortbread’s prized buttery tenderness. Your vigilance during these final minutes determines whether you’re serving restaurant-quality cookies or disappointment.
Identifying the Perfect Golden Hue
How do you distinguish between perfectly baked shortbread and cookies that’ve crossed into overbaking? The visual distinction determines your success. You’re looking for a pale golden hue across the entire surface—not white, not dark brown.
Lighting conditions dramatically affect your assessment. Natural daylight reveals true color better than artificial kitchen lights. If you’re serious about consistency, colorimeter calibration tools help eliminate guesswork.
| Bake Stage | Color | Texture | Action |
|---|---|---|---|
| Underbaked | Pale cream | Soft, doughy | Bake 2-3 minutes longer |
| Perfect | Light gold | Firm, crisp edges | Remove immediately |
| Overbaked | Deep brown | Hard, bitter | Discard batch |
You’ll notice the edges firm up first. That’s your signal—remove cookies when edges turn golden but centers remain slightly soft. They’ll continue cooking on the hot pan.
6. Storage and Serving Tips
Because shortbread’s high butter content naturally preserves it, these cookies’ll stay fresh for up to two weeks when stored properly in an airtight container at room temperature.
You’ll want to layer them with parchment paper to prevent sticking and moisture absorption.
For serving suggestions, present shortbread at room temperature to fully appreciate its buttery texture and delicate crumb structure.
You can pair them with tea, coffee, or milk for an elegant afternoon treat.
If you prefer them slightly warm, gently reheat in a 275°F oven for 3-5 minutes just before serving.
Avoid refrigerating shortbread, as cold temperatures harden the butter and compromise the cookie’s signature tender bite.
Freezing works well for long-term storage up to three months when kept in airtight containers.
Frequently Asked Questions
Can I Use Salted Butter Instead of Unsalted Butter in Shortbread?
You can use salted butter, but you’ll need to adjust your salt measurement accordingly. Since salted butter already contains salt, reduce the added salt in your recipe to maintain proper flavor balance.
Typically, salted butter contains about 1.5-2% salt by weight. Cut your recipe’s salt content by half, then taste your dough to fine-tune the seasoning.
This ingredient-focused approach makes certain you’re not oversalting your shortbread while preserving its delicate, buttery character.
What Causes Shortbread to Spread Too Much During Baking?
You’ll get excessive spreading when your oven temperature runs too low—shortbread needs consistent heat to set structure before butter melts completely. Using softer flour instead of cake flour creates a weaker gluten network that can’t support the dough’s shape.
You’re also susceptible to spreading if you’ve overworked your dough or used too much butter. Chill your dough thoroughly before baking, maintain proper oven temperature accuracy, and choose all-purpose or bread flour for ideal results.
How Do I Fix Shortbread Dough That’s Too Crumbly?
You’ll fix crumbly shortbread by adding moisture incrementally.
Work in a teaspoon of cold milk or cream at a time, mixing gently until you’ve reached the right consistency—the dough should hold together when pressed. You’ve got freedom to adjust based on your flour’s absorbency.
After correcting the texture, rest dough in your refrigerator for thirty minutes, which helps it bind further and prevents spreading during baking.
Can I Freeze Shortbread Dough Before Baking?
Yes, you can freeze your shortbread dough.
Wrap it tightly in plastic wrap and freeze for up to three months—that’s your freezing duration.
When you’re ready to bake, you’ve got options: thaw it in the refrigerator overnight for easiest handling, or bake directly from frozen, adding a few minutes to your baking time.
Both thawing techniques work; choose what fits your schedule and baking freedom.
Why Did My Shortbread Turn Out Tough Instead of Crumbly?
You’ve likely overmixed your dough, developing gluten that creates toughness instead of the crumbly texture you want. Additionally, you probably baked at too high a temperature, which hardens the exterior before the interior can set properly.
Mix your ingredients just until combined—don’t overwork the butter and flour. Bake at 325°F maximum for tender, delicate shortbread that crumbles beautifully on your tongue.


Leave a Comment