Key Takeaways
- Measure flour by weight using a kitchen scale for consistency, then whisk spices (ginger, cinnamon, cloves, nutmeg) into dry ingredients.
- Cream softened butter and brown sugar for 2–3 minutes until light and fluffy, then fold in dry ingredients until just combined.
- Chill dough at least 2 hours, roll to 1/4-inch thickness, and cut with sharp cutters using straight downward presses.
- Preheat oven to 350°F and bake cookies 10–12 minutes until edges darken slightly while centers remain slightly soft.
- Store cooled decorated cookies in airtight containers with parchment layers between tiers in cool, dry locations for up to two weeks.
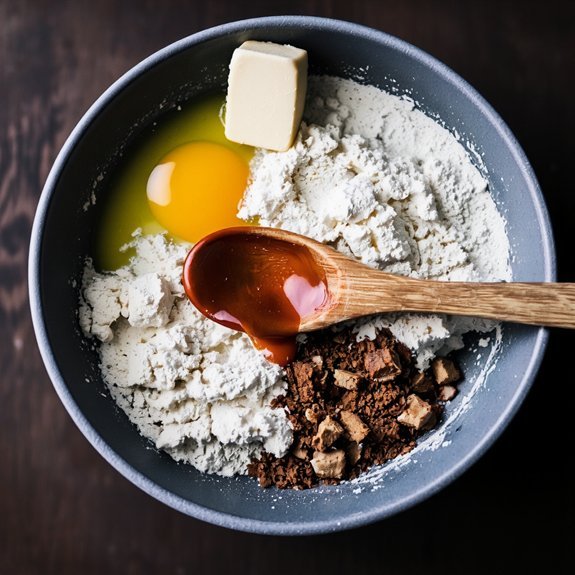
Gathering Your Ingredients
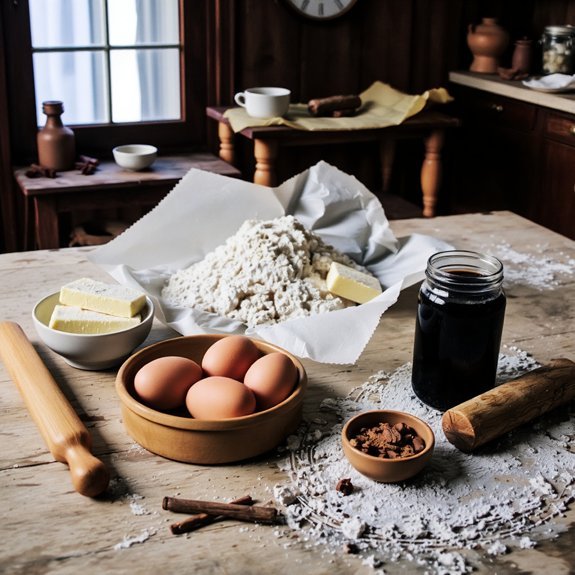
Before you begin mixing your dough, you’ll need to gather all the necessary ingredients for your gingerbread cookies. You’ll require two and one-quarter cups of all-purpose flour, one teaspoon of baking soda, one-half teaspoon of salt, one tablespoon of ground ginger, one teaspoon of cinnamon, one-quarter teaspoon of cloves,
one-half cup of butter, three-quarters cup of brown sugar, and one egg.
For budget shopping, purchase store-brand spices and flour to reduce costs without sacrificing quality. If you’re concerned about allergies, consider allergy alternatives: substitute butter with coconut oil or dairy-free margarine, replace the egg with a flax egg, and use gluten-free flour for wheat sensitivities.
Verify expiration dates on spices before starting. Having everything prepared guarantees efficient baking and prevents mid-process interruptions.
Preparing Your Dry Ingredients
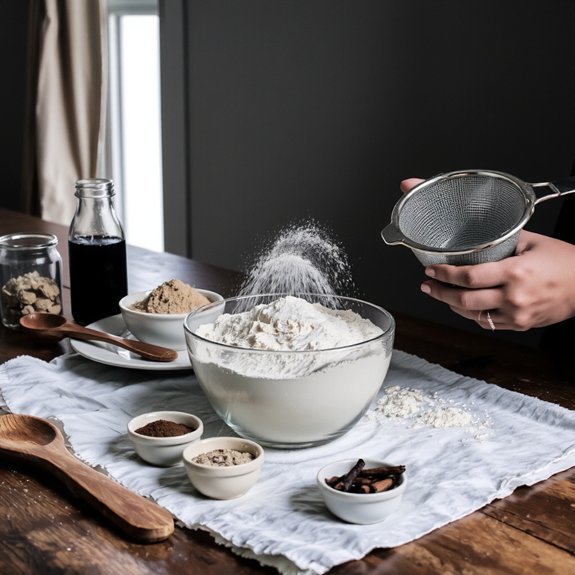
You’ll need to measure your flour accurately using the spoon-and-level method to guarantee consistent results in your gingerbread cookies.
Next, you’ll combine your spices—ginger, cinnamon, cloves, and nutmeg—in a separate bowl before mixing them with your dry ingredients.
This technique distributes the spices evenly throughout the dough, preventing concentrated pockets of flavor.
Measuring Flour Accurately
Because flour settles during storage, you’ll get inconsistent results if you scoop directly from the bag. Instead, use a kitchen scale for precision—accuracy matters when baking gingerbread cookies.
| Method | Accuracy | Speed | Notes |
|---|---|---|---|
| Scooping | Low | Fast | Settles unevenly |
| Spooning & leveling | Medium | Moderate | Better than scooping |
| Weight (grams) | High | Fast | Most reliable |
| Weight (ounces) | High | Fast | Less precise than grams |
Before measuring, verify your scale calibration is correct by testing with a known weight. Account for humidity effects—flour absorbs moisture from air, affecting weight and density. On humid days, you’ll need slightly less flour. Weigh your flour at room temperature for consistency. This method gives you control and eliminates guesswork, guaranteeing your gingerbread cookies turn out perfectly every time you bake.
Combining Spices Properly
Now that you’ve got your flour measured precisely, it’s time to prepare your dry spice blend.
You’ll need to combine ginger, cinnamon, cloves, and nutmeg in specific blending ratios—typically 2 tablespoons ginger, 1 tablespoon cinnamon, ½ teaspoon cloves, and ¼ teaspoon nutmeg per batch.
Whisk these spices together in a small bowl, breaking up any clumps with the back of a spoon.
This guarantees even distribution throughout your dough.
For ideal flavor development, consider blooming spices by gently warming them in a dry skillet for 30 seconds before combining.
This activates their essential oils without burning them.
Mix your spice blend thoroughly with the flour, salt, and baking soda.
Proper integration prevents pockets of concentrated flavor and guarantees consistent taste in every cookie you bake.
Creaming Butter and Molasses
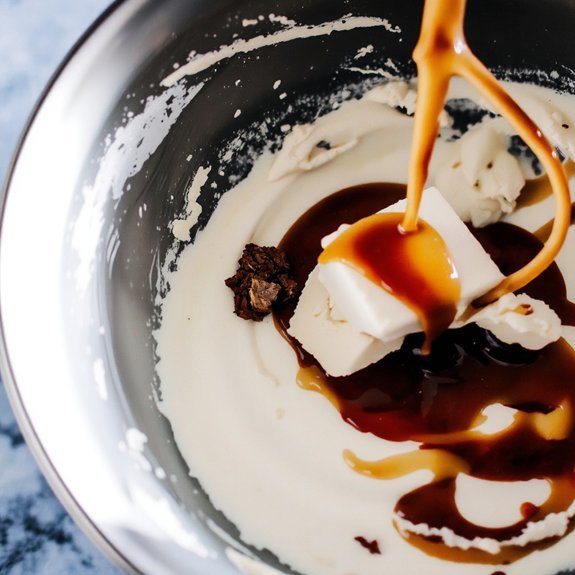
Combining softened butter and molasses creates the flavor foundation for your gingerbread cookies.
You’ll want to cream these ingredients together for approximately two to three minutes until the mixture becomes light and fluffy.
This process incorporates air into the butter, which helps your cookies rise properly during baking.
The molasses acidity cuts through the butter’s richness, balancing sweetness with depth.
As you beat the mixture, fat crystallization occurs, creating a stable emulsion that traps moisture and promotes even browning.
Ensure your butter reaches room temperature before starting—cold butter won’t cream properly.
Beat on medium speed, scraping the bowl’s sides occasionally to guarantee thorough combining.
Stop once you’ve achieved a pale, fluffy consistency.
This foundation determines your cookies’ texture and flavor profile, so don’t rush this critical step.
Combining Wet and Dry Ingredients
You’ll need to alternate adding your dry ingredients and creamed mixture to achieve the proper consistency and guarantee even distribution throughout your batter.
Keep your ingredients at similar temperatures—cold flour mixed with warm butter creates lumps, while overly warm ingredients can cause the dough to become greasy and difficult to handle.
Stir only until you’ve just combined the ingredients, as continued mixing develops gluten and produces tough, dense cookies rather than the tender texture you’re after.
Mixing Method Matters Most
The technique you’ll use when combining wet and dry ingredients will directly impact your cookies’ texture and rise.
You’ve got freedom in your Tool Selection—whether you choose a whisk, wooden spoon, or electric mixer depends on your desired outcome.
Overmixing develops gluten, resulting in dense, tough cookies, while undermixing leaves dry pockets.
Fold dry ingredients into wet components using deliberate, controlled strokes until you’ve just incorporated everything.
This method prevents overworking the dough.
When Batch Scaling, maintain consistent mixing times regardless of quantity.
A doubled recipe requires identical technique, not extended mixing.
Use the same Tool Selection approach to guarantee uniform results across all batches.
Master this fundamental skill, and you’ll consistently produce gingerbread cookies with ideal texture and height.
Your control over mixing directly determines success.
Temperature Balance for Success
While mixing technique establishes your dough’s foundation, temperature control determines whether you’ll achieve the perfect balance between spreadability and structure.
You’ll want to keep your ingredients cool—around 65-70°F—to prevent premature spreading during baking.
Cold dough gives you control; it holds its shape rather than flattening into thin discs.
Monitor your ambient humidity, as moisture content directly affects dough consistency.
On humid days, you’ll need slightly less liquid.
Conversely, dry conditions demand minor adjustments upward.
Your kitchen ventilation plays an essential role too.
Good airflow helps regulate temperature fluctuations and prevents heat buildup around your work surface.
This consistency enables predictable results batch after batch.
Chill your dough for at least two hours before baking.
This seemingly simple step separates mediocre cookies from perfectly textured gingerbread with crisp edges and chewy centers.
Avoiding Overmixing the Batter
Once your dry ingredients are whisked together and your wet components are combined separately, it’s time to bring them together—but restraint matters here.
Overmixing develops gluten, which’ll toughen your cookies and ruin their tender crumb. You’re after a delicate balance between incorporation and restraint.
- Fold wet into dry using a spatula, not a mixer
- Stop immediately when you can’t see streaks of flour
- Watch for visual cues—the batter should look slightly shaggy
- Use texture checkpoints by pinching a small amount between your fingers
- Mix only until ingredients combine; 8-12 folds typically suffice
Your freedom lies in this precision. Undermixed batter’s preferable to overmixed—any remaining flour streaks’ll incorporate during baking. Trust the process, not your instinct to achieve perfect uniformity. This restraint yields the gingerbread cookie texture you’re after.
Chilling and Rolling the Dough

After you’ve mixed your dough, you’ll need to refrigerate it for at least two hours—or overnight if you’re planning ahead.
Chilling firms the dough, making it easier to work with and preventing excessive spreading during baking.
Once chilled, flour your work surface lightly and roll the dough to your desired thickness—typically one-quarter inch for ideal texture.
Work quickly to maintain dough firmness; if it softens, return it to the refrigerator for 15 minutes.
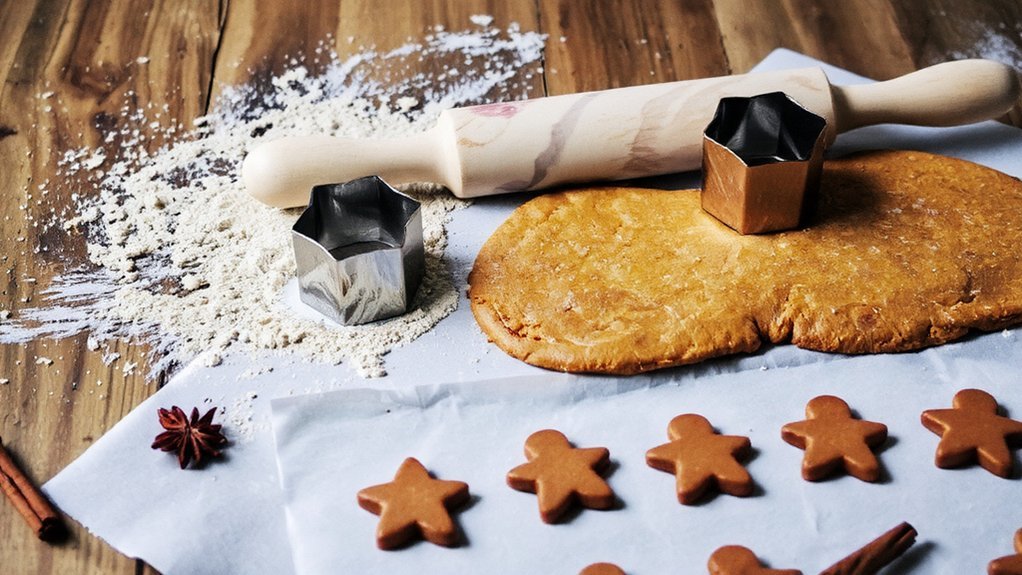
Use cookie cutters to shape your gingerbread, then transfer pieces to parchment-lined baking sheets.
Don’t overwork the dough when handling; excessive manipulation causes cracks and compromises structural integrity.
The firmer your dough remains throughout rolling, the cleaner your cuts and the better your cookies bake.
Cutting and Baking Your Cookies
With your dough rolled to the proper thickness, you’re ready to cut and bake your gingerbread cookies.
With your dough rolled to the proper thickness, you’re ready to cut and bake your gingerbread cookies.
Your cutting technique and pan preparation determine your final results:
- Use sharp cookie cutters, pressing straight down without twisting to prevent sealing edges
- Arrange cut cookies on parchment-lined baking sheets, spacing them half an inch apart
- Prepare your pan with parchment paper or silicone mats for even heat distribution
- Preheat your oven to 350°F, ensuring proper temperature calibration
- Bake for 10-12 minutes until cookies firm up but remain slightly soft
Your cutting technique directly impacts cookie texture and rise.
Avoid twisting cutters, which compresses dough edges and restricts expansion.
Pan preparation with parchment or silicone mats prevents sticking and promotes uniform browning underneath.
Monitor baking time closely—over-baking creates brittleness, while under-baking leaves them too soft.
Remove cookies when edges darken slightly but centers yield gently to pressure.
Decorating and Storage Tips
Your freshly baked gingerbread cookies deserve finishing touches that enhance both appearance and longevity.
Master piping techniques using royal icing to create intricate details—hold your piping bag at a 45-degree angle and apply consistent pressure for clean lines.
Experiment with various tips to achieve dots, swirls, and borders that personalize your creations.
For storage, you’ll want airtight containers that prevent moisture absorption and staleness.
Layer cookies with parchment paper between each tier to avoid sticking.
Keep containers in cool, dry locations away from direct sunlight.
Properly stored gingerbread cookies maintain ideal texture and flavor for up to two weeks.
Don’t underestimate the decorative impact of simple embellishments—sprinkles, edible glitter, or candies applied immediately after piping create professional-quality results that showcase your baking independence.
Frequently Asked Questions
Can I Substitute Molasses With Honey or Another Sweetener in Gingerbread Cookies?
You can substitute molasses, though you’ll encounter flavor impact and texture differences.
Honey creates a lighter taste and softer crumb—less depth than molasses delivers.
Brown sugar mixed with corn syrup better mimics molasses’s richness.
Maple syrup works too but shifts flavor noticeably.
You’ll need to adjust liquid ratios since honey and syrup contain more moisture than molasses. Start by replacing molasses one-to-one, then modify your dry ingredients if your dough becomes too wet.
Test small batches first.
Why Do My Gingerbread Cookies Spread Too Much During Baking?
Your gingerbread cookies spread excessively because you’re likely using softened butter that’s too warm. You need cold, firm butter to maintain structure.
Additionally, verify your flour measurement—you’re probably underestimating. Use a scale or spoon-and-level method, not scooping directly. Excess moisture from insufficient flour causes spreading.
Chill your dough thoroughly before baking. These adjustments’ll give you cookies that hold their shape and independence on the baking sheet.
How Long Do Baked Gingerbread Cookies Stay Fresh in an Airtight Container?
You’ll keep your baked gingerbread cookies fresh for up to two weeks in an airtight container, maintaining maximum shelf life and texture retention.
Store them in a cool, dry place away from humidity and direct sunlight.
You can extend freshness by placing parchment paper between layers.
For maximum texture retention, you’ve got the freedom to add a bread slice inside your container—replace it every two days.
This method prevents staleness effectively.
Can I Freeze Gingerbread Dough and Bake It Later?
Yes, you can freeze gingerbread dough effectively.
Use portion freezing by dividing your dough into individual cookie-sized balls before freezing.
Wrap each portion tightly in plastic wrap, then place them in freezer bags for up to three months.
When you’re ready to bake, employ thawing methods by refrigerating portions overnight or baking directly from frozen, adding one to two minutes to your baking time.
This approach gives you complete control over your baking schedule.
What Causes Gingerbread Cookies to Crack While Cooling?
Your gingerbread cookies crack during cooling primarily because you’ve overheated them or miscalibrated your oven temperature.
Excessive oven heat causes the exterior to set too quickly while the interior remains soft, creating stress fractures as it cools.
Additionally, if your dough hydration’s too low, the cookies become brittle.
You’ll prevent cracking by baking at precise temperatures, ensuring adequate moisture content, and allowing cookies to cool gradually on the pan before transferring them.


Leave a Comment