Key Takeaways
- Cream softened butter and sugar for 2–3 minutes until light, fluffy, and pale to prevent dense, flat cookies.
- Sift dry ingredients (flour, cream of tartar, baking soda, salt) and fold gently into wet mixture to avoid overmixing.
- Chill dough thoroughly before rolling balls in cinnamon-sugar coating to ensure proper rise and prevent flat results.
- Bake at 375°F for 9–11 minutes until edges brown slightly while centers remain soft, then cool on wire racks.
- Rotate baking sheets halfway through and verify oven temperature with a thermometer to ensure even, consistent baking.
Gathering Your Ingredients
Before you mix anything together, you’ll need to gather all your ingredients on your work surface.
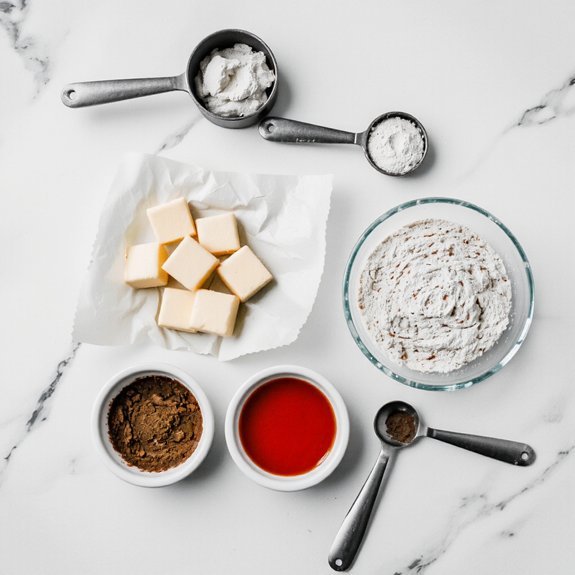
You’ll require two cups of all-purpose flour, one cup softened butter, one and a half cups sugar, two large eggs, two teaspoons vanilla extract, one teaspoon baking soda, half a teaspoon salt, and two tablespoons cinnamon mixed with two tablespoons sugar for coating.
Consider your ingredient sourcing carefully.
Purchase high-quality butter and fresh eggs from reputable suppliers.
If you’re exploring dietary alternatives, you can substitute all-purpose flour with almond flour or use coconut sugar instead of granulated sugar.
Vegan butter works as a butter replacement, and applesauce can replace eggs in a one-to-one ratio.
Organize everything systematically before beginning.
Measure each ingredient precisely into separate bowls.
This methodical approach guarantees accuracy and prevents mixing errors during preparation.
Essential Baking Equipment
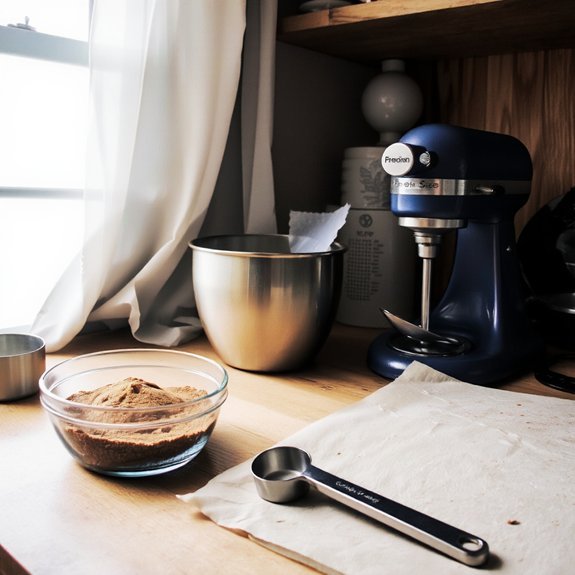
To bake snickerdoodles successfully, you’ll need several essential pieces of equipment.
Proper tool organization promotes efficiency and prevents frustration during your baking process.
Invest in quality items that’ll serve you well:
- Mixing bowls—preferably stainless steel for durability and ease of cleaning
- Electric mixer—saves time and effort when creaming butter and sugar
- Baking sheets—heavy-duty aluminum prevents uneven browning
You’ll also require measuring cups, measuring spoons, and a whisk.
A cookie scoop guarantees uniform sizing across batches.
Equipment maintenance is critical; wash your mixer and bowls immediately after use to prevent ingredient buildup.
Store your tools in designated spaces for quick access.
Quality equipment reduces baking time and improves consistency, giving you the freedom to master snickerdoodle baking without unnecessary complications or delays.
Creaming Butter and Sugar
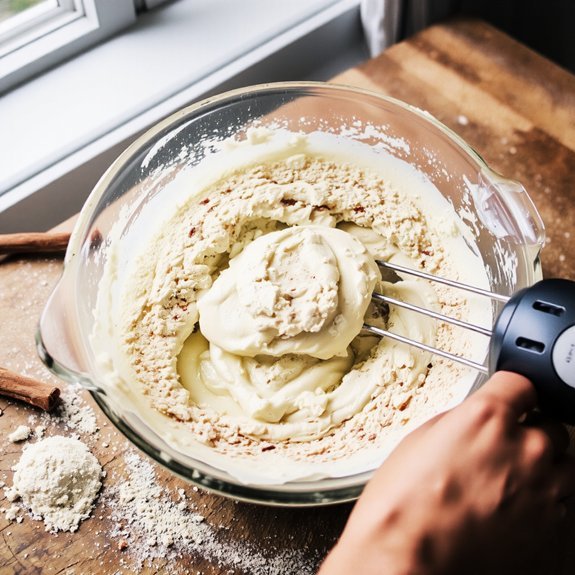
Creaming butter and sugar together creates the foundation for perfectly textured snickerdoodles.
You’ll combine softened butter with granulated sugar, beating them until the mixture becomes light and fluffy.
This process incorporates air into the dough through aeration science, which develops tiny bubbles that expand during baking.
These air pockets provide texture control, determining whether your cookies turn out cake-like or chewy.
Beat the mixture for approximately two to three minutes using an electric mixer on medium speed.
You’ll notice the butter transforms from yellow to pale, indicating proper aeration.
Don’t skip this step—it’s critical for achieving the desired cookie structure.
Proper creaming prevents dense, flat snickerdoodles, ensuring your final product has the ideal crumb structure and rise you’re after.
Mixing Dry Ingredients
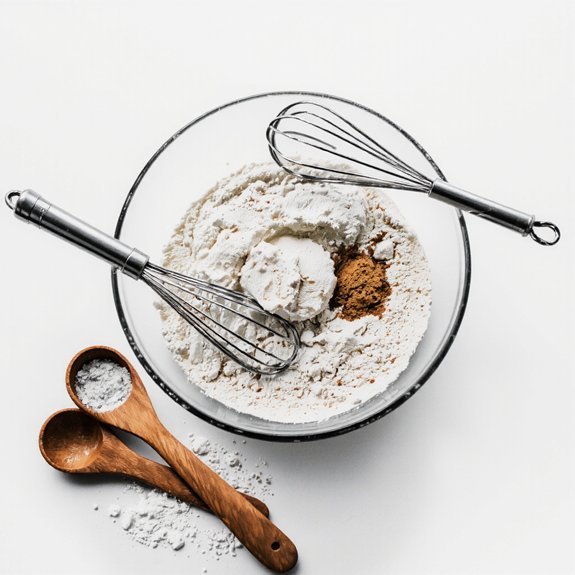
While your butter and sugar mixture achieves its pale, fluffy consistency, you’ll want to combine your dry ingredients separately.
This approach promotes even distribution and prevents overmixing once you combine everything.
Gather your dry components:
- 2¾ cups all-purpose flour
- 2 teaspoons cream of tartar
- 1 teaspoon baking soda
- ½ teaspoon salt
Use proper sifting techniques to maximize aeration effects throughout your mixture.
Sift flour, cream of tartar, baking soda, and salt into a medium bowl.
Sifting breaks up compacted flour and incorporates air, creating a lighter texture in your final cookies.
Don’t skip this step—it’s fundamental to achieving snickerdoodles with ideal crumb structure.
Whisk the combined dry ingredients thoroughly for thirty seconds, guaranteeing uniform distribution of leavening agents.
You’re now ready to integrate this mixture with your creamed butter and sugar.
Combining Wet and Dry Components
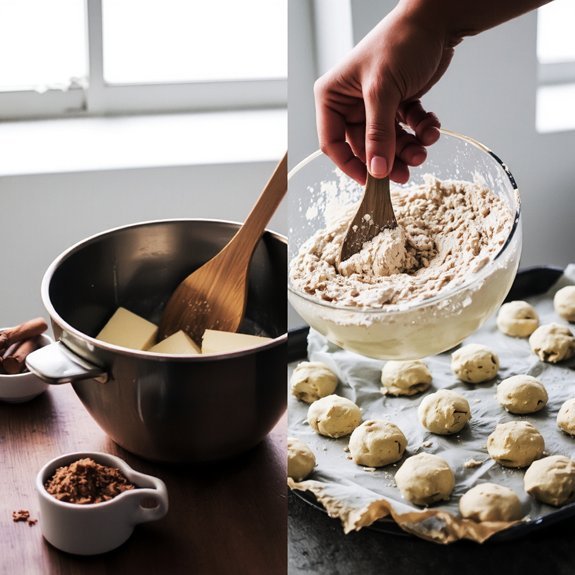
Your sifted dry mixture and creamed wet ingredients are now ready to unite. This critical phase demands precision in technique and ingredient temperature management.
| Step | Action |
|---|---|
| 1 | Add dry mixture to wet ingredients in thirds |
| 2 | Fold gently using a spatula, not a mixer |
| 3 | Monitor hydration control throughout |
| 4 | Stop folding when no streaks remain |
| 5 | Transfer dough to prepared surface |
Incorporate your dry components gradually to maintain ideal hydration control. This method prevents overdevelopment of gluten and guarantees even moisture distribution. Don’t rush—each addition requires thorough integration before proceeding.
Your ingredient temperature directly affects dough consistency. Room-temperature components combine more uniformly than cold ones. Once fully combined, your dough’s ready for the next stage. You’ve earned complete control over your snickerdoodle’s final texture and rise.
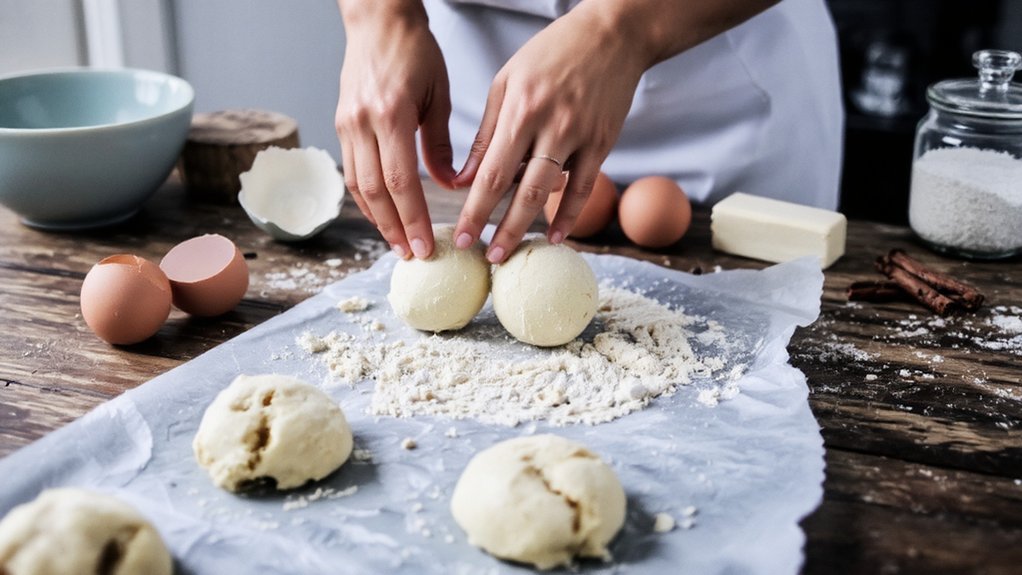
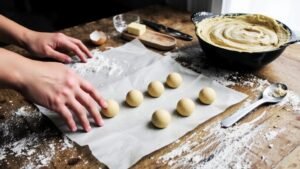
Rolling Dough in Cinnamon-Sugar
Rolling dough balls in cinnamon-sugar coating requires precision timing and proper technique to achieve an even, adhesive layer.
You’ll want to work quickly while your dough remains slightly warm—this guarantees the coating sticks effectively without sliding off during baking.
Your coating techniques should include:
- Combining two tablespoons of cinnamon with one-half cup of granulated sugar in a shallow bowl
- Rolling each dough ball thoroughly, rotating it to guarantee complete coverage on all sides
- Placing coated balls on parchment paper with adequate spacing for expansion
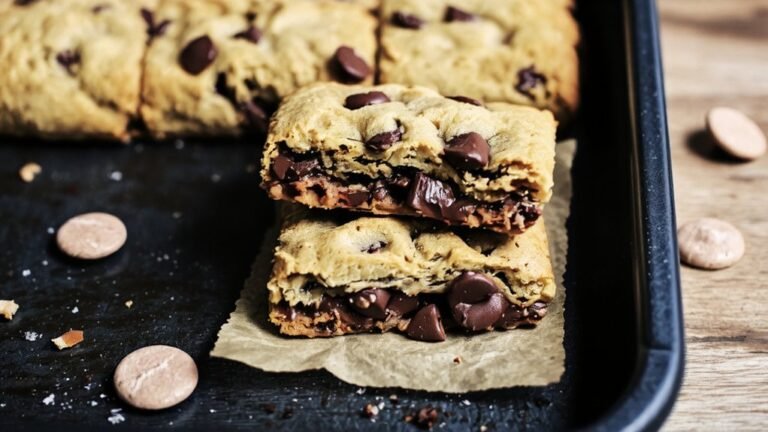
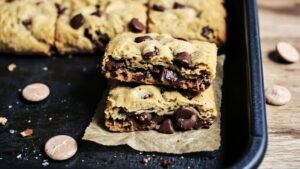
These presentation styles create visually appealing cookies with consistent texture. You’ll notice the cinnamon-sugar layer develops a slightly crystallized exterior during baking, producing that signature snickerdoodle crackle.
Timing matters—coat your dough immediately after portioning for ideal adhesion and finished appearance.
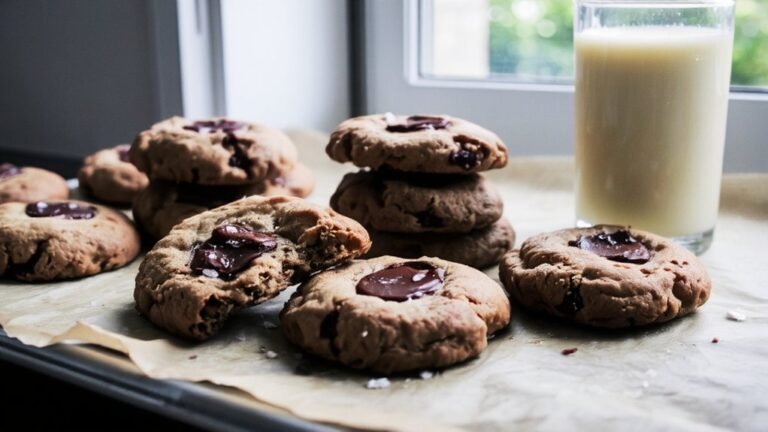
Baking Your Snickerdoodles
Preheating your oven to 375°F guarantees consistent baking temperatures that’ll produce properly set cookies with ideal crackle development.
Preheating to 375°F ensures consistent baking temperatures and that perfect crackled appearance your cinnamon-sugar cookies deserve.
Place your cinnamon-sugar coated dough balls on parchment-lined baking sheets, spacing them two inches apart to allow for spread.
Bake for 9-11 minutes until the edges brown slightly while centers remain soft.
This timing creates the signature crackled appearance you’re after.
For flavor variations, consider adding nutmeg or vanilla extract to your cinnamon-sugar coating.
Experiment with almond or maple extracts in your dough for distinctive profiles.
Remove cookies from the oven while they’re still slightly underbaked—they’ll continue cooking on the hot pan.
Transfer to a wire rack after two minutes.
Presentation tips: arrange cooled cookies on tiered stands or stack them in parchment paper for rustic appeal.
Your freedom to customize extends throughout every baking stage.
Cooling and Storage Tips
Once you’ve transferred your snickerdoodles to the wire rack, proper cooling and storage will preserve their texture and flavor for days.
Allow your cookies to cool completely on cooling racks before storing them. This prevents condensation that’d compromise their crispy edges and soft centers.
Here’s how you’ll maximize their shelf life:
- Store cooled snickerdoodles in airtight containers at room temperature for up to one week
- Layer cookies with parchment paper to prevent sticking and breakage during storage
- Keep airtight containers away from heat sources and direct sunlight to maintain peak freshness
You’ve got the freedom to enjoy your snickerdoodles throughout the week without sacrificing quality.
Proper cooling and storage techniques guarantee you’re not settling for stale cookies. These straightforward methods deliver consistent results every time.
Troubleshooting Common Issues
Why do your snickerdoodles sometimes turn out flat, cakey, or unevenly baked?
Flat cookies typically result from excessive butter or underbaking. You’ll want to chill dough thoroughly before baking.
Flat cookies typically result from excessive butter or underbaking. Chill dough thoroughly before baking for best results.
Cakey texture indicates overmixing or too much flour. Measure flour by weight for consistency.
Uneven baking stems from hot spots in your oven—rotate baking sheets halfway through.
For flavor adjustments, reduce cinnamon-sugar coating if it tastes overwhelming, or increase cream of tartar slightly for tanginess.
When batch scaling, remember that doubling recipes doesn’t always double baking time; monitor cookies closely. Verify your oven temperature’s accurate using a thermometer.
If edges brown excessively while centers remain underdone, lower heat by 25°F.
These systematic corrections address root causes directly, giving you control over your results.
Frequently Asked Questions
Can I Use Margarine Instead of Butter for Snickerdoodles?
You can substitute margarine for butter, though you’ll notice flavor differences. Margarine’s fat composition contains more water and fewer milk solids than butter, resulting in a less rich, buttery taste.
Your snickerdoodles won’t achieve that authentic, indulgent depth. The texture may also suffer—they’ll lack the tender crumb butter provides.
If you’re committed to margarine, use a high-quality brand and make sure it’s unsalted to maintain control over your recipe’s salt content and final outcome.
How Far in Advance Can I Prepare Snickerdoodle Dough?
You can prepare your snickerdoodle dough up to 72 hours ahead by storing it in an airtight container during refrigeration timing.
Overnight resting actually improves your results—you’ll achieve better flavor development and texture.
For maximum freedom in your baking schedule, divide the dough into portions before chilling. This approach lets you bake batches whenever you choose without being locked into a single session, giving you complete control over your production timeline.
What Causes Snickerdoodles to Crack on Top While Baking?
You’ll see cracks form when surface tension breaks during the baking process. If your oven temperature runs too high, the exterior sets before the interior fully rises, forcing the dough to split.
You’re basically fighting between crust formation and crumb expansion. Lower your oven temperature by 25 degrees and you’ll gain control, allowing the snickerdoodle to rise uniformly without compromising its signature crackled appearance.
Can I Freeze Snickerdoodle Dough for Later Baking?
Yes, you can freeze snickerdoodle dough effectively.
Flash freezing individual dough balls on a baking sheet for two hours prevents them from sticking together. Transfer your frozen dough balls into airtight storage containers and freeze for up to three months.
You’ll maintain complete control over your baking schedule—bake directly from frozen, adding just two to three extra minutes to your baking time without thawing.
Why Did My Snickerdoodles Turn Out Cake-Like Instead of Chewy?
Your snickerdoodles turned cake-like because you’ve likely overmixed your dough or used too much flour.
You’re controlling the texture, so measure flour by weight rather than volume—you’ll eliminate guesswork.
Additionally, your baking temperature matters critically; if you’re baking too low, cookies spread excessively and set firm rather than staying chewy. Increase your oven temperature slightly and reduce baking time, checking at the minimum duration.


Leave a Comment