Key Takeaways
- Overworking the dough develops excessive gluten, creating elasticity that contracts when heat activates the network during baking.
- Skipping the chilling process leaves gluten tense and butter too soft, preventing proper layering and causing significant shrinkage.
- Incorrect oven temperature delays crust setting, allowing continued gluten contraction; verify your oven’s actual temperature with a thermometer.
- Not docking or blind baking traps steam beneath the crust, causing it to lift and warp away from pan edges.
- Using too much water weakens the gluten network’s structural integrity, preventing the dough from maintaining its shape during baking.
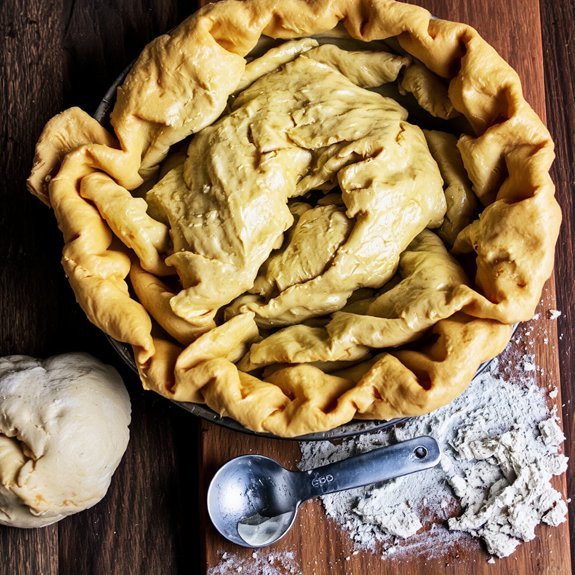
Overworking the Dough
When you overwork pie dough, you’re developing gluten strands that’ll cause the crust to shrink during baking.
Excessive gluten creates elasticity in your dough, making it fight back against your rolling and shaping efforts.
This tension doesn’t disappear—it transfers directly to your crust, causing it to contract as heat activates those gluten networks.
You’ll notice a tough texture replacing your desired flaky layers. Handle your dough minimally—mix until ingredients just combine, then stop. Overworking transforms tender, crumbly dough into something resembling bread dough. Your crust won’t achieve that delicate, crumbly quality that defines excellent pie.
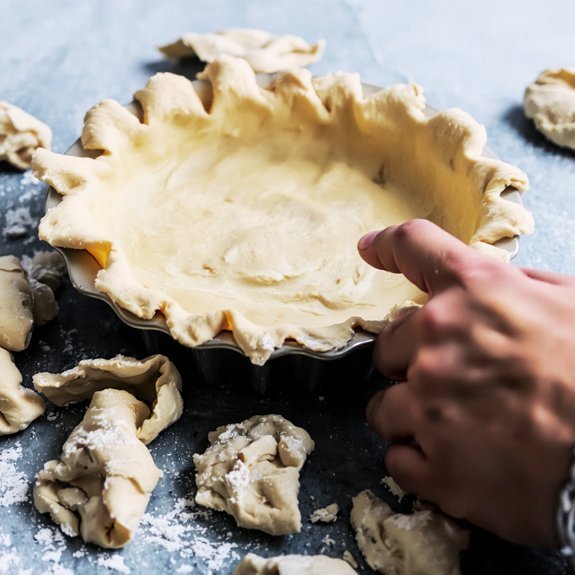
Keep your ingredients cold and work quickly. Use your fingertips rather than your palms, which generate excess heat and encourage gluten development. Respect your dough’s integrity, and you’ll gain the control you need for superior results.
Skipping the Chilling Process

If you skip chilling your pie dough, you’re inviting disaster before your crust even enters the oven. You’re allowing butter temperature to remain elevated, which compromises structural integrity.
Without proper dough relaxation, gluten networks stay tense and contracted.
Here’s what happens when you rush:
- Butter softens excessively, causing fat to blend into flour rather than create distinct layers
- Gluten remains elastic and tight, pulling inward during baking
- Moisture evaporates unevenly, creating stress fractures in your crust
- Your pie shrinks dramatically, pulling away from pan edges
Chilling accomplishes critical objectives: it solidifies fat, allows gluten to relax completely, and lets hydration distribute uniformly. You’re taking control of the baking process by respecting these physical transformations. Skip this step, and you’ve surrendered to shrinkage before you’ve even started baking.
Incorrect Oven Temperature
Your oven temperature directly controls the rate at which your pie crust sets, and any deviation from the recipe’s specified temperature creates conditions for excessive shrinkage.
If you bake below the recommended temperature, your crust won’t set quickly enough, allowing gluten to continue contracting. Conversely, excessive heat can cause uneven setting and separation from the pan’s edges.
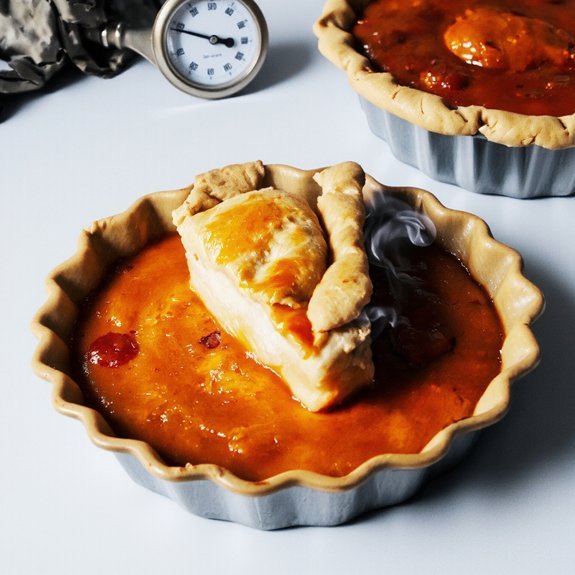
Verify your oven’s accuracy through thermostat calibration using an independent thermometer. Many ovens run 25-50 degrees off their dial readings.
Check placement too—rack positioning matters substantially. Position your pie on the lowest rack to make sure the bottom crust receives direct heat, which sets it rapidly and prevents shrinkage.
Avoid placing your pie too high, where top heat dominates and causes uneven moisture loss. These adjustments guarantee consistent, properly-set crusts.
Not Docking or Blind Baking
Skipping the docking and blind baking steps creates an ideal environment for shrinkage because trapped steam builds pressure beneath the crust, forcing it away from the pan’s sides and bottom.
You’re effectively setting yourself up for failure.
Here’s what happens when you neglect these critical techniques:
- Steam pockets accumulate underneath your crust during baking, expanding and lifting the dough away from the pan
- Unvented air bubbles form throughout the crust, causing uneven shrinkage and warping
- Soggy bottoms develop as moisture gets trapped without escape routes
- The crust contracts excessively as it cools because internal pressure hasn’t been properly managed
To prevent shrinkage, dock your crust with a fork before blind baking.
Pre-bake at 425°F for 10-15 minutes with parchment and pie weights.
This releases steam gradually and stabilizes your crust’s structure permanently.
Using Too Much Water in Your Dough
While docking and blind baking address steam management, excess water in your dough creates a different but equally problematic shrinkage mechanism.
When you add too much liquid, you’re diluting your flour’s gluten network, weakening its structural integrity.
Excess liquid dilutes your flour’s gluten network, weakening structural integrity and compromising your dough’s ability to hold its shape.
This gluten dilution compromises the dough’s ability to maintain its shape during baking, causing it to contract unpredictably.
Additionally, excess water prevents proper gluten development, leaving your crust unable to resist the pull of surface tension as it bakes.
You’ll end up with a soggy texture that shrinks noticeably from your pan’s edges.
Keep your water additions minimal and controlled.
Add liquid gradually, measuring precisely.
Your dough should feel just barely cohesive—slightly dry is preferable to wet.
This approach preserves gluten strength and guarantees your crust holds its intended dimensions throughout baking.
Frequently Asked Questions
Does the Type of Flour I Use Affect Pie Crust Shrinkage?
Yes, you’ll notice flour protein content directly impacts your crust’s shrinkage.
Higher gluten content creates stronger networks that resist relaxation during baking, reducing shrinkage substantially.
You’re better off selecting lower-protein pastry or cake flour rather than all-purpose varieties.
This gives you superior control over your dough’s elasticity.
How Can I Prevent Shrinkage When Using a Store-Bought Crust?
You’ll prevent shrinkage in store-bought crusts by properly docking the bottom—pierce it thoroughly with a fork to release steam and reduce puffing. Chill your crust for at least 30 minutes before baking; this stabilizes the gluten structure.
Use edge crimping techniques that seal the dough firmly to the pan’s rim, creating tension that resists contraction. Blind bake using pie weights if your recipe allows, supporting the crust’s structure during initial baking.
What Role Does Fat Content Play in Crust Shrinkage?
Fat content directly controls your crust’s shrinkage behavior.
When you’re working with dough, saturated fats create a barrier that resists gluten contraction.
As fat melting occurs during baking, it releases moisture that weakens gluten strands, allowing more shrinkage.
You’ll achieve minimal shrinkage by using higher fat ratios—roughly 50% fat to flour by weight.
Cold, solid fats work best because they resist fat melting during initial baking stages, maintaining structural integrity while your crust sets.
Should I Let My Baked Pie Crust Cool Before Filling?
You should cool your baked pie crust completely before filling it. A hot crust won’t support your filling properly and risks further shrinkage. Once cooled, your edge crimping remains structurally sound.
Match your filling temperature to your crust—room temperature or slightly warm fillings won’t shock the pastry. This approach gives you total control over your final product’s integrity and prevents unwanted distortion during the filling process.
Does Humidity in My Kitchen Contribute to Pie Crust Shrinking?
Yes, ambient humidity substantially impacts your pie crust’s performance.
High moisture environments increase dough hydration beyond your recipe’s specifications, weakening gluten structure and causing excessive shrinkage during baking.
You’ll want to work in controlled conditions—ideally 45-55% relative humidity. If your kitchen’s humid, you’re fighting an uphill battle. Reduce ambient moisture by using air conditioning or dehumidifiers, or adjust your dough’s water content downward to compensate for environmental moisture absorption.


Leave a Comment