
Key Takeaways
- Cream softened butter (65–70°F) on medium speed for 2–3 minutes until pale and fluffy using a stand mixer.
- Gradually add sifted powdered sugar in half-cup increments while mixing, maintaining a 1:2 butter-to-sugar ratio for best results.
- Add vanilla extract and milk one tablespoon at a time while mixing to achieve desired spreadable consistency without separation.
- Beat frosting on medium-high speed for 2 minutes after sugar incorporation to eliminate lumps and ensure smooth, uniform texture.
- Store at room temperature up to six hours; refrigerate in airtight containers for two weeks or freeze for three months.
Ingredients You’ll Need
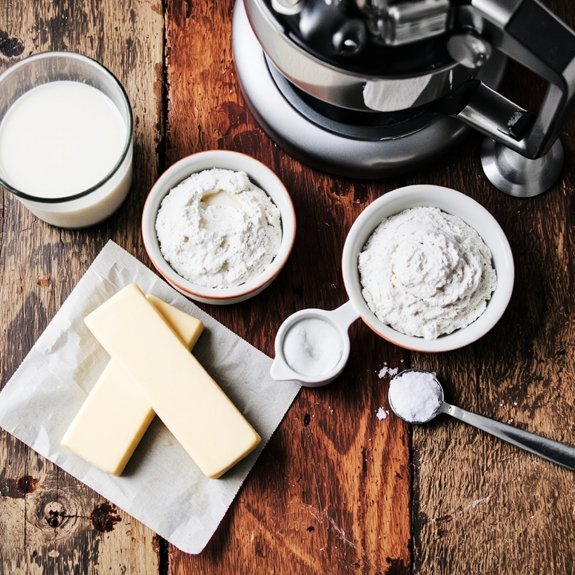
You’ll need four essential components: two cups of unsalted butter (softened to room temperature), three to four cups of powdered sugar (sifted to eliminate lumps), two to three tablespoons of heavy cream or milk, and one teaspoon of vanilla extract.
When sourcing ingredients, prioritize label reading to verify butter fat content and sugar granule fineness.
Quality supplier sourcing assures ideal emulsification and texture consistency.
Select butter with eighty percent butterfat minimum for superior stability and richness.
Your cream or milk should contain eighteen percent milk fat; this ratio prevents separation during mixing.
Vanilla extract demands one hundred percent pure formulation—avoid imitation variants that compromise flavor integrity.
Measure all components precisely using kitchen scales for accuracy.
Room temperature butter incorporates smoothly, preventing lumpy incorporation that compromises your final frosting consistency and spreadability.
Step-by-Step Instructions
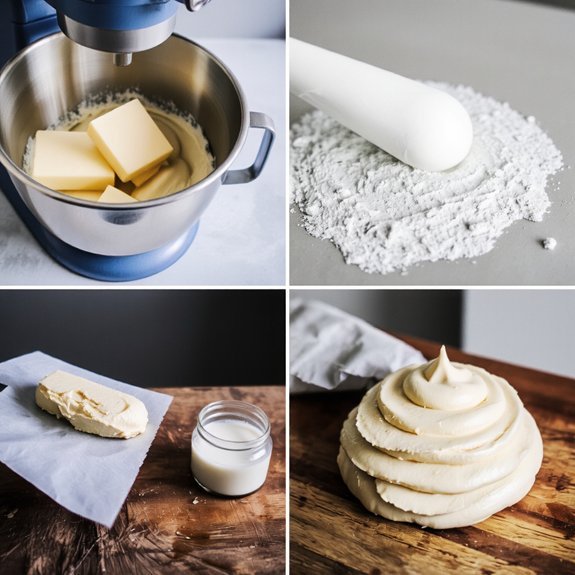
You’ll start by creaming together softened butter and powdered sugar in a 1:2 ratio, beating for 3-5 minutes until the mixture reaches a light, fluffy consistency.
Add your liquid flavoring—vanilla extract, milk, or cream—one tablespoon at a time while continuing to mix, adjusting the texture until you achieve medium peaks that hold their shape.
Monitor your mixing speed carefully; high speeds incorporate excess air and can cause graininess, while low speeds leave lumps and create an uneven crumb structure.
Basic Ingredients and Ratios
Three core components form the foundation of classic buttercream: softened butter, powdered sugar, and milk or cream. You’ll control consistency and flavor by adjusting these ratios precisely.
| Ingredient | Standard Ratio |
|---|---|
| Unsalted Butter | 1 cup (226g) |
| Powdered Sugar | 2-3 cups (240-360g) |
| Milk/Cream | 2-4 tablespoons |
| Vanilla Extract | 1 teaspoon |
You’ll want to understand the cost analysis: butter represents your largest expense, while powdered sugar adds bulk affordably. The nutrition breakdown reveals approximately 100 calories per tablespoon, with fat comprising the majority.
Start with room-temperature butter—this promotes proper emulsification. Gradually incorporate sifted powdered sugar to prevent lumps. Add liquid incrementally until you achieve your desired consistency. This methodical sequencing guarantees smooth, spreadable frosting without overworking the mixture.
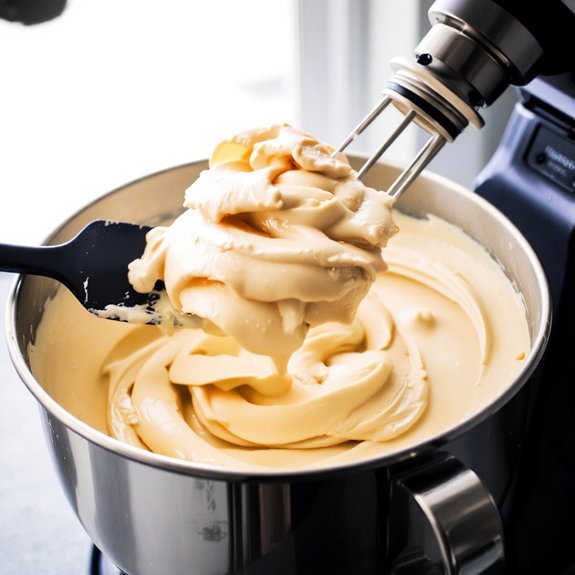
Mixing and Consistency Tips
Now that you’ve gathered your ingredients in the proper ratios, the mixing process determines whether your frosting achieves that ideal silky texture or becomes grainy and separated.
Start by creaming softened butter on medium speed using your paddle attachment for 2-3 minutes until it’s pale and fluffy.
This incorporates air, creating volume and lightness.
Gradually add powdered sugar in small increments, mixing thoroughly between additions to prevent lumping.
Slow your mixer to low speed during this phase.
Once combined, increase speed to medium-high and beat for an additional 2 minutes.
Practice deliberate bowl rotation every 30 seconds to guarantee uniform incorporation.
Add liquid flavoring—milk, cream, or extracts—slowly while maintaining consistent speed.
Stop and scrape sides as needed.
This methodical approach yields smooth, spreadable frosting without overworking or separating the emulsion.
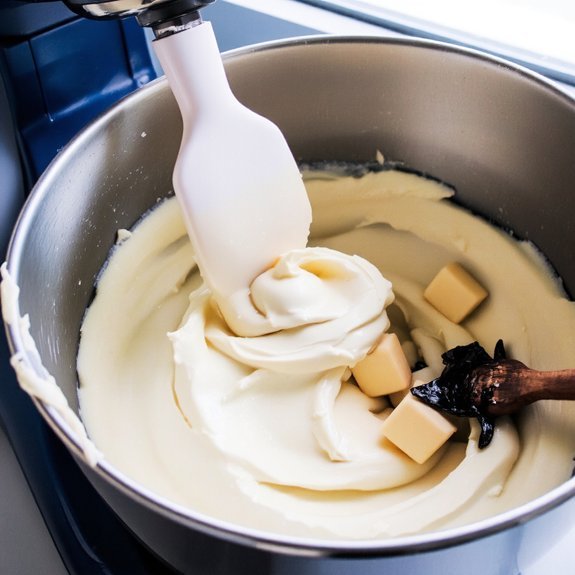
Achieving the Perfect Consistency
You’ll achieve the ideal consistency by ensuring your butter reaches 65-70°F before mixing, as this temperature allows proper incorporation of other ingredients without becoming greasy or too soft.
Add your liquid—whether milk, cream, or egg whites—in 1-tablespoon increments while beating on medium speed, pausing between additions to assess the texture. This methodical approach prevents you from oversaturating the frosting and gives you precise control over your final product’s spreadability and stability.
Softening Butter Temperature
Before you combine ingredients, the butter’s temperature determines whether your frosting’ll achieve the ideal creamy texture or end up greasy and separated. Room temperature butter—approximately 65–70°F—maintains its crystal structure while remaining pliable enough for incorporation.
Cut your butter into cubes to accelerate softening uniformly. This methodical approach prevents localized melting points that compromise emulsification. Never use cold butter straight from refrigeration; it’ll create lumps resistant to blending.
Conversely, butter exceeding 75°F’ll begin degrading its crystal structure, leading to separation. Test consistency by pressing your finger into a cube; it should yield immediately without leaving an indentation. This precise temperature range guarantees even fat distribution throughout your frosting, delivering that coveted smooth, spreadable finish you demand.
Adding Liquid Gradually
Incorporating liquid—whether milk, cream, or egg whites—demands a measured, incremental approach that prevents your frosting from separating or becoming too thin. Add liquid in small pour intervals, starting with one tablespoon at a time. Mix thoroughly between additions, observing sensory cues: the frosting should gradually shift from stiff peaks to a spreadable consistency.
Watch for visual indicators—when the mixture begins incorporating smoothly without lumps, you’re on track. Listen to your mixer’s sound; increased resistance signals you’re approaching ideal thickness. Feel the frosting’s texture between additions, ensuring it remains homogeneous without graininess.
Don’t rush this process. Temperature fluctuations and ingredient ratios directly affect absorption rates.
Vanilla Buttercream Recipe
Creating a classic vanilla buttercream requires three essential components: softened unsalted butter, powdered sugar, and pure vanilla extract.
You’ll need one pound of butter at room temperature, four cups of powdered sugar, and two teaspoons of vanilla extract.
Start with your equipment checklist: a stand mixer, paddle attachment, and medium mixing bowl.
Cream the butter for three minutes until pale and fluffy.
Gradually incorporate powdered sugar in half-cup increments, beating for one minute between additions.
This prevents lumps and guarantees smooth texture.
Once combined, add vanilla extract and beat for two additional minutes until you achieve peak consistency.
Your frosting’s pairing suggestions include layer cakes, cupcakes, and sheet cakes.
Store at room temperature for six hours or refrigerate for extended shelf life.
You’ve now mastered this fundamental technique.
Flavor Variations and Customizations
Once you’ve mastered the vanilla base, you can transform your buttercream by adjusting fat ratios, incorporating flavor compounds, and modifying texture through ingredient substitution.
Experiment with herbal infusions like lavender or chamomile by steeping them in your butter before creaming.
You’ll discover that seasonal pairings—citrus zest for spring, spiced extracts for fall—elevate your frosting’s complexity.
Increase cocoa powder concentration for richer chocolate notes, or swap dairy butter for coconut oil to achieve lighter consistency.
Add espresso powder for depth without bitterness.
Substitute whole eggs with yolk-only ratios for silkier texture.
Incorporate fruit purées carefully; calculate their moisture content to prevent deflation.
These methodical adjustments grant you complete creative control while maintaining structural integrity and stability throughout storage and application.
Troubleshooting Common Problems
Even with meticulous technique and ingredient adjustments, you’ll encounter textural and consistency issues that require systematic diagnosis and correction.
Grainy frosting typically results from sugar crystallization or inadequate creaming; resolve this by gently reheating to 110°F and re-beating.
Overly soft frosting demands temperature reduction—refrigerate 15-20 minutes between mixing intervals.
Equipment sanitation proves critical; residual grease or water compromises emulsification, so wash all bowls and beaters thoroughly with hot soapy water before starting.
Workflow optimization accelerates problem-solving.
If your frosting breaks or separates, gradually incorporate room-temperature milk while beating at reduced speed.
Curdled consistency typically indicates temperature imbalances; allow ingredients to reach 68-72°F before combining.
Implement systematic testing by adjusting one variable at a time, documenting results for reproducible success.
Storage and Make-Ahead Tips
Proper storage extends your frosting’s shelf life and enables strategic advance preparation for time-constrained baking projects.
You can refrigerate buttercream in an airtight container for up to two weeks at 40°F.
For extended preservation, employ freezing methods by transferring frosting into freezer-safe containers, allowing three months of viable storage at 0°F or below.
Before application, thaw refrigerated frosting at room temperature for thirty minutes, then re-whip for two minutes to restore ideal consistency and aeration.
Frozen frosting requires four to six hours of gradual thawing in your refrigerator before re-whipping.
You’ll maintain superior texture and stability by maintaining precise temperature controls throughout storage and thawing cycles.
Label containers with preparation dates to track shelf life accurately and guarantee you’re using frosting within recommended timeframes for peak performance and food safety.
Decorating Techniques and Best Practices
Transforming buttercream into professional-looking decorations requires mastering fundamental piping techniques and understanding how consistency affects your results. You’ll achieve ideal control by maintaining a 65-70°F temperature and adjusting your frosting’s crumb coat thickness accordingly. Use a palette knife to apply smooth base layers before piping detailed work.
Select appropriate tip sizes: small round tips for dots and lines, star tips for rosettes and borders. Hold your piping bag at precise angles—90 degrees for vertical work, 45 degrees for angled designs. Practice steady pressure control to achieve uniform decorations.
Enhance visual impact by strategically applying edible glitter to specific design elements. You’ll gain confidence through repetition, allowing you to execute advanced techniques without hesitation and create distinctive, polished finishes.
Frequently Asked Questions
Can I Make Buttercream Frosting Without an Electric Mixer?
Yes, you can liberate yourself from electric mixer dependency. Use hand whisking with a balloon whisk, vigorously beating softened butter and powdered sugar for 8-10 minutes until you’ve achieved proper emulsification and volume.
Alternatively, employ the jar shaking method: combine ingredients in a sealed container and shake aggressively for 15 minutes. Both techniques demand elbow grease but yield identical results.
Add vanilla extract and milk incrementally, maintaining consistent beating throughout the process.
How Far in Advance Can I Prepare Buttercream Before Decorating?
You can prepare buttercream up to two weeks ahead.
Store it in an airtight container at room temperature for three days, or refrigerate for extended storage.
When ready to decorate, you’ll need to rewhip it to restore ideal texture stability—this takes roughly five minutes with a mixer.
Monitor for flavor changes; refrigerated buttercream may develop subtle taste shifts, so allow thirty minutes of tempering before application.
What’s the Difference Between American and Swiss Buttercream Frosting?
You’ll find American buttercream uses higher butter-to-powdered sugar ratios, yielding a sweeter, grainier texture you can whip quickly.
Swiss buttercream employs cooked egg whites and butter in balanced proportions, creating a silkier, less sweet consistency.
Your ingredient ratios fundamentally determine the texture comparison: American frosting’s 1:3 butter-to-sugar ratio produces stability but density, while Swiss’s methodical heating process creates superior smoothness and elasticity. Choose based on your desired finish and flavor intensity.
Can Buttercream Frosting Be Frozen for Several Months?
Yes, you can freeze buttercream for up to three months.
Transfer your frosting into airtight storage containers, leaving minimal headspace to prevent crystallization.
When you’re ready, thaw it overnight in your refrigerator at controlled temperatures. Don’t rush the thawing process—slow defrosting maintains your frosting’s emulsion structure.
Once thawed, re-whip it for 2-3 minutes to restore its original consistency and texture before application.
Is Buttercream Frosting Safe for Individuals With Dairy Allergies?
Standard buttercream frosting isn’t safe for you if you’ve got dairy allergies—it’s traditionally butter-based. You’ll need to swap in dairy substitutes like coconut oil, vegan butter, or nut-based alternatives.
Check allergy labeling meticulously on all ingredients to avoid cross-contamination. Follow this sequence: verify each component’s certification, measure precisely using weight measurements, and document your substitutions. This methodical approach guarantees you control exactly what goes into your frosting, giving you the freedom to enjoy desserts safely.


Leave a Comment